Everyone is saying Ai these days. It’s the marketing gimmick. But Adobe is showing that when they say Ai, they mean tools that are actually smart. Like the Ai masks from last year made even better in 2023.
But what about Lightroom’s new Ai Noise reduction?
In today’s video I’ll show you how to use it and give it punishing comparison tests. Lightroom already beat Capture One in my Lightroom vs Capture one Noise and Worms testing. But for photos you need something extra on. This new button is more amazing than I expected. I’ll show you in the video below.
At this point we have to start asking how much noise even matters.
The early days if digital left us with lots of noise and artifacts that recent Noise tools and better sensors have mostly brought it up to the detail level that we had in film.
With the improvement this year from Ai noise tools like this, you have to ask how much ISO and noise even matters. You can clean it up so well it’s almost too clean, and adding in a little organic grain like I do in most of my edits is more important than ever.
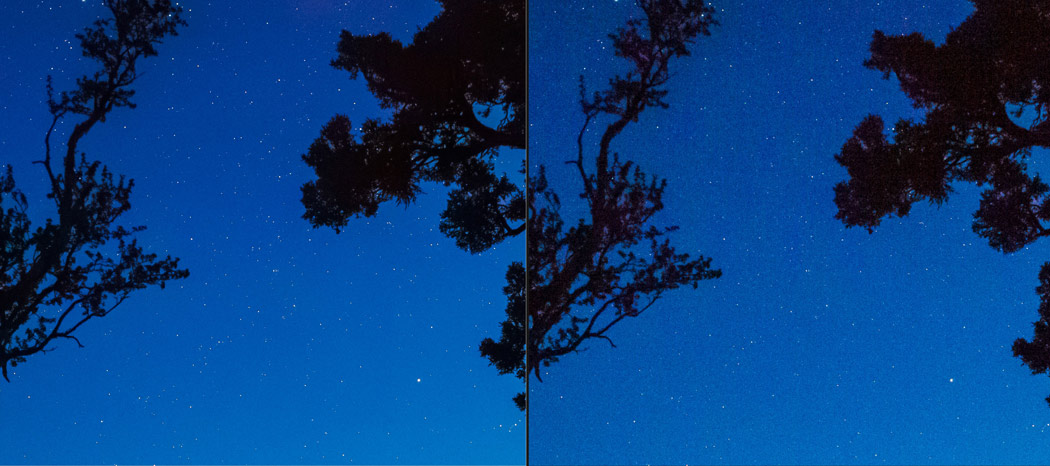
Even on this old 5D MK2 file at ISO 25000, Lightrooms Ai noise using the settings I show in the video completely transformed it like no noise tool I’ve ever used.
ON this S21 Ultra RAW file there was not much noise but the Lightroom Ai Noise process still improved the detail in a way that amazing me. I’ll show you the side by side in the video.
This is the start of big changes in how we edit.
I predict that very soon these Ai editing tools will nor be long processing steps but just part of the system like any other slider. They will keep getting better and as photographer we need to focus on the value of using them but also keeping photos real.
In the end I think this tool is game changing and I hope we see more Ai tool’s make make our real images better rather than a focus on Ai tools making photos that are not real photos.\
I made a comparison of Luminar Neo vs Lightroom vs Capture One with no affiliate links, sponsors or brand bias.
Lightroom and Capture One are the big dogs in 2023. Watch my annual review here. But what about Lightroom vs Luminar Neo, it Capture One vs Luminar Neo? Today we find out!
Luminar gets advertised as the easy editor. But most reviews are affiliate or even sponsored videos. We need smaller devs and competition, so I don’t want to ignore them. Today we’ll compare Lightroom Vs Luminar Neo and even bit of Capture One in a real world test.
Download my Free Luminar Neo preset I made for the video. Also use my Filmist LUTS in Luminar Neo as LUTS work amazing in Neo. Download the Filmist free pack and the very least and give it try.
I admit, comparing Lightroom vs Luminar Neo surprised me!
Both in that Luminar Neo does a lot of things, but also I expected more. I feels like Skylum has been focusing on fun features that advertise, rather than refining the app and making it pro tuned. With things like UNDO not even working as of March 2023 (v1.7) this app is not ready to be a photographers daily driver.
In general Luminar Neo gives a broad suite of editing tools for RAW files. It actually has more tools than Lightroom, even if some are a bit gimmicky, many are quite useful.
Luminar is trying to bridge the gap between photoshop and Lightroom. And to a point, it does that with fun add on’s, AI tools and some basic layer control. But it’s still nothing close when it comes to the layer based editing to Photoshop or even Affinity Photos. This like LR and C1 is is a RAW style editor first.
How well does Luminar Neo vs Lightroom Process your files.
Overall it’s honestly good. Masks are clean, selections are nice if a bit slow. AI seems to work more of less Ai-like.
BUT as I showed in the video and below, Luminar falls apart in more difficult shadow and highlight situations. Instead of giving a smooth roll-off in clipping, it bands. Something Lightroom used to suffer from, but these days is maybe even a bit ahead of Capture One.
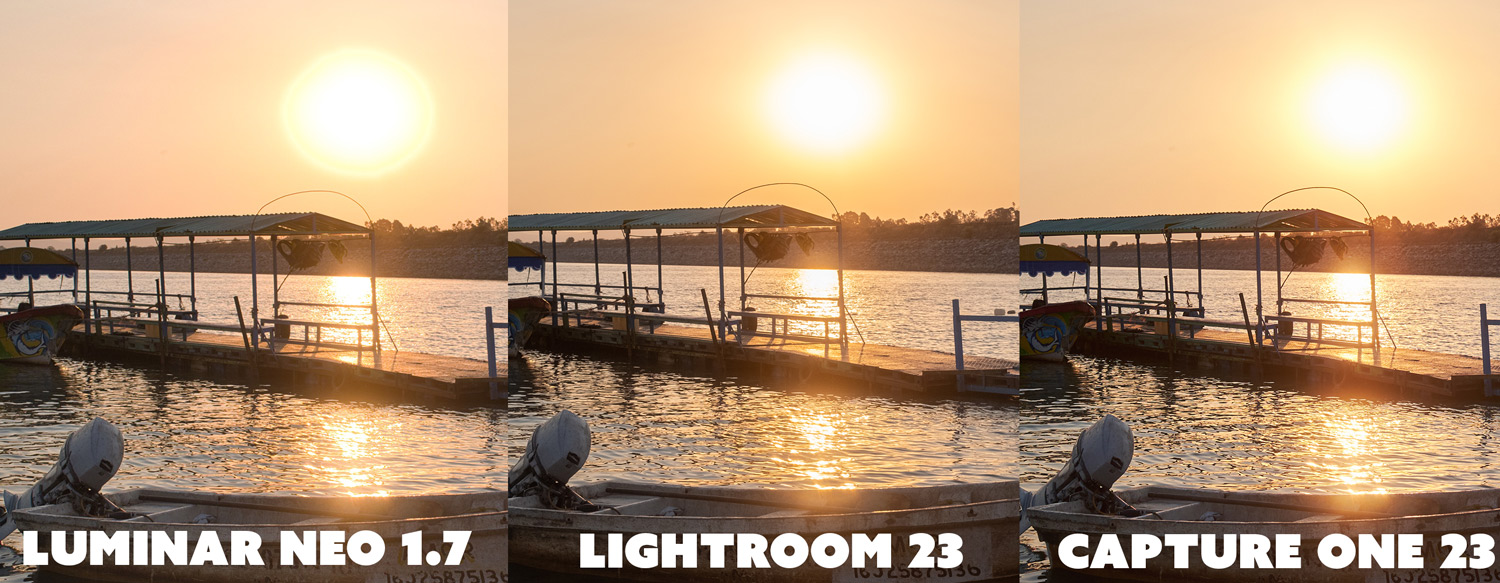
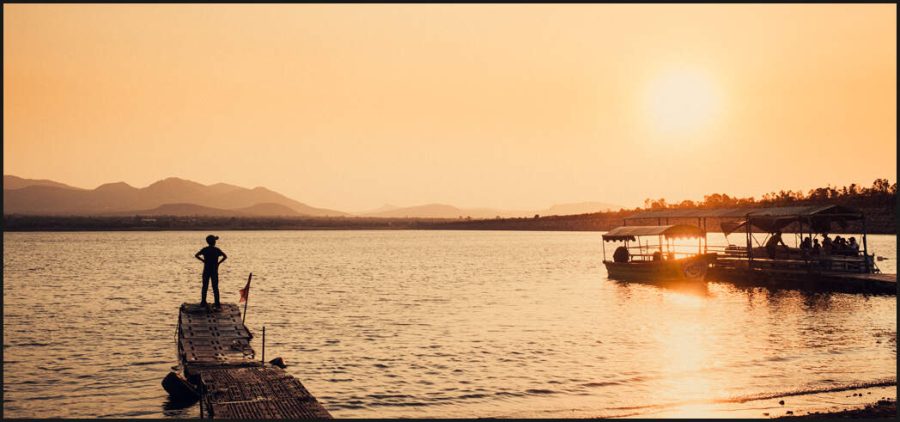
Look at the sun. My tough test RAW file shows that Luminar Neo is far behind Lightroom and Capture One is detailed processing. In this case I( used just Shadow and Highlight on the RAW file. Click to open larger view.
Is it worth using Luminar Neo vs Capture One vs Lightroom?
Not exactly. Neo is a powerful tool but it’s just as expensive and Lightroom and Photoshop Combined. So while it might be easier to learn and get started (for sure it’s easier than Photoshop) it’s also far more limited, has lower quality Raw processing and it’s lacking a lot of basic pro grade features.
Skylum is treating Luminar more like a mobile app than a serious pro photography tool. It’s many tools are in disconnect with interface problems, lack on expandability and they try to sell extras and instead of fixing slow or buggy features.
While importing is fast, even basic tools like resetting a photo, cropping and exporting are slow and drag when compared to Lightroom and Capture One in general. But the results of the many tools do work well.
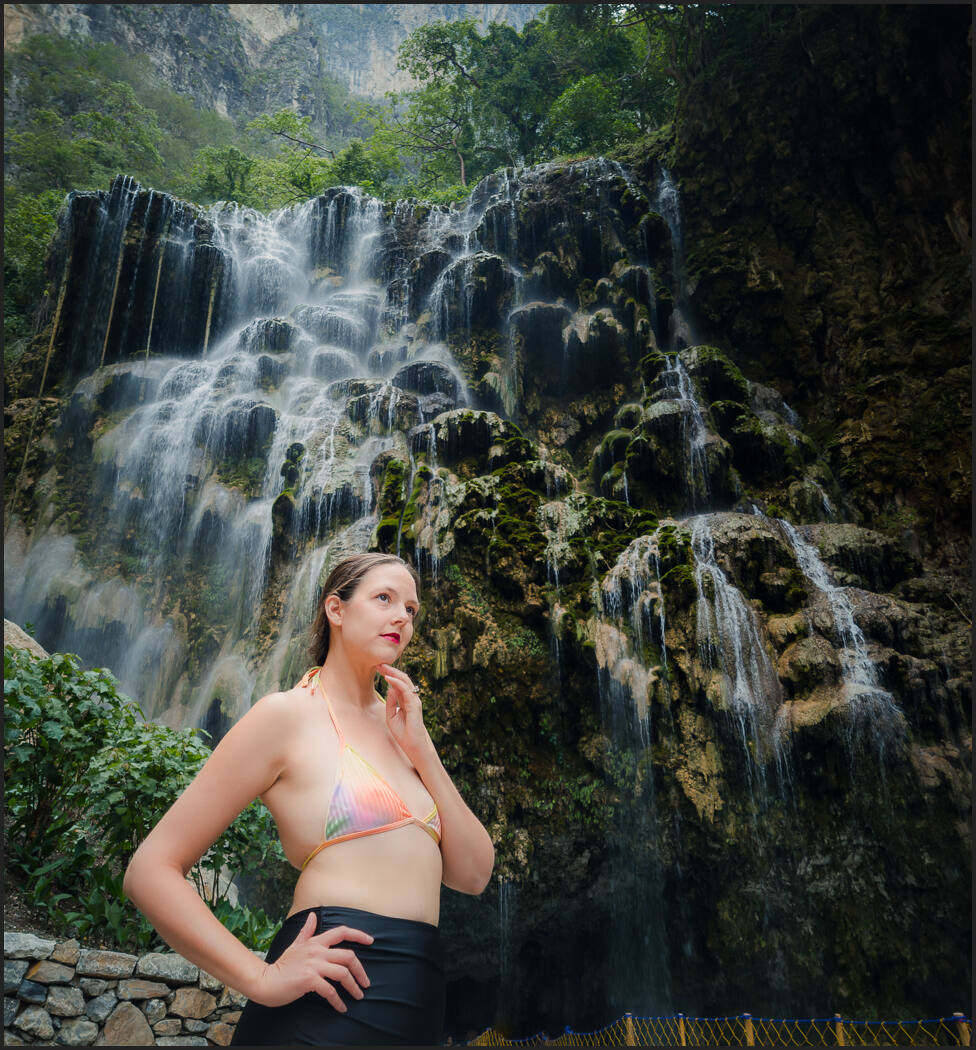
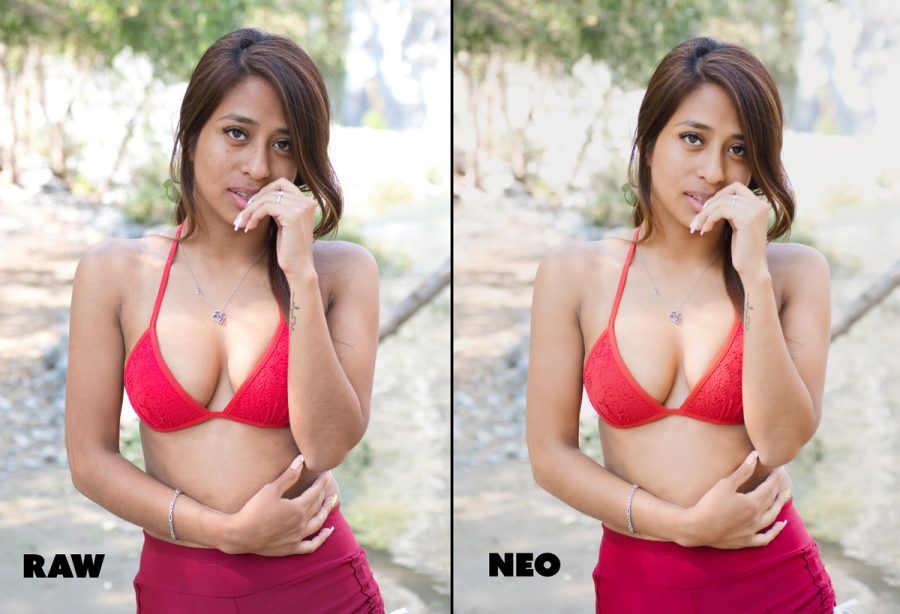
Before and after with the Summer preset I made for Luminar Neo (download fee under the video). It makes more advanced edits like skin smoothing and portrait details a slightly more one stop shop. A little more than Lightroom but still less than Photoshop.
Is Luminar really the easy Photo Editor?
That’s how Luminar Neo vs Lightroom. is promoted. The easy, cheaper one click editor. In a sense it’s easy. The learning curve seems straight forward and it can do some things you would normally need Photoshop for.
On a learning scale of 1-10, I would rate Luminar a 4, Lightroom a 5, Capture one a 6 and Photoshop an 8 in it’s learning curve.
While this won’t replace Lightroom, Capture One, Photoshop or Affinity for pros, you will get a lot of tools and if you’re looking for a new app to play with, Luminar Neo offers a lot in one package but it’s more expensive than both LR and PS, combined!.
That said the problems and inability to do simple things any pro app should do make things not so easy of you operate by those standards. Here’s looking at you UNDO, come on Skylum.
You can do a lot here from replacing skies (do very many of us do that) to great portrait edits. It’s just important to separate marketing from realty and then decide what you like best. Luminar Neo vs Lightroom.
A decent jack of all trades is Luminar Neo vs Lightroom
I hope with feedback like this, Skylum can raise the bar and make Luminar a real contender against Lightroom and Capture One. Because we need contenders.
I’m still rooting for it and will give the Skylum team a chance to listen and take action. I want to be clear in all of this. It’s a good app. But when comparing to top pro apps we can’t pull any punches and we have to compare apples to apples, dollars to dollars.
In the battle Lightroom vs Luminar Neo this year, Lightroom + Photoshop gives you more bang for less buck. But Neo has a lot of potential and I really hope that by 2024 the scales start tipping.
Tell me your thoughts in the comments. Will you use Luminar Neo, or stick with Lightroom / Capture One in 2023 — Gavin Seim
In the Luminar Neo Vs Lightroom battle, you’ll find both to be powerful editors. But don’t expect the same level of RAW quality in tough scenes like this one or the same level of Ui refinement that you’ll find in Lightroom or even Capture One. As Neo grows it has a lot of potencial and it will be exciting to see what they can do if they listen to the pro market.
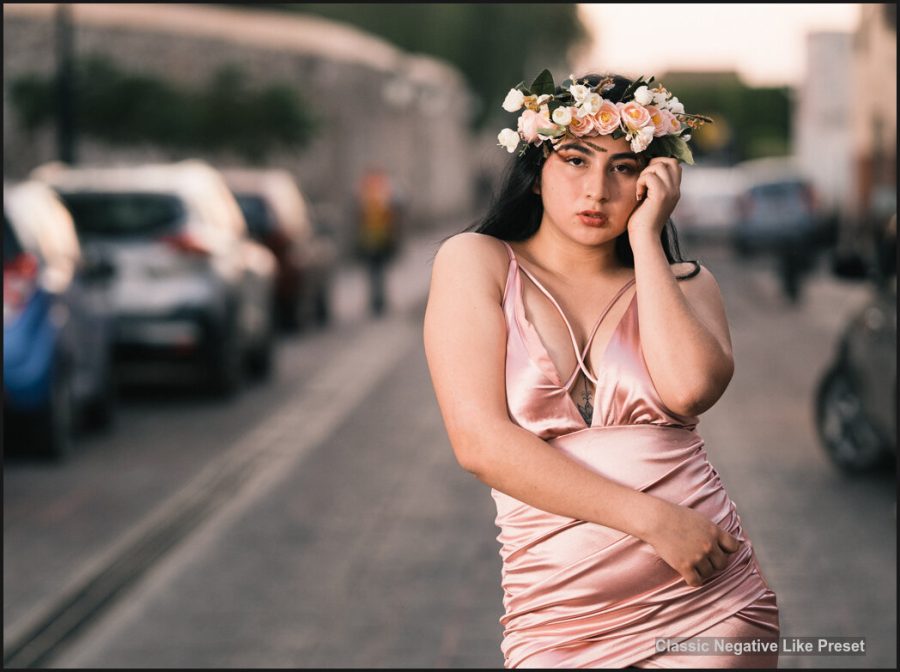
Classic Negative and Classic Chrome are two very popular color profiles on Fuji cameras. It seems Fuji is the only camera maker who has managed to make its in-camera profiles iconic. That’s because they create their camera profiles from Film. The problem is they only work on some cameras
Filmic presets are the solution.
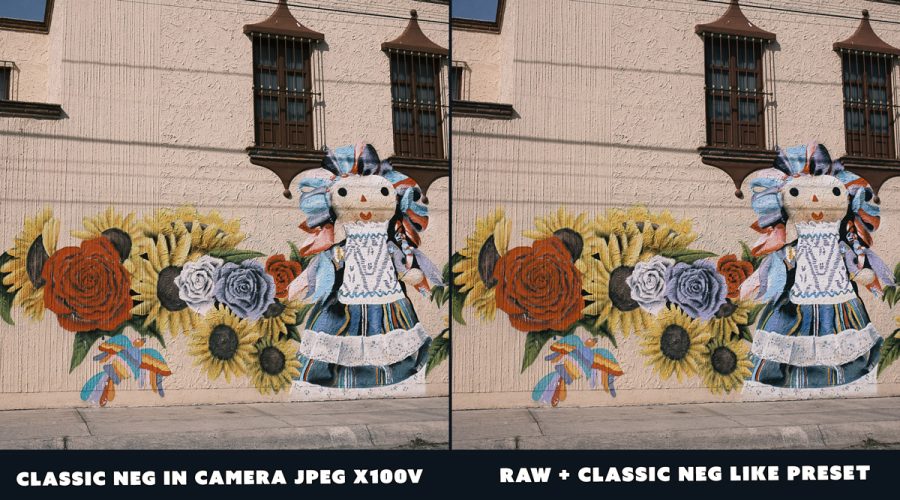
The Gen.2 Classic Negative Like presets have been refined a lot since my first version a few years ago giving you the JPEG-like colors with the RAW advantages in post.
I just finished Filmist V1.8 with new Gen. 2 versions of my Classic negative-like and Classic Chrom-like presets, as well as Ektar Gen2 (I made a post about that here) With nearly 5 years of development, Filmist has become a king of great filmic presets, and I’m super proud of it.
I’ve been making master preset packs since Lightroom launched. But the hardest to create are my Capture One and Lightroom film presets, Filmist. Presets like PowerFlow and Natural HDR and great. But the film does something magical for digital.
IN it I’ve included the improved Gen.2 version of Classic Negative like for you Fuji lovers, PLUS a few other film presets to get you started. The improved Classic Chrome and Ektar presets are included in Filmist complete.
I love Filmic presets. Here’s why they work so well.
Overdriving sliders in an edit is a very common problem. More is not more in a great photo. That, I believe, is why people like these Fuji camera profiles—they are subtle.
It’s silly, but it hurts a little when my customers reject my recommendation to try Filmist as their next pack. I know they are missing out. I love film presets because when you shoot real film or edit with good film presets, it changes the way you create photos.
Things that were once boring become atmospheric and feel more real. It helps you gain perspective on every other process because film will always have an organic look.
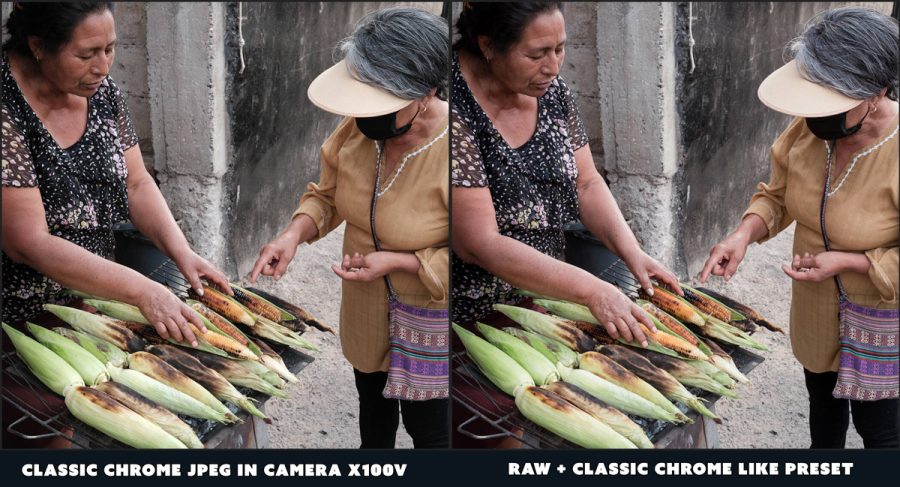
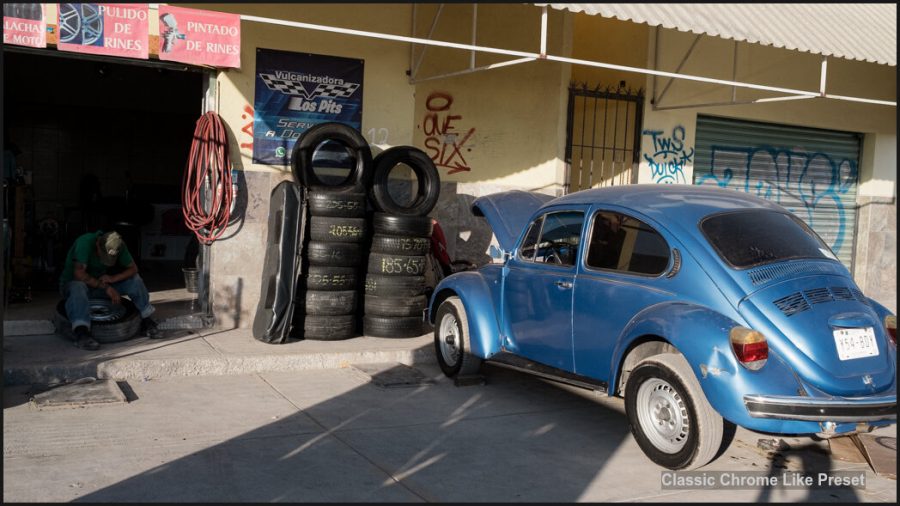
The JPEG Classic Chrom from my Fuji V100V next to the RAW file processed with the presets only. This looks was especially hard to re-create on RAW, but now that I have it I can use it on files from any camera.
I also love Fuji cameras and they have great profiles like Classic Chrome. But I don’t use them much. I nearly always apply the looks with a preset and not a baked-in look because it gives more control. Plus you can use filmic presets on any camera or even video thanks to LUTS.
PS: If you want to create your own Classic Chrome preset for free, you can watch the video I made on the Gen 1 recipe here to get a good starting point.
Filmist 1.8 brings better C1 and Lightroom Film Presets!
In today’s post, I’ll share a variety of photos processed with these Capture One and Lightroom Film presets. Everything comes from my newly updated V1.8 and nearly world-famous “like” versions of these recipes as presets for any camera.
1.8 also has the new Gen 2 of the Ektar 100 which is a really great film. I’ll write more about that in another post. All these looks come thanks to many test images from the long hours, so they are more accurate than ever. The updated version includes the Lightroom Presets, the Capture One Styles, and the video LUTS.
You can also download the Filmist sampler again for the 1.8 version. If you own FIlmist Complete, this is a free update, and you can get your account for the latest install.
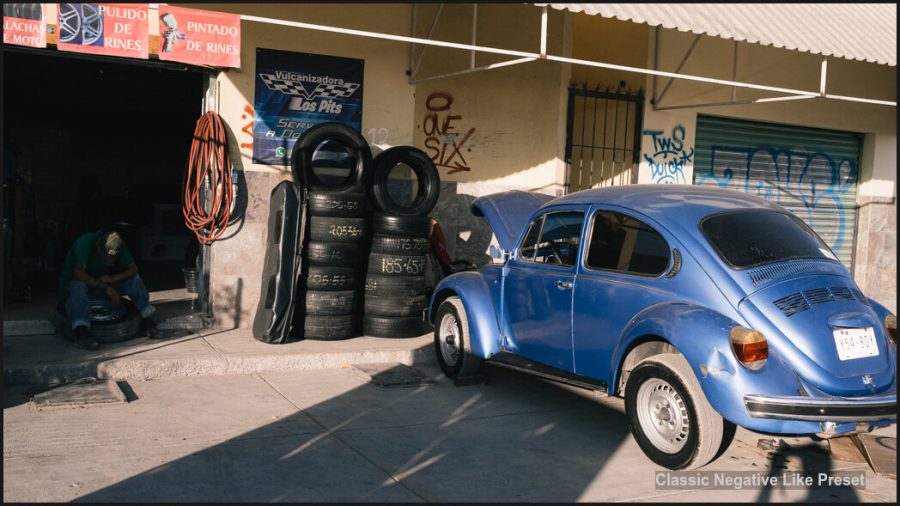
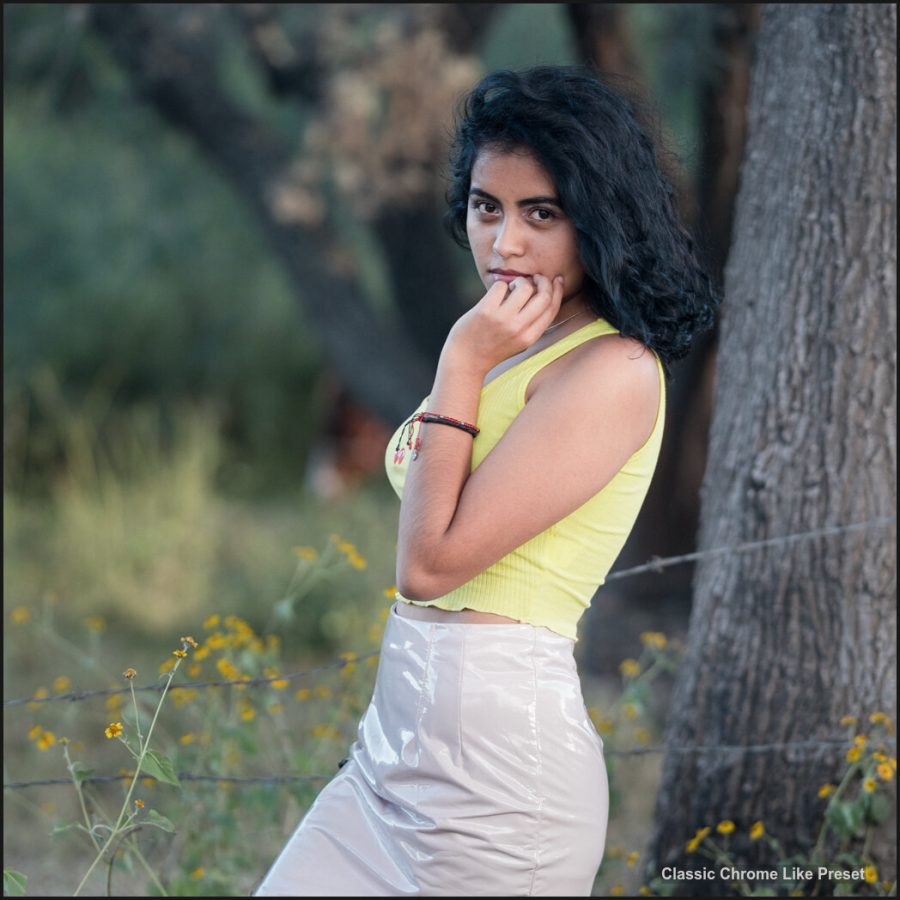
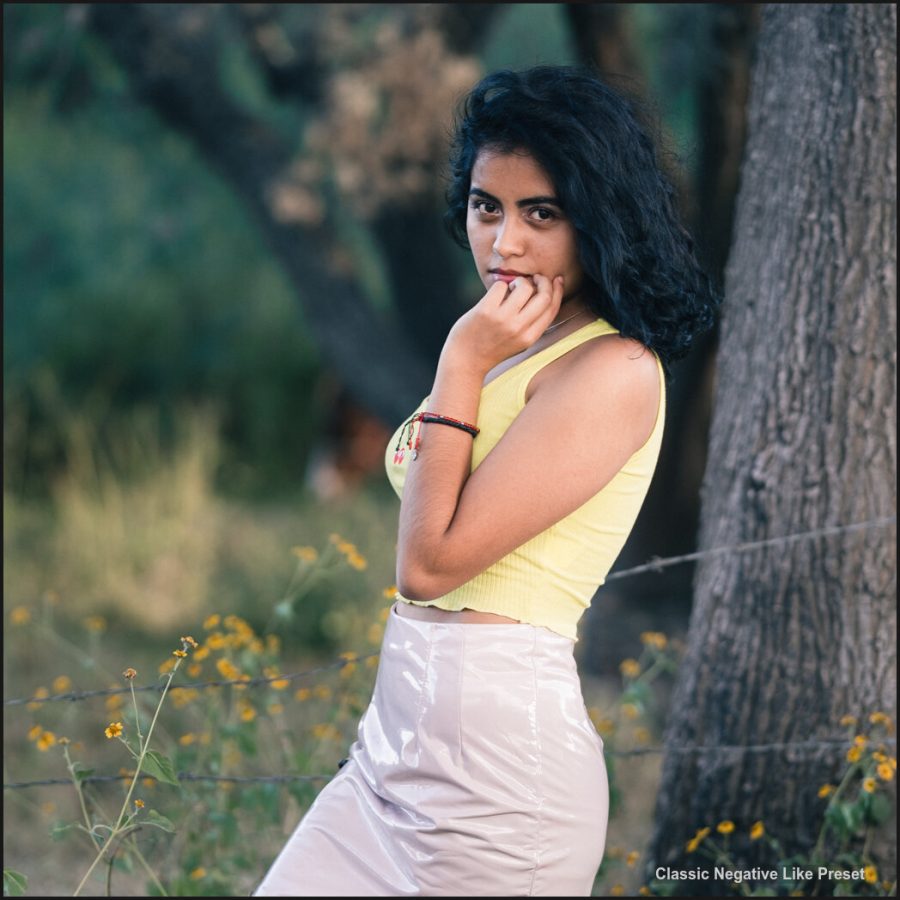
Classic Chrome Like, RAW File with presetClassic Negative Like, RAW file with preset
A Classic Negative vs Classic Chrome Profile Review
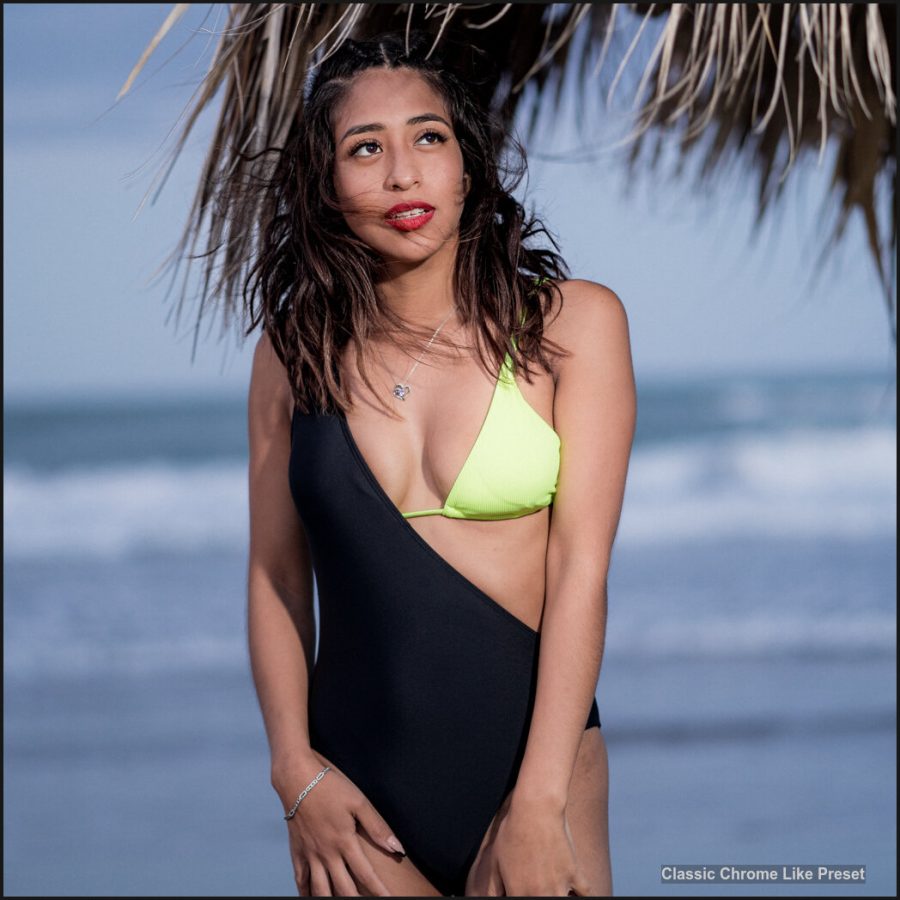
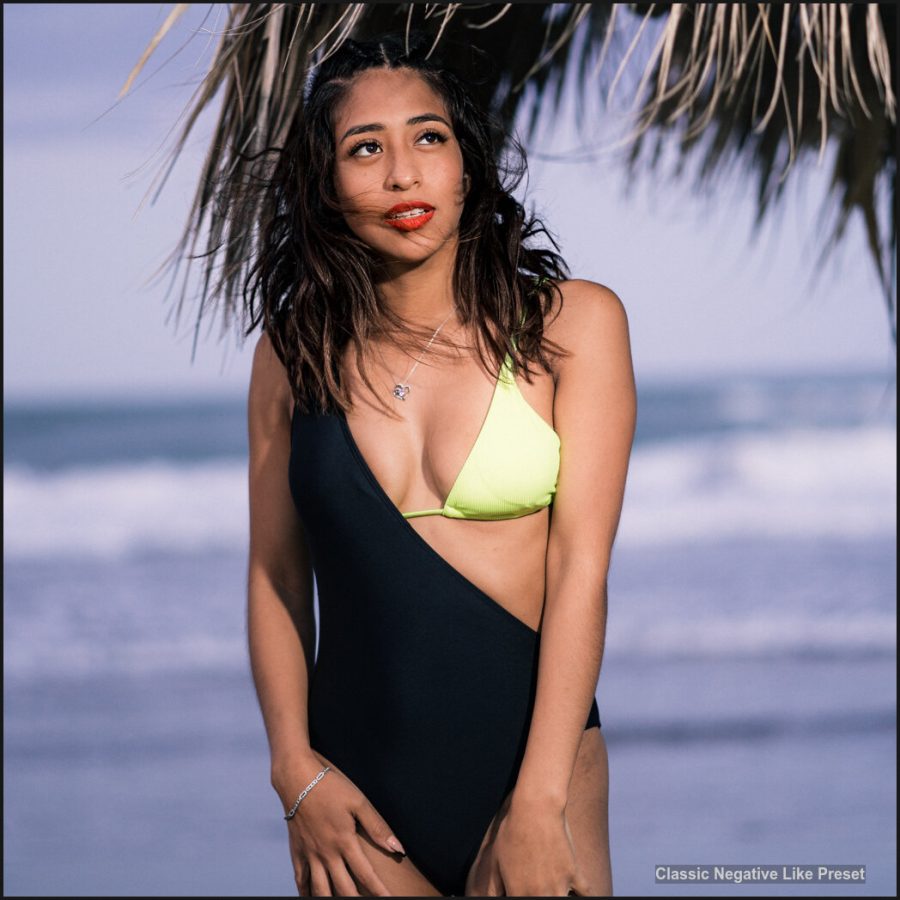
Classic Negative – is a bit deeper and more intense. It has subdued colors but is more contrasty. It’s well-loved for streets for that reason, though usually, it’s not my favorite for portraits. Turn up the exposure a little on portraits to make it smoother.
Loosely based on Superia 200 and Classic Chrome is very loosely based on Kodachrome. I talked about that in this video.
Classic Chrome – is soft and gentle and sometimes you may need a bit more if your light is not contrasty. But it’s versatile.
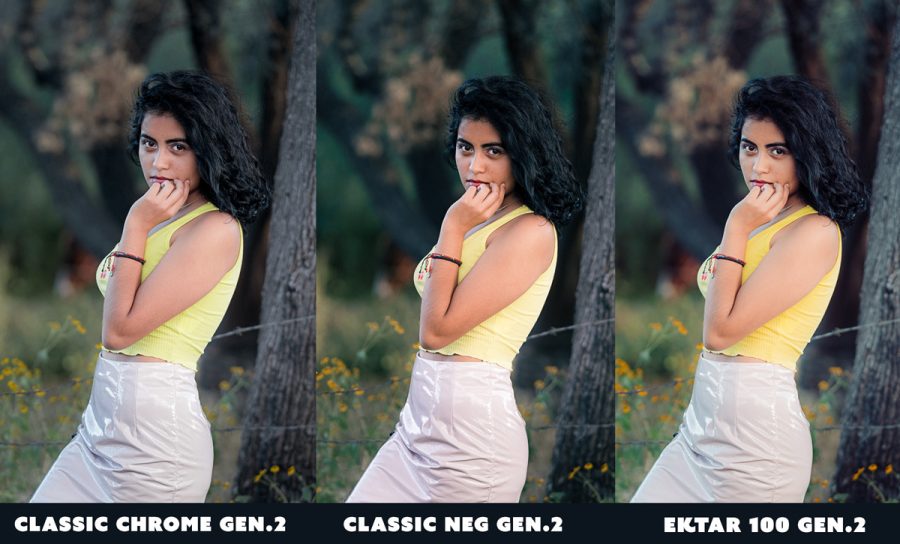
While Classic Negative has an almost soft color look, classic Chrome is a bit brighter and more slide film-like, even though it’s not actually that close to the Kodachrome film it was inspired by.
Both produce great results and both can feel very natural. But if you look at these examples you can see how each has its own character. All these examples were done with the presets, which means camera type is not a barrier.
Film presets should be made with extensive testing to work well.
I do extensive homework for every film I make. In fact, making Gen.2 of these was hard because they were already good. I had to spend hours refining fine details in Lightroom and Capture One, and that’s the most tedious part.
When I shoot with Fuji cameras, I use both of these profiles. But in the post, I always take the RAW file and use the presets. Yes even before the built-in fuji-specific RAW profiles for better dynamic range and more accuracy.
It’s important that we can apply these looks to any file, any camera, old or new. Not just the latest model. Because when editing a project, you need consistency, not looks that are all over the map. If I shot part of a project on Fuji and another part on Sony or Canon, I want to be able to edit them with the same feel.
Presets make it easy and turn a recipe that requires dozens of hours to create into a single click. All while leaving you in control. By using presets on Raw instead of baked-in JPEGS, I get smoother highlight roll-off, I can increase or decrease the effect, and I can change my mind later.
The Classic Chrome-like presets on a SONY Raw FileClassic Neg-like presets on a SONY Raw File
Film presets solve a problem.
I made Filmist so we could better bring the darkroom to digital. Before, we had a limited number of films but a nearly infinite number of ways to develop them back in the day. Most are gone now. Today we have many ways to develop with a simple slider and while under-editing creates boring photos that lack atmosphere, over-driving a slider can take a great photo and make it bad instantly.
Film has an organic shadow-rich look. So Wwen you start editing with film presets you get more than just tinkering with sliders. Yes, you save time, but you try things and see things. Colors, shadows, various kinds of reds, and nuances can take a rather plain photo and make it seem like something from the pages of National Geographic. Color, Silver mix, and shadows matter.
You can see in just the Classic Negative and Classic Chrome looks that while the processes are not that intense, they are distinct and when you learn to make the destination or the nuances you become a better photographer and editor. Film makes that process a whole lot easier because it’s backed by hundreds of years of chemical processes and research into what makes our eyes respond to shadow and light.
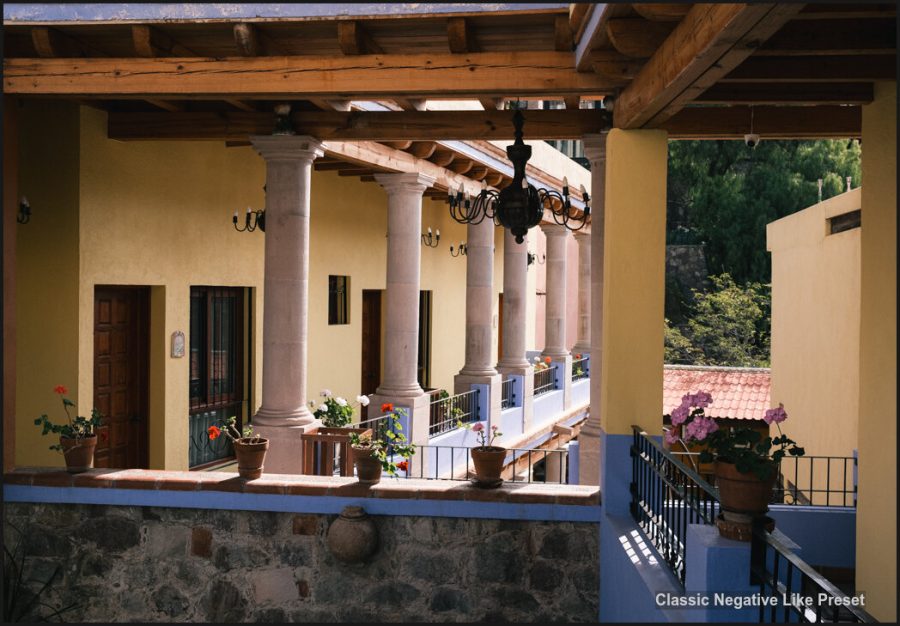
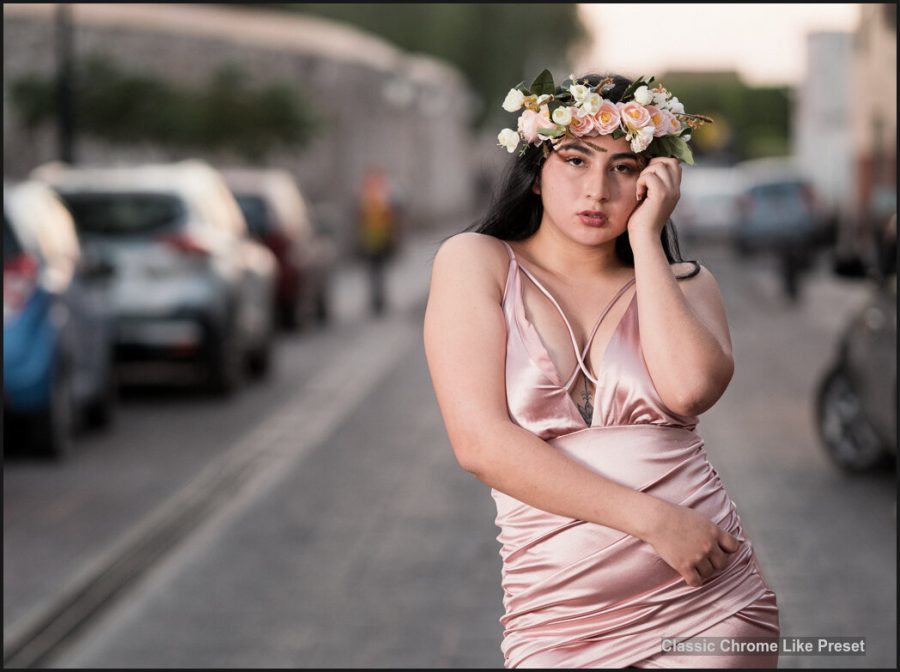
Below are a few more examples of these modern film-inspired look
Gavin Seim
Fuji RAW File, Classic Chrome Like Lightroom FIlm PresetFuji RAW File, Classic Neg Like Lightroom Film PresetI’ve dialed the looks in for as Lightroom Presets and Capture One StylesIN Both LR and C1, Classic negative is a bit moodier and with less saturated tones.
RAW Portrait Classic Chrome LikeRAW POrtrait Classic Negative Like
Merry Christmas. I started creating presets 15 years ago before the rest existed. I always gave you free preset samplers from packs Like Filmist and Natural HDR. So today I’ve made you a perfect starter pack of free black and white presets from the new Silver 5 presets.
This free black and white presets pack includes 5 hand-picked B&W styles for Lightroom, Capture One and RAW
I also added a few mod’s from the brand-new Mod-Kit that’s included in the complete version to show you how fast it will make you. I even included one of the AI mod tools in the LR version!
There are 3 key elements that create better black and white. Watch this video and I’ll show you them as well as how to use these black and white presets to level up your black-and-white.
I, the video, my secrets to using black and white presets to edit!
Take special note of how each Silver preset takes a different approach in how it mixes your tone using the 3 keys for a perfect black-and-white recipe. Once you have the complete pack, you’ll see this extended much further but just as simple and easy to apply.
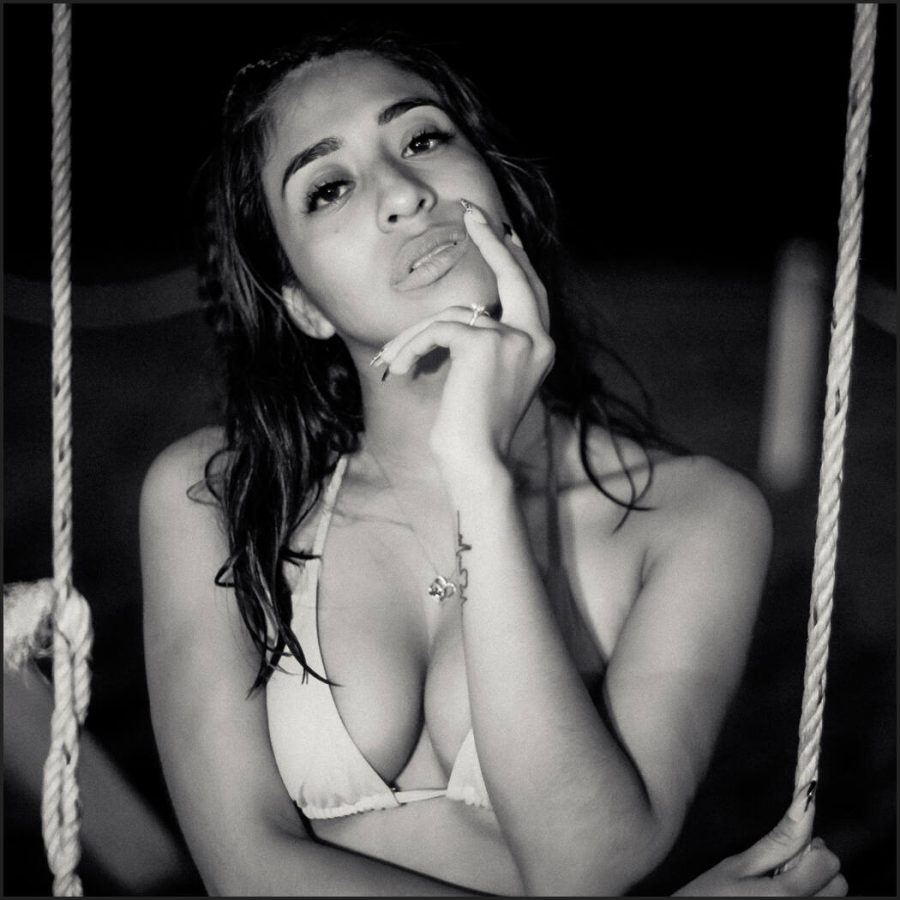
Some are perfect for portraits, others for rich streets of the landscape. That’s the key to mixing the tools and completing your vision!
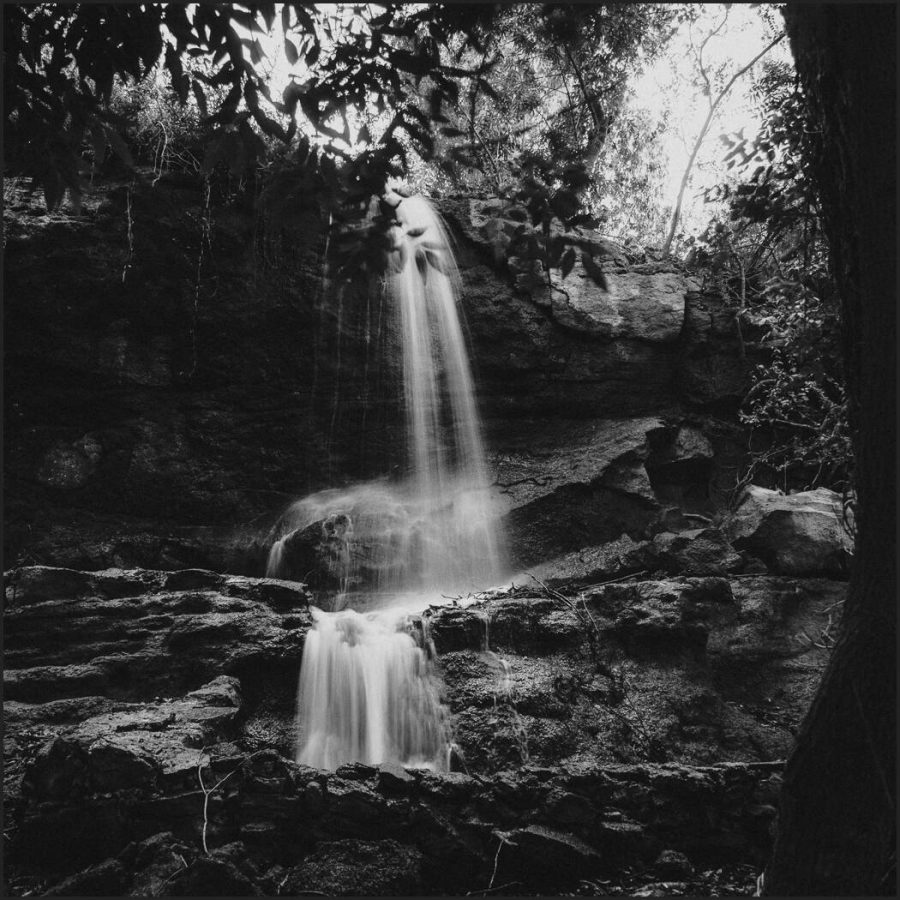
Natural screens often benefit from a more crushed dark black and white and you’ll see great examples of that even in the free presets of Silver 5
You’ll quickly see what I showed you in this Silver 5 training video from my channel. How when you have advanced formulas you are more creative with your edits than any purist who tried to create a recipe from scratch every time. They simply never get this deep in their edits. That’s why presets are essential.
I hope you enjoy this free black and white presets pack.
Please let me know in the comments. See just how much time a good black and white presets system will save you and take a look at the complete Silver 5 pack as well because this free presets sampler pack is just the beginning.
Gavin Seim
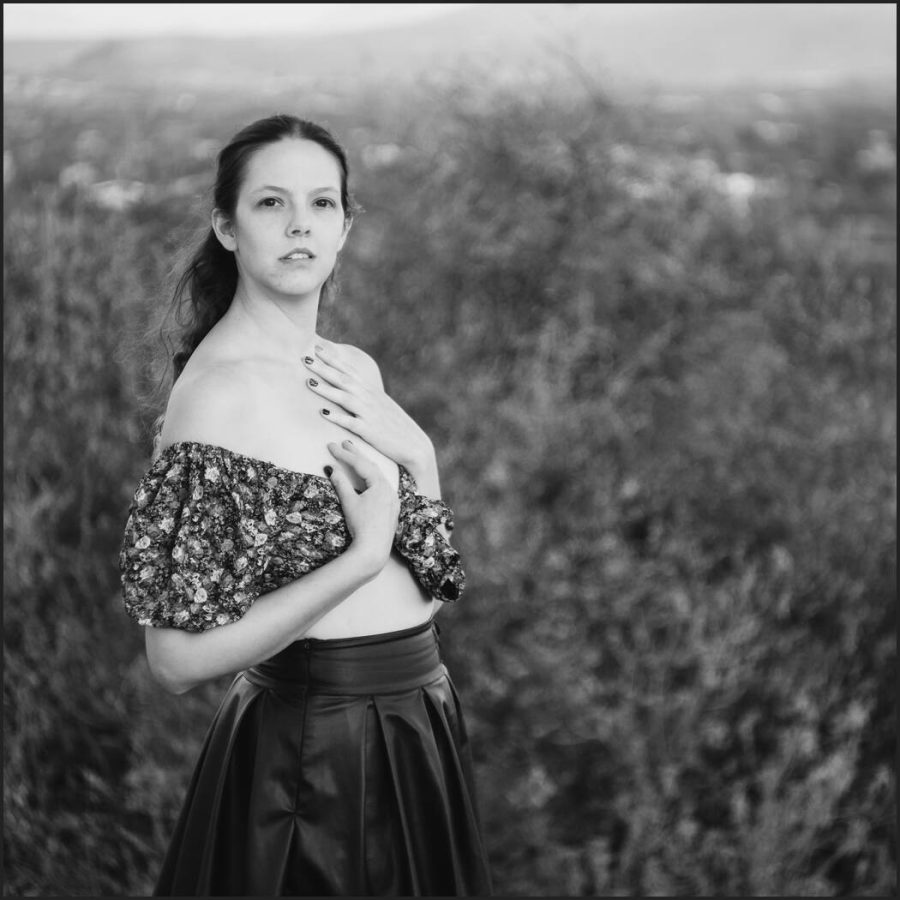
Good portrait presets tend to focus on softer tones and the skin color channels are very important.Download the free Black and white presets from Silver 5 and try all these elements in your photos.
Lightroom should be easy. So I decided to take a step-by-step course to make it easy.
I’ve been looking for a way to teach Lightroom better because when it’s natural all your photos get better. So I’ve started this series, taking Lightroom step by step.
A Lightroom training and reference guide.
You can watch the parts you need. I’ll keep adding more chapters so they are all kept tidy in a playlist. As this project grows you will be able to come and review any part you need at your leisure.
That’s been my theory in making Lightroom presets and Capture One styles like Filmist, GoldChrome, PowerWorkflow, and more. The tool should work for you. It’s the same with software. If you know what’s happening, the tool will get out of your way and you can work smoothly and better.
I’m also considering a series like this for Capture One so let me know if you’re interested.
You tell me what you want to see.
I’ll keep expanding this. Next will develop settings. We’re going to create the largest free library of Lightroom training resources, so you tell me what you need and I’ll keep them coming.