October 17, 2022

There are a lot of Lightroom Film Presets and Capture One Styles. But today I’ll show the films that keep me coming back for clean edits.

I did some street shooting and casual portraits over the weekend and it got me thinking about how my film edits get me shooting more and help me think creatively.

When things feel authentic, you want more of them. So I want to share with you how I use film looks for digital. These are my go-to Lightroom film presets and Capture one Styles for 2022.

I’ll share favorites emulsions from the Filmist presets project in no particular order. These inspire me to create better edits and shoot better in the camera. I encourage you to buy the actual films where possible and shoot a roll or two. It’s an amazing teaching tool. Classics Like Porta and Delta black and white can still be purchased. Others like Kodachrome, Fuji 400H, and Agfa are left to our digital edits which I’ll show you today.

Get Filmist presets here: You can get my complete Filmist pack which includes all these and a lot more. You can also go download the Filmist FREE sampler pack which has Portra 160 and a couple others to get you started and how good film edits actually are.
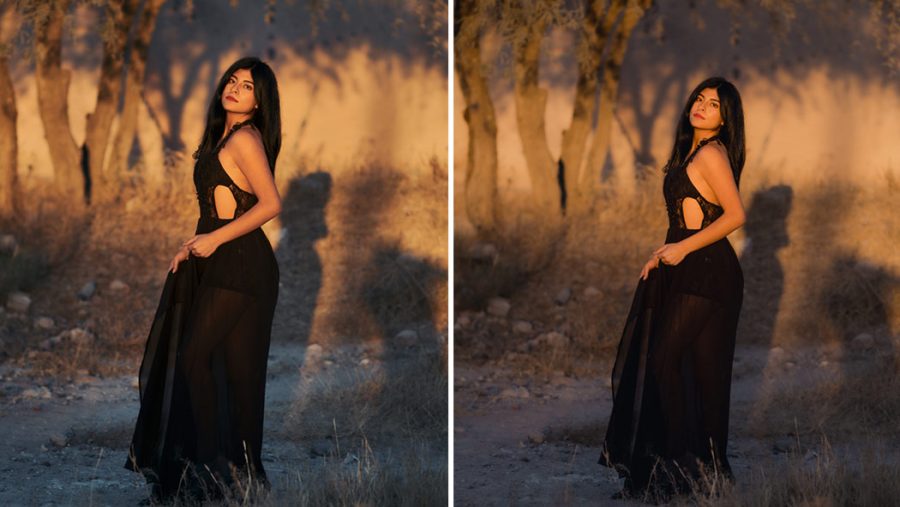
Classic Negative

This one is super popular in Fuji cameras. The look is actually based on Superia 200 film. It’s softer colored and moody and people love it for that. This preset lets me use the recipe on any camera or file and it’s actually one of the free ones in my film presets sampler.

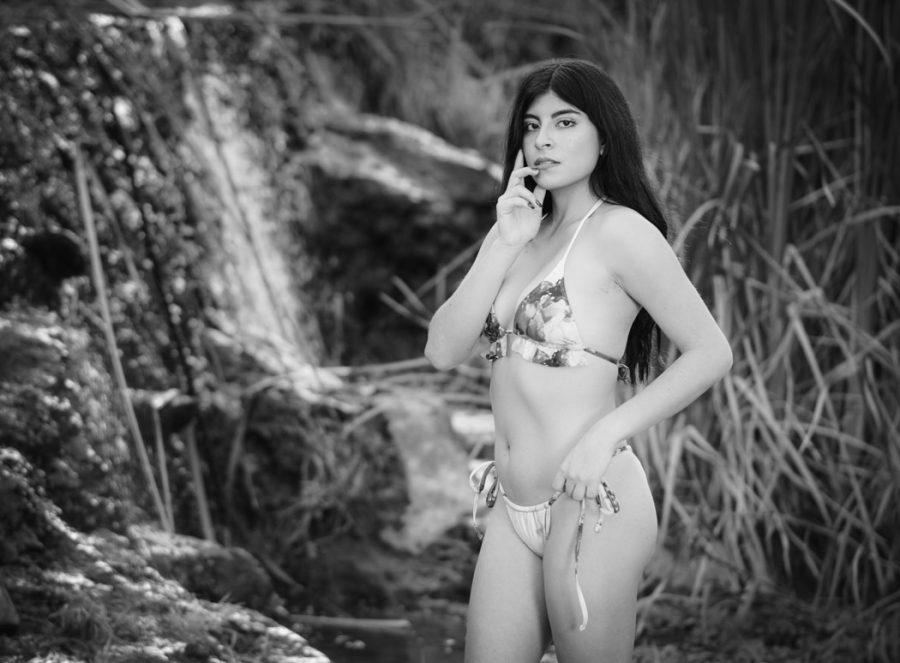
I shoot better in the camera because of film presets.

Film has a special quality. The nuance of tone and colors. And even when doing that on digital, I find myself more confident in shooting and focusing on emotions. Knowing that I can choose my film after and get that atmosphere and mood makes me charge in. Maybe I’m crazy and that’s just me.

I created the Filmist pack a few years ago with one idea. To be the most complete and authentic film emulsion preset pack for Lightroom, Capture one and LUTS for video. I had tried others and they were not bad, but as the photographer who made professional presets since the very beginning of LR, I knew I could do better and make a film preset pack that was not just one or two films, but a complete chemical-inspired system The FIlmist project was born.

Let’s look at more film types…

Porta 400

Maybe the ultimate film classic and one that we film shooters can still get and always come back to. So I put a lot of time into getting all the Portra looks right. And I always come back to it.

It does not matter what Camera!

I was a film lover before I ever bought a Fuji Camera. And while their built-in color profiles are nice, they are locked to the camera. I see no need to bake in a recipe and throw away the rest.

When I create Filmist I, test on Fuji, Sony, Canon, Nikon, and others to make the looks as authentic as possible. Hundreds of hours go into this to make these film presets balanced on all images, not just a demo.

But even when shooting my Fuji X100V for example, I still shoot the Raw and add the preset from Filmist, not from the camera profile or a JPEG. This us all the control.

Why film for digital?

If you follow me you know I make various focused and refined preset and style packs. Sometimes I go straight to Silver black and white Presets or Natural HDR or PowerFlow for large groups of files.

But I know Filmist will work on everything. Film colors and tones had creative twists and unique characters. But they give something that’s organic and make you want to shoot more and edit cleaner.
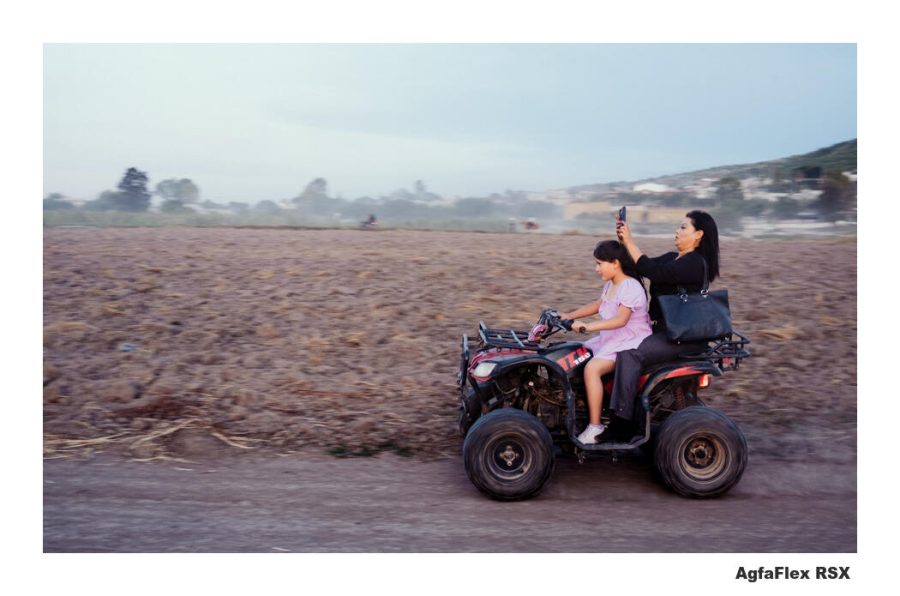
Agfaflex 45

It’s based on the early color film. So it’s a bit dark and faded almost lo-fi feel. I don’t use it on everything but when it works it’s amazing because the lights pop and the shadow and color are low. You’ll see what I mean when you try it.
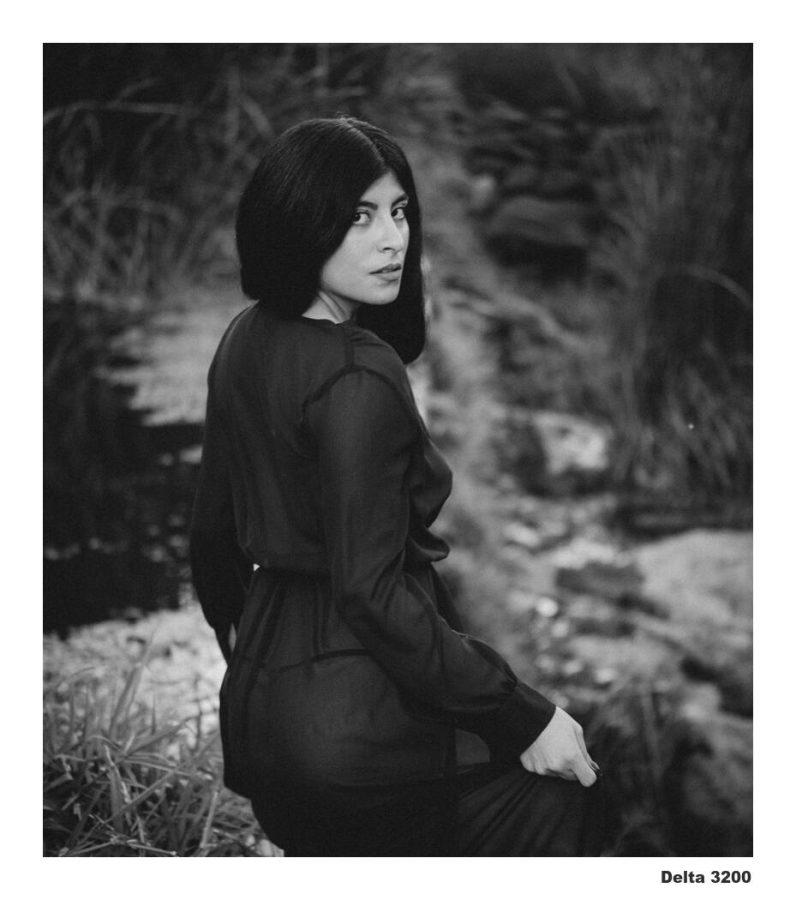
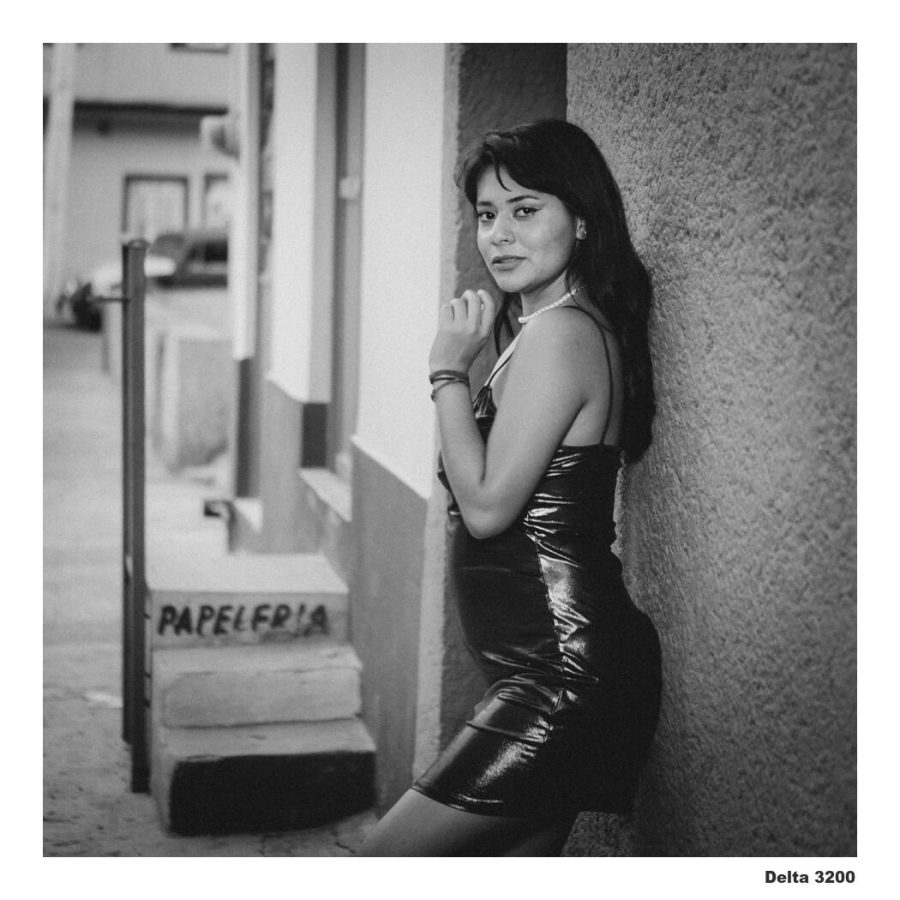
Delta 3200

Another I always come back to. There are lots of other black and white films like HP5 and more in Filmist. But the Delta preset really does something rich with those shadows and tones and if the grain is too much I can just use one of the chem-kit mods to lower it. But honestly, I usually leave it grainy just like the real thing. I love it for portraits.
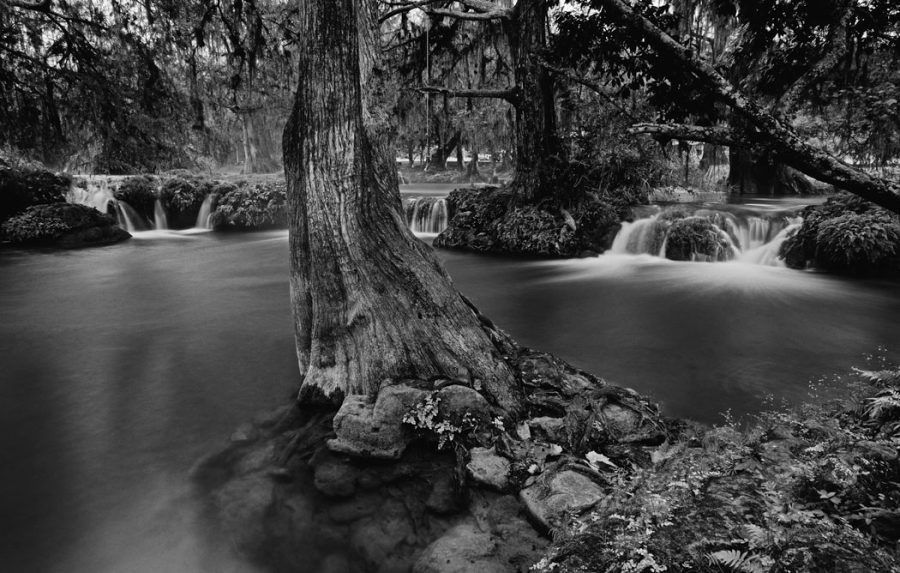
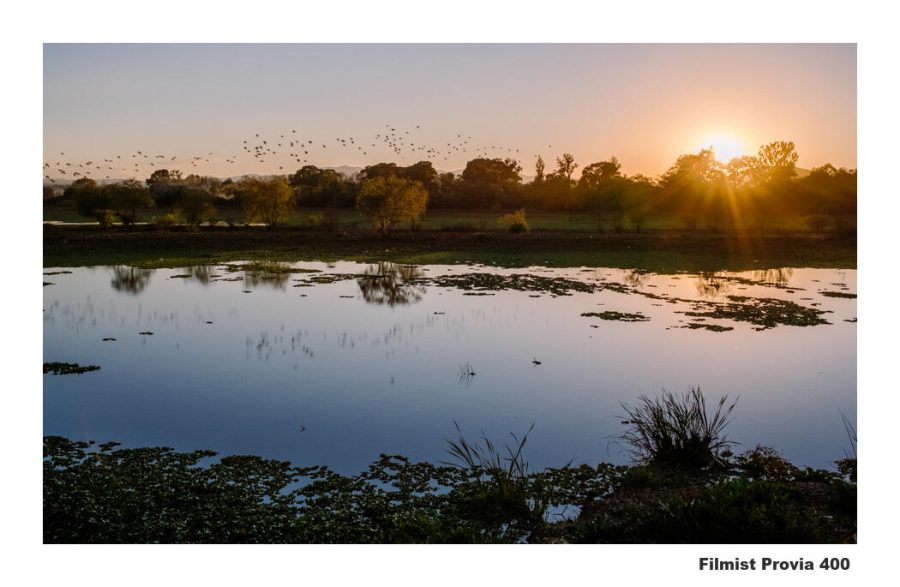
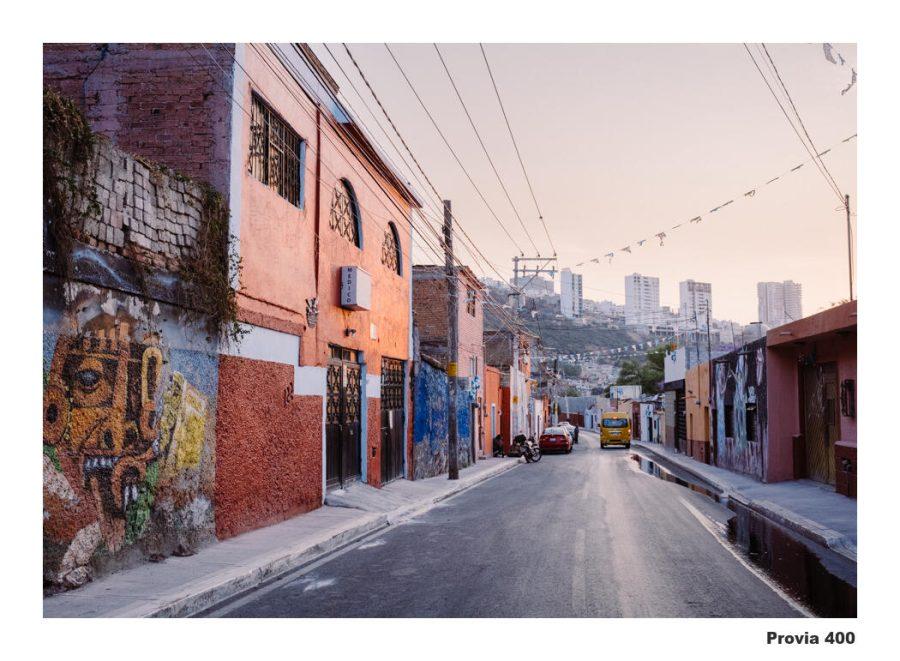
Fuji Provia 400

This classic was really versatile. While I will use it for portraits and especially streets if a want a bolder color than Portra, it works especially well in landscape photos giving a naturally rich color that feels straight out of the darkroom whether I’m using Lightroom or Capture One.
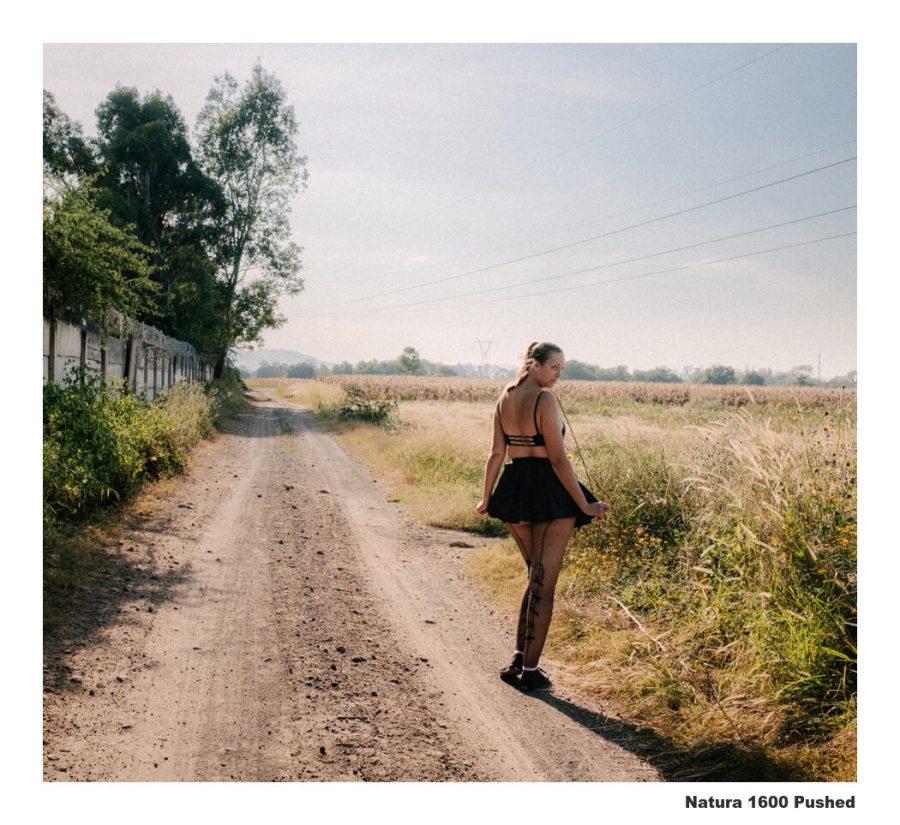
Natura 1600

This was one of the recent gen.2 updates. Natura is warm and grainy, but you can easily remove the grain. I like it myself and it really produces those on-the-go type street and portrait scenes that have raw emotion.
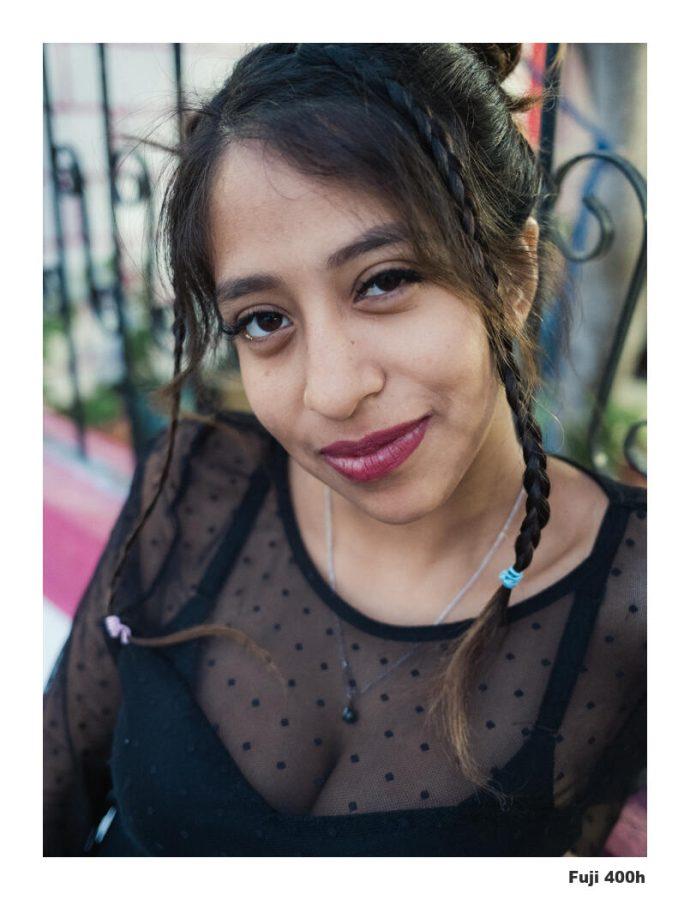
Fujifilm 400H

To be this was Fujis Portra. But its greens and tones are different. Like Portra however, it’s a wonderful go-to for when you want a clean organic feel without anything over-cooked.

Porta 800

All POrtra is good. I remember buying 800 in roll for weddings when I was starting out. It’s distinct from 160 and 400 and the presets and style is also. It works great on many portraits but it’s a tad more intense and greener also making and great street and journalists film.
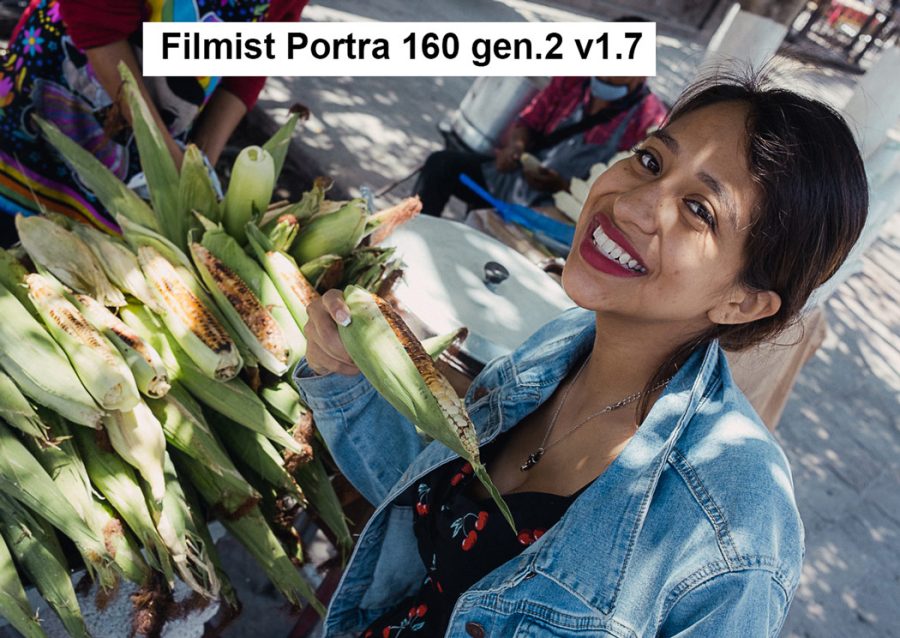
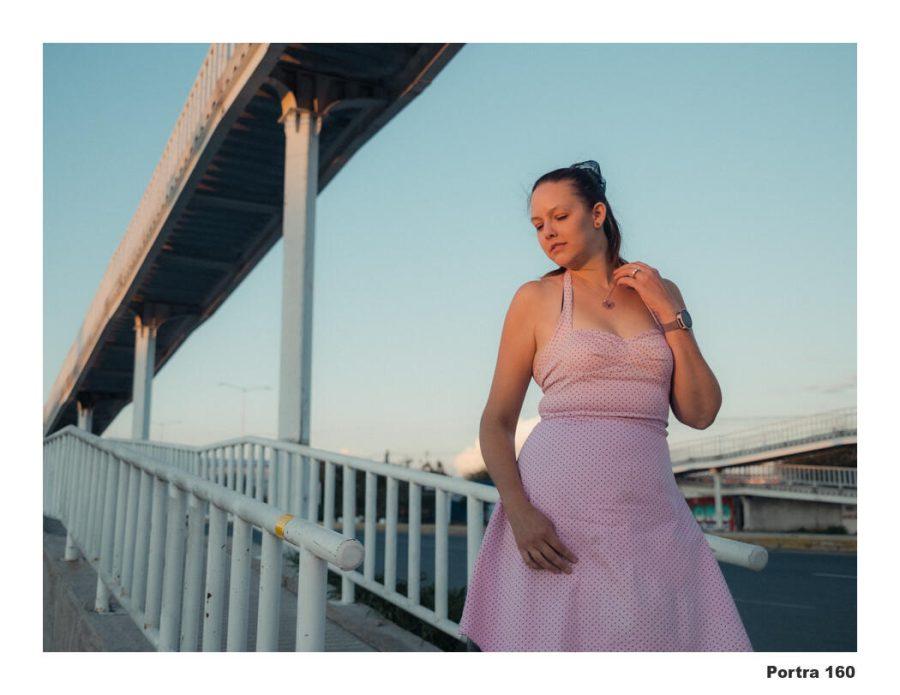
Portra 160

All the Portra’s are in here for good reason. They are all amazing. !60 is a touch less warm than 400 with a softer grain. I would say I favor The 400 presets, but I will often use the 160 style as I did here, especially when I want a touch less warmth due to light conditions.
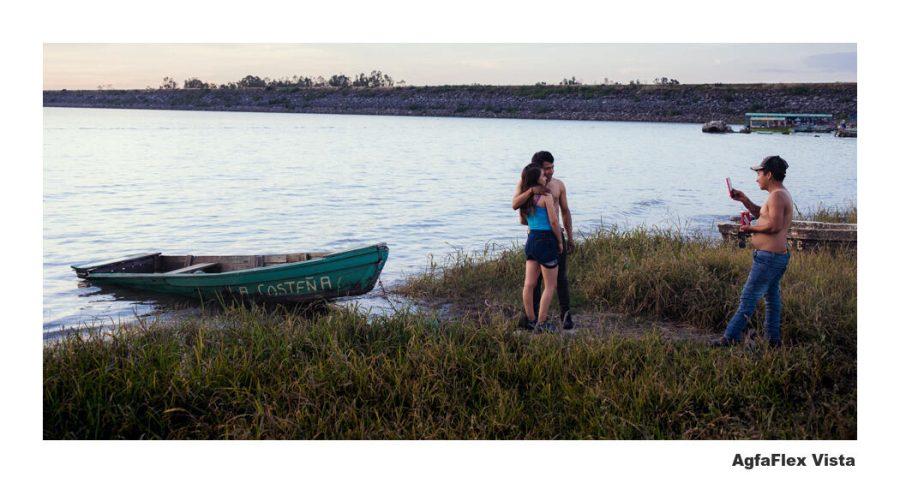
Agfa Vista

Based on Agfa vista and I love the way it uses greens give you a unique color mix without feeling over-processed. I use this everywhere, portraits landscapes, and streets, and also use the RSX variant quite a lot.
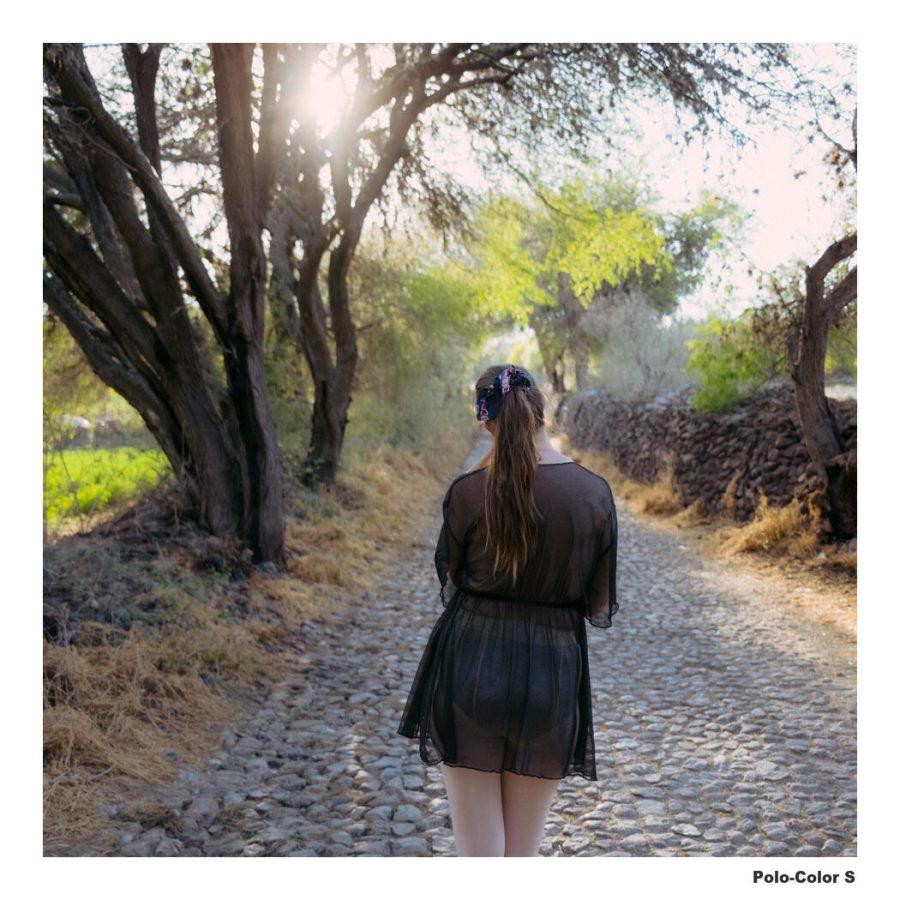
PoloColor S

Polaroid films vary because they are organic and their process can be altered by how chemicals are used. But polaroids can be all over the place and we still love them. So I have 3 Poloroud inspired looks to cover variables and the S variety is just soft warm goodness that works on a lot of things
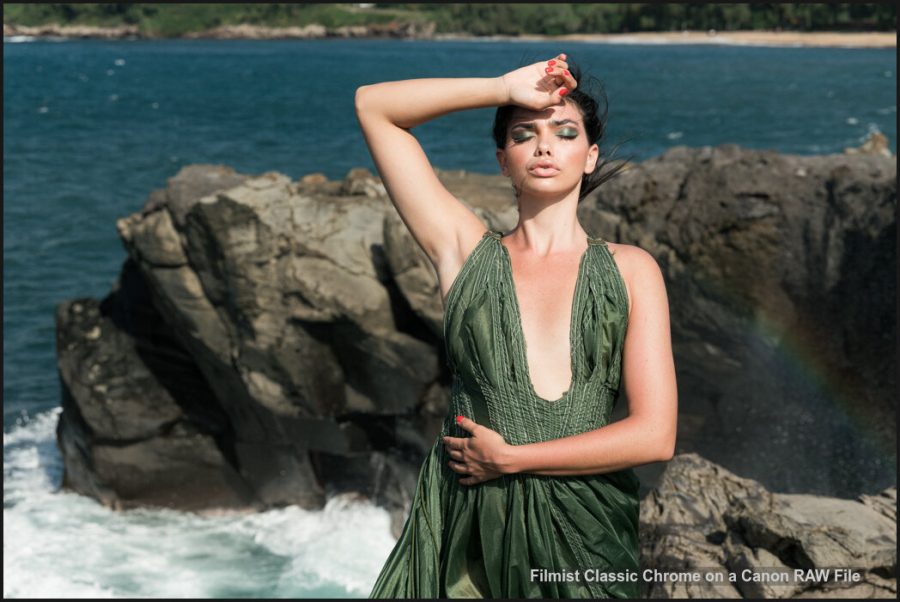
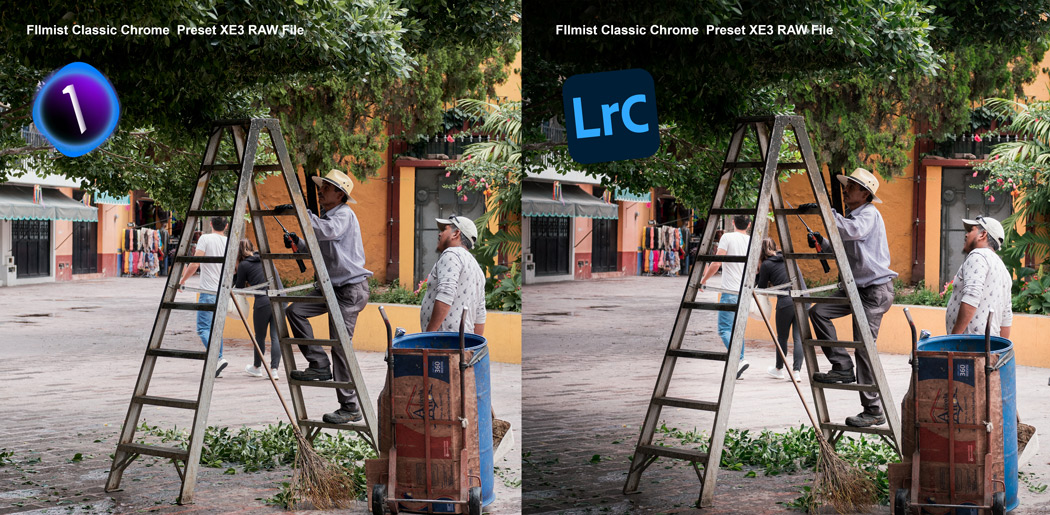
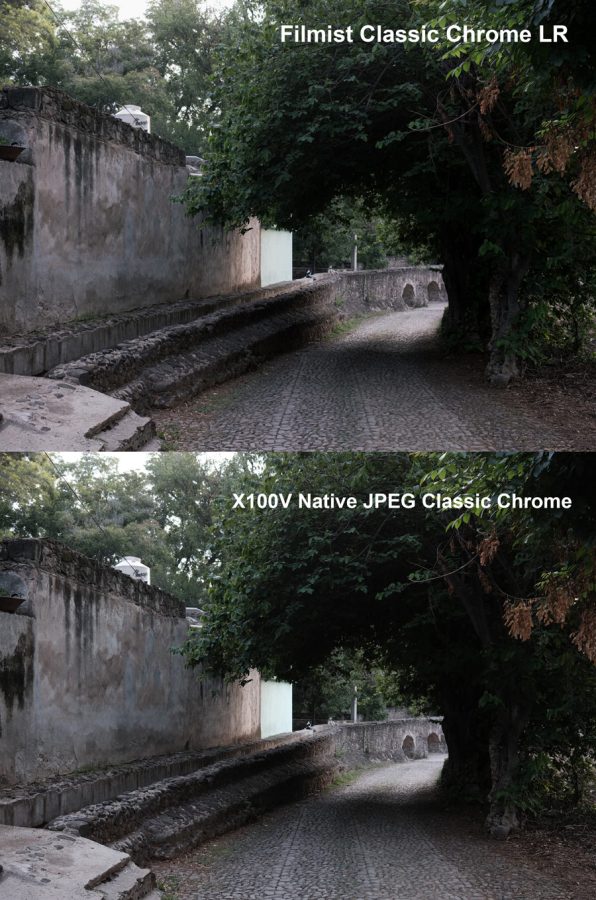
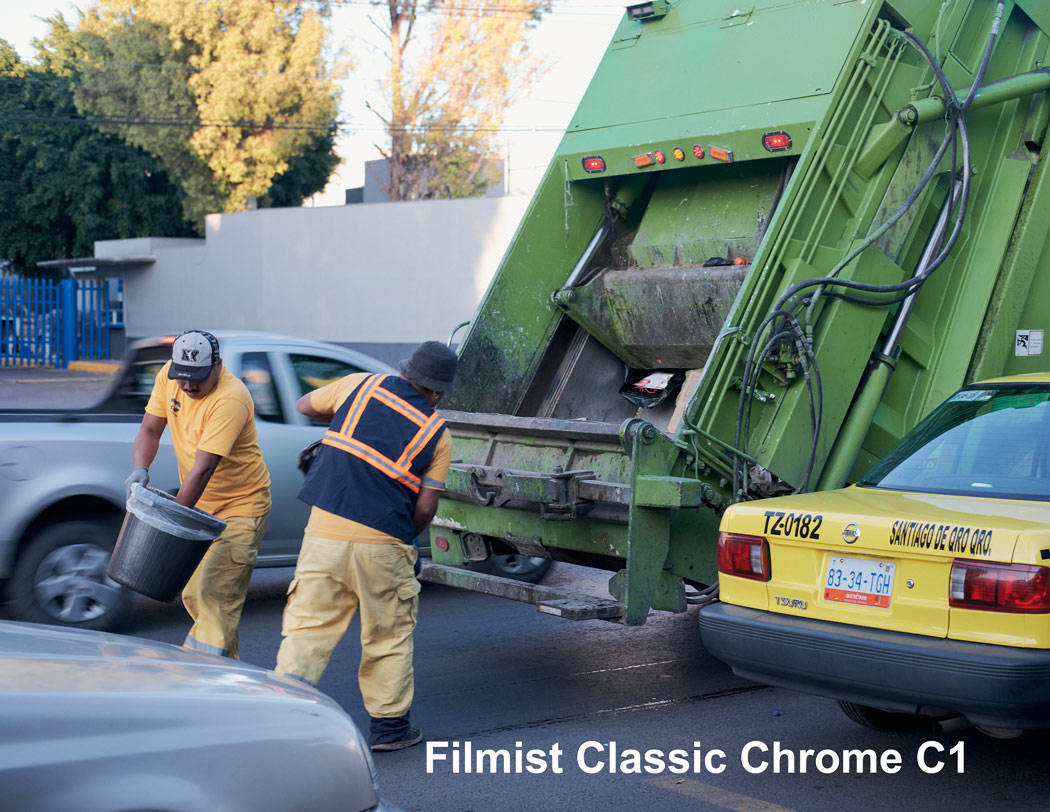
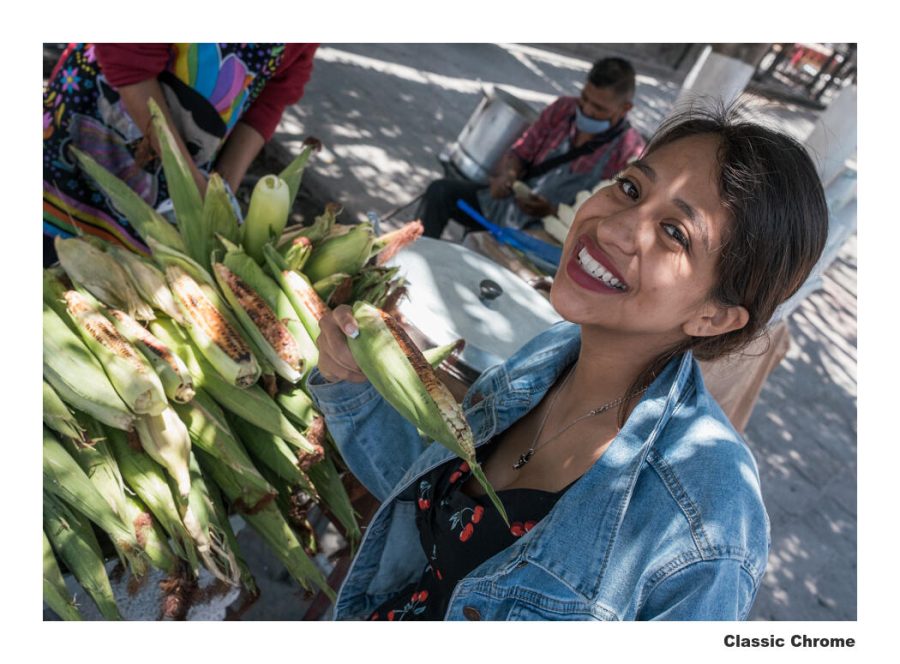
Classic Chrome

Like the Classic Negative preset above, classic Chrome is another Fuji camera look but in creating it was a Lightroom Presets and Capture One Style we can use it on any file, not just Fuji. It’s very gentle so you can use it in batches and on anything for a clean look.

Classic Chrome is not actually based on Fuji films but on Kodachrome. Though it’s a loose interpretation. Filmist also has Kodachrome and that emulsion is a lot bolder. But at the right time, it’s amazing.

It’s not about faking it. It’s about growing your potential!

There are many ways to edit and refine a great photo. Using authentic film presets and tiles, lots for video, etc. It’s not about any sort of pretending. It’s about using the atmosphere and color our industry spent 100 years creating. You don’t throw out what works just because you have something new. And film works, the kind that comes on rolls and the looks that come inside Filmist.

I hope you found this useful and get some inspiration of your own. You can learn more about Filmist or download it here.

Gavin Seim

Read More

August 12, 2022

Should you use Capture One or Lightroom for your black and white edits? PLUS where does Photoshop for black and white fit in?

We’re going to test that in today’s video with direct comparisons. Taking the sale filed and editing them in each to see what gives us the best black and white in the least time. I’ll give you tips for all of them along the way.

Also, see my Lightroom vs Capture on 2022 video here for a general overview of these two great apps. For now, let’s watch today’s video and do some black and white tests.

Since I started digital photography 20 years I’ve seen just about every technique for Black and White in digital Some needless complex. some are just ugly. Simplifying that process led me to bypass plugins and create tools Like Silver 4 presets and Blackroom BW Actions.

Pure Capture One. While there are fewer BW sliders, you can make up for it with the more advanced color tools and get a stunning result.

Honestly we B&W lovers occasionally get a little snobby, so this question can be complex. But since we no longer have the chemicals we used to use in the darkroom the traditional color filters do not have the same effect. Today to take the same principle and make it work digital.

The best black and white conversions usually start for a color photo because with those color channels we can convert and extract the colors, much like we did with filters in the film days but with more detail. Darkroom like green filter, lighter reds, etc. If you bake black and white in camera, you lose all that power. That’s not to say your BW photos are wrong. Just that they are not as flexible.

So I usually convert on the raw file. In LR or C1. I use my SIlver 4 presets if Filmist. But whether you use creative presets to go further, or all manual. You don’t want to supply desaturate. Use those channels and the power of your RAW.

Watch today’s video above, because we’re looking at Lightroom VS Capture ON in a side-by-side level. Does one give you a better black and white conversion than the other and what are the advantages between Lightroom and C1.

After that, you can go deeper into your black and white edits..

If I’m going to edit my best work. I go beyond RAW. I’ll restore the color channels before going into Photoshop, leaving my other edits in place. Then I can go deeper with my black and white edits. But they are also more complex in Photoshop.

Sometimes it’s not even clear how you can make a better black and white in Photoshop. I use Blackroom to convert to a more complex BW because it always helps me find a way to improve the edit without stumbling around. That’s what it was built for.

More about how I do those more advanced edits in this video and on the Blackroom page.

Lightroom is a little more user-friendly compares to Capture One. But with Styles or presets, you can get your look fast in both.

In conclusion. Which is best? LR, C1 or PS

When it comes to Lightroom VS Capture One for black and white. I think Lightroom has the edge for ease of use and results that just work. Capture One with its other available tools can perhaps give you more options but with more work. Both are going to work great if you save presets or styles or Have a pack like Silver 4 or Filmsist on hand.

In the end, both are good and the results will be good.

But comparing both to Photoshop. Photoshop offers more options, but with a lot more time spent. Even if you use Photoshop actions to vastly speed up these more advanced edits, Photoshop should probably not be where you start.

Edit normally in Lightroom or in Capture one or another RAW-type editor. Then take the very best images you want to showcase to Photoshop to give them that edge that makes them win.

Lastly, plugins for black and white are heavily hyped. I used them when I all this starting out but native tools have improved a LOT since those days. As I mentioned in the video, a plugin adds another step and takes away control.

Yes, using presets and styles and actions help a lot because they make hard tasks fast. But they use the native app tools in Lightroom, Capture One, and Photoshop. So instead of a new file or a flat image. You just highly refined sliders, adjustable layers, and a totally transparent process. To be that’s a huger win.

Let me know if the comments what you think is the best black and white tool.

Gavin Seim

The detail in Photoshop is almost impossible to beat. Layers and details equal more refinement. So I still take by best photos here in the end after using a RAW style editor.
Don’t be afraid to edit your black and white a little more. Whatever app you use. In the end, it’s all about shadow and contrast.
Read More

July 2, 2022

Why do camera-specific color profiles like Classic Chrome have to be camera-specific?

They don’t! In the end, it’s just a mix of colors and contrasts. A very detailed mix. And that’s what I’ll show you this week along with some samples of how these recipes look in real life.

The Filmist 1.7 update brings a lot of nuance, especially in the brand-new Classic Chrome recipe.

There’s a free sampler with 3 great film presets on the Filmist project page. It now includes the new Portra 160 1.7 update

First, I updated the Porta Gen.2 Presets.

Porta 160 for LIghtroom and Capture 1 Film presets - FIlmost free film preset
The latest version of Portra is more natural in both its LIghtroom Presets Variant and Capture One style. This is one of 3 Portra presets but this one can be found free in the FIlmist sampler pack.

I make Filmist 1.7 to have more refined Lightroom Presets, Capture One Styles, and video film LUTS that include a major refinement to the Gen.2 Portra presets, making them work more naturally like film.

Portra works on nearly anything and after years, the latest version of my gen,2 Portra presets much like the new Natura 1600 is just subline.

You can also watch my video on making the gen.2 Portra formulas.

The reason great recipes are better as presets is that they take a lot of dialing in. You will never do them manually every time. If you’ve seen things like my Sliders master workshop or the 3 Magic Sliders video on my channel, you have seen how these details matter.


Next, I finished the brand new Classic Chrome preset!

Canon RAW FILE, Classic Chrome Preset in Lightroom Classic.

Yes, I finally finished the much-requested Classic Chrome formula as a preset that can be used in any camera. It’s very clean and versatile. It’s actually a Fuji variant of Kodochrom, though since there were many Kopdachromes I can’t say which one specifically.

For those that don’t have my presets, I will be doing a video on how to create your own version of this recipe on my channel in the next week or so. So stay tuned.

Side by side of classic chrome presets in Capture one and Lightroom
Same image in LR and C1 using the presets / style. Almost identical in LIghtroom and Capture One, I programmed the preset to give a very accurate rendition.

If you own a fuji Camera that supports the Camera specific RAW profiles in LR, or C1 you can shoot RAW and then apply the camera-specific color profiles. The problem is they don’t work on other files or even older models of your Fuji camera that did not include that Film profile.

So Like I did for the Classic Negative Lightroom Preset and Capture One Style. I’ve been working for weeks building and refining a recipe for based on Classic Chrome V2.


The win here is that you can use this on any file type!

Here I used Classic Chrome on a Sony A73 file and result looked great.

Classic Chrome is a process that many photographers love because it’s very gentle and has that subtle feel.

This recipe is only included in the Complete version of my Filmist, since I already give away the Classic negative recipe for free in the Filmist sampler pack.

Side by side – The baked-in JPEG of the Classic Chrome look next to the preset process on the RAW file. Lightroom.

While in the Lightroom vs Capture One debate, I often favor the interface and speed of Lightroom. This was one of those times when the more advanced color controls in Capture One let me dial it in a little easier.

As you can see here however even in Lightroom, the baked-in JPEG from the Fuji camera next to the same photo from RAW file and NOT using any camera-specific profiles, just the preset. Well they are nearly identical which makes me happy.

A baked-in JPEG varies a lot from the settings and dynamic range you apply inside a Fuji camera. Here you just have the clean look and then can simply mod it with sliders of even the built-in Chemical tone mods that are in FIlmist. More control is the order of the day when you shoot RAW and then apply the color after.

Like I said next week I plan to make a video showing how to edit with Classic Chrome and where it works well. I’ll also give you an insider’s view of the formulas so you can play around and make your own variant even if you don’t use my presets or styles.

For Filmist users, make sure you update to V1.7 of the film pack in the portal. Then let me know in the comments how you like the results of these new updates 🙂

Enjoy – Gavin Seim

The Filmist Classic Chrome style used from Capture One
Read More

June 20, 2022

The topic of Lightroom VS Capture one comes up a lot.

I am a little bit of an expert since everyone one of my Lightroom Develop Presets Packs also comes, and a Styles Pack for Capture One Pro and I’ve been using both for many years.

I’ve compared various things about Lightroom and Capture One and I have the main video for 2022 that compares Lightroom VS Capture One in a wide sense so you can decide which one is best for you.

YOu can even try the edit yourself with the RAW file below and the free lightroom preset and free capture one style I’ll link below. You can also share your results on the Shadow Hunters group post for this.

Try it – Download the RAW file for today’s test here.

So today is about a simple portrait edit. BUt not really an easy one because of the tricky light. This is a perfect test to see how we use Lightroom and Capture One in the real world for a great portrait edit and which one offers the best features.

Both edits are clean and have gentle differences from Lightroom to Capture OnePro

Download the Portra 160 Preset/Style I use in the video for FREE in the FIlmist Mini Pack.

Watch the video and see side-by-side edits and some tips for editing great portraits in both.

Lightroom is a little more initiative and has better Ai tools. Capture One is more nuance and control. They are close!

In the end, both are good and both have their advantages. But watch the video and I’ll show you some ups and downs. Whether you use Lightroom Classic, CC, or Capture One Pro 22, you can get great results and we’ll see them in today’s video.

Let me know which one you like best and why, or if there’s another app you favor for your RAwe editing, I’d like to hear about it in the comments.

Read More

April 20, 2022

I wanted a more perfect Portra film preset for Lightroom and Capture One. So I made it!

Portra is a classic film, the 160 leans a touch green and is very versatile. The 400 is warmer and probably the top portrait film ever and the 800 is less famous but has a bit more color pop and a rich look.

Portra gen.2 took the Portra presets that have always been part of my Filmist presets and made them so much better. I tinkered and calibrated for days to get the feel of Portra just right. It took a lot of film research and formulation but the result was worth the wait.

You can Get Filmist here –  The free pack has my new Portra 160 preset. Here’s my new video on the new Portra looks.

In making gen2 Portra I had to make all 3 presets from the ground up for Lightroom and then do it again for the Capture One Styles. But the result is a film emulation of Portra better than any I have ever used. It captures the aesthetic of Portra and just looks stunning. Watch the video and I’ll show you how it works.

Porta looks amazing on Portraits but also on a lot of other things.

Filmist is a lot of film emulsion presets, but the gen.2 Portra looks along with new gen.2 Natura 1600 which I recently finished developing brings in two of the most versatile films ever as digital presets for Lightroom and Capture 1 and LUT. I’m using these constantly in my workflow. Even if you only grab the free one I included in my Filmist free sampler pack, I hope you enjoy it.

Gavin Seim

Read More