January 8, 2018

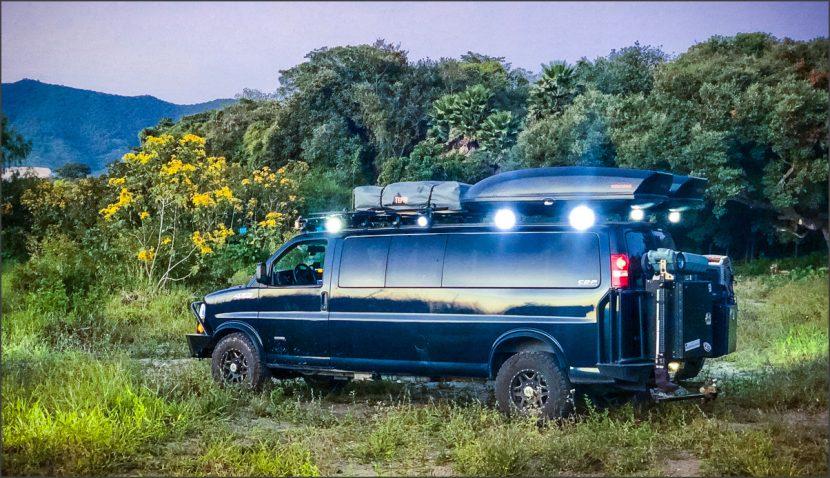
If you get lost in the Jungles of Mexico, don’t sweat it. Your adventure VAN has everything you need and it’s safer here than most people think, so ask a nice local to give you directions.

As a filmmaker and a paragliding pilot along with my wife we need my gear and want to be able to go anywhere with it. Turns out optioned Toyota Sienna retails for $50,000 and while moms seem to love those, it won’t cross a river with an RV in tow or climb a mountain with your gear.  We needed a van that was ready to roll anywhere; so we built it and created an adventure van that mom and dad both love.

The (mostly) finished product. The epic one and only truth van.

Swan was our 5th and she came last year; that meant my crew cab pickup would no longer haul the family. More than that we needed a vehicle that would be self-contained and was ready for on the road adventures in since we spend months of each year exploring. Our van setup turned out to be very timely for our travel to Mexico as we expose the propaganda that the USA is the best country in the world.

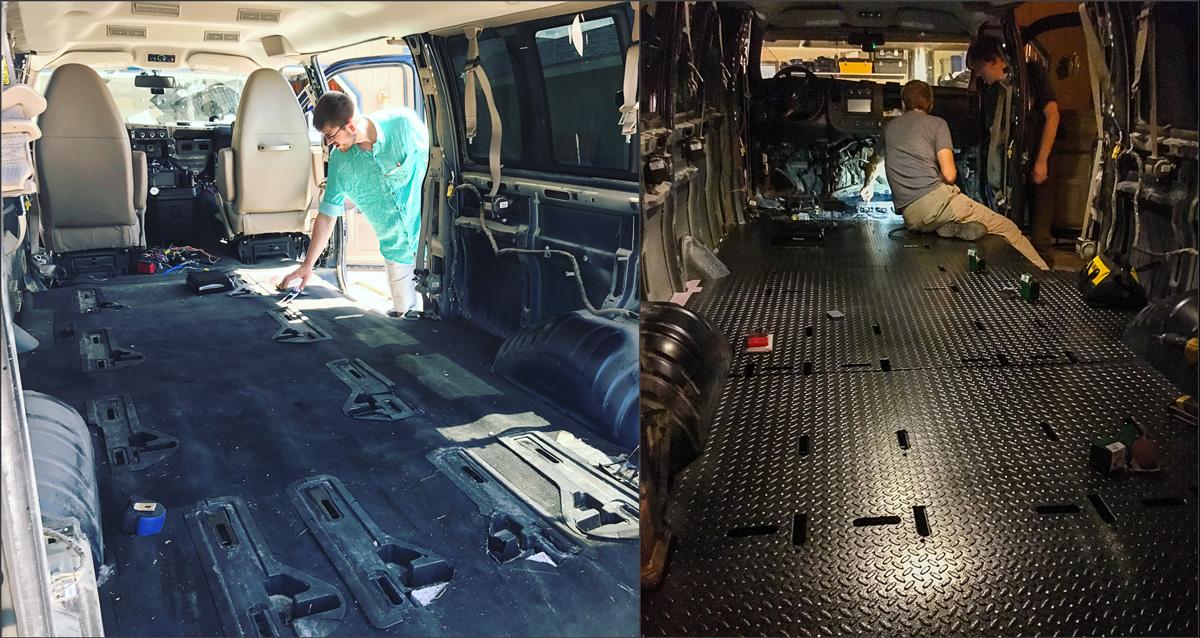
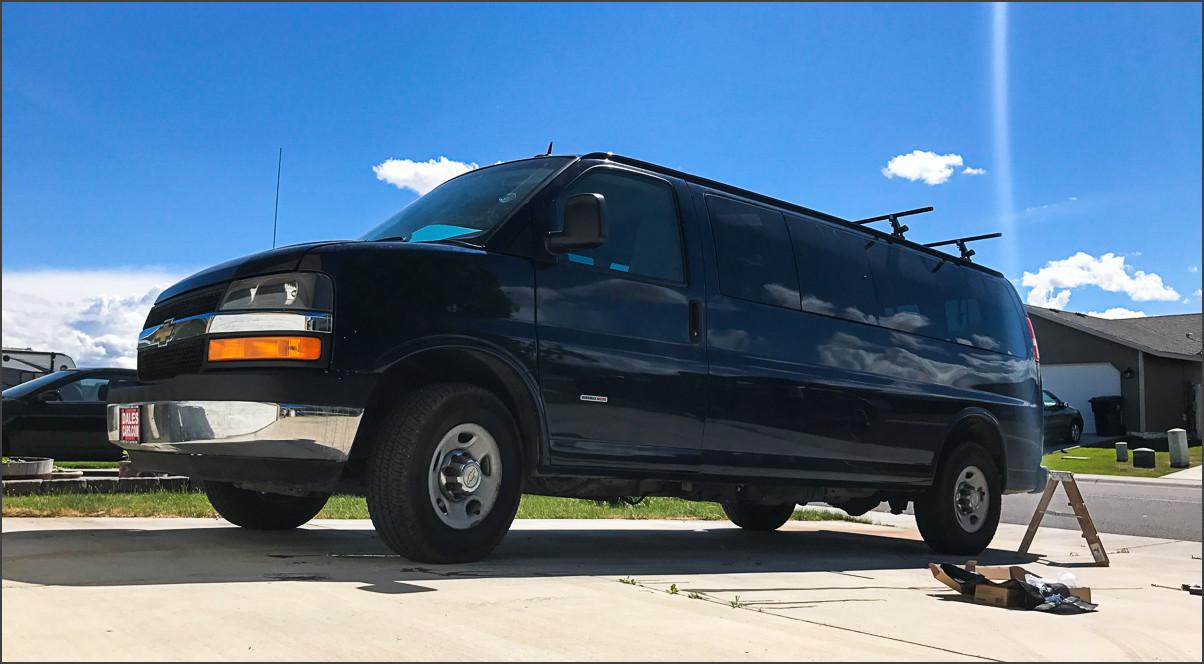
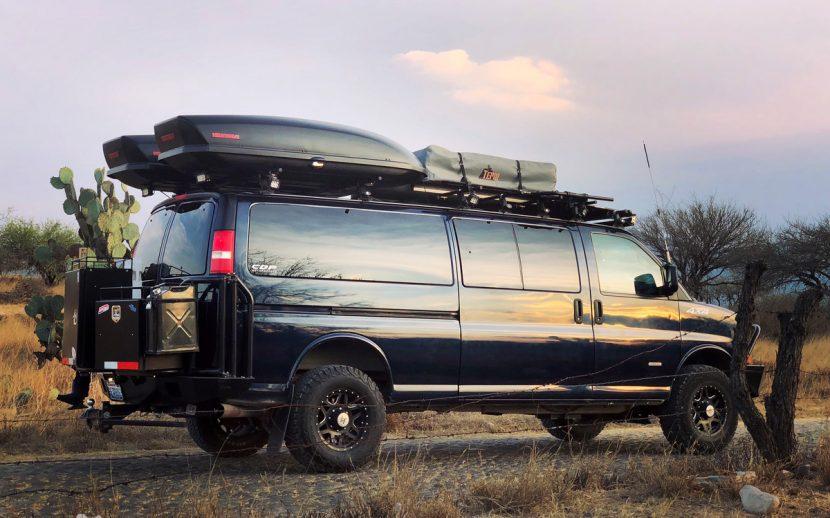
I’ve yet to settle down enough to do a full video tour of the van but it’s coming. This 2013 Chevy Express 3500 15 passenger with a Duramax engine. The Diesel is pretty rare but you can find them used. The latest Diesel’s have the new wimpy engines and are not great towers. We bought this last Summer pretty much stock and just under 100k miles. It cost about $24,000. My Summer project begins in everything from changing the ugly carpet to a custom powder coated diamond plate floor with the help of my metal working brother in law.

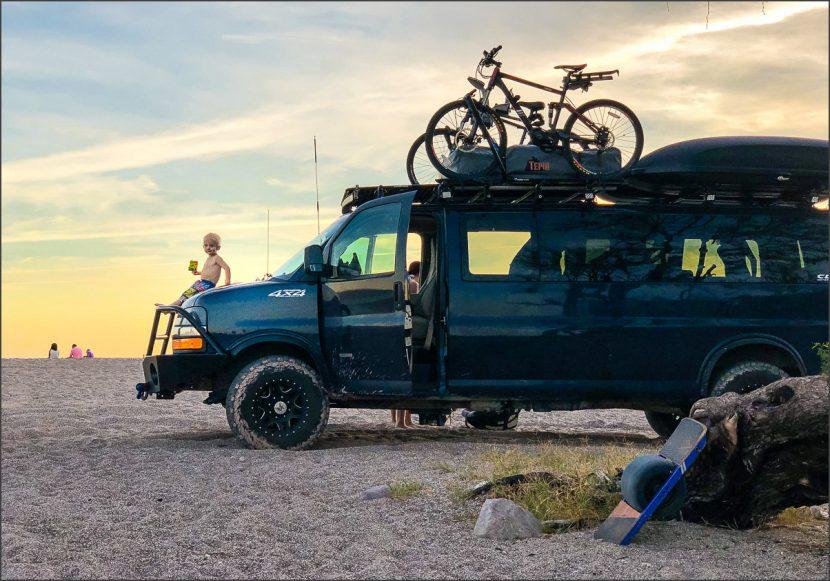
We installed triple Yakima racks and then the largest roof boxes they made, a rooftop tent and a wood platform with a solar panel that I could also stand on to shoot from. We redid the electronics adding with a Pioneer 8200 nav stereo, new speakers, a small sub and finally 360 degree lighting. And that floor, that would allow us to have a sturdy surface to attack toolboxes and accessories inside; everything is modular.

Getting started with a clean canvas.

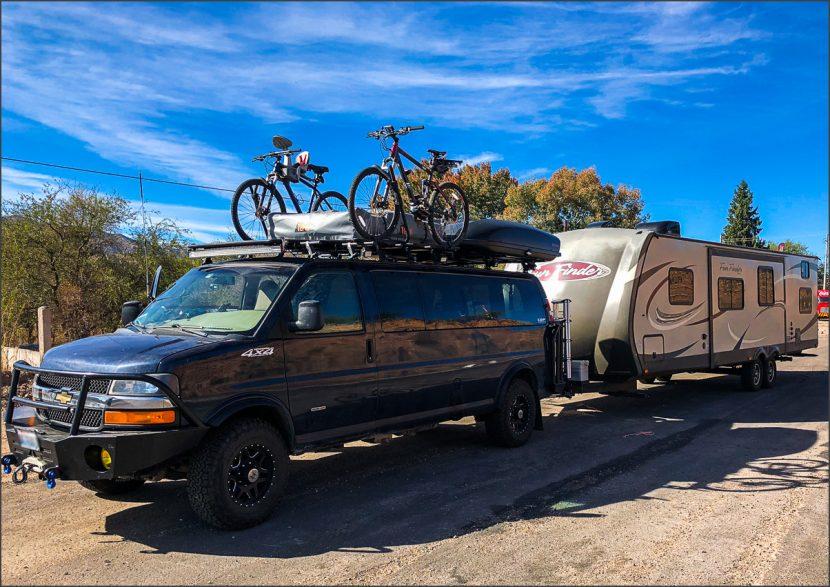
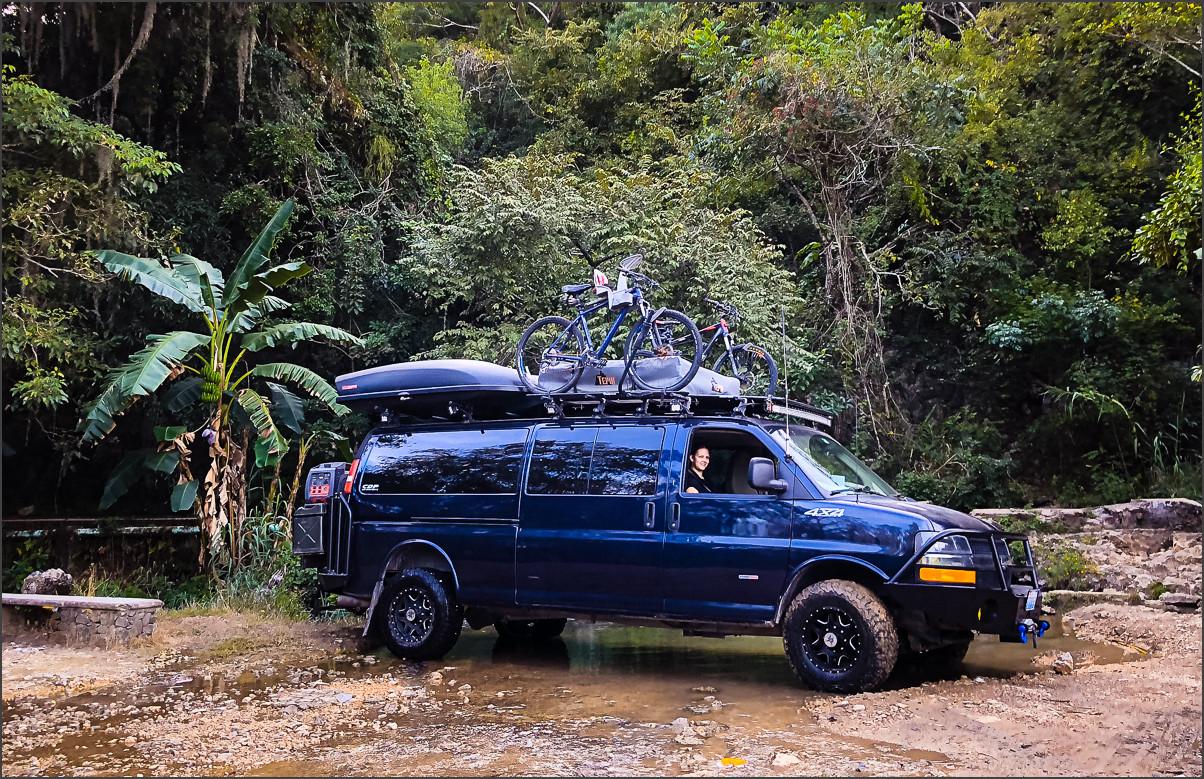
Next we drove it to Utah with our 10K lb travel trailer in tow. The van went to Advanced 4×4 in Salt Lake City for the really good stuff. A full 4×4 conversion, a lift, 33in tires with 17in wheels and of course these epic front and rear bumper system from Aluminess. The suspension was upgraded and airbags were installed for better towing as we rolled out.

That was finished in a few different phases then it was back to my work adding things like hi-lift jack, a 12,000lb winch to the front bumper and filling those rear boxes with tools, camping supplies, a stove Rotopax tanks and more. The rear bumper also carries our extra fuel and everything we need from water to food. Finally, we had the Duramax custom tuned by Starlite Diesel with a 5-way switch on the fly tuner to change the performance of the engine depending on what we’re doing.

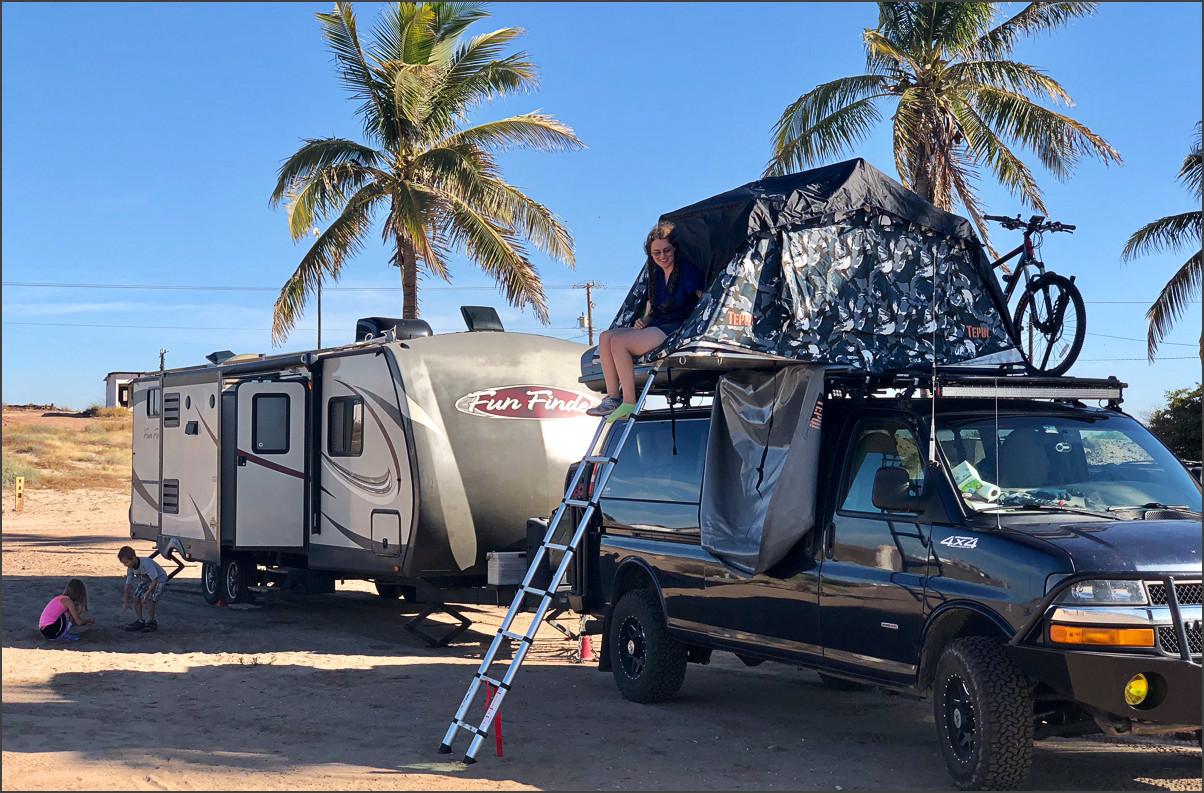
We did not make the inside into a full RV van since we usually pull a trailer. One great thing about vans is from the roof to the chassis they are like a canvas; so build it however you like. We opted to keep the inside open for hauling families and paragliders but added things like extra plugs, improved LED lights and an inverter for AC power right inside the cabin. We also have a truck beds mattress so the entire area behind the two bench seats can become an extra bed.

We can sleep in the rooftop tent or inside when not towing an RV and the essential supplies and tools are always board. I have a few ideas up my sleeve for a modular bed inside that won’t interfere with cargo and people hauling abilities. The metal floor is rugged, but all the seat slots still work so you can configure it as needed. We leave the 2 rear seats out when traveling so there is room for bikes and gear and it still seats 8 with plenty of room for hitchhikers in the back.

We the van buried on the the other side of this dune in Mexico with the RV attached. But some friendly locals and a Hi-Lift jack solved the problem.

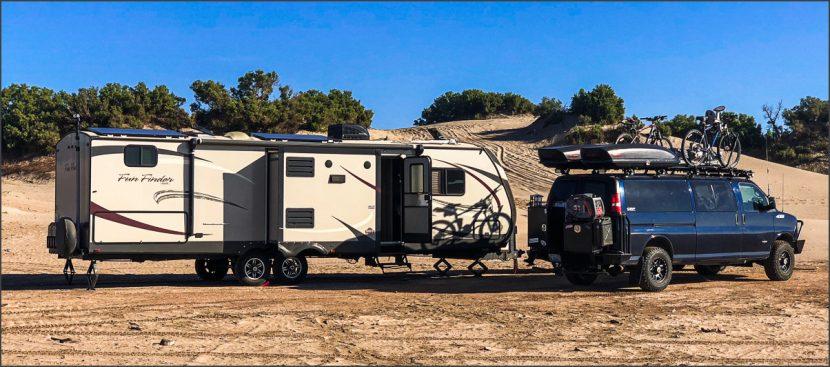
This was a big project. All told we have about 55k into this rig. That’s with the van itself, 4×4 conversion, racks, floors, lights, tent, everything. It gets 16-19mpg when not towing and averages 12 with a 10k lb RV behind it. If we had found one this nice already done I figure it would have been at least 65K, there are very few like it. There’s been a few glitches and fixes to dial it all in because it was a used rig. Then again a new diesel would push 60K just for the van and still have glitches.

Jungle Camping without a trailer with my wife and 5 kids in Jalpan de Serra, Mexico.


In central Mexico and a guy came over and did a full exterior detail and polish for $30USD, It reflects the sunset today.

Tips for building your own. Ford and Chevy are good but many things the Chev rides better. I say get a gasser unless you need the heavy towing like Diesel is great for that, but they are harder to fix and cost more initially too so if you don’t need 600lbs of torque, save your pennies for your adventures.

We did lights, floors and rack work ourselves. But the bumpers and mechanical conversions were all done by Advanced 4×4 and done right. They are the largest 4×4 conversion shop next to Quickly back east. You could grab a gasoline van like this stock  for around 16k and new I think they are only in the 20’s. Then convert it to your liking. You could also look at the Nissan vans, they are sweet and convert well to 4×4. The Sprinters are nice too but getting a 4×4 conversion is not easy so, bear that in mind when planning.

We call her the Truth Van. It’s not a sports car, it’s better and it cost less. A practical vehicle that goes almost anywhere and takes the people and the gear you need to get there, get the shot and spread the truth. We feel blessed to have been able to rig this out when we did and it’s seeing lots of use as we travel the continent.


The van gutted to redo the floor with powder coated plate.
The kids love chilling on the front bumper cross bars. It’s like an extra seat.


The beefy tuned Duramax will tow our big RV up ttheower..pass at 70MPH. It’s nice to have that p


Outfitted and towing the RV with the roof top tent out.


Exploring the Jungles of Nayarit Mexico.
Read More

March 6, 2012

NOW UPDATED for LR1-4 | Silver Shadows 2 came out in Nov 2011 and has been a huge success. It represents years of LR refinement since version one. It may blow you away when you see the efficient high quality silver conversions possible without ever leaving LR.

With the release of LR4 came some changes that made old presets not work so well. Users of my current presets collections are getting free updates for LR4 and the first of those was for Silver Shadows 2. You should have already received it if you own them.

I always make up a free sampler pack and I wanted to release an updated one that reflects the changes that came in Silver Shadows 2, for those of you that don’t own the full pack. So below is a free sampler kit that includes 7 presets. For both Lightroom 1-3 and Lightroom4 versions.

You can download below, no strings. When you realize how powerful they are, scope out the full collection. It has over a hundred unique effects, refined and organized into the ultimate black and white toolkit. Either way, head over to the product page for the video of SS2 presets in action while you download the freebies.

Enjoy… Gavin Seim

Download the SS2 Freebie Pack, v2.3

Watch the video and check out the complete collection.

Read More

March 2, 2012

Mouse over for before/after effect of Lumen Modified.

Silver Shadows 2 is a complete black-and-white system for Lightroom users. We released it a few months ago it’s has received a resounding thumbs up in reviews and feedback across the web. That’s cool, but it gets better.

Today I’m proud to announce Silver Shadows 2.2. It’s a FREE update for existing v2 presets users. In fact, you should already have received an email with your download.

What’s inside. Silver Shadows 2.2?

2.2 features FULL compatibility with Lightroom 4. A separate set, revised for use with the LR4 2012 process and the new adjustment features. With that however, Silver Shadows 2 remains compatible with older versions, and includes a set for LR1-3 users. Both sets have all the Silver Shadows 2 presets effects.

New Effects & Refinements:

Silver Shadows 2.2 also includes three NEW presets including, Lumen Modified #1 and Light Modified #2 (Cp). Both are versatile creative effects to go with the more than 100 existing black and white presets in Silver Shadows 2. They give you rich tones and bold notes while maintaining dynamic range. Another new effect is Dynamic Dark Boost, a conversion meant for images that are a bit too dark. With this effect you can quickly bring up tone without altering exposure. It can also be used on lighter images for an ultra high key effect.

There’s lots of little refinements and updates throughout Silver Shadows 2. You can find a full list in the release notes of the info page that comes with the download. If you don’t yet own Silver Shadows 2, head over and check out the demo to see why it’s the only black-and-white toolkit you need. If you already have Silver Shadows 2, get your download now. This version completely replaces the previous. V1 users of Silver Shadows can also get a discounted upgrade to V2. If you did not receive your download or have press/support related questions, contact us, effects@seimstufios.com.

Gavin Seim

Read More

December 14, 2011

Right cut. Original RAW file desaturated in LR. Left cut, same file with the Dynamic Silver III preset from Silver Shadows 2 applied in LR.

Just a few quick observations today. One reason I stay in a RAW as long as possible is that quality and dynamic tonal control is at it’s highest on an original RAW file. Once we leave that environment, we can certainly still work with tonal values, but we throw away some of that precious information.

On the right is a sharpened and desaturated original file from Sunset’s Hidden Falls. On the left, the same file with nothing more than applying Dynamic Silver III from my new Silver Shadows 2 toolkit. This effect pulls out dynamic range without flattening the shadow and contrast too much. It could also be done manually of course.

Once I have the dynamic range under control, then I’ll move on to external edits as needed. I don’t hesitate to go into Photoshop (though I try to stay in 16bit mode) for detail work. I did plenty of that on the final version of this). But getting my basic tonal range managed before I leave the RAW file behind gives me better results and helps me maintain that quality as high as possible for my wall prints. It’s a better wokflow and a better image.

Gav

Read More

September 8, 2008

Nik Siver Effects Pro = 4/5 stars

Silver Effects Pro

UPDATED: 04/10.

We’ve worked out a deal with Nik and you an save 15% on any of their products with promo code PPS.

I finally got a chance to play with Nik’s new Silver Efex Pro. It’s a Photoshop/Aperture plugin for making Black & White images from color one’s. Here’s the straight scoop! The interface follows Nik’s fairly clean and simple window style that graces the rest of their plugin’s. When it open’s you’ll be greeted by your image; a sidebar on the right that gives you control over the effects being added; a sidebar on the left with some easy preset effects,  and a few other tools around the screen that control the preview, etc.

Overall I liked the plugin. It suffers the the problem I find with most PS plugins, that causes me to stick with actions and presets for most images. When you open an image in the plugin you have to wait a few seconds and then use the tools in another window. Essentially PS goes away for that time, and when you commit those changes you are returned to your regular work environment. There’s nothing really wrong with this, it’s just not great for a workflow with large quantities of images, but more designed for those great images you want to spend extra time with.

I did find what’s inside to be simple and effective. There’s various preset options for making B&W images fast. You have color tones, film type, color filters etc to give you full control over making a nice piece of art. There’s also the ability to add some great looking grain effects is so desired, and the plugin; like many Nik products includes the U Point option that allows you to easily control effects on specific portions of the image (See Viveza)

BOTTOM LINE: I won’t be using Silver Effects for my everyday B&W images, because presets in Lightroom and actions in PS do most the the B&W effects I need, with more speed. I can also get most of the effects that the Silver provides by using the built in tools that PS provides (though with a bit more work)
All this said I think Silver is a good tool for getting great B&W effects on those images you want to spend some extra time with. It’s also great for trying out various effects with a lot of control and precision. I knocked off a half star because, Silver, at $199.00 costs twice what it probably should. Still if you have 199 to spare, and want a great tool for really fine tuning B&W images then pick it up (you can of course try Nik’s short 15 day demo).

Gavin Seim

Read More