June 2, 2009

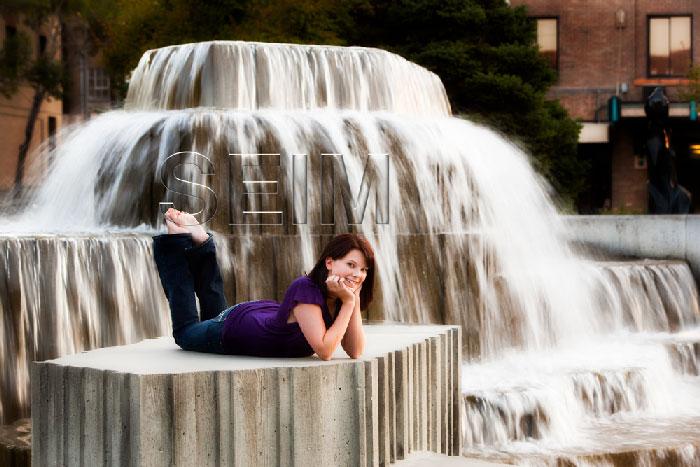
seim-wedding-caveb-photo-40-650x434
Get the essentials: Thinking outside the box works, Just remember to get the MUST have's. Walking down the isle, standing at the alter, the first dance and many more. What's important to each couple can vary, so communication is important.

Where to start, how to get there, how to stay there. Secrets for professional and aspiring wedding photographers from Gavin & others.

by Gavin Seim: How do I handle my first wedding? How do I become a pro? I get these type of questions fairly often. Weddings aren’t for everyone but most aspiring and pro photographers will photograph a wedding sometime in their career. There’s much to be learned from what’s demanded of us at a wedding. While this article is aimed at those getting started, seasoned pro’s will get ideas too.

Today I’ll give some I’ll talk the basics of how I see and think when I photograph a wedding. Tips 1-6 will focus on getting great images. Then we’ll talk a bit about a  post production and business (which is every bit as important). As we go thru them I’ll post some favorite images and share some thoughts.

The first wedding is daunting. Let me say that I won’t be talking about extreme photography basics in this article. If you’re at that stage there’s no shame in it, but you should gain some experience before tacking a wedding on your own. It’s a one time event and if you get it wrong you will be, at best, a sore spot in the eyes of your client. That’s not good for getting new clients and both you and your client deserve better.

If you can, second shoot aside an experienced photographer it’s a great way to learn, gain better portfolio and get more confidence. In my case that never happened. Though got serious about photography at age 12, my first wedding was cold turkey. I photographed for fun at a wedding and the couple loved them. That pushed me forward and my first paid wedding came awhile after. The rest is… Well the rest is below.

seim-wedding-caveb-photo-46-650x434
Try new things: This shot is the result of the first time I used off camera wireless flash (with Radio Poppers) at a wedding. I was just learning them, but made the choice to push myself to get great light in this scene. It paid off and my final image has a neat cinematic feel that fits my style.

Before my first wedding I absorbed the information in at least three wedding photography books. That helped me get a feel for what should happen. Without that study I would have missed a lot of important things. Resources like this are great (I wish I had had them) but a book can help you get perspective and have a reference to review. I’ll list few good books to get you rolling at the bottom of this post.

My first paid gig was back in the film days. I was about eighteen. Armed with my Canon EOS3, a cheap flash, a cheap zoom lens and an old monolight strobe handed down from Doug Miller, a real local pro, I became a wedding photographer. Was I good? No, but I was enthusiastic.

Read More

October 20, 2008

By Gavin Seim: Today I want to share a tip that some of you may already be using, but many others have not delved into. It’s called Auto Sync.

Within Lightroom’s Develop Module (D) you can select multiple images in the filmstrip and you’ll see the sync button appear on the bottom of the right panel. You can select the images you wish to sync, and click Sync. It will ask what settings you want to apply, then apply those settings to the selected images. OK so most of us know this already, and while it can be a big time saver there’s still more.

Auto Sync is slightly more hidden, but very useful. With your images selected, hold CNTRL (Win) CMD (Mac) and the Sync button now turns into the Auto Sync button. Click on the Auto Sync button to activate it. It now stays active until you click again to turn it off.

Read More

August 31, 2008

Hey gang. Here’s a small set of actions I made to help watermark photo’s. If your in SE fan club on Facebook you got these a few weeks ago. but I wanted to post them up here for the blog readers. Nothing huge here. These just take a logo, or type and make it have that transparent bevel look of a watermark.

You can also modify them to speed things up. For example you could record a command at the beginning of the action to place your logo at the start, and then save and close at the end so that you could automate the watermarking. You can add commands to an action like this by simply selecting the action and pressing record. Then re-save the action when your done modding it.

Also if you use LR check out Mogrify. It’s a great plugin. Make you overlay in PS, then use the LR Mogrify plugin to overlay it on export. It’s how I do my batches.

UPDATE: 09.09 to V1.1. Added a new glassy effect action (see sample below).

watermarl-action

~ Free V1.1 download link ~

Read More

May 30, 2008

If you follow my photography blog, you probably saw my latest digital art work, that I call Road to the past. As promised here is the details of how I made it.

Animae effect with Road to the past

I recently saw the movie Speed Racer, and liked the smooth saturated Anime like feel. Not that it would work for every image, but it had a good feel. So I started to work an some actions. I frequently get visual ideas from movies, and movie posters, and though I’m sure this does not meet the official standard for Anime, it was inspired by that look.

I‘ve finally found a sweet spot with a few adjustable actions that give a saturated, Anime type look, without looking fake and foolish. Here’s a bit of what I did to get this image.

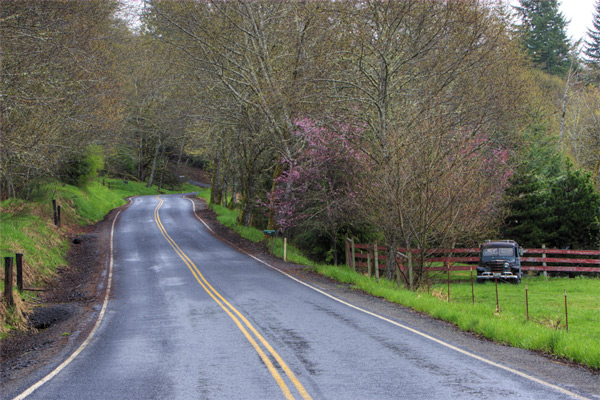
This is my original image. This was taken on a side road of HWY 12 in Washington. A cool shot, but not yet spectacular…

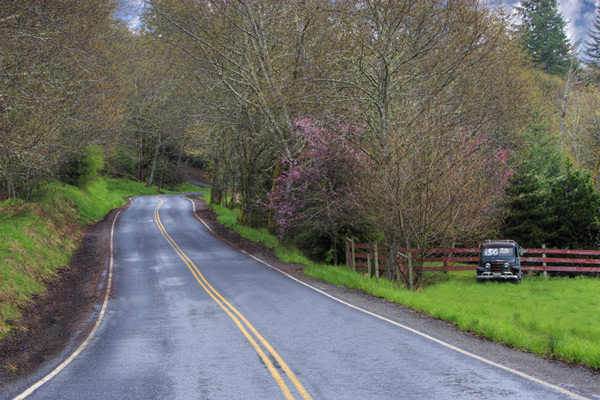
My first job in making this into digital art, was to clone out the things I didn’t want. The goal here was not to make an exact representation of this scene, but use it as the model for the piece I really wanted. I also added some clouds in place of the blank sky that was in the corner. Below is the cloned version.

So when all the cloning was done the rest was easy now that I had the action I needed. I ran the effect I’ve titled Anime II, and then spent some time doing final adjustments on the layers & masks. Lastly I added subtle beams of light (look far up the road) to add some dimension do the image. Basically this was dome by painting white lines on a new layer, blurring them, adding a little outer glow, and then setting that layer to overlay mode.

I‘m happy with the finished product, and it looks great in print. I feel the effect is not too over the top, and yet still has a good feel to it that offer something more than just a plain photo. It’s close to that line between painted, and photograph, yet without looking automated. I’m defiantly loving these actions

If you want to hurry me along making these actions available, or want to be added to the notification list just drop me a note… Gavin Seim

Animae effect with Road to the past

Read More