February 8, 2019


“Mexico is forgiving, JPEG is not”

I always shoot RAW because JPEG means data is thrown out and the more data you have the more dynamic range and color gradients and detail you get. In post that’s important. Don’t ever let someone tell you that JPEG is the same as RAW.  Mexico is forgiving, JPEG is not. It has it’s place, but no software or wishing will restore information that has been thrown away.
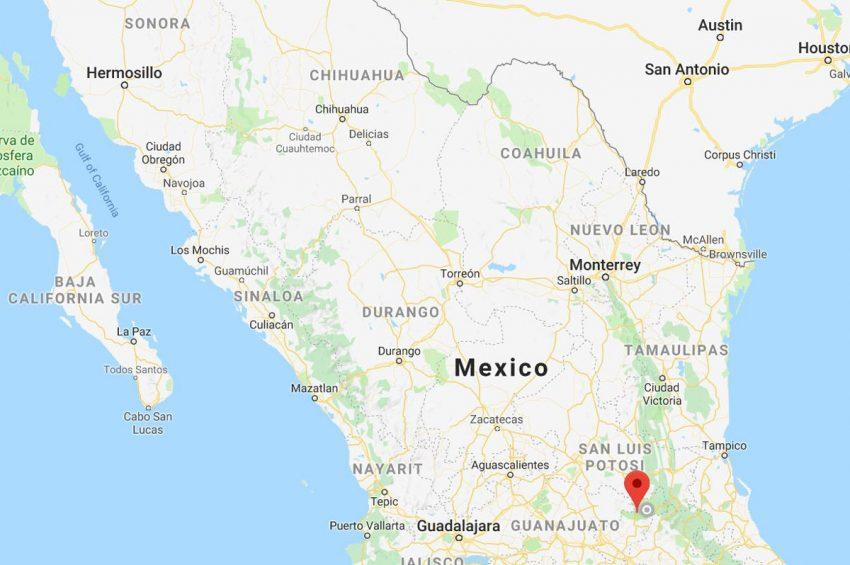
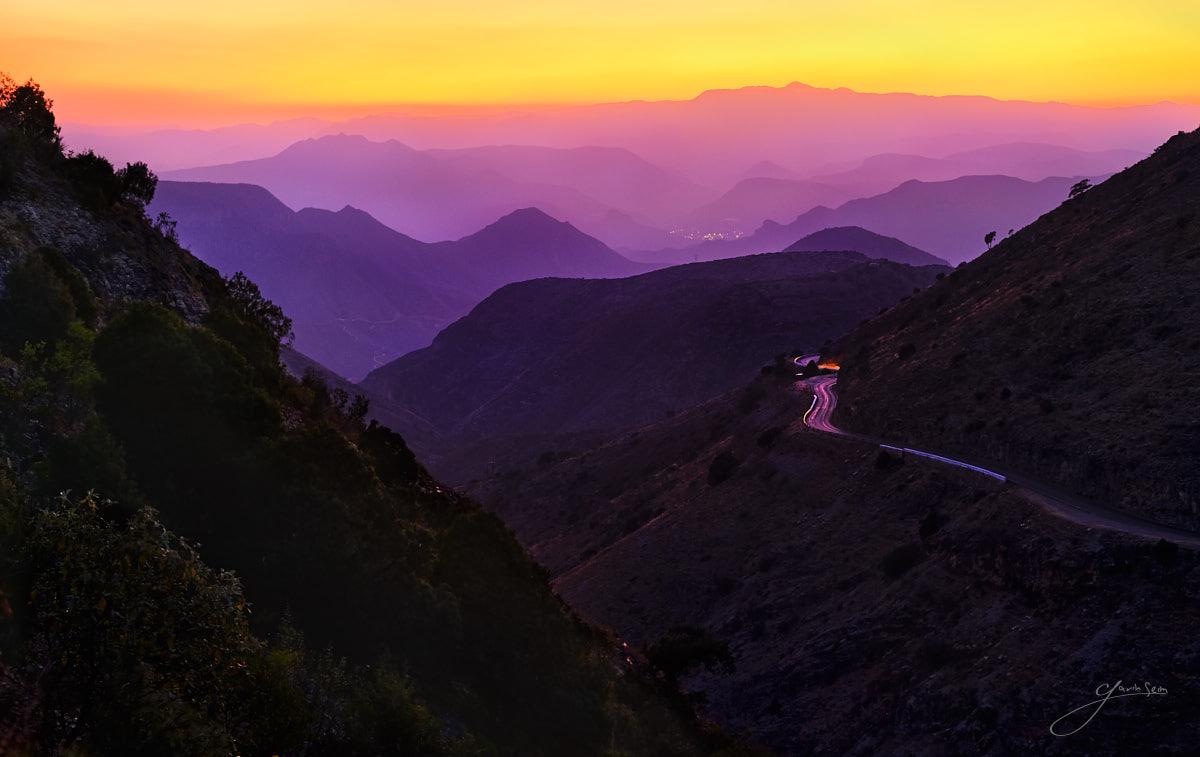
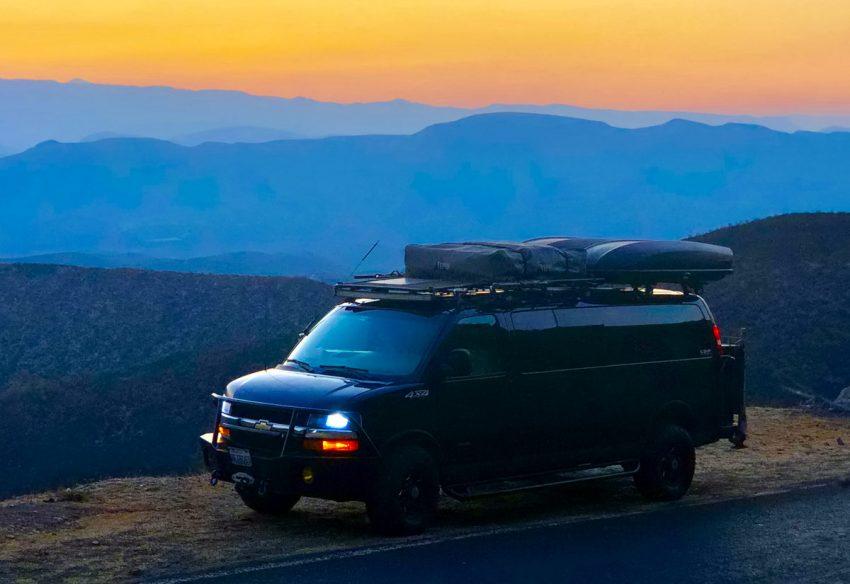
This week we took a drive in the van up into the high mountains of  La Huasteca Mexico. It’s a magical place in many ways but this time we headed up Hwy 120 towards the tree-line and the jungle of Pinal de Amoles, which sits at about 8000 ft. I took my new Fuji XT3 and a few compact prime lenses. In this case the 35mm f2. We headed up the San Juan side of the mountain which is a but dry dusty side this time of year leading to some dusty long distance views. But when the sun sets behind those, it’s impressive.

That sun was setting as we wound up the hairpins toward the jungle treeline and looking back over the valley above a small town called Carmango was the purest high gradient color sunset I could hope for. It actually reminded me a bit of the smokies back in the USA, but the color was stunning and alive. Just like Mexico.

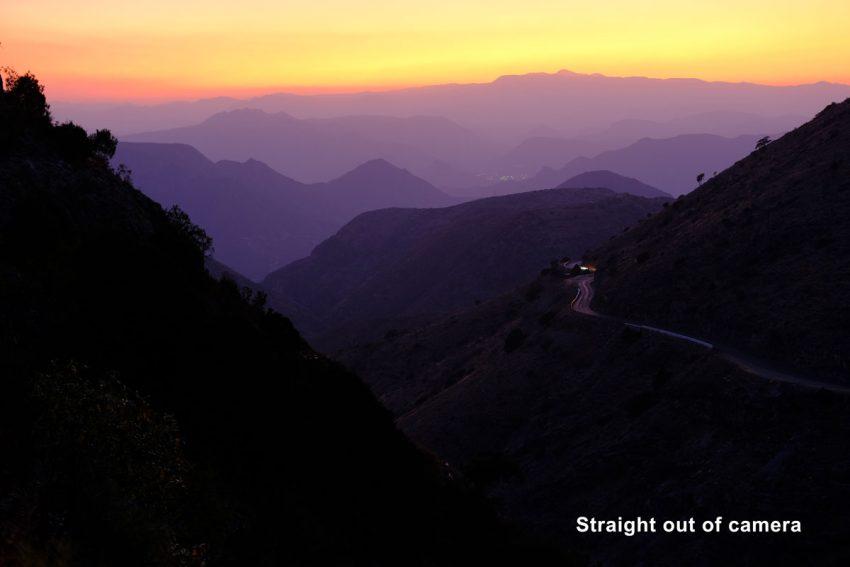
I got the shot, but I found out after returning home that I accidentally switched the menus of my Fuji XT3  to JPEG. My editing flexibility was now limited and I was kicking myself. Sure the built in profiles from the Fuji look good, but it’s still a JPEG and especially in high dynamic range scenes like this, I want every ounce. With subtle smooth color gradients like this you have to be careful or you will get artifacts. The more you edit the more that can be a problem. Especially if you’re not in 16 bit.

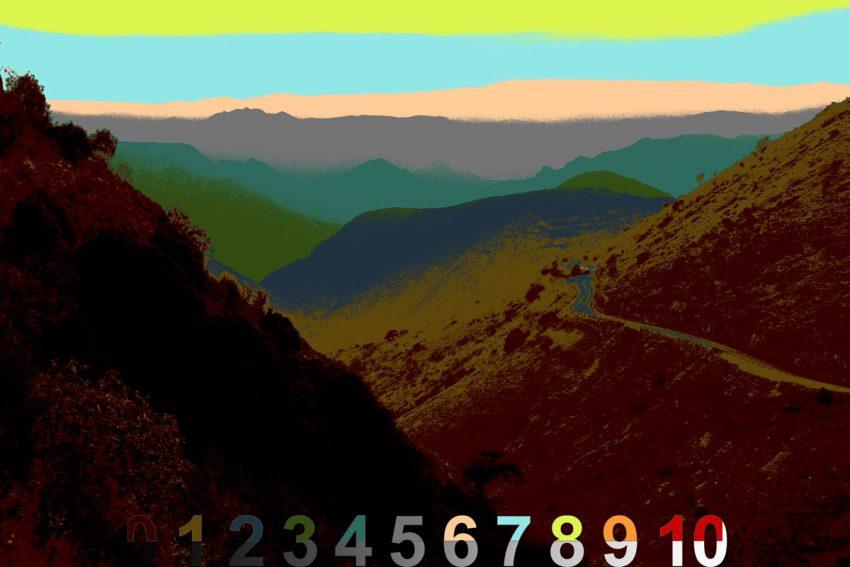
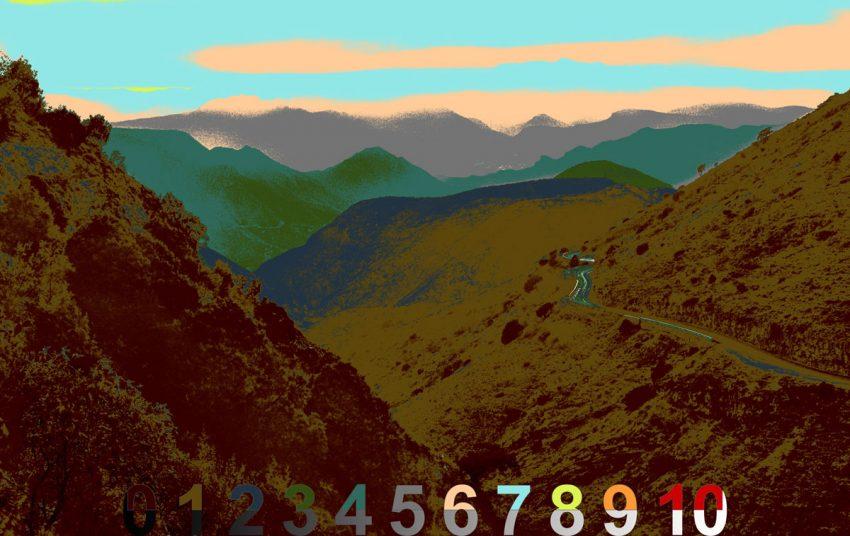
So I started with the original untouched JPEG filer in Capture 1 (LR would also have worked fine). If you look at my our of camera file it’s nice but check out the tonal map from Lumist. It’s already pure clipping. Before anything else I did some brushing to recover a bit of shadow detail on the left foreground. Fully black there will be too much negative tone. After that I opened the file as a 16 bit TIFF in Photoshop. I can’t create more range out of nothing but by switching to 16 bit we get smoother colors and less artifacts as we edit. Here’s what I has our of camera. Not bad. But can we edit it.

The good thing was that I had a few image to choose from. I had taken a few frames and then realized it was beautiful and I should NOT be hand-holding at a higher ISO to make it fast. So I got the tripod and ended up at 1/2 sec, ISO400 f4. I did a bit of bracketing since I had little time to micro analyze the tone. This yielded me a sharp image in with balances zones. Even though I thought I was shooting RAW I kept the highlights down on this, not to compensate, I expose where I want. But because it was more about the color and contrast in the hills. I did not want a washed out sky. That paid off because had I needed to recover highlight from the JPEG, it would have been tough.

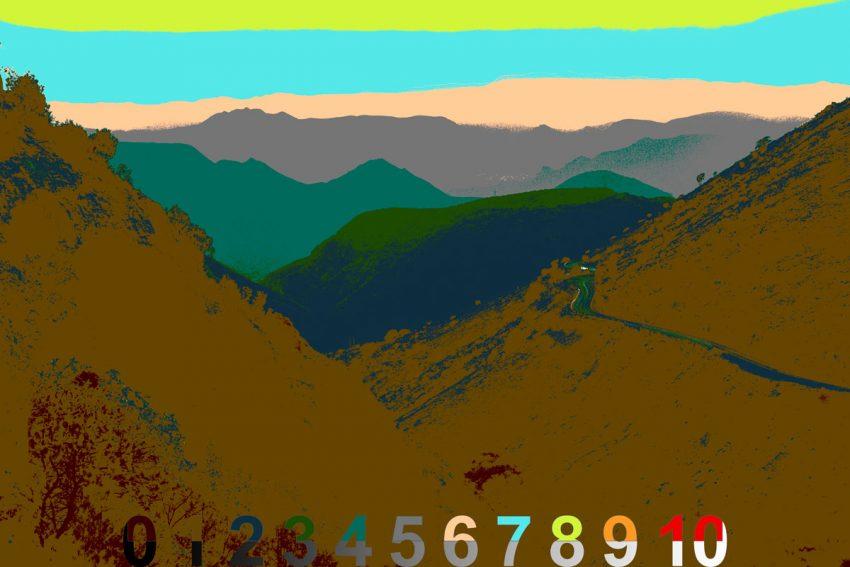
Here’s the tone values of that I took into PS and you can see those shadows really were lifted after that first shadow edit  keeping some detail in my black. I didn’t want a lot of detail there so even on the JPEG, this did not introduce a lot of artifacts.

Looks decent. Now into Photoshop.

I used Lumist to examine the tones and see what to change. I wanted to boost thing a little but keep editing to a minimum. The next thing I did was some sky work using selection from Lumist, including a fire paint overlay. I enhanced the natural purple and the oranges of the sky and mountains a little using these. I finished by watching my tones and doing some burn and dodge. A little shadow burning in particulate helped me define the lines between the mountains.

Below you can see the tonal map of the fished image that’s at the top. I kept my sky fiery but with no tones above Zone 8, which is pretty dark for a sunset sky, at least for me. But because the shadows of the image go all the way to Zone 1, we still have rich contrast and a full 8 stops being in the tonal range of the image from Z0-Z8. No muddy crushing of everything into mid tones here.

So Can JPEG Work?

Yes the JPEG worked out and I have a printable image, this time. But this is a good lesson in paying attention. Images minutes before were in RAW and tinkering around in menus I switched over and din’t realize it. I exposed well, but had I shot like this all day at an important event I would have lost images due to highlight and shadows being thrown out. Even here a raw would have given me a tad more subtle quality and that does matter when printing.

Always shoot RAW for art images. The fact that the image was exposed well in camera  like we talk about in the EXposed Workshop and processed carefully in post kept it looking good. JPEG’S can look great, but they can also fall apart when you push them hard and while I don’t always push a file hard. I always recommend the extra latitude of a RAW.

Let me know what you think of the result. — Gav

Read More

September 8, 2012


Here’s a free excerpt from my EXposed Series looking at the Zone System. It’s a segment from CH3 that will whet your whistle on using the Zone System on digital to change how you use the light and make exposures. It works wounders.

If you crave more just head over to https://seimeffects.com/exposed. because the complete series has lots more on mastering the Zone System and everything else related to your exposures. It really will change how you see light.

Enjoy and let me know if you have questions… Gav

Read More

August 13, 2012

New download /DVD workshop takes photographers on a cinematic journey across America and passionately teaches how to see and photograph light like never before.
Soap Lake, WA (August 14, 2012) – Seim Effects Photo Tools announces today the release of the new workshop by award-winning photographer Gavin Seim – EXposed, a film about seeing and photographing light. Produced over months, while traveling across America. EXposed documents experience and techniques inspired by the masters and refined for the digital age.

DOWNLOAD PRESS KIT
Includes full release, image samples and review information.

EXposed teaches photographers how to not only photograph light, but how to truly see it. EXposed is an informative entertaining 4-hour journey following Gavin as he travels around the United States of America with a Camper and a passion for light, hunting perfection and showcasing the importance of understanding the quality, range and tones of light and its impact on our photography. Gavin has compiled 15 years of study into what has become a simple and breathtaking study of light.

Weddings, Portraits, Landscape, Digital, Film. It doesn’t matter. EXposed is not a workshop about the latest fads or gadgets. It’s a workshop about light. Because that’s what really counts. EXposed is a cinematic journey that will teach photographers how to make better exposures. A completely unique workshop about exposure, light, the power of the Zone System, dynamic range and perfect tone control.

“My heart went into creating this workshop and I can’t express how proud I am of the outcome. With all the discussions in photography today, it’s surprising how little we talk about the art and science of exposure and proper tone control,” said Gavin Seim, photographer and owner of Seim Effects. “Making great photographs involves more than just clicking, buying new software, or pushing buttons. It’s something that goes deeper and mastering it requires practice and understanding of light and tone in subtle ways.”

Through 4 hours of educational materials about using light contained in 14 organized chapters that photographers can view and review at their own pace, EXposed teaches:

  • Core concepts to understanding exposure
  • Using the Zone System
  • Visualizing: Really seeing light
  • Dynamic Range and what it means for every image
  • Long Exposure and the secrets to hidden beauty
  • Finishing images, Burning, Dodging
  • Metering and tone placement
  • Seeing and directing light
  • Ratios and lighting tools

EXposed is available now. And until August 31, 2012 the instant HD digital download price is just $89 (a $10 discount) and the DVD plus instant digital download price is just $99 (a $20 discount). For more information and the trailer please visit:  www.exposedworkshop.com.

About Seim Effects Photo Tools
Gavin Seim, owner of Seim Effects Photo Tools, is an internationally recognized photographer, renowned for his experience with creative workflow, the digital darkroom and time tested techniques. He has a passion for creating easy-to-use software tools and educating photographers of all skill levels to be more efficient, creative and profitable.

Gavin Seim’s software presets for Lightroom include the new Silver Shadows 2, Power Workflow 3, and Color Fantasies. His Photoshop tools include Hollywood Effects 2, Creative Essentials, and Naked Elements. Also available is LightFlow, a powerful Aperture Presets collection.

For more information on Seim Effects Photo Tools visit:  https://seimeffects.com

#   #  #

Note: Press materials and image samples can be downloaded from the Seim Effects website:  https://seimeffects.com/press . For editorial review copies please contact: effects@seimstudios.com

Contact:

Gavin Seim or Nathan Seim
Seim Studios LLC.
PH: 509-754-5255, Email: effects@seimstudios.com

Steve Rosenbaum or Leigh Nofi
S.I.R. Marketing Communications, Inc.
PH: 631-757-5665, Email: sir@sironline.com, leighnofi@sironline.com

Read More

January 13, 2012

A photo of Tanguy's motion control rig. More below.

by Gavin Seim: As an HDR nerd and teacher I’m not easy to impress. But this did it. Tanguy Louvigny. did this really stunning sequence of HDR time lapses and really nailed it on various levels. First, as an dynamic range guy, I really admire how the process he used in Photomatix is balanced and didn’t go for that way over the top tonemap process.

Next he managed the motion using his own rig made with Tetrix robotics, and controlled it with Mindstorms Brick (actually a Lego product), then programmed it in Robot C. Impressive indeed. You can see more photos of his rig here.

His result for all this was a really stunning body of time lapse work. I hope to look closer at the system that he used for his rig. It seems there’s some possibilities there. You can also read a bit more on picturecorrect as they did a little interview asking Tanguy some detail questions.

All in all it’s quite impressive. Watch the video below and check out his site. And since we’re on the HDR topic, I’ll throw in a shameless plug  and add that if you want to learn more about capturing and processing HDR, check out my HDR Magic video training series... Gav

Here’s a forest series he did using the same setup.

Read More

November 13, 2011

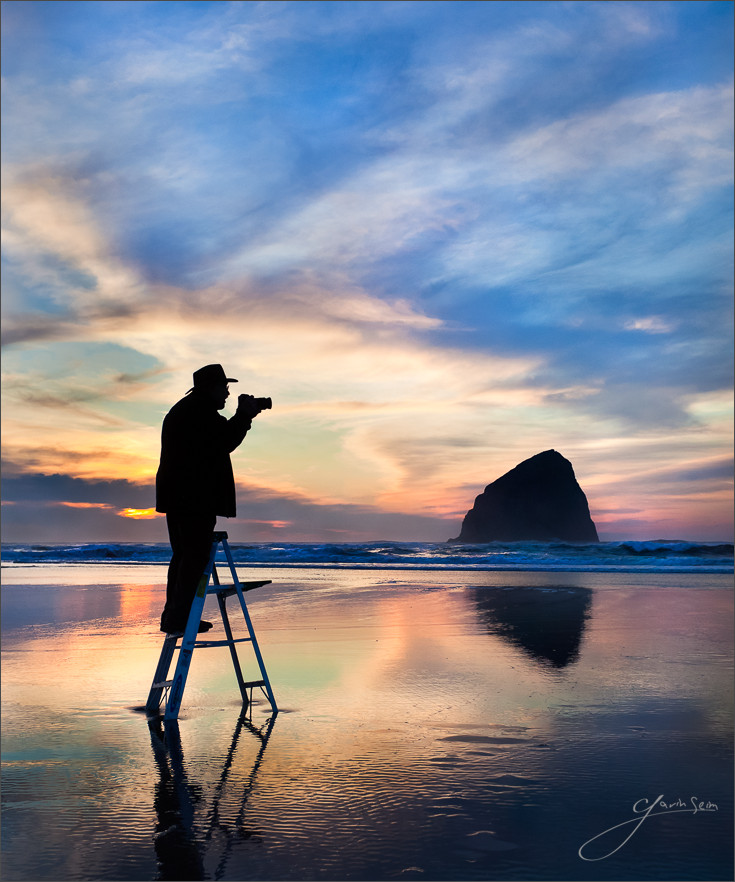
Artists Sunset – Ken Whitmire in Pacific City Oregon. Fall 2011 by Gavin Seim.

It was one of those Sunsets. The ones with stunning clouds and radiant colors that seem to last forever. Like a great song that keeps on playing. I was on a road trip to the Oregon Coast with Ken Whitmire, the renown portraitist. Ken was working with a family on the beach in Pacific City and I assisted, while getting images and video for a project we were working on.

About halfway through Ken was on his ladder, having this family of five walk down the beach. I just stood back and watched. A bit envious of the amazing portraits he was going to take home. It was a stunning evening. I took in the incredible ocean landscape with some awe. In between video clips, I decided to go vertical and try to illustrate Ken as the working professional in his environment. I hoped for a sort of memorable feel that that artists and photographers could relate to.

This has been really well received. I admit, I did not realize it would strike such a chord, but I’m glad it did. To me this says something about creative craftsmanship and taking your time. It reminds us to take the extra steps up that ladder to make an image Great. That’s what Ken Whitmire has done for over fifty years and I’m glad I got to be  a small part of that.

Our road trip was a memorable one in more ways than one. In fact by brother and I wrote a short short story about this trip. You can read that here on the Brothers Seim blog.

Release details: Prints available. Contact the studio. Learn more about prices. Available prints…


For photographers. How it was made…

Read More