June 2, 2009

seim-wedding-caveb-photo-40-650x434
Get the essentials: Thinking outside the box works, Just remember to get the MUST have's. Walking down the isle, standing at the alter, the first dance and many more. What's important to each couple can vary, so communication is important.

Where to start, how to get there, how to stay there. Secrets for professional and aspiring wedding photographers from Gavin & others.

by Gavin Seim: How do I handle my first wedding? How do I become a pro? I get these type of questions fairly often. Weddings aren’t for everyone but most aspiring and pro photographers will photograph a wedding sometime in their career. There’s much to be learned from what’s demanded of us at a wedding. While this article is aimed at those getting started, seasoned pro’s will get ideas too.

Today I’ll give some I’ll talk the basics of how I see and think when I photograph a wedding. Tips 1-6 will focus on getting great images. Then we’ll talk a bit about a  post production and business (which is every bit as important). As we go thru them I’ll post some favorite images and share some thoughts.

The first wedding is daunting. Let me say that I won’t be talking about extreme photography basics in this article. If you’re at that stage there’s no shame in it, but you should gain some experience before tacking a wedding on your own. It’s a one time event and if you get it wrong you will be, at best, a sore spot in the eyes of your client. That’s not good for getting new clients and both you and your client deserve better.

If you can, second shoot aside an experienced photographer it’s a great way to learn, gain better portfolio and get more confidence. In my case that never happened. Though got serious about photography at age 12, my first wedding was cold turkey. I photographed for fun at a wedding and the couple loved them. That pushed me forward and my first paid wedding came awhile after. The rest is… Well the rest is below.

seim-wedding-caveb-photo-46-650x434
Try new things: This shot is the result of the first time I used off camera wireless flash (with Radio Poppers) at a wedding. I was just learning them, but made the choice to push myself to get great light in this scene. It paid off and my final image has a neat cinematic feel that fits my style.

Before my first wedding I absorbed the information in at least three wedding photography books. That helped me get a feel for what should happen. Without that study I would have missed a lot of important things. Resources like this are great (I wish I had had them) but a book can help you get perspective and have a reference to review. I’ll list few good books to get you rolling at the bottom of this post.

My first paid gig was back in the film days. I was about eighteen. Armed with my Canon EOS3, a cheap flash, a cheap zoom lens and an old monolight strobe handed down from Doug Miller, a real local pro, I became a wedding photographer. Was I good? No, but I was enthusiastic.

Read More

May 17, 2009

by Gavin Seim: Today I’m going to kick off the new analyze inspiration series I promised a few weeks ago. In a nutshell, I take an image that get’s me thinking in some way. I talk about what I see (or don’t see) in it and invite readers to chime in with their own ideas and inspiration.

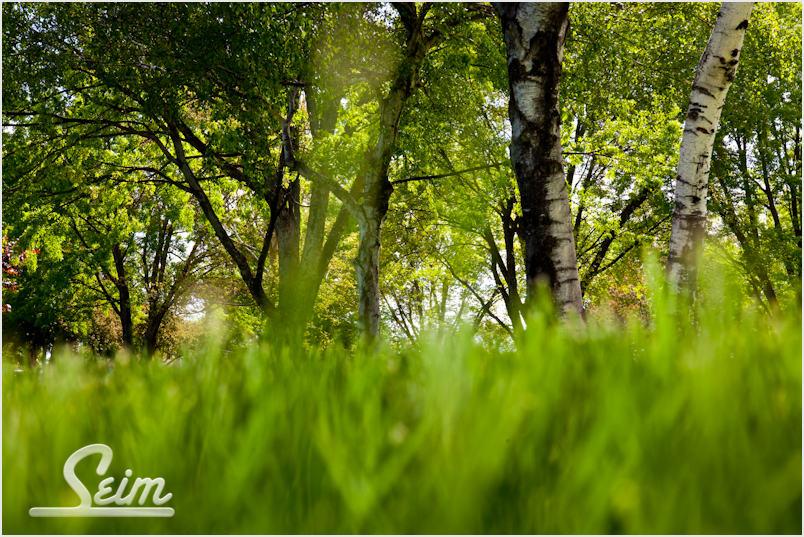
Pretty straightforward random thoughts about what was done and why it’s good, or bad. Here’s today’s photograph. Let’s start by just looking at it…

seim-photo-1

I was experimenting with composition and lighting yesterday in the park when I took this. I actually had my face and camera down in the grass giving me this soft foreground perspective that covered a big area of the frame. I shot it on my 5D MK2 at 1/125, f11, ISO400, 58mm and I think I had a little off camera flash on the foreground grass. I did some quick post in Lightroom using the Nature Boy preset from my PW2 collection and darkened the foreground a little using a gradient.

  • Good: The composition is different which draws in my eye.
  • Bad: There’s no main focal point. The grass may lead me in but then I don’t know which element I’m supposed to be seeing.
  • Good: It feel like there’s something hidden here. My eye scans wanting to solve the mystery.
  • Bad: It feels a bit crooked which annoys me.
  • Good: I like the bold greens.
  • Bad: I don’t want it on my wall.

In my opinion this shot only gets 64/100. That’s a FAIL and I would not hang it on my wall. The fact that it lacks a MAIN subject pretty much kills it. That doesn’t mean it’s useless however. The reality is that I was not expecting a great shot. I was exercising my skills by trying things.

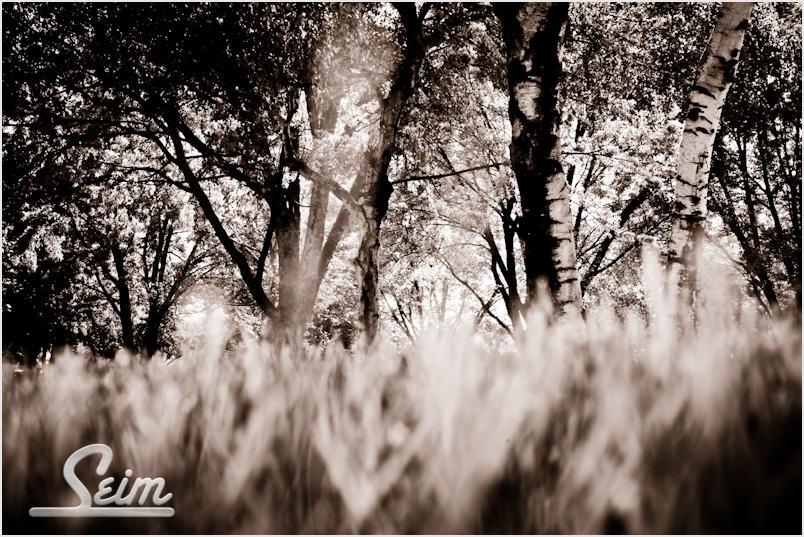
Below I approached it differently. Same image, but in LR I applied a warm infrared from Monochromatix. This changes the whole mood. I also like it this way. In many ways it’s more simple, but the key problem remains. I don’t have a main subject and without one, this shot does not fulfill my eye’s desires to fin something amazing at it scans.

Thinking out loud. I got something from this shot even though it’s not great. It has me thiking about perspective, lighting and patterns. What if there was a HUGE bull Elk in walking between those two tree’s just right of center. That would change everything. If I’m ever laying in the grass watching a huge elf, you can bet this exercise will come to mind.

This was fun. I’ve got myself thinking about new ideas by looking close at this image and talking about it. I think I’m going to like this series. This is the kind of thing KungFu Photo is all about. Now I’m ready for your thoughts and ideas.

infrared-vintage-park

Read More

May 16, 2009

by Gavin Seim: There’s plenty of info and a video on each  product page of this site, but I wanted to make a post giving an overview of how I use Seim Effects in m fast photo workflow and what each collection is best for. I’ve found that having your workflow nailed down makes all the different in creative efficiency.

power workflow lightroom presets

Power Workflow2: This is my starting editing tool, but certainly not the only one I use. Lightroom used with PW2 is the key to those fast 3hr wedding edit sessions I do. PW2 is a set of about 60 highly refined and organized presets that can be applied with a mousclick to one or thousands of images.

There’s categories, starting with the batch correction Super Series presets. I start my workflow by adding these to large batches of images from my session. This get’s me the basic but essential stuff like exposure, contrast and tone under control. There’s various Super Series presets depending on the shooting situation. Basically I pick the one that looks best for a batch of images and off I go. No rocket science yet. I may still have to do a few tweaks on a few images since no auto tool is perfect, but it get’s me close.

After the auto correction I sort down my images with a 3-5 star rating system. 5 being the best. I’ll then go over my favorite images and add other effects from the set. The Super Series is just the beginning. There’s lots of color and B&W effects to choose from and soon I have a nice variety.

black and white presets

MonoChromatix: Black and white can be so powerful. PW2 takes has some great monotone effects, but MonoChromatix takes  it to the next level with a complete set of all monochromtic effects that perfectly complements PW2. When I think an image just looks great in B&W and want to get something really remarkable I’ll try some effects from this set until I find one that’s perfect. There’s everything from classic black and white to sepia, to infrared. I use these to get some really cool B&W looks, and it saves me the time of having to use a plugin in Photoshop.

Creative Essentials: Essentials is a great tool for someone who does not use Lightroom, but also for someone use mainlines in Lightroom and then does those special tweaks in Photoshop like I do. It’s simple and straighforward with some poerful tools.

Once my primary edits are done in LR I head to PS with a few of my favorite photographs. There’s things I can do in PS that just can’t be done in LR. Essentials is a great starter set of actions that includes a nice range of effects from tonal changes to really nice color tones, shatpening and softening effects.

hollywood effects photoshop actions

Hollywood Effects: The set that started it all. It’s been thru some tweaks, but the name still says it pretty well. Hollywood and Essentals complement each other really well and when I head into Photoshop I use them both.

In Hollywood you’ll find plenty of cinematic glows, color modifiers and mood setters. Some of them can be intense, but since with my actions I make standard practice of having layers, masks and details, you can easily adjust the way an effect changes your image to get a totally unique look.

I keep a main workflow action set where my actions (as well as favorites from others) are saved in one set. Easy to manage and easy to backup. Then I put the action pallete into button mode and it’s like a console of photo tools a mouse click away.

__

That about sums it up. As I work everything stays saved back into LR and when I’m done I just export the final results. Event those not using Lightroom can still move their workflow along much faster by having both action sets loaded and ready to fire.

It’s a complete workflow for Lightroom or PS users that does an important job. Giving us more creativity while making us faster. I’m always working to devise new workflow ideas and improve effects so stay tine. You’re also welcome to contact me with feeback or ideas… Gavin

Read More

March 14, 2009

by Gavin Seim Updated 11/09:

Images stuffed into mat pages, then an album covers is becoming less and less attractive to clients. If you’re designing wedding, event, or portrait albums you’ve probably played with making layouts in Photoshop or another program to then have printed as flush mount albums like Kiss or Asa Books, You might have also used press books like the ones from WHCC. Once you have a good design there’s loads of choices, but it’s the design that’s the challenge.

As many people know the service and support of Adobe has gone in the toilet in recent times and while they need some competition to slap them back on track, their software is still great. Today I want to talk about In Design CS4 and how it relates to album deisgn. I’ve tried various tools for album design, some of which worked really well. When it comes to crunch time however, I’m finding In Design is the king.

I learned the basics about using ID for albums from a video that Kevin Swan made. And now gives free on the Kiss books site. Not required but it was sure a great crash course and I use it often to hone up my knowledge. The bottom line is that it’s fast, easy and powerful. Once you get the hang of it.

In Design was not actually designed for photographers to make albums. Rather it’s the industry standard for designers doing layouts on magazines and other published material. It turns out however that it works a treat for doing albums. Bear in mind it’s not a photo editor. What ID rocks at, is laying out pages and doing it fast.

I cringe when I think of doing individual pages in Photoshop. It’s not a page design tool and it’s tedious to do layouts with. What I love about ID is that the entire project is contained in a single file. All images on the pages are referenced to the original files on your computer similar to when one makes a web page. You can edit and change you design in one place and when it’s finished just export the final file as a PDF of JPEG’s. Kinda like the way we use Lightroom.

indesign-3

Read More

March 9, 2009

Spring is nearly here and our sister site Seim Effects has just launched some great deals to kick things off. Check out the site for 20-25% any of their effects.

SE has lots of fans all over the world. Their Lightroom Presets and Photoshop actions work great and they have great service to go along with it.

If you’re not wanting to lay out the moolah, you should also check the freebies section of their site with all kinds of zero dollar goodies.

www.seimeffects.com

Read More