April 30, 2010

by Gavin Seim. Updated 06/23/12: It’s been a common debate, though much less so as pro’s learn that RAW is a no brainier. I deal with both the JPEG and RAW side quite often because the tools I make on Seim Effects. I’ve seen the value of RAW and once you do there’s no going back. Some photographers that still use JPEG, use a reason like… “I nail my exposure, so there’s no reason for me to use RAW”. I think when this happens it’s one of two things.

  • Showmanship. For some, I think showing everyone how spot on your exposure comes out is a great way to show off when making a presentation. OK I get that, we all like to show our proficiency, but I’d rather not toss away quality on my clients images to get expert points on the minds of my peers.
  • The most common reason however. I think some still have a mental block about RAW and don’t want to address it. I remember being in that spot years back. Somehow the larger files size and RAW data seems daunting. In reality it was not big deal at all. I know because I went thru it. If you’re in this camp just move beyond it and you’ll be glad you did.

This idea is simple and that’s why this article will be short. JPEG tosses out information that you might need later in order to make a smaller file. It keeps that the camera “thinks” it needs. RAW keeps it all. And with today’s direct RAW editing and localized adjustments using software like Lightroom, the power of using RAW data has become crystal clear. Let’s skip the banter however and settle this. I could make up a bunch of examples for you, but this one photo proves my reasoning, so I’ll keep this short.

________________

1: Here is an outdoor wedding scene from a 5D MK2 unedited other than being cropped. Yes it’s a bit under exposed, but had it been correctly exposed I would have lost even more detail in the sky area. Now at a glace, this photo seems like no matter what we do it will be pretty bland. Lets look.

Read More

April 12, 2010

The Crew. Missing in photo, Larry, Steve and Jon

Focus on Focus. A look at micro focus adjustments and the Lens Align Pro calibration system.

by Barry Howell:  Have you ever found a menu option on your camera that made you wonder, “What’s this”? I found such an option on my Nikon D300 called “AF Fine Tune.” My old-school curiosity sent me on a quest to discover its purpose, and how it could improve image quality. With a few quick Google searches, I found multiple forums and discussions about the importance of calibrating lenses to your DSLR camera bodies.

A recurring theme on the ProPhotoShow.com podcasts, and in other various articles, is how to make your images have more impact. There is no bigger buzz kill for photographers than capturing an image we think will be great, only to find that it’s a little soft. There are many variables we can control to ensure optimal sharpness: shutter speed, depth of field, steadying the camera, etc., and I always assumed that if I focused on the right spot, my images would be tack sharp. Guess what? That isn’t always the case, and I was determined to overcome the problem.

Before contacting Michael Tapes at RawWorkflow, I performed a very un-scientific, but effective test of my AF Fine tune option. I was photographing the MN State Boys Hockey Tournament at the Excel Energy Center, a venue that is well lit for television broadcasts. I very carefully focused my Tamron 300 2.8 lens on some helmets lined up on the boards. The scene had great contrast, I was using a monopod, and I figured could get this image dead on. I zoomed in at 100x on the LCD and it looked pretty good. I then went into the menu and made a +5 adjustment, took another shot, and upon inspection realized I had made it worse. Then, I made a -5 adjustment and the image improved noticeably. I knew then and there that I had to calibrate my optics.

Within a week I’d found such a tool; I obtained a Lens Align Pro Focus Calibration System. I invited several photographer friends for a focus calibration party at my studio and we embarked on a journey to make our gear perform better. In our group were five Nikon shooters and one Canon shooter. Between us, we probably had over $50,000 worth of bodies and glass waiting for a checkup. The results were at times sobering, but every lens, once calibrated, focused better than ever before. The calibration method involves the following steps; it took a little trial and error, but they were pretty easy to do reliably.

Read More

February 19, 2010

Click To Listen>> Photography Podcast. PPS #66
Review in iTunesVote on Podcast AlleyDirect Podcast Feed

The Panel... Gavin SeimDavid ZiserDennis ZerwasDouglas CoonBarry Howell
This week the panel discusses the latest news, nigh photography, Ansel Adams, business ideas and more.

Podcast #66 forum discussion:

Notable Time Indexes:

  • 00:00 Random news and ideas.
  • 47:43 Lets talk tips and business.
  • 1:15:24 Zisers Secret. FUTURE FEELINGS.
  • 1:51:20 Promoting to venues.

Viveza2 is here. You can save 15% with code PPS.

LumaVue panels are a great way to stand out.

OnOne’s new suite is here too. Save 15% with code PRPHTPC.

Olympus E-PL1 a $600 pen camera.

Get David Zisers new book. Captured by the Light.

Aperture3
is here. What do you think.

Treys. World in HDR book is available.

Gavin’s Color Fantasies Lightroom presets are here and ready to rock.

PICKS:

Thanks all… Gav

Read More

August 29, 2009

by Gavin Seim: I’m a Lightroom fanatic, but with my recent expansion into projecting proofs to sell larger prints and increase my sales, I started looking at software for projecting scaled images using my digital projector. The choices were limited. Whats being using now, is expensive software like Prism Projector, or Pro Select. These are good for some, but cost hundreds of dollars and have a bigger problem in that it throws a curve ball into a well planned workflow. They make us entirely leave Lightroom for the sales presentation. Not cool.

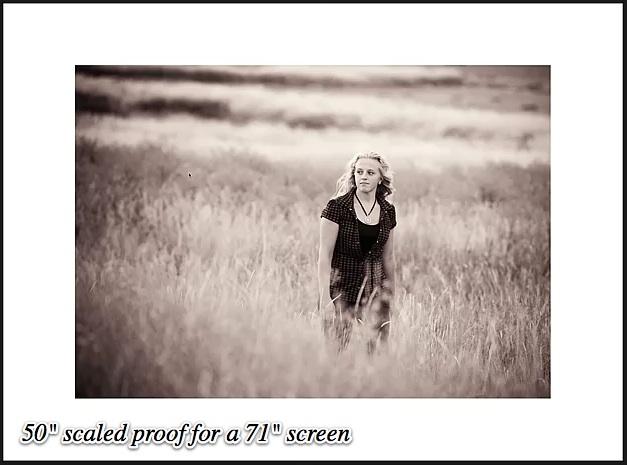
At first I couldn’t find a way, but I kept experimenting and finally I figured it out. I found I could make special print templates in Lightroom that could be scaled to the screen size and project images to size without ever leaving Lightroom. I call them Projectics.

projectics-sales-presentation1

I can’t tell you how excited I am about this. I’m now actively using Lightroom for my proof sessions with great results and no need for external software. No it does not have all the gimmicks and frills that some other sales apps do, but I for one don’t need those.  I just need to project various images and sizes easily and effectively and that’s what LR can do. Using the scaled presets I can change sizes instantly. Then since I’m still in LR I can pick favorites, add things to collections, and even do edits without every leaving my workflow.

In the past I’ve written about using a separate Catalog for each job. There’s no rule you have to do things this way, but it makes more sense all the time. Since I’m sometimes in the studio and sometimes taking my Canon LV7370 on location, it keeps things really simple. I can simply copy the entire catalog for the session onto a portable drive and off I go.

projectics banner Home

Yes, I’ve made a collection of these presets to sell. Hey it’s what I do. You could make some yourself, but if that does not sound fun, I’ve done the math and tedious stuff and made a simple set that just works and will continue to be updated. Either way Lightroom is a powerful sales tool and I need no other sales software to proof, project and sell large prints.  Oh and if you want to learn more about the sales concepts of all this, check out this article about selling large Wall Portraits.

Whether you get my presets or not I suggest you head over to the Projectics page and watch the video because it will show you how it all works and how I’ve integrated it into my workflow. The power of Lightroom keeps growing and I thrilled. Time is money, and projecting proofs is a key element in great prints sales and placing beautiful prints on your clients walls… Gav

Read More