October 2, 2020

How to edit portraits better, stop over thinking.

Photographers keep under-editing their work. But just dragging the sliders won’t fix it. Heck, that was the theme of the Muse editing pack that we originally shot this session for. So lets edit portraits better with some simple techniques.

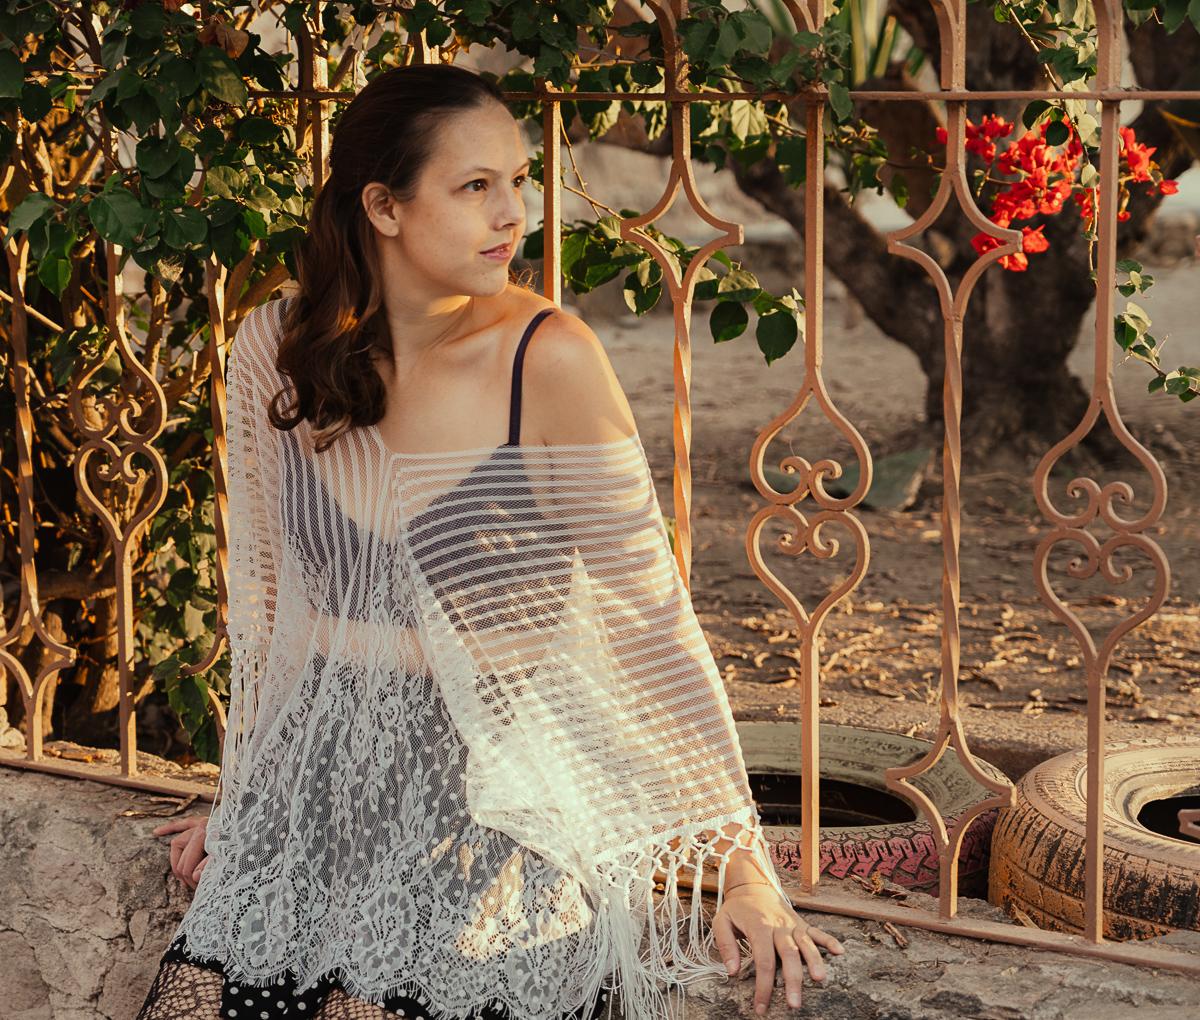
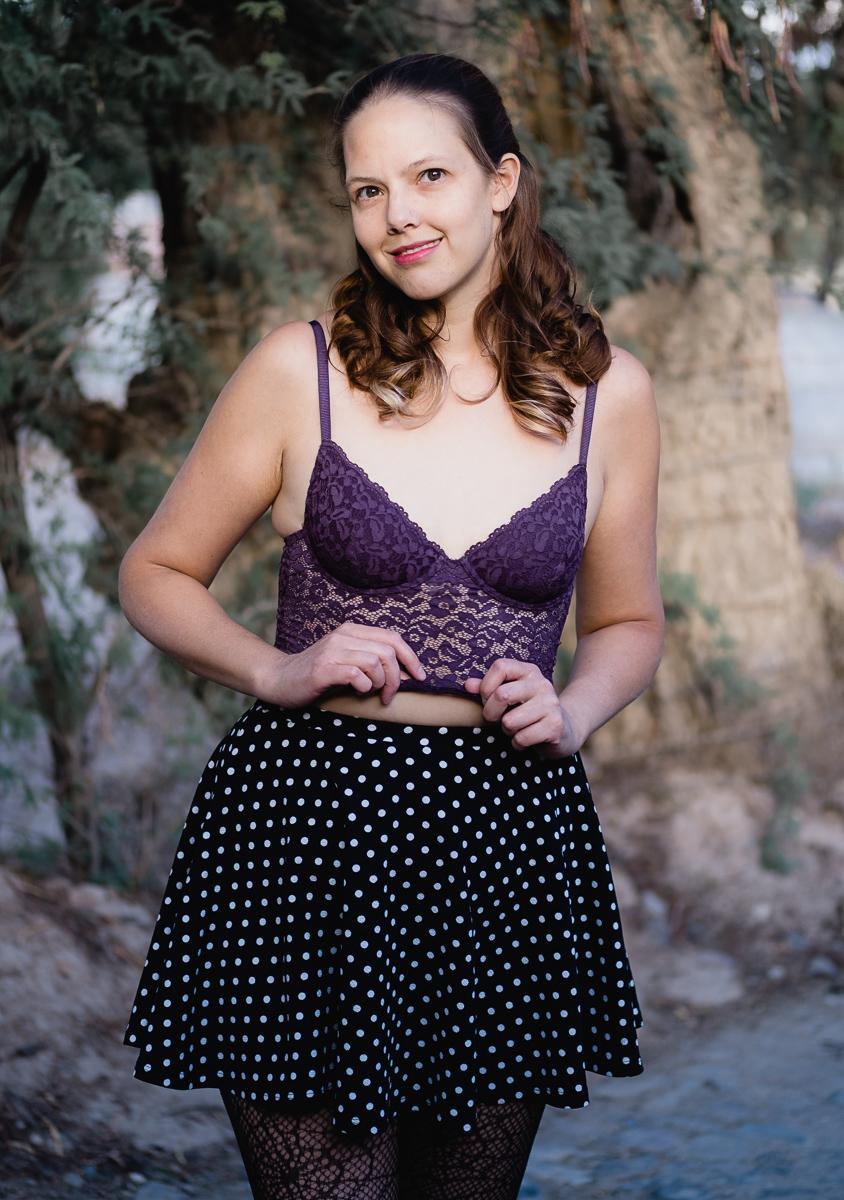
It’s always harder in real life I know. We are gonna dig into that today as we take on the cute photo session we did for the Muse launch and I’ll show you hands on how I edit with it.

How do I edit portraits better. How prevent myself from under-editing blues. I always use tools that push be to go past the basics. I stay sharp Lightroom presets or Styles for Capture on to edit fast, I use actions or watch videos like this one. BUT I also use those manual tweaks to get your look perfect. I’ll show you in this weeks video.  It’s time to edit portrait better. It’s time to to stop under-editing your photos, so let’s tale this bull by the horns.

Here’s some useful links related to the video as well.

There’s a couple more in depth training videos from this shoot for PhotoKit members where we dig more into the session and some more advanced edits.

The winning formula to get a better portrait edit here, was starting that edit in camera. Finding the light, getting a great look and then being unafraid to edit like we meant it. Even though we have not taken any of these into Photoshop, used actions or made detailed fashion or skin edits, they still look great and from here we can go wherever we like. Hope you enjoy, let me know if you want to see more like this.

Gav

Editing portraits better. Golden sunset shot edited with Muse Lightroom presets
Golden sunset shot edited with muse lightroom presets
cute bustier photo session with muse Lightroom presets
A soft edit from muse of this cute bustier. It’s all about editing portraits better.
Read More

March 23, 2018

Does this photo look green and ugly? Not in black and white it doesn’t. These two sliders change everything and in today’s video we’ll find out why.

This is another tip for raw processing and for (but not limited to) the new Silver 3 presets. We’re going to look at how you can take better control of your black and white process by using the white balance sliders to get the luminance and gradient mix you want in every image.

You’ve likely done this before, but I thought we would take the time to understand better how white balance effects black and white. Some of the presets in Silver 3 do this already behind the scenes, but you can tweak any black and white process to your heart’s content using this method.

The presets I’m using are Silver 3 for Lightroom. Get them here.

Read More

February 4, 2016

This weeks tutorial video focuses on getting better dynamic range on single files and shares some of the powerful tips used in our Natural HDR presets to show you you can improve dynamic range on any image.

But there’s no need for me to keep writing. Watch the video and see for yourself — Seim

Read More

April 30, 2010

by Gavin Seim. Updated 06/23/12: It’s been a common debate, though much less so as pro’s learn that RAW is a no brainier. I deal with both the JPEG and RAW side quite often because the tools I make on Seim Effects. I’ve seen the value of RAW and once you do there’s no going back. Some photographers that still use JPEG, use a reason like… “I nail my exposure, so there’s no reason for me to use RAW”. I think when this happens it’s one of two things.

  • Showmanship. For some, I think showing everyone how spot on your exposure comes out is a great way to show off when making a presentation. OK I get that, we all like to show our proficiency, but I’d rather not toss away quality on my clients images to get expert points on the minds of my peers.
  • The most common reason however. I think some still have a mental block about RAW and don’t want to address it. I remember being in that spot years back. Somehow the larger files size and RAW data seems daunting. In reality it was not big deal at all. I know because I went thru it. If you’re in this camp just move beyond it and you’ll be glad you did.

This idea is simple and that’s why this article will be short. JPEG tosses out information that you might need later in order to make a smaller file. It keeps that the camera “thinks” it needs. RAW keeps it all. And with today’s direct RAW editing and localized adjustments using software like Lightroom, the power of using RAW data has become crystal clear. Let’s skip the banter however and settle this. I could make up a bunch of examples for you, but this one photo proves my reasoning, so I’ll keep this short.

________________

1: Here is an outdoor wedding scene from a 5D MK2 unedited other than being cropped. Yes it’s a bit under exposed, but had it been correctly exposed I would have lost even more detail in the sky area. Now at a glace, this photo seems like no matter what we do it will be pretty bland. Lets look.

Read More

November 25, 2008

For Adobe users (that would be most of us) Camera RAW 5.2 is now available. I don’t always post about releases like this, but this has some significance due it’s it’s RAW support for certain newer cameras including.

  • Canon EOS 5D Mark II
  • Canon PowerShot G10
  • Panasonic DMC-LX3

There’s others as well, but a lot of folks will be glad to see that these models are now supported. I expect my LX3 tomorrow, and a 5D MK II… well as soon as it comes (hopefully soon)

There’s are a few more minor updates. John Knack posted some details on his blog. I just wanted to spread the word. Download it for Windows here and Macintosh here.

Gavin Seim

Read More