I was playing round in LR this morning as I often do, trying different presets and processing. This is the Great Fountain Geyser in Yellowstone, captured at sunrise while dormant. Behind it the White Dome geyser shoots into the sky. I used the Subtle things from Color Fantasies LR presets and a few burning brushstrokes. A very quick process.
Subtle things imparted nice color tone and a certain magical quality, without being overbearing to this serene place. Remember when using presets to stay flexible. Try different effects and look for things that work. Then don’t be afraid to refine a little more, especially on your best work. I’ll likely refine this further if I decide it’s good enough for my official fine art collection, but U like where it’s going. You can see the before and after below. Click either image for a larger view… Gav
by Gavin Seim (updated 7/21/12): I give workflow a lot of thought. In fact I started writing this nearly two years ago and it’s based on methods I’ve refined in my own business. If you read this and follow through with it, you WILL edit faster. Truth is, I’ve actually refined my skills by just by writing this down. I’m going to be a little blunt today so don’t take it personally and don’t think me arrogant. My goal is to make us all better at editing so we have more time for life. Good processing is very valuable, but it does not have to be slow.
I devote a lot of energy to planning workflow for my own studio and for the tools that I make for LR, Photoshop and Aperture (check those out here). I’ve experimented a lot and I’ve built a system that works. As photographers we often end up with hundreds, even thousands of images to edit. But editing should not be a tedious overbearing monster. What we need is a plan. I say that in a good batch workflow, you should be spending no more than 20 minutes sorting & editing per 100 images. If you spend much more than that, you likely have ENAS, or Editing Non-Awesomeness Syndrome. It’s a common ailment among photographers, but there is a cure, which we’ll address here.
This topic can get tedious if we don’t have some fun so lets keep it light. Really though. These concepts work for 25 images or 25,000. It’s about being organized, creative and efficient with editing. It’s the opposite of having countless pieces of software you switch back forth to, or endless erratic steps to reaching your goal. I can edit a wedding with 1500+ images in 3-5hrs of computer time. I’m not a light editor either, so some will do it even faster. Sure, it’s OK to spend extra time editing because you’re enjoying your work or doing fine art, but a solid foundation will make every project flow better.
Because I’ve also built a business out of making workflow tools, I’ll be using my own effects today. But these tips apply to any tools that fit into a smooth editing plan. I’m also using Lightroom. It’s the fastest I’ve found to date and can do about 90% of what Photoshop can, but about 5x faster. That’s huge! If you use Aperture or something similar that’s cool too. I’ve worked with both and the approach is essentially the same. If however you’re still doing main corrections in Photoshop, you’re probably wasting time. Doing all your editing in Photoshop does not mean you’re more creative. It just means you’re slow! That’s not to say you should not use PS. But with a good A-Z workflow you’ll use it less, edit faster and make your work better.
Power Workflow 2 is our biggest seller here at Seim effects and for good reason. All our products are very effective and many users have the complete collection of products, but PW2 is at the core of the super fast yet creative editing workflow that we’re all about. Thank you all for spreading the word and making the Seim Effects such a popular product line.
Version 2.5 has made PW2 that much better with some great new presets and refinements to current ones. This new version something you’ll want in your kit.
It’s a FREE update for current Power Workflow2 owners. If you didn’t get the automatic upgrade email contact me and I’ll get you taken care of. If you’re still using the old V1 of Power Workflow you”re missing out. V1 users are still eligible for an upgrade discount so contact me if you need a code…. Gavin
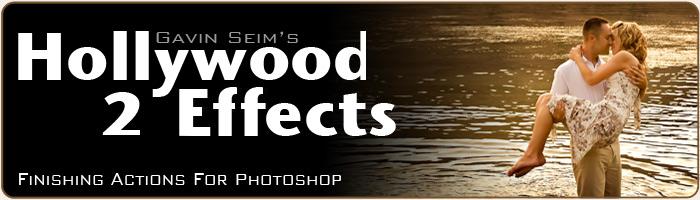
This has been in the works for a long time and I think you’ll find it’s been worth the wait. I’m proud to announce the immediate availability of Hollywood Effects version 2. Hollywood Effects has been a popular set for photographers who wanted to add something special to their best images after basic corrections. Version 2 it taking it to a whole new level.
V2 completely replaces Hollywood Effects 1, with many new effects and improvement to many classic effects for easier customization and better results. V2 is setting a new standard. This is killer set of actions with some AMAZING new effects.
Portraitist: HE2 has something for everyone and especially for portrait photographers. HE2 includes the full version of the brand new Portraitist Series actions. Change the way you work with skin by automatically smoothing skin and masking out critical areas like eyes, making a portrait that’s ready out of the gate. Similar to effects done with plugins that cost far more, now in a simple one click action.
For current owners of Hollywood Effects there’s a discount upgrade program. For those that have purchased Hollywood Effects V1 in the past 60 days (after May 30th 2009) we’ll be sending you a FREE upgrade to V2. If you have not received your discount/upgrade email soon, please contact us and we’ll hook you up.
by Gavin Seim: There’s plenty of info and a video on each product page of this site, but I wanted to make a post giving an overview of how I use Seim Effects in m fast photo workflow and what each collection is best for. I’ve found that having your workflow nailed down makes all the different in creative efficiency.
Power Workflow2: This is my starting editing tool, but certainly not the only one I use. Lightroom used with PW2 is the key to those fast 3hr wedding edit sessions I do. PW2 is a set of about 60 highly refined and organized presets that can be applied with a mousclick to one or thousands of images.
There’s categories, starting with the batch correction Super Series presets. I start my workflow by adding these to large batches of images from my session. This get’s me the basic but essential stuff like exposure, contrast and tone under control. There’s various Super Series presets depending on the shooting situation. Basically I pick the one that looks best for a batch of images and off I go. No rocket science yet. I may still have to do a few tweaks on a few images since no auto tool is perfect, but it get’s me close.
After the auto correction I sort down my images with a 3-5 star rating system. 5 being the best. I’ll then go over my favorite images and add other effects from the set. The Super Series is just the beginning. There’s lots of color and B&W effects to choose from and soon I have a nice variety.
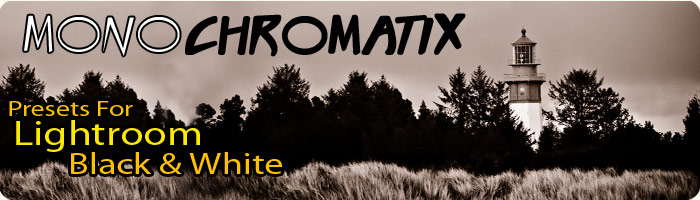
MonoChromatix: Black and white can be so powerful. PW2 takes has some great monotone effects, but MonoChromatix takes it to the next level with a complete set of all monochromtic effects that perfectly complements PW2. When I think an image just looks great in B&W and want to get something really remarkable I’ll try some effects from this set until I find one that’s perfect. There’s everything from classic black and white to sepia, to infrared. I use these to get some really cool B&W looks, and it saves me the time of having to use a plugin in Photoshop.
Creative Essentials: Essentials is a great tool for someone who does not use Lightroom, but also for someone use mainlines in Lightroom and then does those special tweaks in Photoshop like I do. It’s simple and straighforward with some poerful tools.
Once my primary edits are done in LR I head to PS with a few of my favorite photographs. There’s things I can do in PS that just can’t be done in LR. Essentials is a great starter set of actions that includes a nice range of effects from tonal changes to really nice color tones, shatpening and softening effects.
Hollywood Effects: The set that started it all. It’s been thru some tweaks, but the name still says it pretty well. Hollywood and Essentals complement each other really well and when I head into Photoshop I use them both.
In Hollywood you’ll find plenty of cinematic glows, color modifiers and mood setters. Some of them can be intense, but since with my actions I make standard practice of having layers, masks and details, you can easily adjust the way an effect changes your image to get a totally unique look.
I keep a main workflow action set where my actions (as well as favorites from others) are saved in one set. Easy to manage and easy to backup. Then I put the action pallete into button mode and it’s like a console of photo tools a mouse click away.
__
That about sums it up. As I work everything stays saved back into LR and when I’m done I just export the final results. Event those not using Lightroom can still move their workflow along much faster by having both action sets loaded and ready to fire.
It’s a complete workflow for Lightroom or PS users that does an important job. Giving us more creativity while making us faster. I’m always working to devise new workflow ideas and improve effects so stay tine. You’re also welcome to contact me with feeback or ideas… Gavin


 by Gavin Seim (updated 7/21/12): I give workflow a lot of thought. In fact I started writing this nearly two years ago and it’s based on methods I’ve refined in my own business. If you read this and follow through with it, you WILL edit faster. Truth is, I’ve actually refined my skills by just by writing this down. I’m going to be a little blunt today so don’t take it personally and don’t think me arrogant. My goal is to make us all better at editing so we have more time for life. Good processing is very valuable, but it does not have to be slow.


