August 29, 2009

by Gavin Seim: I’m a Lightroom fanatic, but with my recent expansion into projecting proofs to sell larger prints and increase my sales, I started looking at software for projecting scaled images using my digital projector. The choices were limited. Whats being using now, is expensive software like Prism Projector, or Pro Select. These are good for some, but cost hundreds of dollars and have a bigger problem in that it throws a curve ball into a well planned workflow. They make us entirely leave Lightroom for the sales presentation. Not cool.

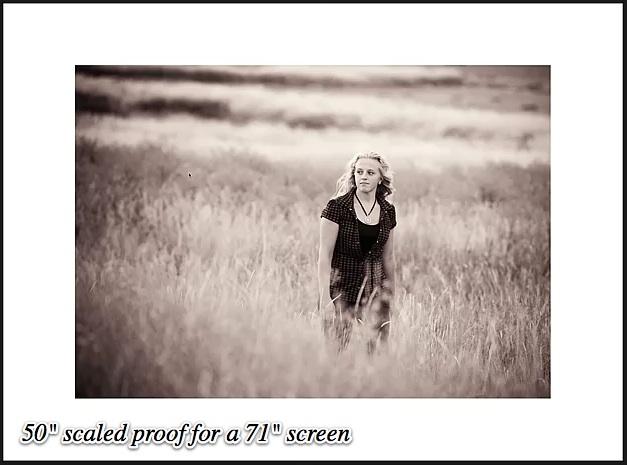
At first I couldn’t find a way, but I kept experimenting and finally I figured it out. I found I could make special print templates in Lightroom that could be scaled to the screen size and project images to size without ever leaving Lightroom. I call them Projectics.

projectics-sales-presentation1

I can’t tell you how excited I am about this. I’m now actively using Lightroom for my proof sessions with great results and no need for external software. No it does not have all the gimmicks and frills that some other sales apps do, but I for one don’t need those.  I just need to project various images and sizes easily and effectively and that’s what LR can do. Using the scaled presets I can change sizes instantly. Then since I’m still in LR I can pick favorites, add things to collections, and even do edits without every leaving my workflow.

In the past I’ve written about using a separate Catalog for each job. There’s no rule you have to do things this way, but it makes more sense all the time. Since I’m sometimes in the studio and sometimes taking my Canon LV7370 on location, it keeps things really simple. I can simply copy the entire catalog for the session onto a portable drive and off I go.

projectics banner Home

Yes, I’ve made a collection of these presets to sell. Hey it’s what I do. You could make some yourself, but if that does not sound fun, I’ve done the math and tedious stuff and made a simple set that just works and will continue to be updated. Either way Lightroom is a powerful sales tool and I need no other sales software to proof, project and sell large prints.  Oh and if you want to learn more about the sales concepts of all this, check out this article about selling large Wall Portraits.

Whether you get my presets or not I suggest you head over to the Projectics page and watch the video because it will show you how it all works and how I’ve integrated it into my workflow. The power of Lightroom keeps growing and I thrilled. Time is money, and projecting proofs is a key element in great prints sales and placing beautiful prints on your clients walls… Gav

Read More

June 12, 2009

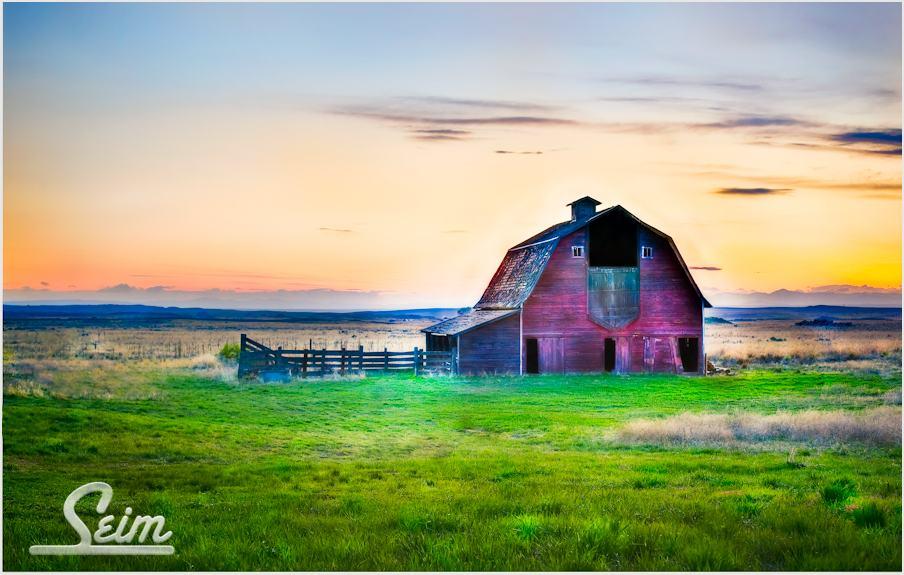
wispering-barn-wa

Around New Years I make a pack of goodies to send out to fans and customers of Seim Effects throughout the year. I sent these in the SE newsletter, but have not posted it officially.

Inside you’ll find a few cool Photoshop actions and a couple great presets for Lightroom. Bold and clear is the order of this year and included in the actions you’ll find Visual Razor X, the 4th generation of my vivid sharp action.

If you need help installing presets see here, and to learn how to manage actions see here. To stay more up to date on the latest freebies you can join the Seim Effects club on Facebook. Enjoy… Gavin

– Download 2009 Free Effects Pack –

Read More

December 4, 2008

One of today’s big hurtles a good photographer must overcome is getting that amazing final edit. If you take your image straight out of the camera and leave it at that, you probably won’t get much notice. But if you over edit you may not either.

Standing out is about being excellent as well as being different. Being different however is more than it suggests. Just looking different isn’t good enough if it’s not attractive to your target audience. The post production details count and are a process of learning when and where to apply them. Today lets analyze a recent image and talk about it.

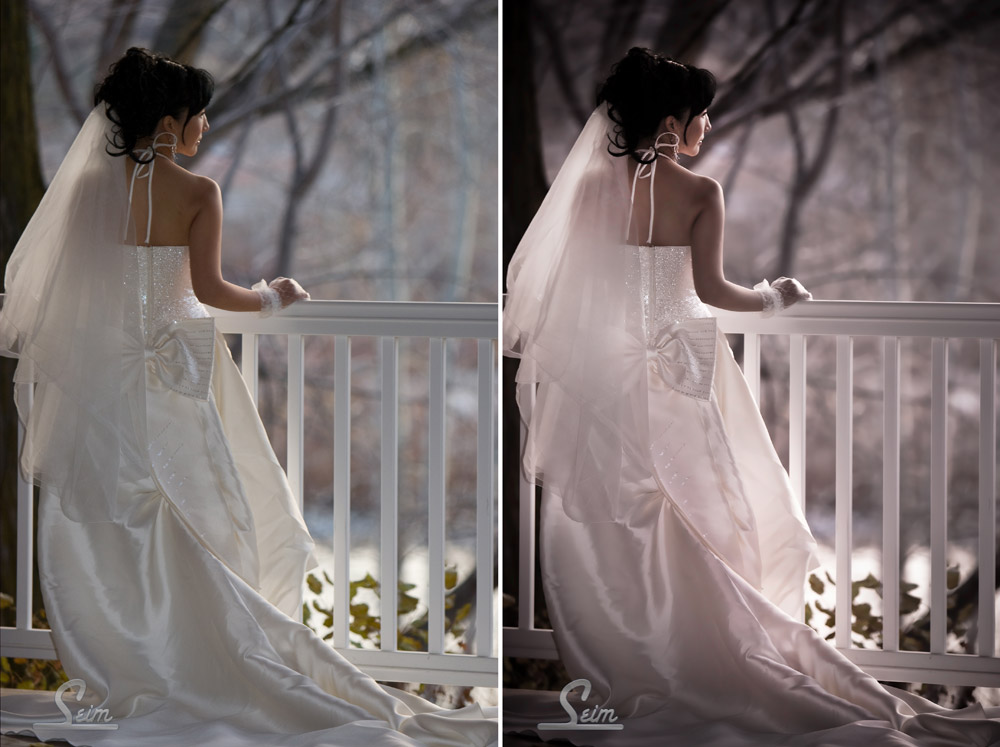
I call this shot The Gazebo. Though it’s a new favorite, it’s not an HDR or any other special acronym. It’s just a good foundation image, edited right. What I did to it was not so amazing, I just used the right effect at the right time.

The left side is straight out of camera. It’s good. I used my Canon 70-200 @ 150mm 1/125 at 2.8 ISO 320 with just a little fill flash. I  got nice compression and blur in the background. The evening light was coming from the right side and worked perfectly but was not really unusual.

I knew right away it had potential, so I started playing. Playing is the the keyword here. I use Lightroom presets and Photoshop actions not because it couldn’t be done manually, but because I want a great variety and I would not have that variety by doing it all manually every time. The effects I used were my own, that are sold here in Seim Effects, but this applies to whatever you happen to use. I started with a vintage preset from Power Workflow2. I tend to use the vintage looks sparingly, but it worked well with this simple scene.

Then it’s on to Photoshop. I used the Old Fashioned Love Song from Hollywood Effects. This helped me manipulate the light into something more interesting and glowing. Then thinking it needed a touch more I ran Simply Soft from Creative Essentials Actions. This is a skin softener. As I did this I used the masks to remove blur from areas of detail like the face.

Finally I finished up the way I normally do, by working with burn and dodge. This is a tool that most people overlook, and it’s one of those editing gems that’s right in front of us. I can draw the eye wherever I want it using burn and dodge. If you want to learn more about that see this post.

So there we have it. The finished product took only a few minutes and had that dreamy loving look to it. My point here is not that you need to use these specific effects to get your look. It’s that you need to do things other than just taking the picture if you want a portrait.

Set up your system so it’s easy to add effects, because otherwise you’ll avoid them. I have my favorite actions or Lightroom presets a click away, and when I’m working on a good shot I’m not afraid to try various looks because I can try ten different effects in the time I could do one of them manually. Also use direction. Just because you find an effect yon love don’t apply it to everything. balance is key and one of the most common mistake it to over do things. I often apply an effect and the fade it back so it’s very subtle, but makes my image more powerful.

What do you see in this image? How would you have done it differntly? Share your ideas in the comments… Gavin Seim

Read More

November 16, 2008

Updated 10.10.09 to version 2.5 sampler (download below).

My free sampler of Power Workflow2 Lightroom Presets is  here. This has a small assortment of what comes with the complete set, but there’s some great presets here.

A key with presets is to build a good workflow. I spend a lot of time with that, and you’ll see some of it here. Start with a good auto preset for batches. This free set includes a preset from my new “Super” series auto settings. Apply it to a whole batch to get rockin, then move on and try some other effects.

There’s also a coupon inside that will save you a few bucks if you decide to get the whole set. If you already have PW2 you already have these, but stay tune because Christmas is near and I have some goodies in store 🙂

Download FREE PW2.5 Lightroom Presets Sampler:

Check Out My Video & The Complete Set:

Read More

October 31, 2008

Buy Power Workflow Presets now and get a free upgrade to Power Workflow2

Power Worklfow Lightroom Presets are extremely popular. Since launch I’ve released various updated and enhancements, but the best is yet to come. Power Workflow2 is almost here.

More details are coming really soon, but these have been in the works for months. I can say that PW2 is going to be a huge upgrade, chock full of new goodies to keep us working creative and fast. I’m still working on the official graphic, but here’s a pre-comp. Stay tune for the official announcement… Gav

Read More