by Gavin Seim. Texture on photographs can be powerful tool. You take a texture image like a stone surface for example, lay it over your photograph in Photoshop or a similar editor and subtly overlay it by changing blending modes, opacity etc. This can be really cool, but it’s also easy to fall into the fad. Not that trends are always bad, just be aware of them.
Some of you reading this already own my Naked Elements texture collection. I’m proud of the set and I thought it would be useful to give a few thoughts on how to make best use of the textures in your photography. But no matter what texture you use, these ideas still apply.
A bold texture overlay. This intense is usually a bit much for me, but we all have our own look. You can certainly tell texture has been added. Bolf can be great but use it with care. Mouse over for original.
- 1. Don’t simply fall for the fads.
Texture can be great, but don’t fall into the trap of thinking every image needs super duper texture just because others are doing it. Visualize what you want from your image and how a texture will help you get there. Don’t just try to mimic everyone else. - 2. Use balance.
Texture overdose is a passing fad. Great texture is often so subtle that most would not even know it’s there. Bold texture is good at times, but remember that subtle can add character and dimension without any distraction. Always consider if what you’re doing makes your image better. - 3. Change the modes.
Don’t be afraid to play with different blending modes after you overlay the texture. “Overlay” mode is the mode common for texture overlays, but it’s sometimes shocking how blending modes can change the look of your image. - 4. Use The Masks.
Don’t just overlay a texture and call it good. Once it’s in place use layer masks (here’s a video i found in case you don’t know masks). Blend areas in and out using the mask to manipulate the texture and draw subtle attention to your subject. For example you might want to erase most the texture from a face to keep it natural, allowing it to complement the scene in the foliage and surrounding areas. - 5. Don’t get in the rut.
It’s easy to find something new and then use it all the time. Avoid it. Most texture collections have variety. Change it up and see what works. Texture is not a way to be lazy, it’s a way to be creative on your best images and make them shine.
That’s all for now. Simple stuff, but if you keep it in mind your textured works will become more refined. Also if you don’t have a good assortment of textures you can check out my Naked Elements. I also have a freebie pack you can download here to get you started. Have fun and use texture wisely… Gav

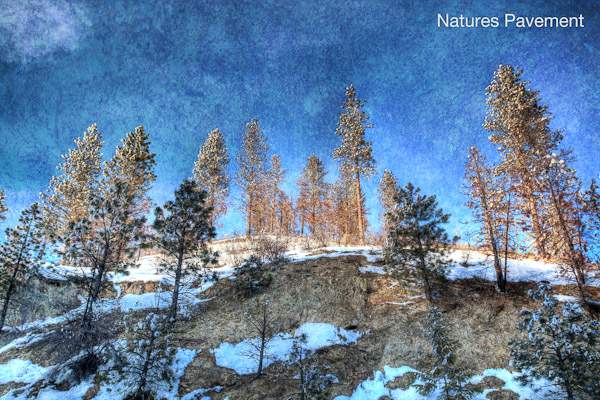
A gentle process. The texture is subtle, imparting a warmth and slight texture to the scene. Mouse over for original.