We usually talk about harsh light in terms of how to eliminate it with flash or fix it in post. That is important. But there is another way.
We can make any light work for us…
In the edits today I used Filmist, but also tools like Elegance, Natural HDR and PowerFlow which all have presets I’ve designed for sunlight and problem light.
Hard light is not what we think.
As I talk often in my free Shadow Hackers workshop. We often don’t realize that the the biggest problem if hard lights is not only clipping, but how it create hard shadows.
You want to stay around for the final tip because it’s not just the lend or the process, How we think about the light we are presented with is often more important than anything.
Look deep as why the light is hard and what the shadows are doing and everything can change in a single frame.
The way we look at the light we are faces with often defines photos more than the light itself.
Do side quests
When you’re under the pressure of a paid session you tend to play it safe. Value your work. But sessions, collabs etc are like a gym for a photographer.
Start trying thinning and making challenges for yourself and watch your photography grow faster than ever.
This video is packed full of real world in camera photography tips and I hope you mad it till the end and found something that helped you.
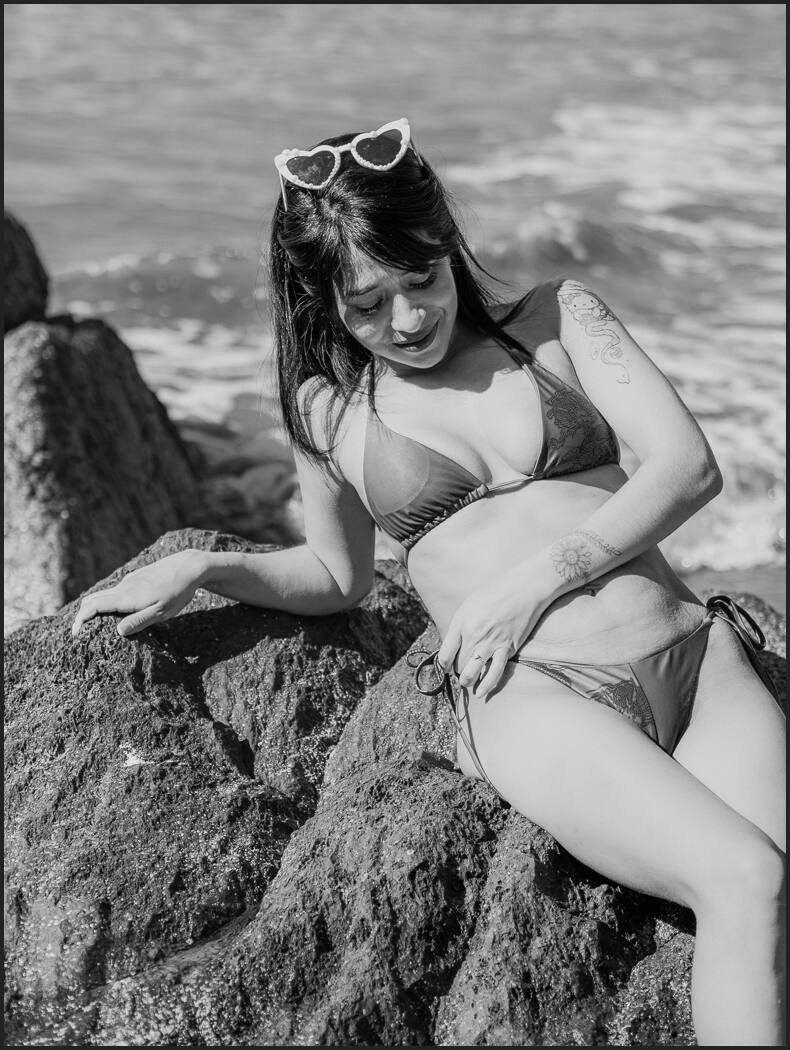
This is a black-and-white method study. I will add notes on each photo of why they work and what details mattered most ot me. I used the amazing new Silver 6 Pack on all of these.
Some photos work great in black and white. Especially the ones you planned for black and white. Others go monochrome, and it’s chaos. But it’s not always what you think. The way you edit for tone changes everything.
These photos all have my personal notes. My tools are not essential here. But the method they show us is game-changing.
Notice the use of tonal range here. We always tend to lift shadows, but it’s the shadow that creates contrast and leads the eye.
This could be another video because often in busy scenes, isolation is a big problem. Be brazen. I used a dark filmic preset, but I also burned heavily on the edges and dodged (brightened) the subject to use the ghostly blur of these street portraits and extract the feeling of the scene.
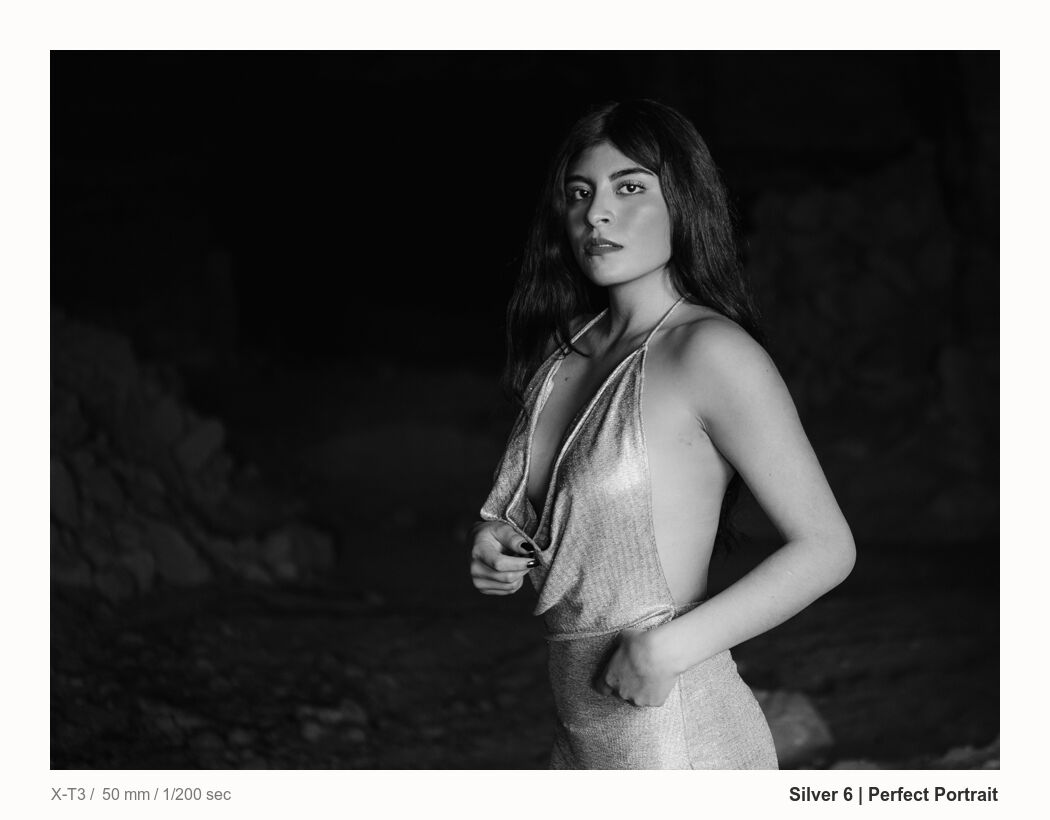
Should this have a hair light? Some would say so. But this soft portrait focuses conversion, lets the shadow frame the model. I like it. If you use Silver, you’ll notice that the portrait-focused recipes dial back on clarity and detail more like we would have achieved in film. Clarity sliders are way overused.
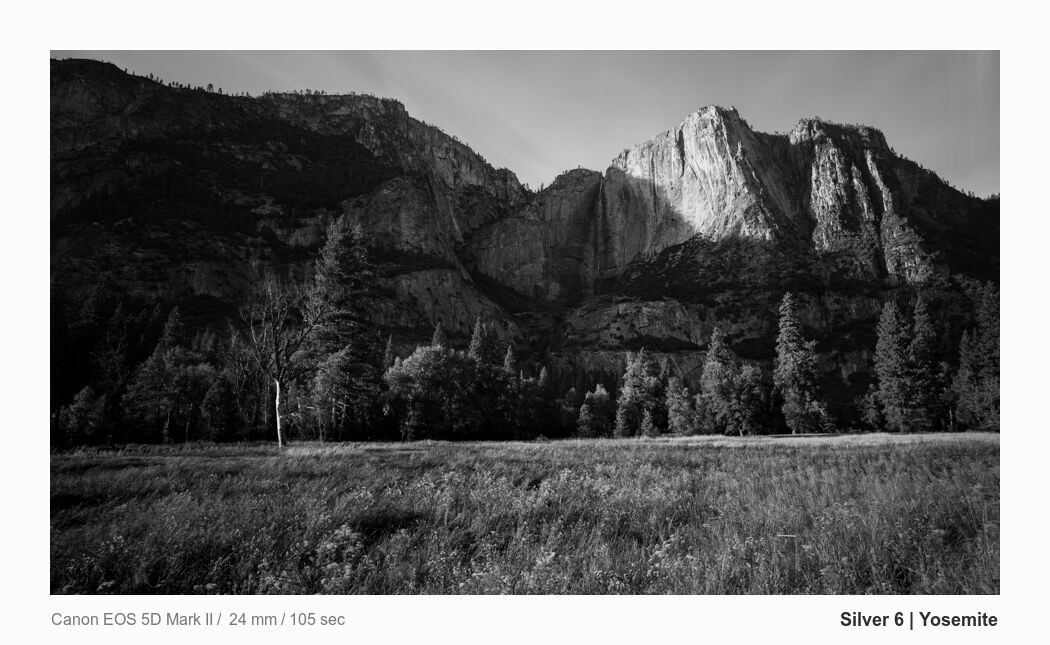
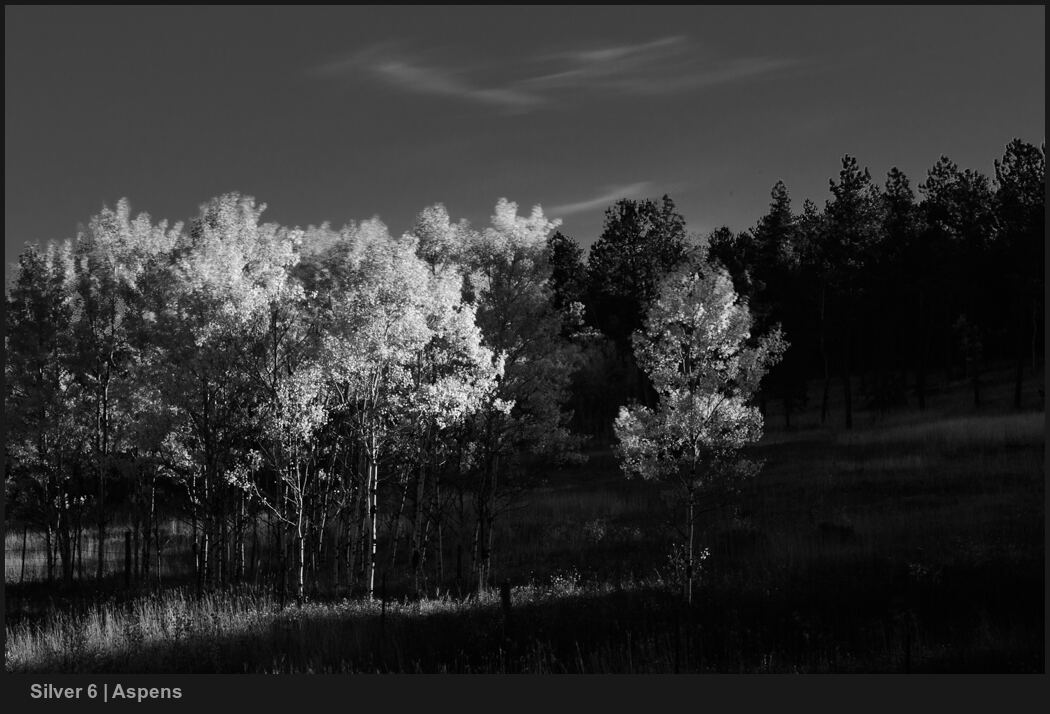
This was shot on 4×5 film, and what I had ignored in the archives. Like the one below that I made last week’s video, I used an Aspen recipe for extreme contrast that let the brilliance shine.
This was a rejected photo, and you can watch the video here. It was all about isolation. Sometimes, a black and white gets too busy, and you must tone down everything but your subject.
I show this in my Shadow Hackers classes a lot as a reminder that basic lighting methods are not always what a photo needs. The shadow category of Silver 6 really helps me find things I would not otherwise see.
This is so dark. I could have lightened it instead of using the shadow recipe so you see the whole scene. But this leaves you wondering. letting people see everything is one of the biggest mistakes in color and more in black and white.
Soft tones, dark blacks. They work in portraits. I darkened the background a little so her face is dominant. But I did not try and do perfect lighting or follow all the rules. It’s a girl in a car, and the rest is left to the viewer.
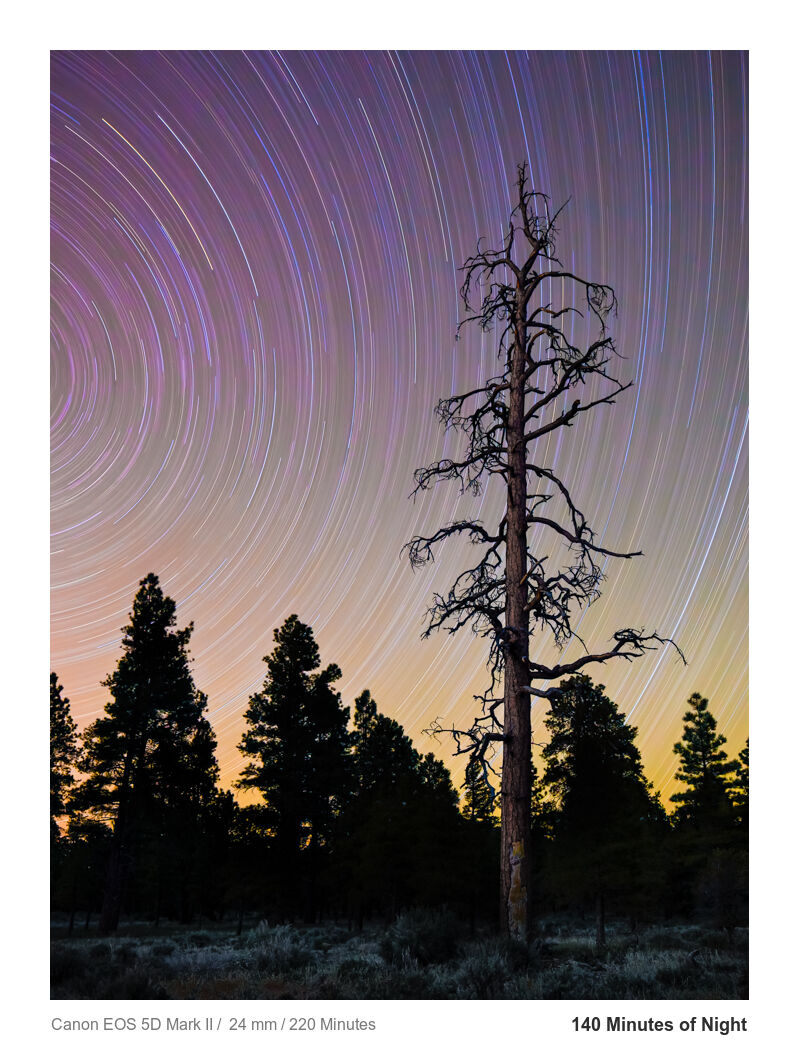
Minimal scenes work great in monochrome. But again, people make the mistake of lifting shadows instead of letting them drive the show. I left the tree very dark, but you can still know what you are seeing and wonder what surrounds it.
Back to busy night scenes. These are hard in color or black and white. Look for moments always. But then you need to frame them with backlights and pools of shadow. Don’t be afraid to burn edges and background to help them pop. Movement also draws the eye to the subject. Be liberal with shutter speed. More in my recent post on photographing events.
Yet another that said for years because it felt flat. Then I made Silver 6. This base preset would usually not be good for a portrait. But for these natural misty scenes it brings life to something that you might have thought was too flat.
The backlight showcases the subject and texture here. But the large pool of shadow and letting it be shadow is what frames the entire thing.
Here we are backlight again. The model is almost all in shadow. It leaves her curves natural and imperfect but leaves you wanting to know more.
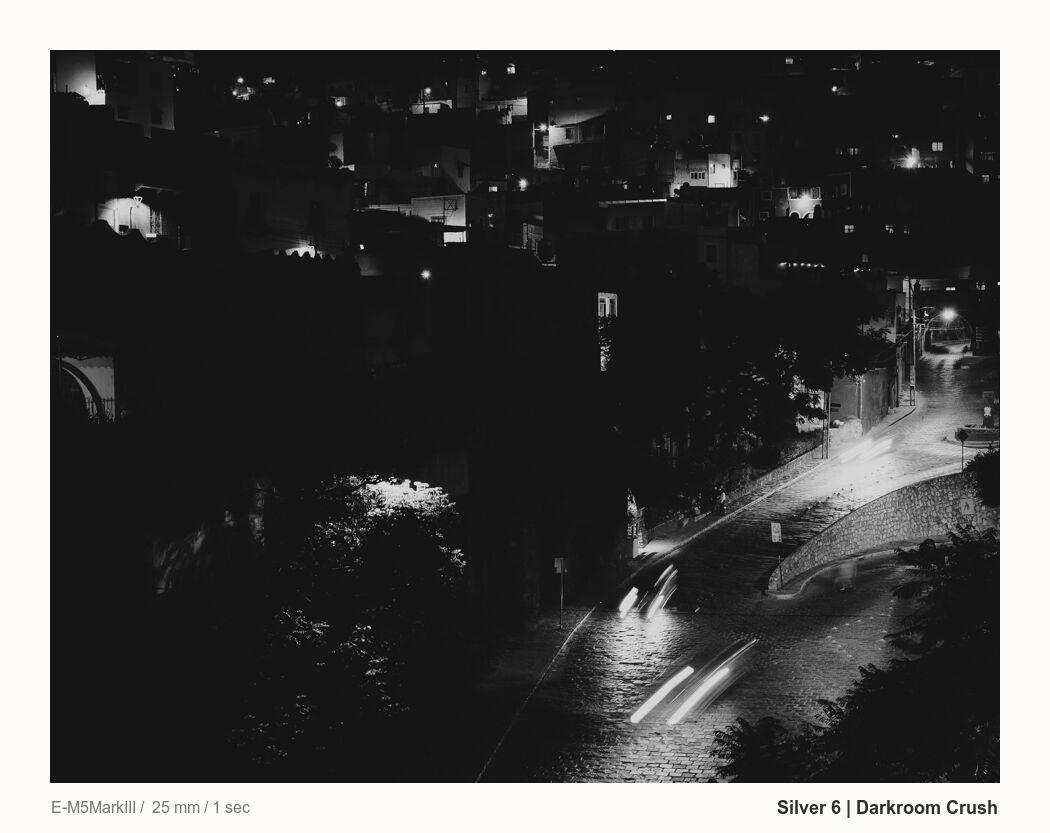
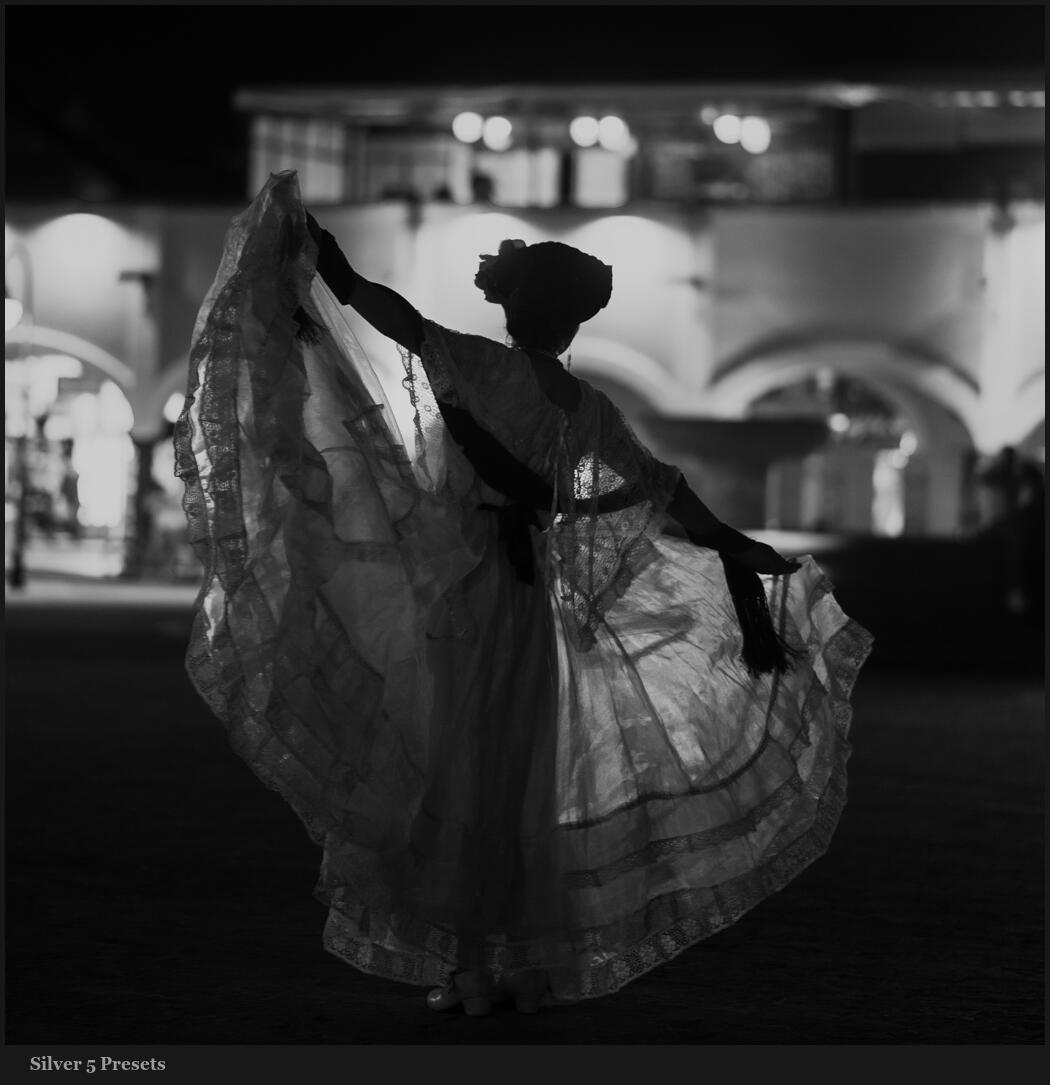
You’ve probably seen this one before, but it’s a favorite. It works again because of the shadow. I didn’t try to lift the foreground and let you see everything. I let you wonder what all those details are while the birds create mystery in this Mexico town square.
Great edits will find what you could not!
You see a theme here. Always focusing on the shadow. That’s what I teach. But it does not have to mean dark photos. It’s about using your eyes in the camera to frame, backlight, surround or lead eyes.
Then it’s about what legends like Ansel Adams and en Whitmore taught. Using the tone. Darken the lighting and, with digital processing and test those recipes to get the perfect values.
Not all photo work. But some photos work years after when you discover how to use tone better. Whether you make your own or use my Silver 6 pack, we can take shortcuts. Great recipes will do what you will not in your edit. But once you see it, you will realize that it’s exactly what the photo needed.
The method – Isolation
Eyes follow lines and framing, and most of all tone. If you use shadow and mix it with light, you can do light or dark scenes, and they work. Sometimes you just have to push tones around to let your subject be seen. That’s the key here.
The key is not following trends. It’s about finding how tones can mix to create the feeling and emotion that you saw in that scene when you pressed the shutter. It’s in there, look deeper.
The method is simple. Ask yourself what your subject is. Then see the shadow and how light is flowing, just like the masters of the darkroom. Don’t be afraid of black or pure white. Push as hard as you need until that subject is ISOLATED, the true focus that cannot be avoided.
This seems simple. But in reality, we rarely push that far. With it, you will often create a photo that creates more questions than it answers. But you will also either make the photo work, or learn why it failed, and do better in camera the next time.
The real story is making people imagine the story!
As I created Silver 6. I pushed myself really hard in this method. And I started discovering many photos I had failed to finish that just worked.
You can get Silver 6 here. But you can also start tinkering and creating recipes like I have spent years building and saving them, and you will be surprised by what you find.
You REJECT a lot of photos. That’s OK. Even if you go slow or shoot film like I often do, not every photo is a hit. But don’t delete them. They might be hiding something like this one was.
The photo is not bad. It’s just not great.
I used mostly the new Silver 6 presets for LR and Capture One for Dance in the Grove. But you can do the same things I’m showing you, and you’ll see why this works.
How often have you been disappointed with a photo?
I have. Hundreds of thousands of times. But I rarely delete them. More and more, I learn that sometimes my initial vision or process is wrong.
We should always try to get it in camera. If you’ve been to my Shadow Hackers LIV,E you know how seriously I take that. But understand tone also comes after you press the shutter, and sometimes it changes everything.
It was boring.
That’s why I never did anything with this. It’s not a bad photo. It just didn’t feel inspired at all. Even before the AI of Ai shock and awe scam photos, landscapes had to be special. We did have Flickr after all. I still do.
As I was working on the new Silver 6 presets and digging deep into the new Shadow Silver tools. I started looking in my archives for old photos that would let me test.
As I mentioned in the video, this is why presets are so important, even if you make your own. When I edit one photo, I am trying to edit that. But when I make a preset, I’m thinking about a concept and how it can work for not just me but the thousands of photographers who use Silver.
By pushing myself, I try edits I would not normally try. Sometimes they don’t work. Sometimes they let me discover things like the Aspen shadow-focused preset I made for this.
What makes it work?
See what I mean. You may not love the final photo as much as me. But it snaps. It has shadow and depth and a little mystery that makes sme want more.
It used tight isolation, shadows, and the 10 stops of tonal range.
It’s not about black and white. But black and white often helps us find things we did not see before.
When I save a photo that never quite worked, it’s usually because black and white simplifies that. And in the shadow study I did for Silver 6 presets, I took that further and left tonal timidness at the door.
What do you think? If you use Silver 6, or create your own recipes, try these bold shadow tools on some of your old images and see for yourself what happens.
Don’t ask what the story is. Ask what emotion you want to feel.
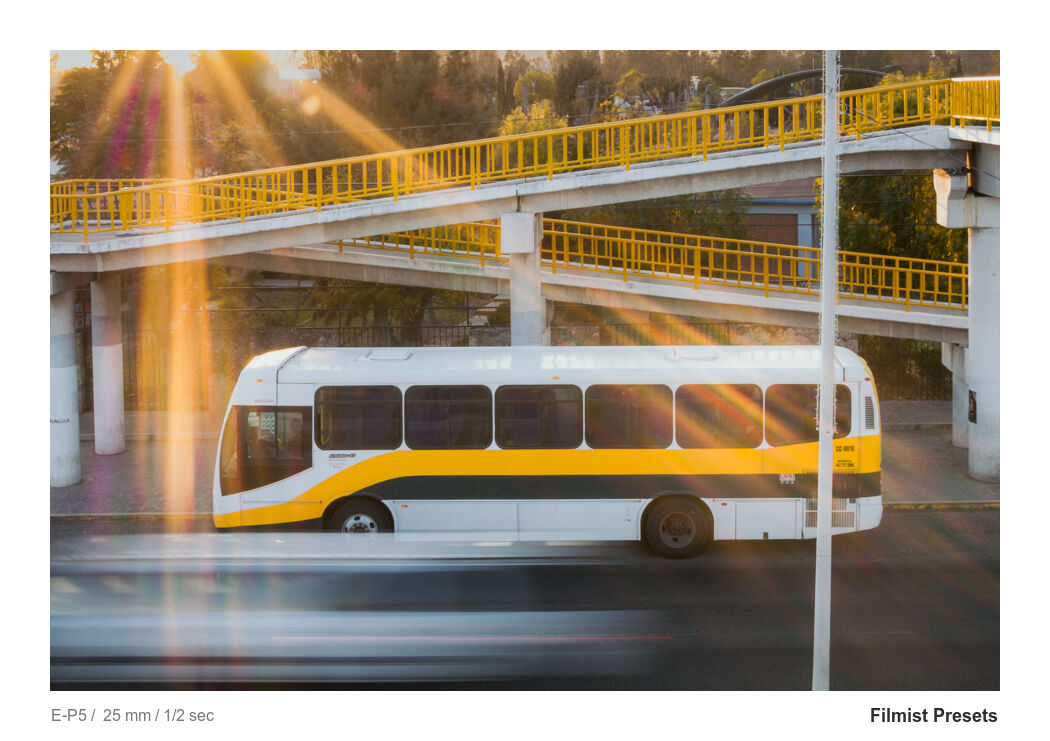
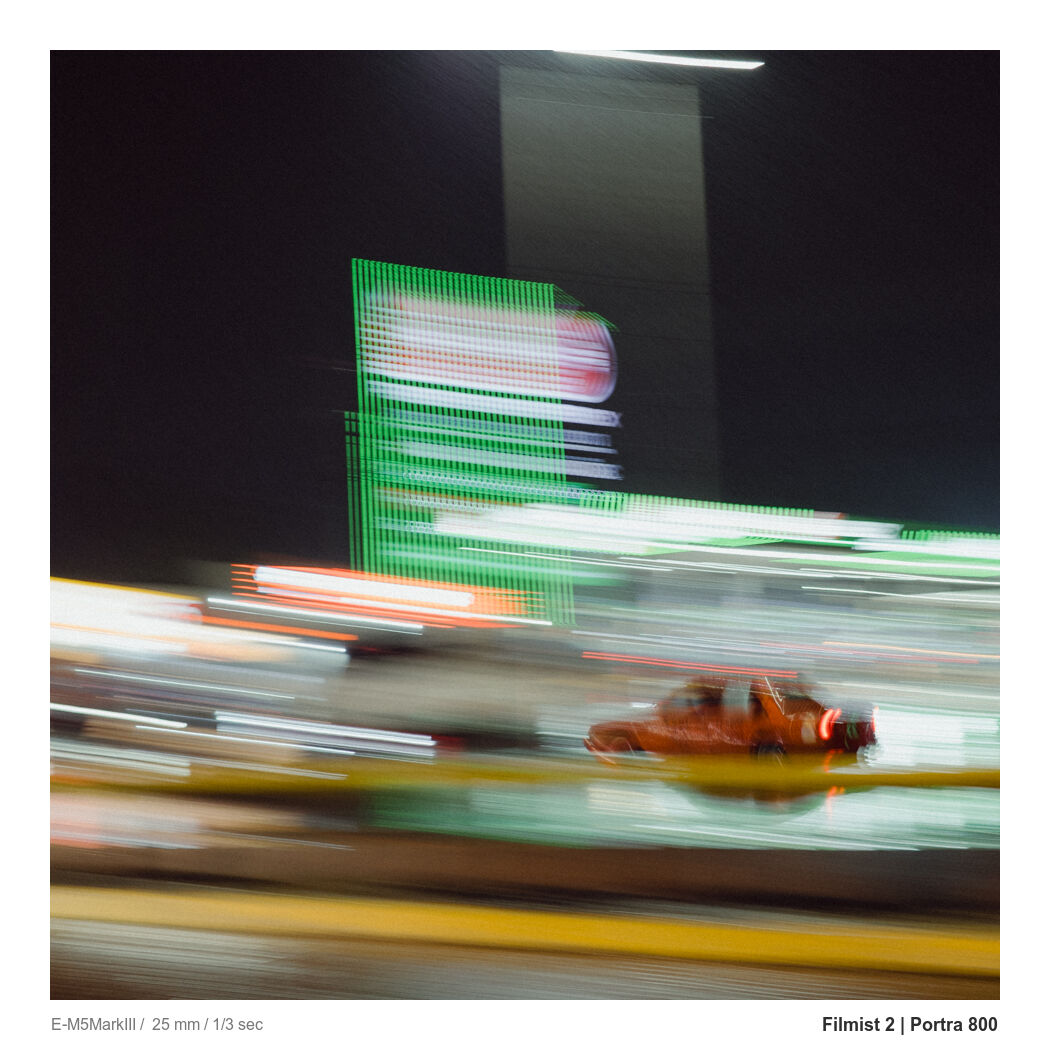
Next to shadow, I think SHUTTER SPEED is the most undervalued creative tool. Today, I will show what years of experience have taught me about it. I’ll add shutter speed notes on each photo.
The exact speed matters.
We talk about aperture and bokeh a lot. But the shutter can transform the simple scenes into something beautiful. Something that provoked thought and questions.
I think a lot of new photographers just think slow vs fast. But you can see that nearly every one of these was distinct. Slow for one scene might be 1/30th, but for another, you need 1/2 second.
Editing Notes: There’s a wide variety of photos here, so I used everything from Filmist presets to Silver and Alchmeist actions. I tried to note each photo.
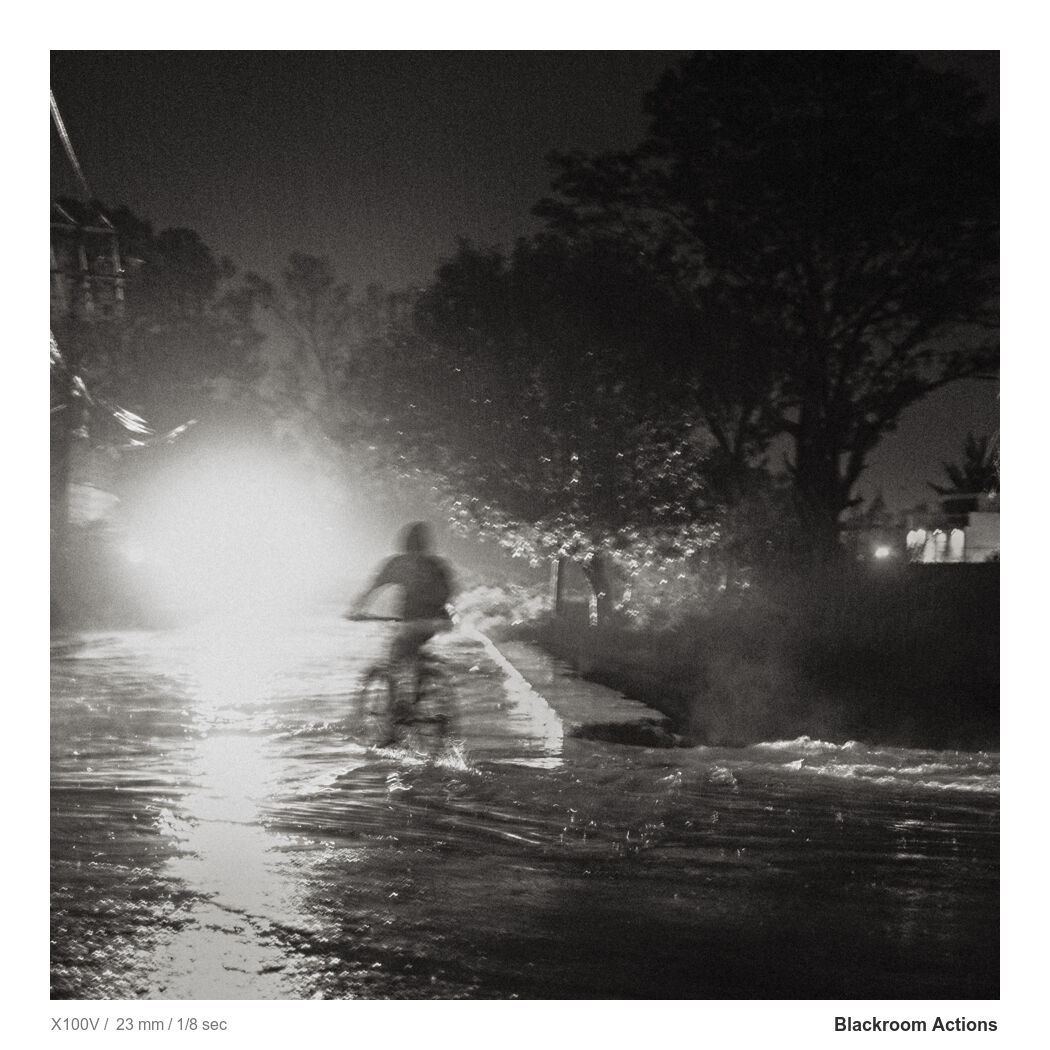
It’s Ok to handhold.
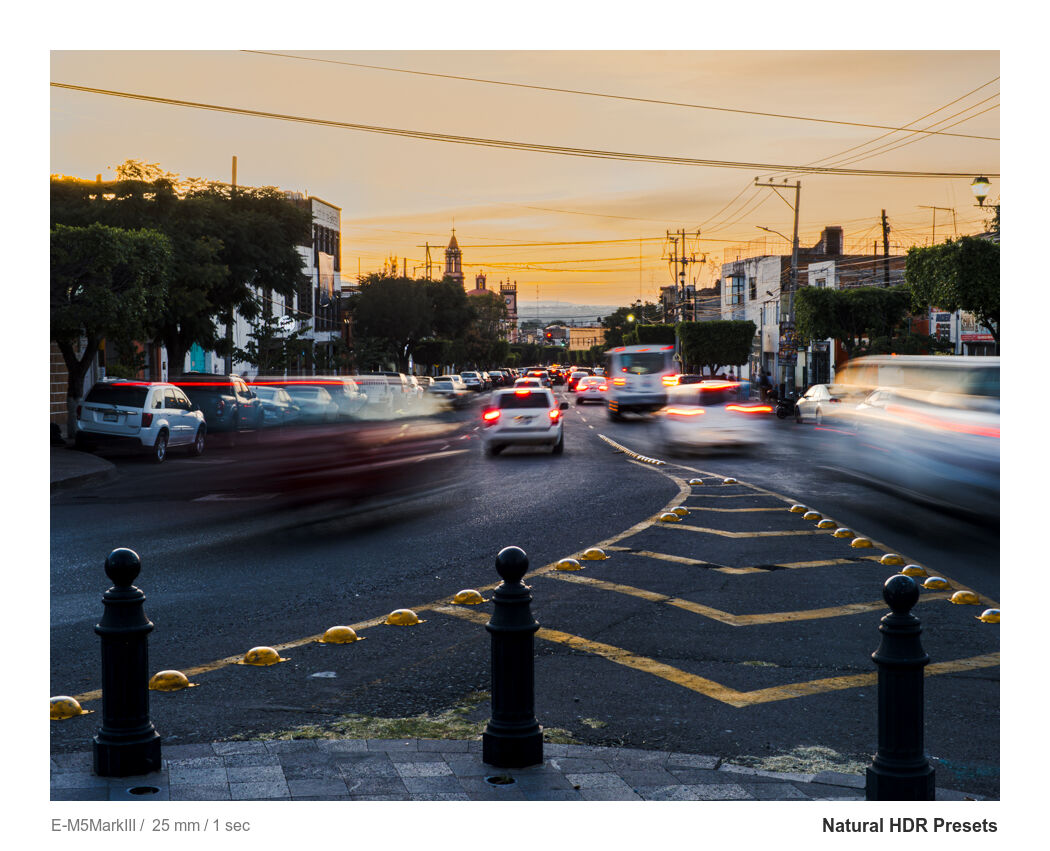
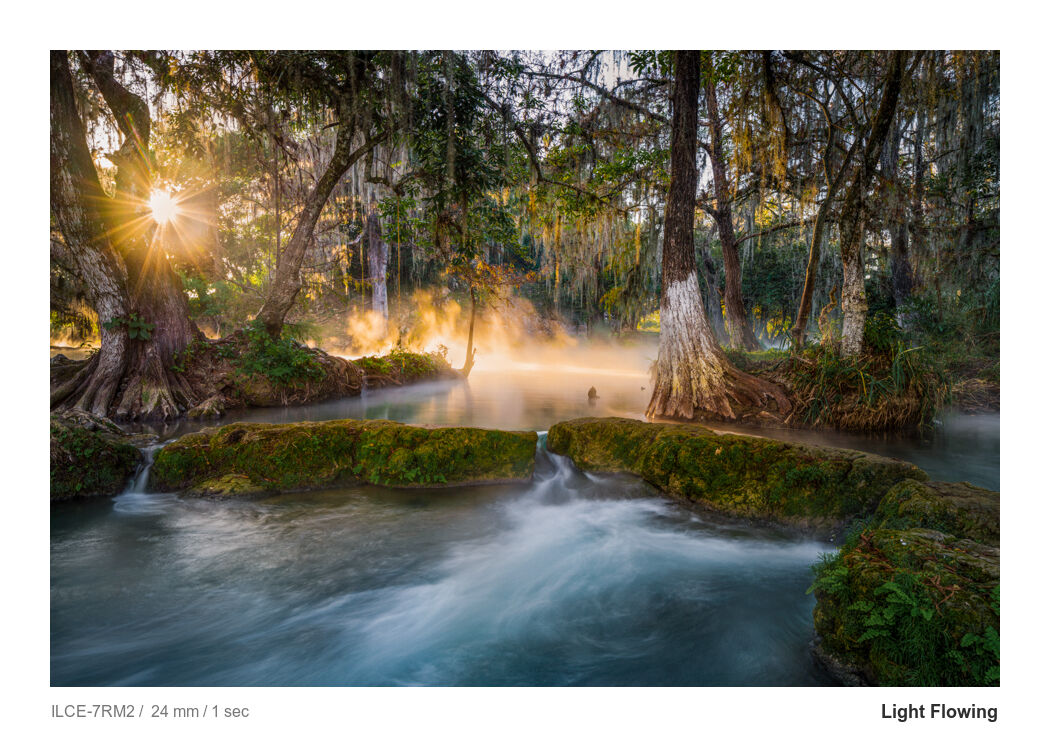
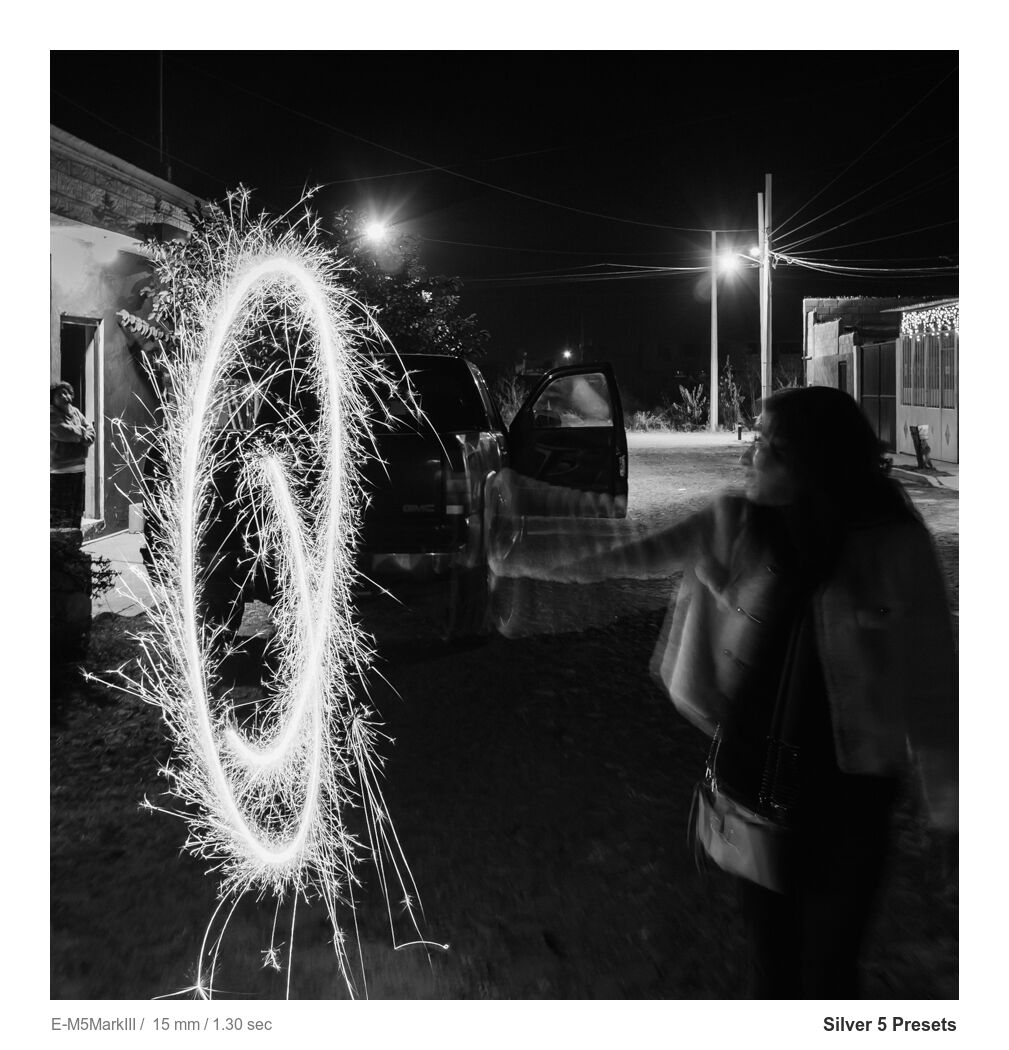
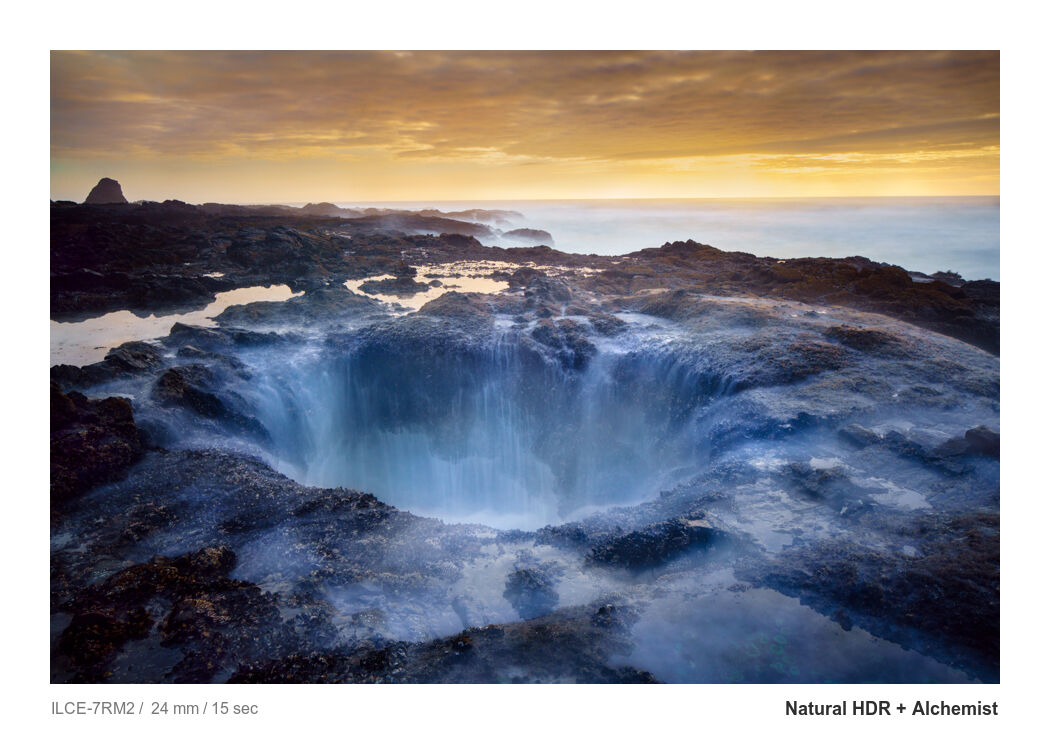
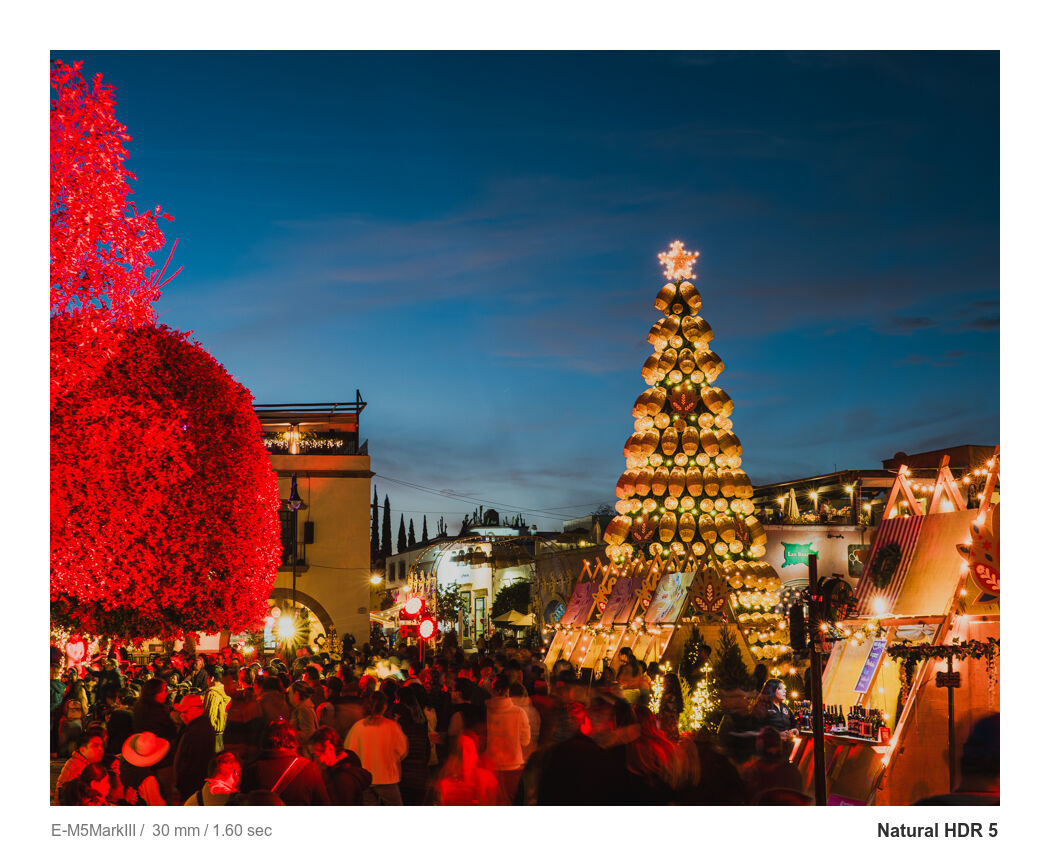
Of course, we have the classic slow shutter on a tripod for water or stars, or sparks. This is probably how it is used most. Some love this look, some call it cliché. Exposure from 1 to 15 seconds can yield beauty in moving water.
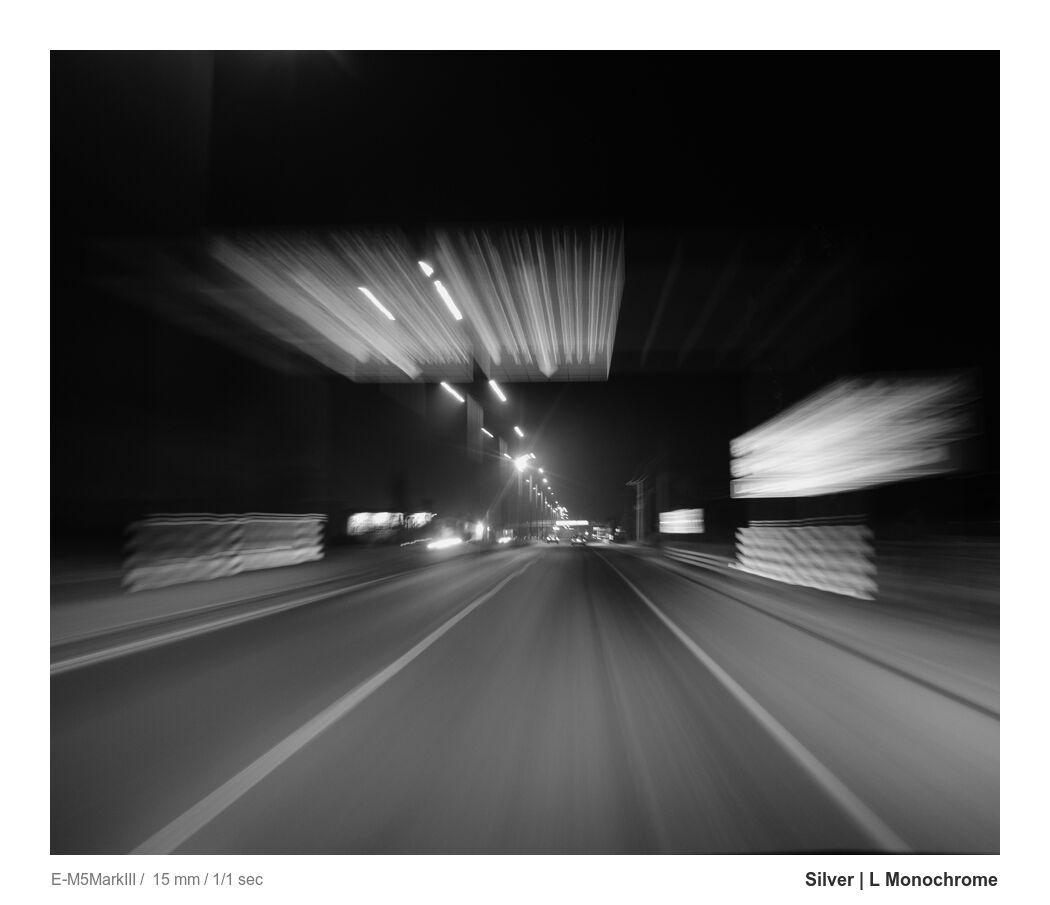
But a slow shutter is often overlooked in portraits and in documenting. Clearly, there is more risk, as many photos simply do not work. This was done in film days. It’s far more open now. Cameras with IBIS, especially smaller cameras like Micro Four Thirds, have amazing stabilization. This even lets us shoot handheld at over 1-second, creating dreamy movement very different from being on a tripod.
If I need some inspiration, I will often just drop the shutter to 1/4 or even slower and see what happens. Of course, pay attention and don’t forget to go back up if you are doing important work. You don’t want to photograph a whole wedding blurred.
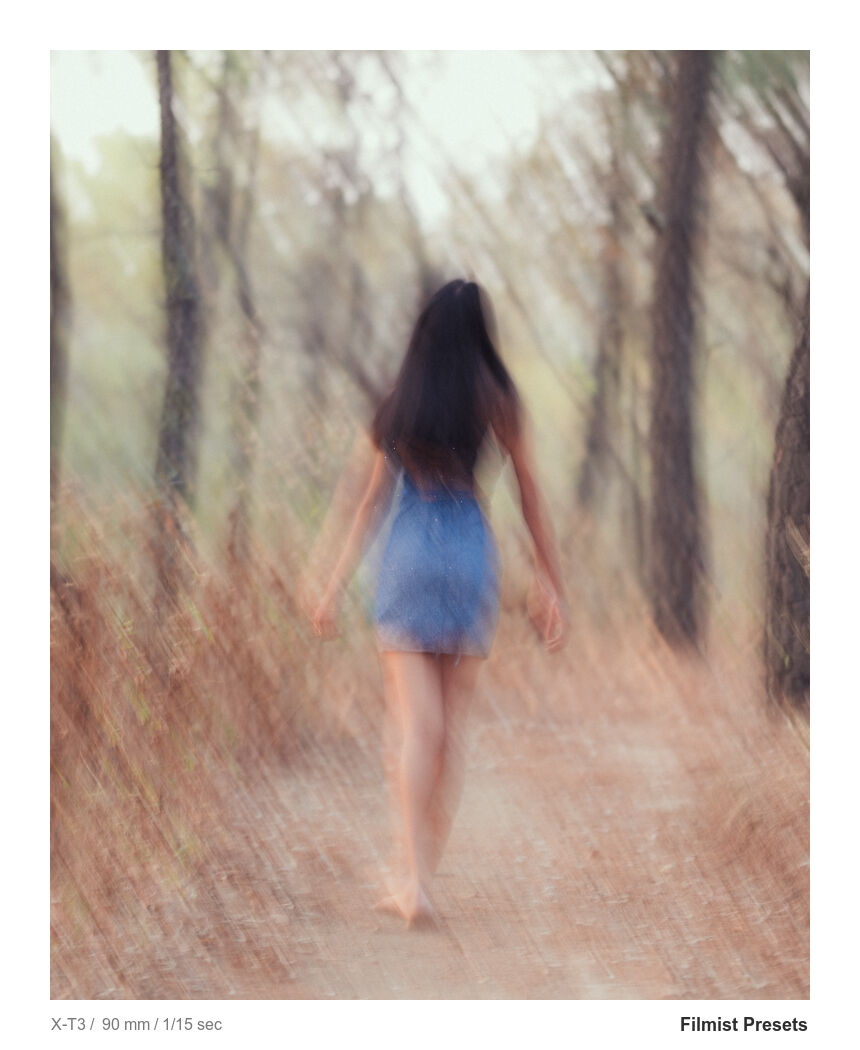
Yes, the pristine landscape here was on a tripod. I love tripods, and you should use them. But in a world of AI where photos need emotion, the movement of hand holding with practice can become magical and ghostly, and still even sharp at critical points.
Each time you try a speed, you discover something.
20 years ago, when new and on film, I was the photographer at Motor Speedway. I would always get the essential photos of the cars that I had paid me. But then, being bored and cars went in circles, I would slow the shutter speed and do creative panning. While some failed, many did now, and these images created motion, and the drivers loved them.
It’s not easy. Don’t get frustrated.
Blurring photos on accident is easy. Blurring them with intent takes time.
In a digital world, we often think that having a good camera and its ability to take good photos make us photographers. But anyone can hit a good photo sometimes, without training. But if you think that way, you will always be a commodity. You might get paid, but you will never achieve your full potential.
When we seek emotion in photos and test our limits. We get so skilled at the basics that we start exploring even in the middle of a job with confidence. That is when you realize why it takes many years to master the art.
My weekly Master Shadow Tips are really about hunting shadow and framing for drama, like we talk about in my free Shadow Hackers LIVE workshop.
The worst thing about events.
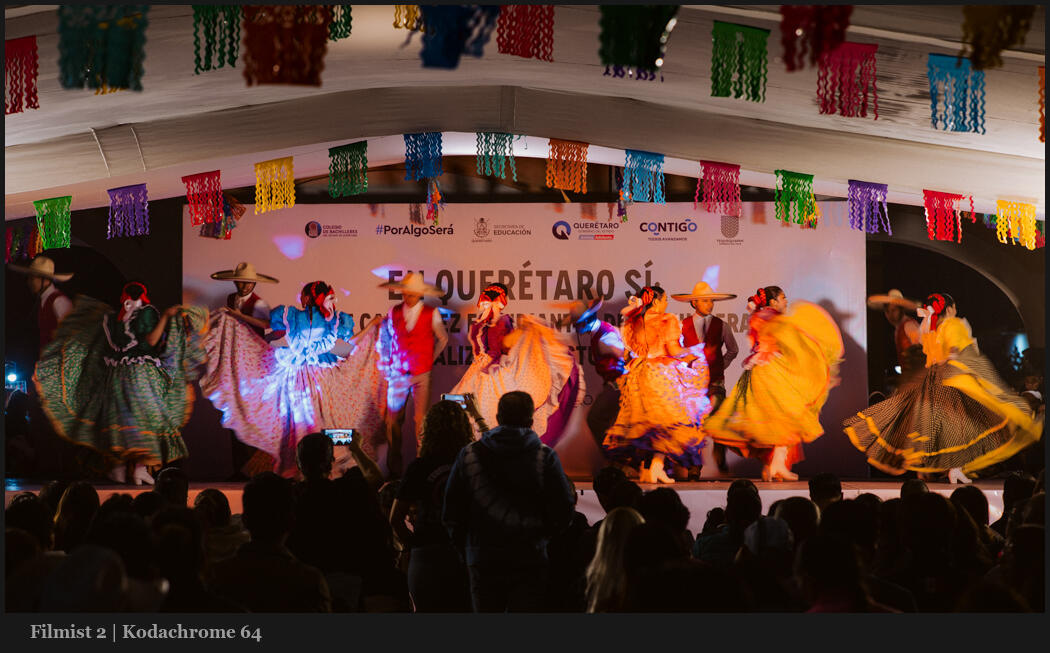
The problem is photos that look like they came from a stage. Concerts, weddings, performances. Podums. How can we avoid making that the focus? How do we make event photos into art?
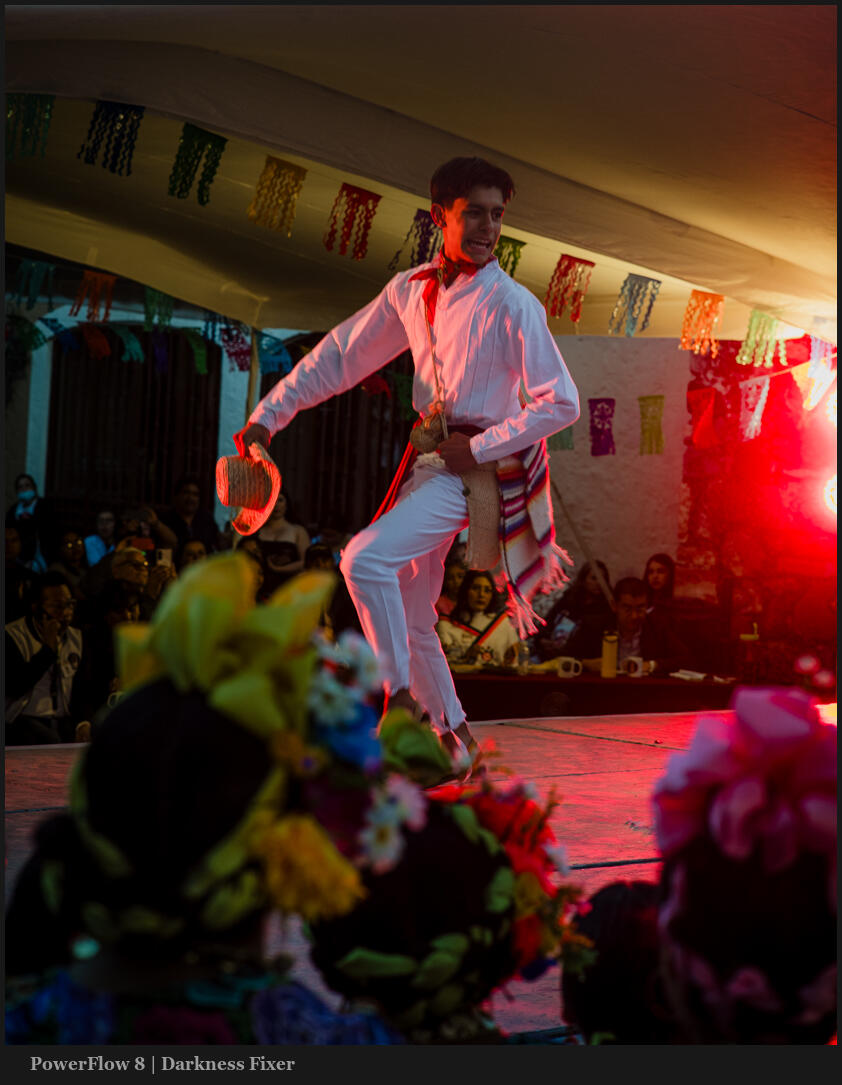
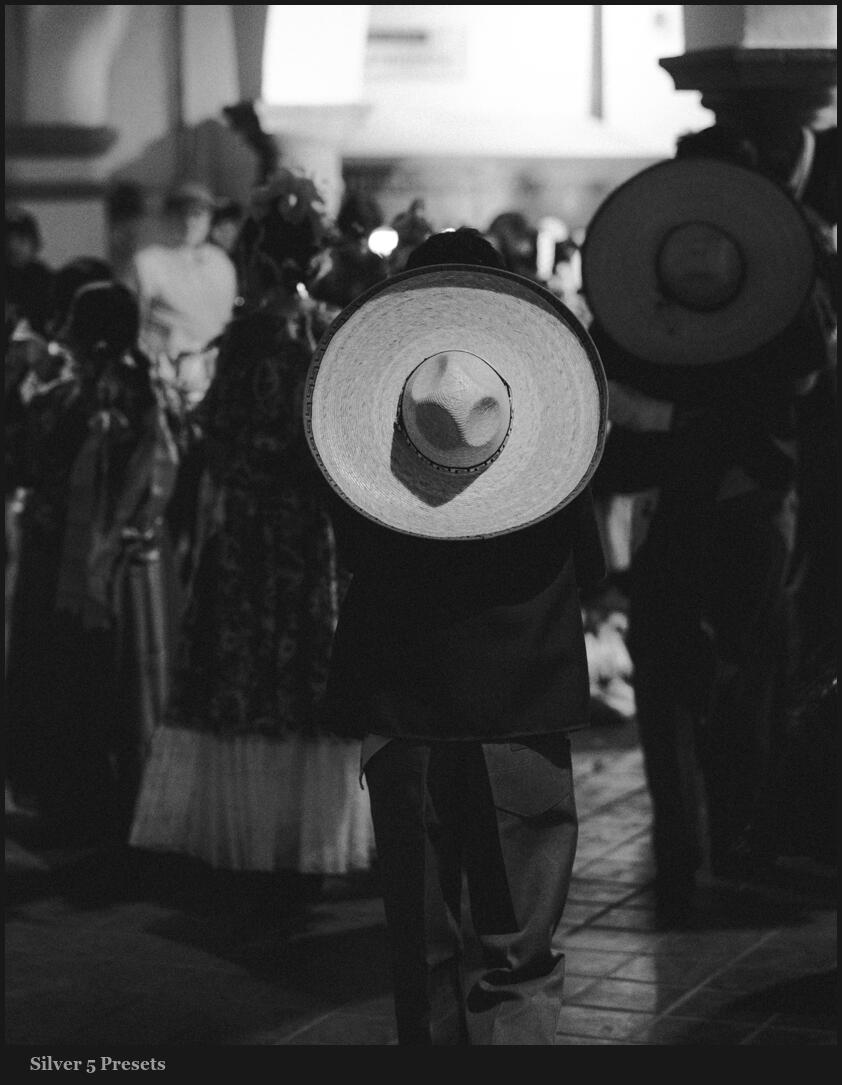
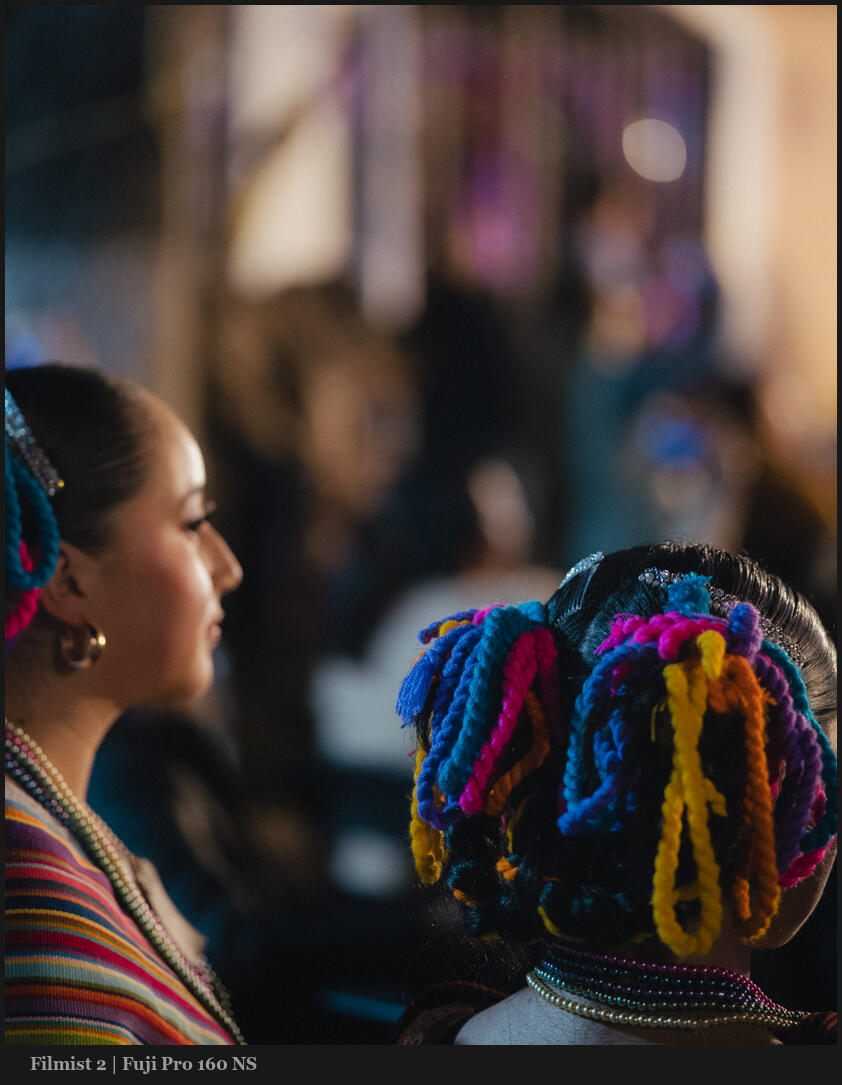
Tools used in editing: These were edited mostly with Filmist and Silver presets (grab the free mini packs of both of these on the pages) annd also a little PowerFlow 8 as well.
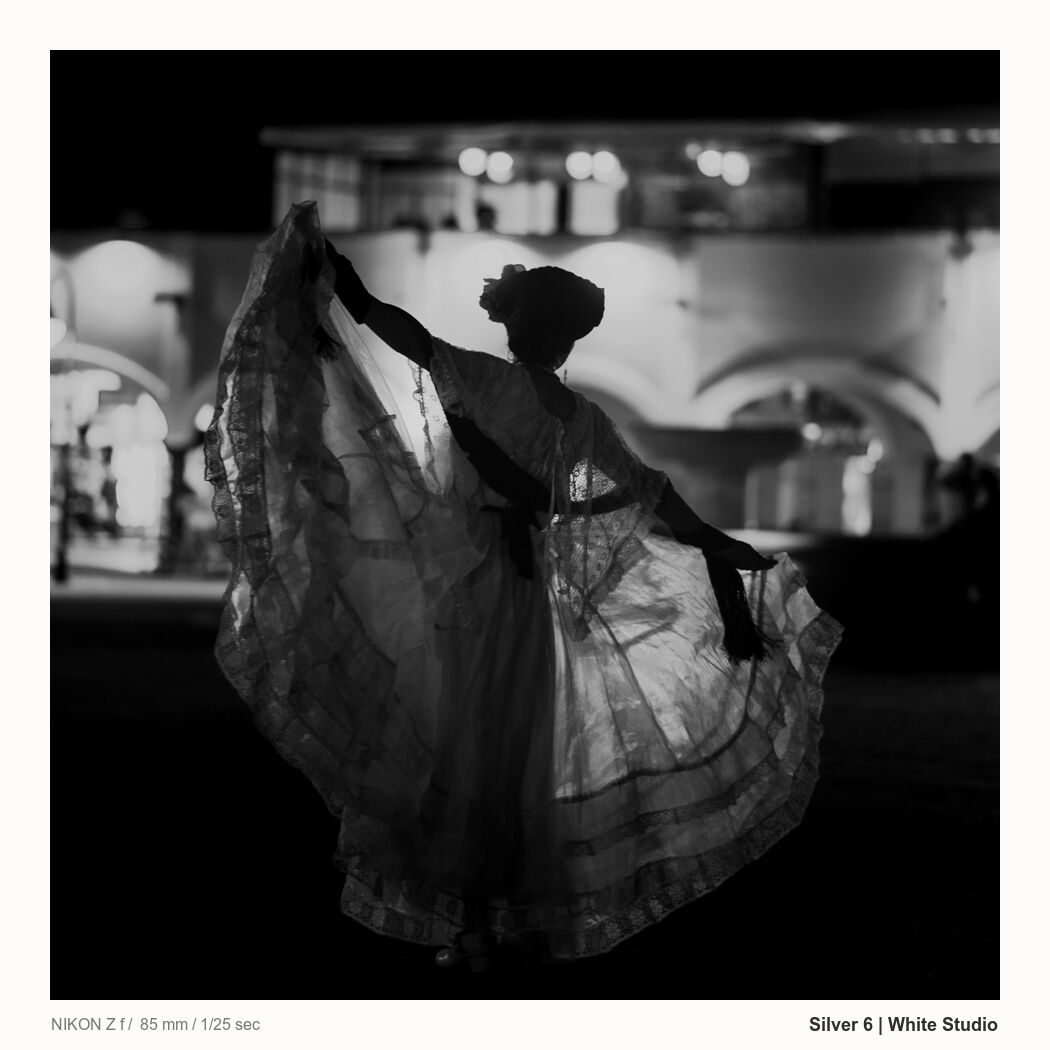
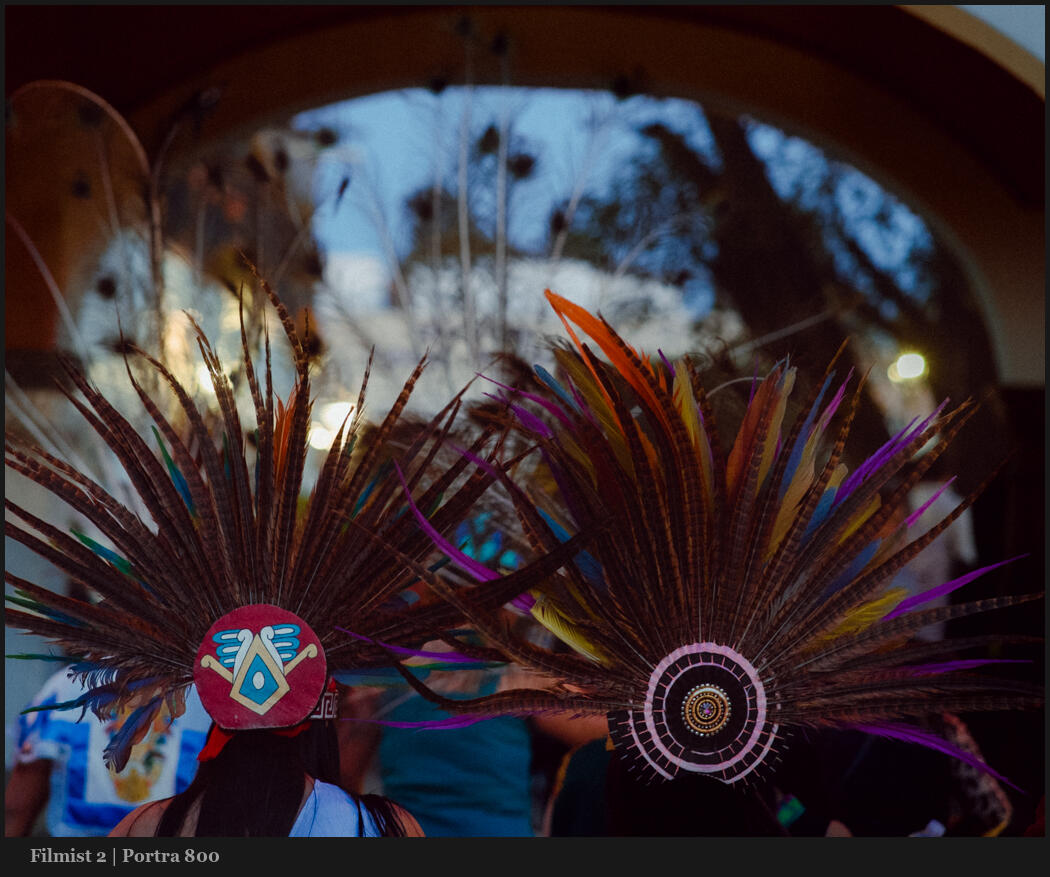
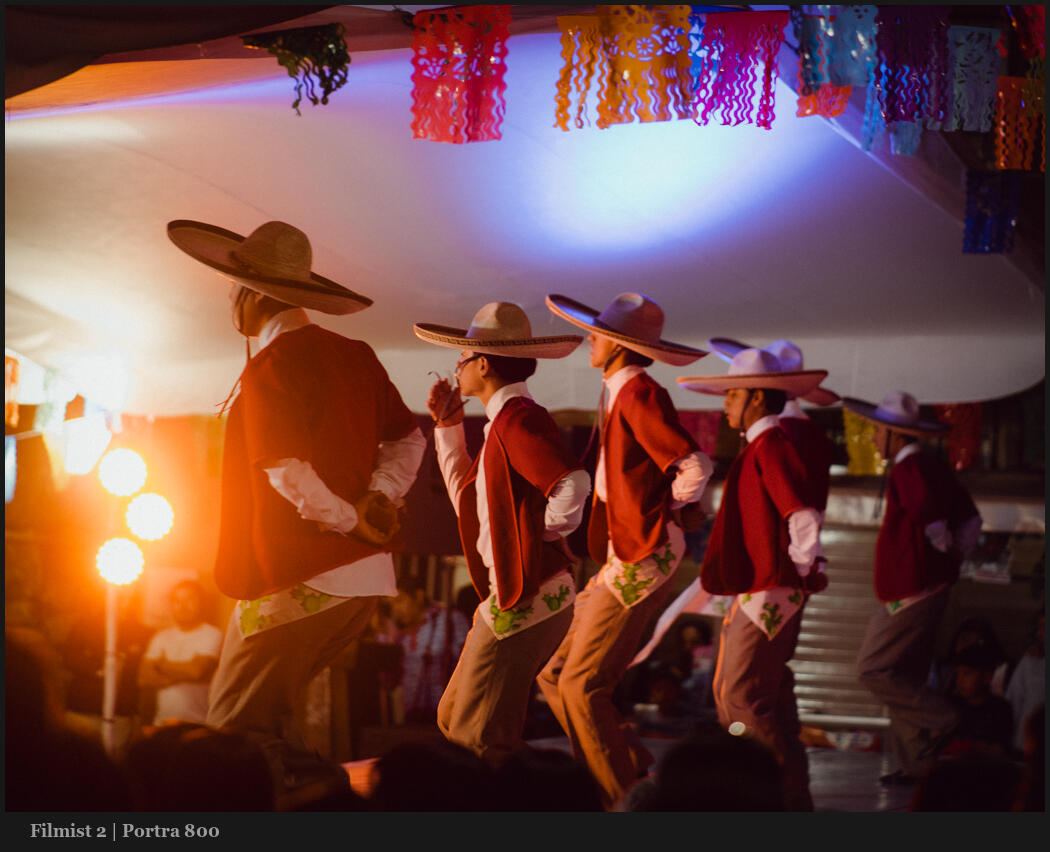
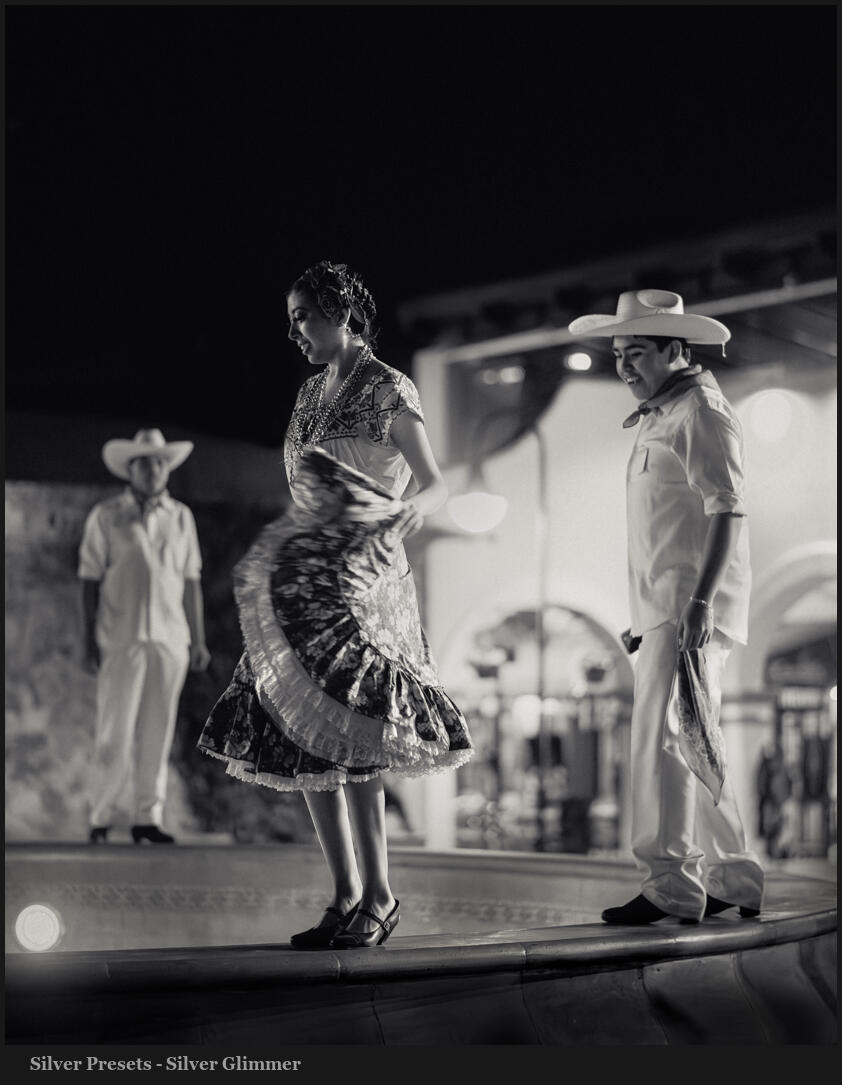
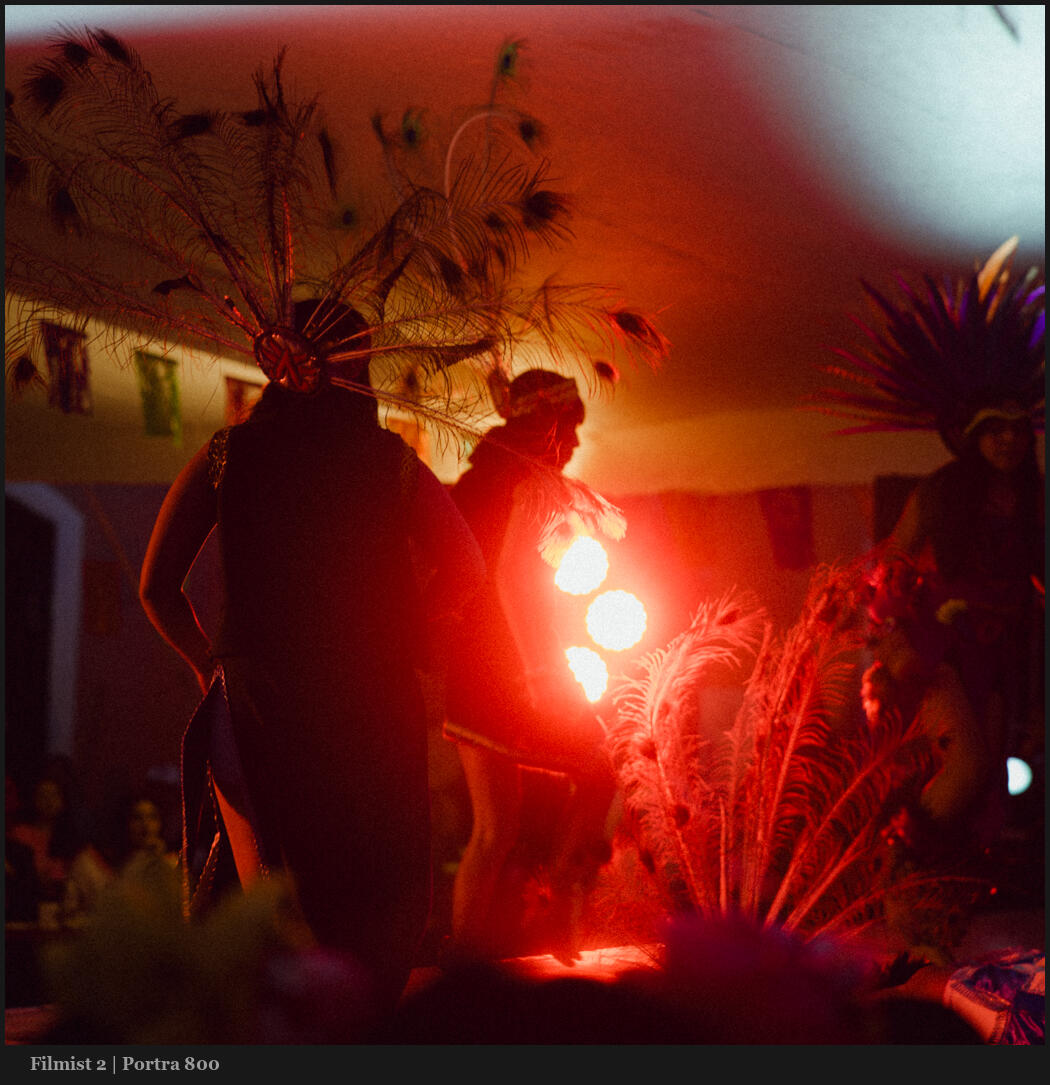
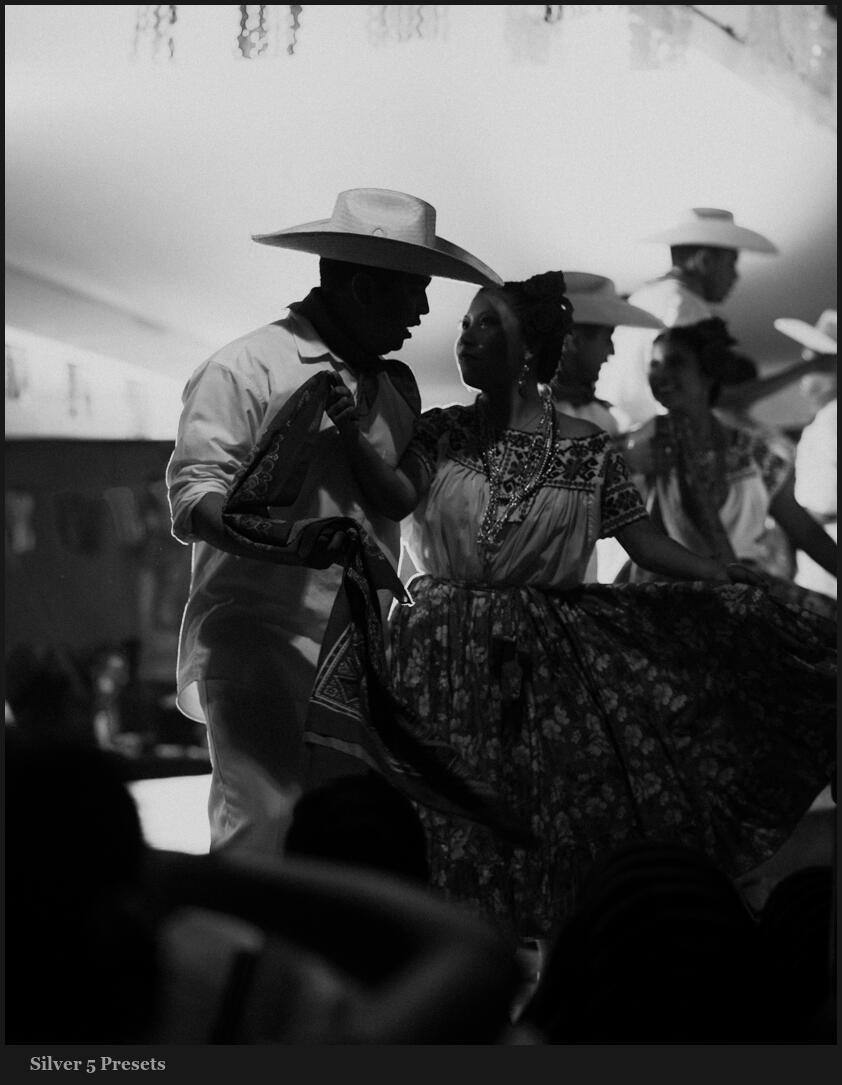
I was fascinated by the Traditional dances in Tequisquipan, Mexico. But, thinking about how stage photos are so boring. Thinm, about your events. Amazing dancers, outfits, or singers backed by podoums and sponsored messages that make everything feel, well, staged.
I did an exercise and the results got me some great photos and a lot og local attention on these photos. Because the other people there did know that photos that looked like these.
Focus on avoiding photos that draw the eye to a stage.
Of course, there are times you want to show a stage or set. But usually, you don’t want props or sets to be the focus. You want the photos to have a feeling.
So I looked for a shadow to frame things like I talk about so often.
Instead of staying wide, I used a Sony 85mm 1.8 portrait lens on my NikonZf. A bit long, but it forced me to compose tightly and focus more on movement and feeling. I used the backlights to create deeper shadows while exposing down, ignoring the camera exposure recommendations.
I worked from the side, avoiding the ugly sponsor backgrounds that plague public events. I shot from the side, from behind, and off the stage I walked about I asked questions about the outfits. Turning my back on the stage.
Every frame was intentional.
There was zero spray-and-pray here. I was looking for closefor frames that stood on tehir own.
I took candid photos of dancers playing between sets. They were taking photos of each other with tehir phones, but I was taking photos of them. Avoiding the sterile posing they are used to doing at public events.
When I did photograph the stage, I used methods like slow shutter speed to show movement. Tight view to draw attention or to place people or objects in front of the lens to frame the subject. Sure, you could bring a zoom or a wider lens. But forcing myself to stay at 85mm created a difficulty that made me look harder.
Fearless Shadows and rich edits.
I shot for shadow and I edited for it. I used presets and film looks I know work and create natural drama like Kodachrome 64. I did not fall for traps like canking up shadow sliders.
The deep frames mixed with avoiding front stage views, going behind the stage, where no one was taking photos, and focusing on creative compositions, combined with often slow shutter speeds, create movement that also makes the photos feel more alive.
Instead of thinking like an event photographer. I thought more like a street photographer. I thought it was an interesting exercise, and the principles from this can be applied to any event, wedding.
Get out of your comfort zone and just watch what happens.