Lightroom vs Capture One for portraits!

The topic of Lightroom VS Capture one comes up a lot.

I am a little bit of an expert since everyone one of my Lightroom Develop Presets Packs also comes, and a Styles Pack for Capture One Pro and I’ve been using both for many years.

I’ve compared various things about Lightroom and Capture One and I have the main video for 2022 that compares Lightroom VS Capture One in a wide sense so you can decide which one is best for you.

YOu can even try the edit yourself with the RAW file below and the free lightroom preset and free capture one style I’ll link below. You can also share your results on the Shadow Hunters group post for this.

Try it – Download the RAW file for today’s test here.

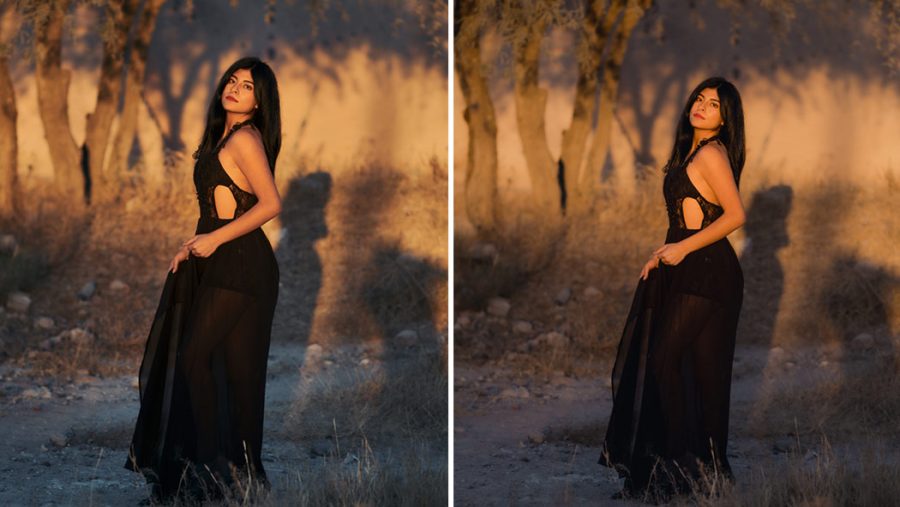
So today is about a simple portrait edit. BUt not really an easy one because of the tricky light. This is a perfect test to see how we use Lightroom and Capture One in the real world for a great portrait edit and which one offers the best features.

Both edits are clean and have gentle differences from Lightroom to Capture OnePro

Download the Portra 160 Preset/Style I use in the video for FREE in the FIlmist Mini Pack.

Watch the video and see side-by-side edits and some tips for editing great portraits in both.

Lightroom is a little more initiative and has better Ai tools. Capture One is more nuance and control. They are close!

In the end, both are good and both have their advantages. But watch the video and I’ll show you some ups and downs. Whether you use Lightroom Classic, CC, or Capture One Pro 22, you can get great results and we’ll see them in today’s video.

Let me know which one you like best and why, or if there’s another app you favor for your RAwe editing, I’d like to hear about it in the comments.

Related Posts...

Inspire your photography using modern pictorialism instead of high-tech!

Inspire your photography using modern pictorialism instead of high-tech!

Why you should Stop using White Balance Grey Cards. Here’s what they don’t tell you.

Why you should Stop using White Balance Grey Cards. Here’s what they don’t tell you.

Make your camera an Xpan digital panoramic and change how you see the world.

Make your camera an Xpan digital panoramic and change how you see the world.

Speed Masking just got upgraded and even works in Capture One!

Speed Masking just got upgraded and even works in Capture One!

Tell me your thoughts....

Leave a Reply


Your email address will not be published. Required fields are marked

{"email":"Email address invalid","url":"Website address invalid","required":"Required field missing"}

About the Author

Glad you're here.

I'm from WA State USA and started studying photography in 97. I started work as a pro (using that word loosely because I sucked) using film at age 16. I learned fast but was not as easy to find training then. Sometimes I beat my head against the wall until I figured stuff out.

As digital dawned I went all in and got to study with masters like Ken Whitmire. In 09 I founded the Pro Photo Show podcast. I started promoting tone-focused editing. When Lightroom arrived, I started developing tools to make editing and workflow better.

20 years of study and photography around the country earned me a Master of Photography (M.Photog) from PPA. I got to see my workshops and tools featured in publications across the industry. Once I even won the prestigious HotOne award for my "EXposed" light and tone workshop.

Wanting something calmer, I moved to Mexico in 2017. It's a land of magical light. I'm here now exploring light and trying to master my weak areas. I make videos of that for my Youtube channel, sharing what I learn. I hope you'll stick around and be part of Light Hunters Tribe... Gavin

Gavin Seim

>