Should stop buying Canon cameras, or is this fine?
Canon just pissed a lot of customers off. I don’t think it will make them more money in the end. We have a lot of Canon uses here and I was a huge Canon guy for years. But we have a problem and I want you to tell me what you think.
Companies may be able to make products that “prevent” customers. Like by killing lenses such as the Viltrox 85mm. But ignoring your customer can be a fatal mistake.
That’s what Kodak learned before they went bankrupt in 2012!
A lot of you know me for Lightroom presets, Photoshop actions, and Capture One styles. But you may not know that long before that I had the photo podcast and even now I do a lot of non LR/PS videos on my YouTube channel.
Kodak is perhaps one of the greatest marketing lessons in modern history. They were KING of moments for a century. They invented the digital Camera. Then tried to snuff it. By being out of touch with their market, Kodak fell from nearly 150,000 employees in the 80s and 16 BILLION in sales in 1996, to Bankrupcyin 2012..So how does that relate to Canon?
I’m going to talk about that AND show you why the expensive lens is not always the one you need in today’s video.
Imagine how the course Photoshop would have been different if they has locked of us creators, plugin developers, and third-party partners in the name of the intellectual property. You would not even be coming here for my Lightroom presets.
Since I’ve commented on Canon for many years and seen this arc. The truth is Canon is no longer king and they are lashing out! So I thought I would make a video and share of a few of those stories and what has led us to this Canon fiasco. I hope you’ll share your thoughts in the comments here or on my channel.
Respecting customers is first.
I don’t have a Viltrox lens myself as of writing this. But if you use my products you know that despite being a one-man band, I work hard to make sure customers are happy. Because without customers your intellectual property, your marketing. your tech is pretty much useless.
There’s nothing wrong with Canon cameras. or third-party lenses What’s wrong is Canon! Now Canon is about to find out if their customers will allow themselves to be treated this way.
I’ve been thinking for a while about how to make today’s video. People keep asking me for an overview of my tools but I’ve wanted a way to make that video useful, even for those who don’t have any of my tools or who just use my free tools.
What is Native editing?
This is when you use the tools already in your app like Lightroom instead of plugins. It can mean presets, actions, or all manual. And usually, it’s better because it uses all the engineering built into your favorite app.
Today I’ll show you why native editing in Lightroom, Capture One, Photoshop, and the rest is usually better than a plug-in and how to decide what kind of edit to do.
But I’m also going to show when you need to go beyond LIghtroom and a RAW edit and go to Photoshop.
There’s a lot of confusion on this and I get questions all the time about what native tool to use, why Silver 4 presets or when to Use Blackroom, Filmist, Lumist etc.
So Why do you need Photoshop?
I’m covering this more in the video. But where LIghtroom and apps like it are RAW converters. They are fast, you can copy and paste settings. You can batch edit. That’s great
You really can’t do that in Photoshop. Actions speed things up rapidly, but you can’t just apply settings from one photo to another or import a batch and edit on import. The difference is that in Photoshop you can do high-level refinement on your best photos. The keep is knowing how to use your RAW converter and your pixel level; editor like I show in the video.
There are a lot of ways to achieve your goal in photography.
I think the best way to get there is to know your options and most importantly to start making your editing plan. You need a system in place that guides you thru your own process each time.
I hope you found today’s video useful because I want this editing approach to make sense. If you have feedback just leave me a comment and I’ll see you next time.
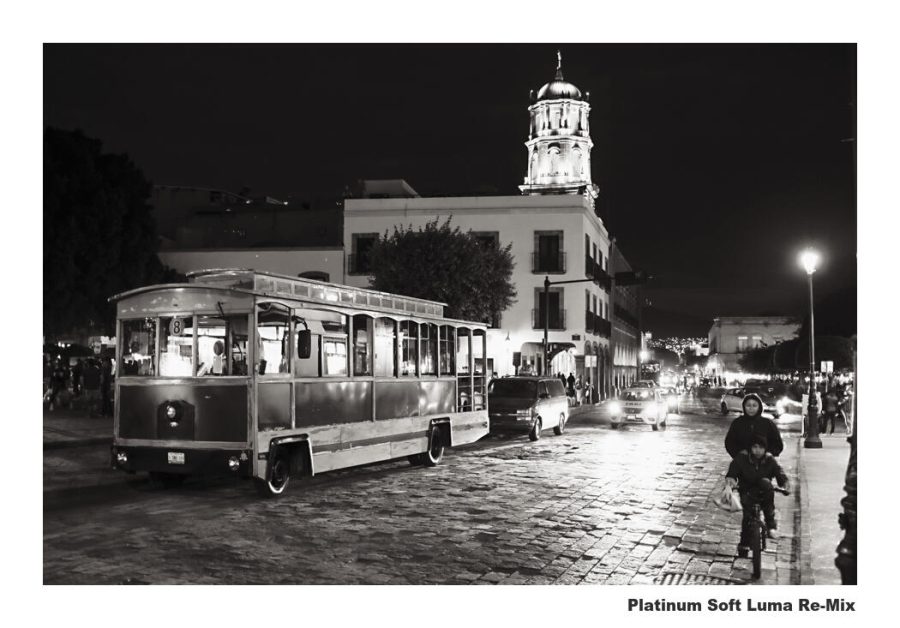
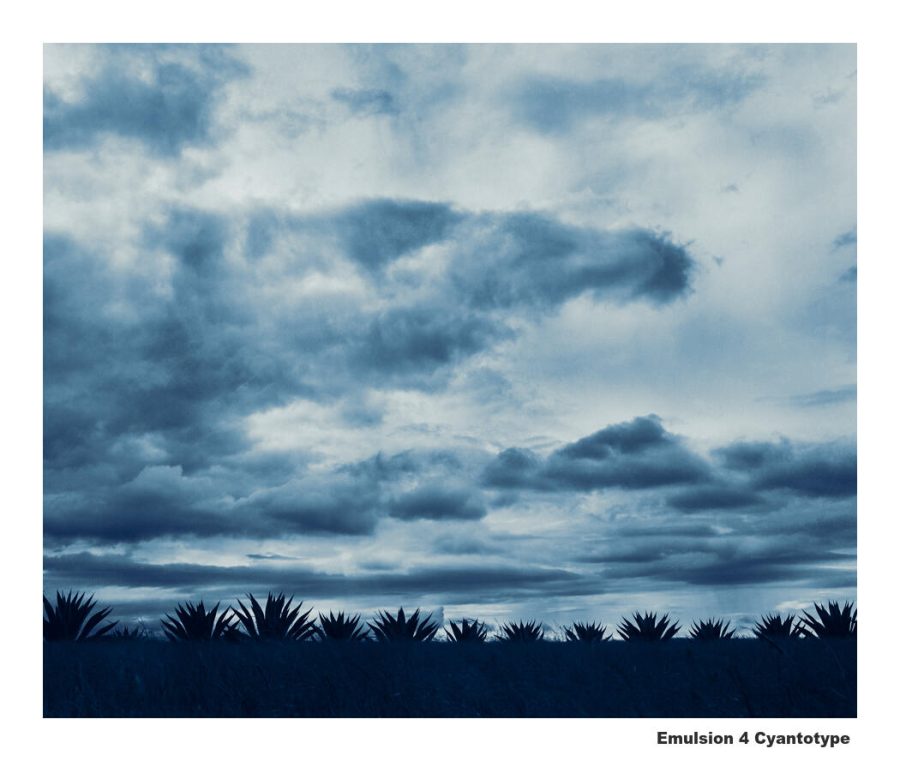
Platinum, Cyanotype, Colldoain, and Seleneum are all inside the Emulsion 4 darkroom actions pack.
Emulsion 4 has been out for a week making dakroom actions easier than ever. Now I made a complete series on how it works and how to create amazing effects with them. And I finished the Emulsion 4.1 update which brought even more refinements including my new favorite Platinum mix based on very finely made soft platinum prints from the darkroom.
A lot of people avoid actions because they don’t want to use Photoshop even though they have it. There missing out because there is no easier way to use Photoshop. The experienced user is more creative and saves countless hours while the new user gets advanced effects simply and learns more along the way.
Emulsion takes completed layer mixes in Photoshop and makes them easy regardless of Photoshop experience level. But I’ve been listening. People have been saying, Gavin, we want more detailed videos So for Emulsion 4, I just finished a complete training series and uploaded it as a playlist on YouTube.
There are videos on installing Emulsion 4 all the way to advanced user guides that show you how I like to each use of the chemical emulsion in the action pack.
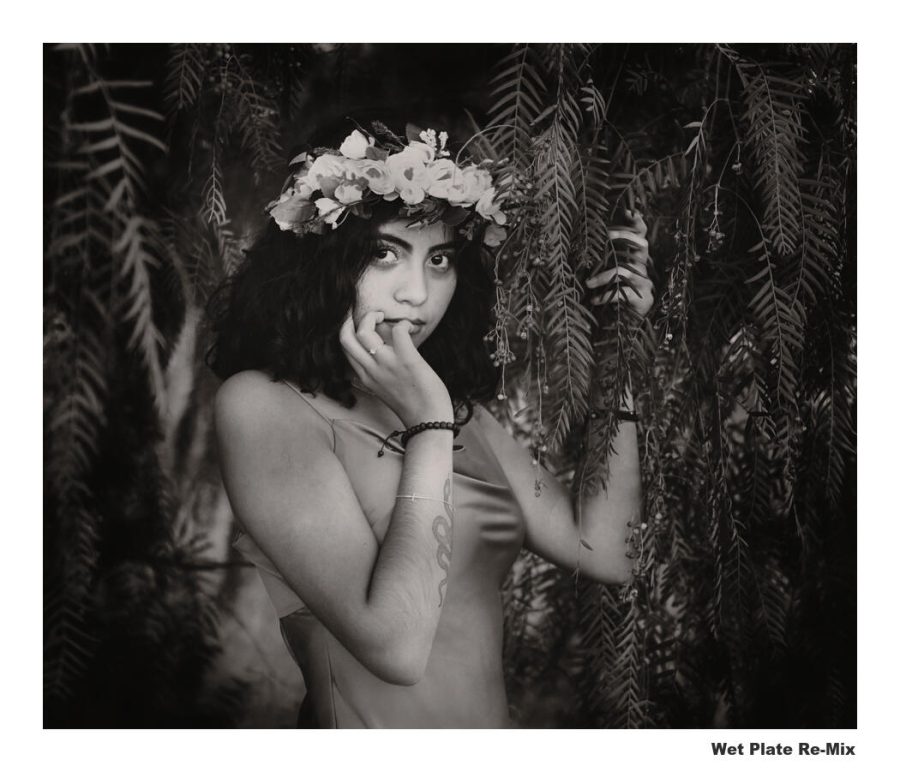
There is a separate video for how to create Cyanotype, how to manage all the PLatainum Palldidum effects, how to use Selenium toning for digital, and how the Wet Colldoain effects can be mixed in many ways.
The main thing to remember as you use EMulsion or any of my other actions like Blackroom, Lumist, Naked Darkroom etc. Is that I develop these to make complex tasks easy, not take away control like so often happening in plugins.
After every action, you have all the layers and all the control. If you are not very experienced in Photoshop it’s fine, just use the look as you see it and gradually start playing with layers. If you are experienced, the sky is the limit and you can tinker more. Either way, you’ll save a ton of time because Emulsion 4 is doing the hard work for us.
Please leave a comment and tell me what you think of Emulsion and this training format. Or tell me what videos I need to make to add to this playlist. Either way I’m here tp help you with Emulsion 4 so you can creat amazing chemical tones photographs.
Selenium toning was an important part of the darkroom that nearly every photographer had used. It also translates well to digital and that’s what I’ll show you today. It’s great because it’s easy to make understated. So I created it as part of Emulsion 4, next to Platinum, Wet, and Cyanotype.
Even if you don’t use my Emulsion actions you can recreate this yourself using tone layers. First let’s talk about you should discover this magical chemical. I’ll add a bonus Emulsion 4 video at the bottom of this post to show more about how I’m doing these advanced tones that shift with tone value as they did in the darkroom.
Selenium was one of the most popular chemical baths for a darkroom. But it’s little known to the digital world.
Unlike early-era processes, such as Collodion Wet Plate or Platinum. Darkroom Selenium toning is a little more subtle. Of course, you can push it harder. But in a low state, it tends to make black-and-white photos seem more black-and-white with a natural coolness that feels less like an effect and like like a perfect print.
When to use Selenium on digital
In Selenium Toning you bathe a black and white print in a Selenium bath after the main print is made to balance color casts and make it richer. A chemical print often has a slight cast depending on how it’s processed. That’s often balanced out with Selenium.
Yes, we can use true neutral monochrome prints on digital prints. But adding light selenium can actually make your digital prints feel more like a darkroom print because it’s such a classic look from the darkroom.
Selenium works great in artsy kind of projects as well as in classic clean black and white prints. This is a mild application with a slight warm shift selected from the options in the Emulsion 4 easy layer stack.
Make your own selenium look.
My Emulsion actions make an easy-to-mix layer stack that makes it easy, But you can make your own too. Study what color tones you want to use like I did in my actions and use a tone-limited layer or a gradient map so you are getting a gradual application of color tints that changes acres your tonal range like it did in the darkroom.
Bear in mind that the color grading tools of a raw processor like Lightroom can get this general look. I included a Selenium tone for example in my Silver 5 presets. But what I’m showing you here with layers in Photoshop gives a more refined and rich result.
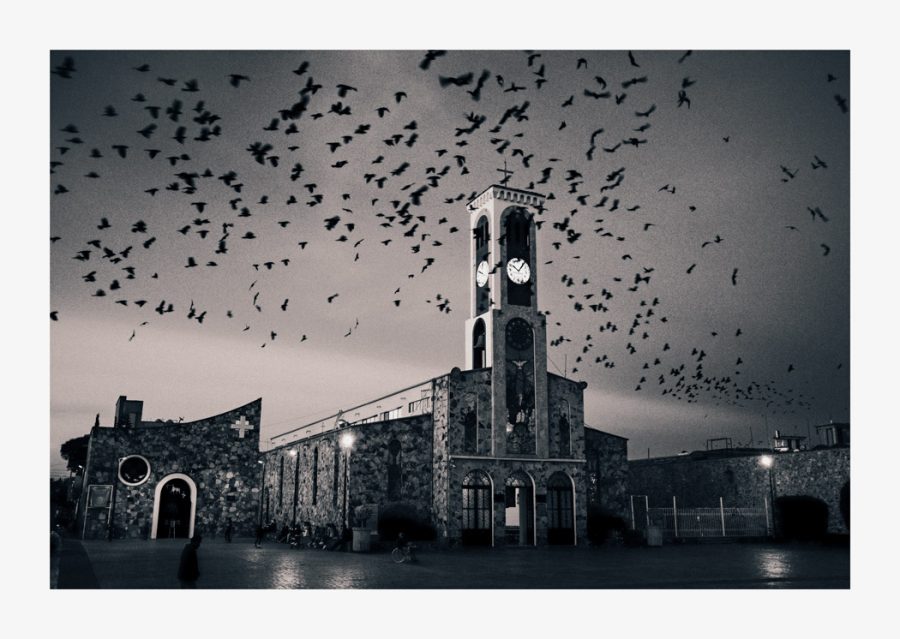
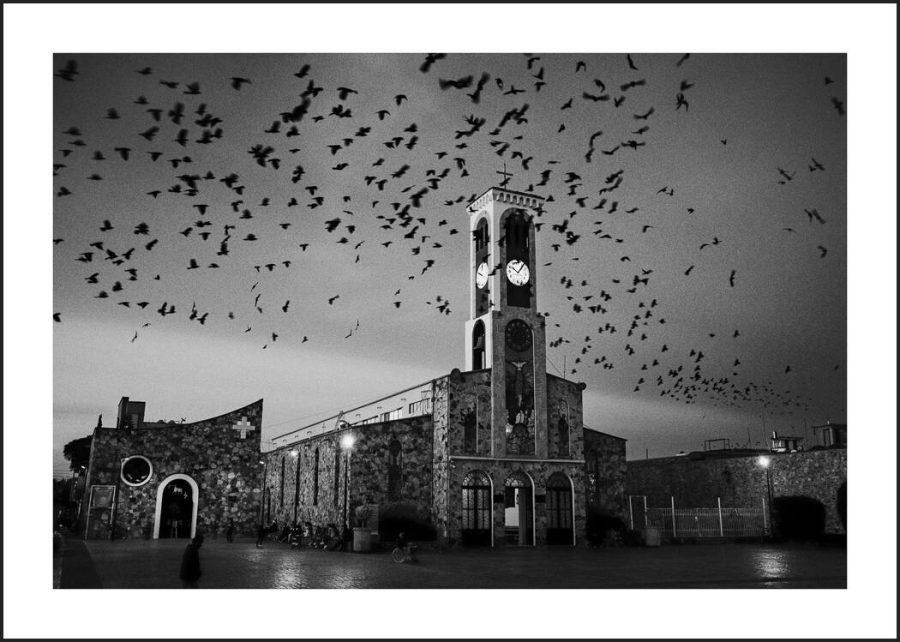
I’ll show you various examples here of harder and softer applications of selenium toning on digital files. Don’t be afraid to add your tones AFTER you add the border, as I did above in the bird’s photo. Since we print on pure white paper most of the time, this can add a more authentic, classic feel to the final image as in the darkroom bath the entire paper is involved.
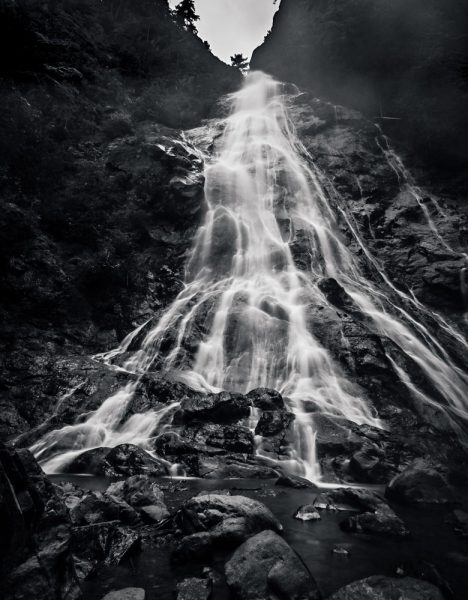
Here I pushed harder in the master tint, with the Gold Bath option is added to simulate adding real gold to the process in the darkroom.
These photos can be silent or bold depending on you!
What’s cool is that the tone from it can be so light that it may not even be seen as a color effect, like in the photo below. You know it’s there only because it’s side by side. Selenium can be used as a color effect, or as a simple final process like this that still feels like a monochrome process.
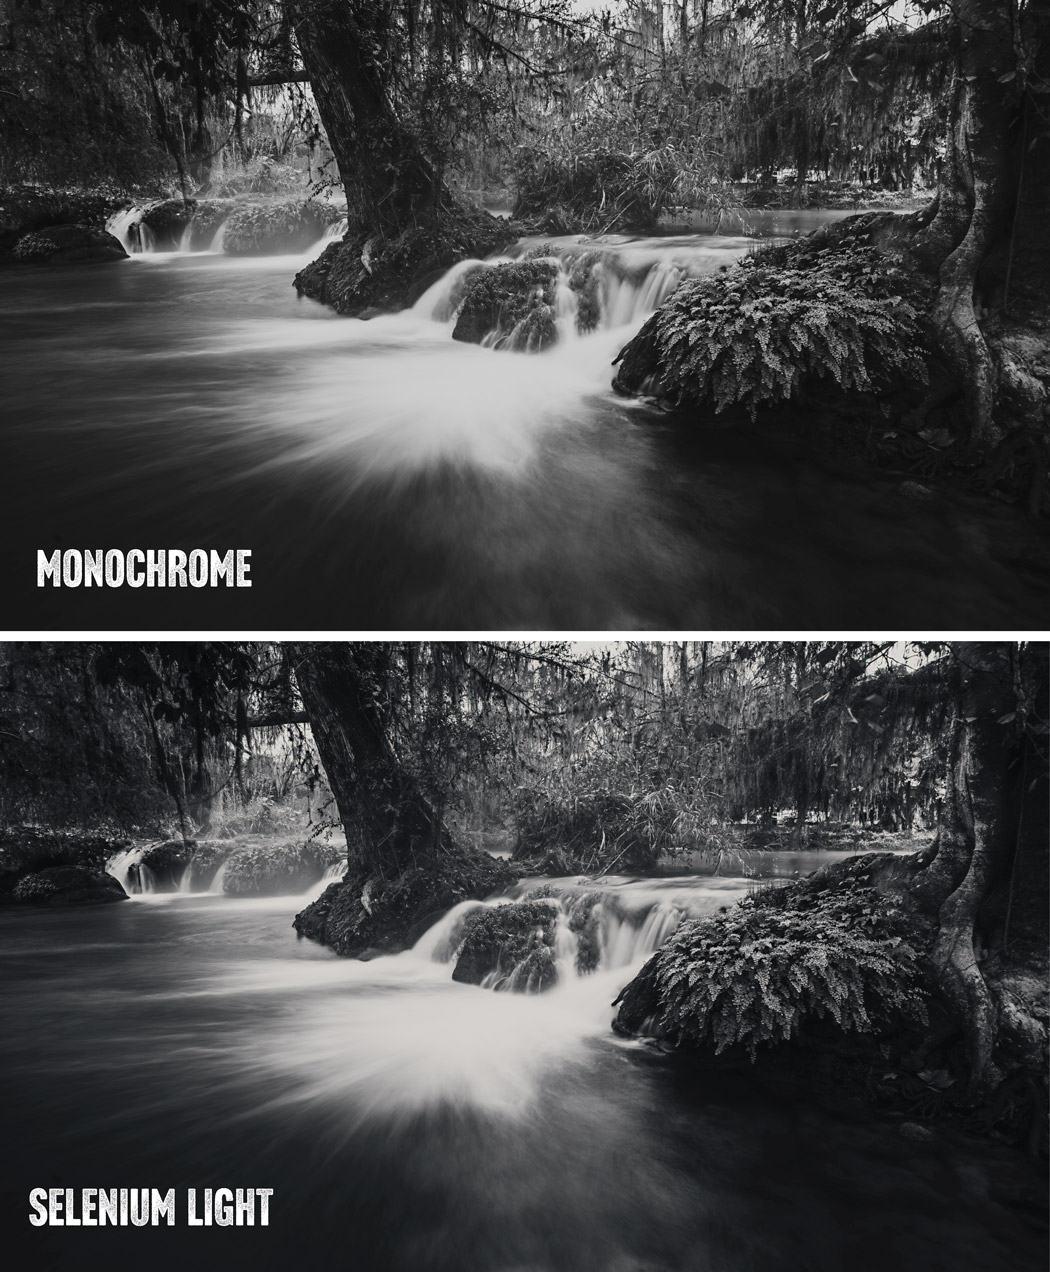
Cooler, warmer, neutral. It’s all there with Selenium.
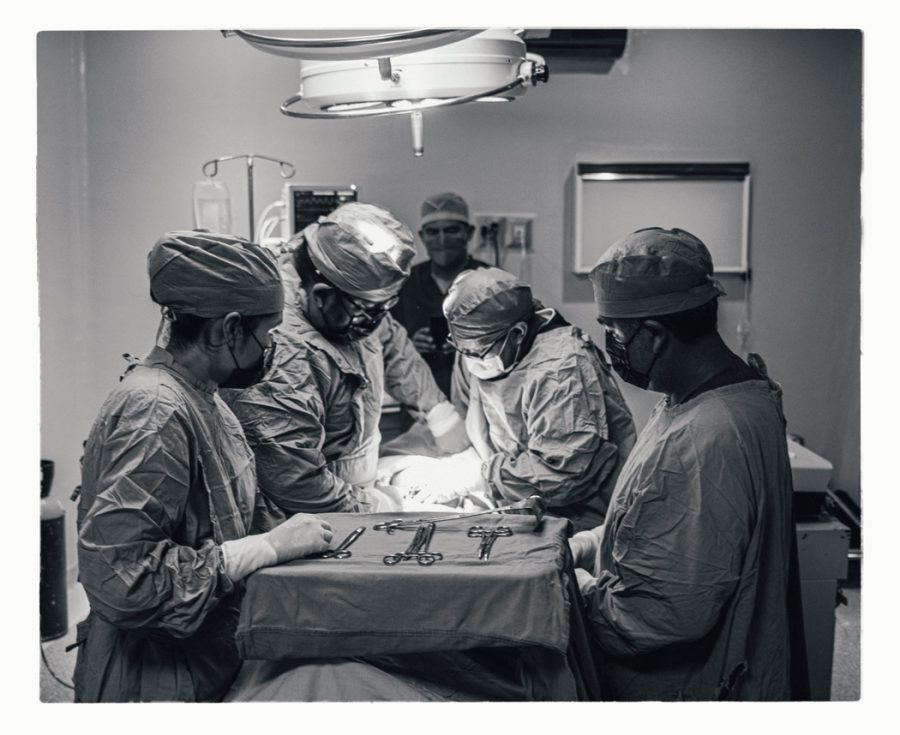
The top image seems slightly toned, but it is monochrome. The bottom is a light application of Selenium tone from Emulsion 4 emulating around a 1:20 bath ratio. The slight natural blue almost makes it feel more like a true B&W.Surgery room, Mexico. The warmer selenium 1:5 option provides a more noticeable tint without being overpowering. You can see here I added the tint after the border was applied from Naked Darkroom
It can make your black and white feel more real.
Some darkroom photographers use Selenium on every print as aside from its toning benefits it gives longevity to the print when used in the darkroom. It’s common in the darkroom, so when you see a Selenium black and white print, it might feel more like a real black and white because for many years it’s been a staple in the finishing process.
At a glance, the bath in Emulsion 4 may just seem like a light blue tone. In reality, it goes much deeper. That’s why I thought it deserved its own post here. I wanted to show why the Selenium bath is so useful to improve your black-and-white photography.
The same photo from the Surgery but with a classic process that does not warm. It’s just there and you don’t really think about why.
How I do Selenium tone edits with Emulsion like I show in the video.
The ability to print a true monochrome from a digital file is great. It can also be a little sterile. So when I had users of my products asking about Selenium Toning in Emulsion, I did my research to get it right for Version 4. It’s a process that changes based on the type of bath, and the ratio, and that has options often used in the darkroom like mixing the Selenium with other chemicals to get different hues and looks.
Selenium affects the shadows first and less in the highlights but these things can vary depending on how you process the print. So in Emulsion 4, I tried to stay true to that. The ability to quickly alter settings of the Selenium digital effect allows us to replicate that look and adjust it as low or high as we need using the master tinting tool in Emulsion 4 actions.
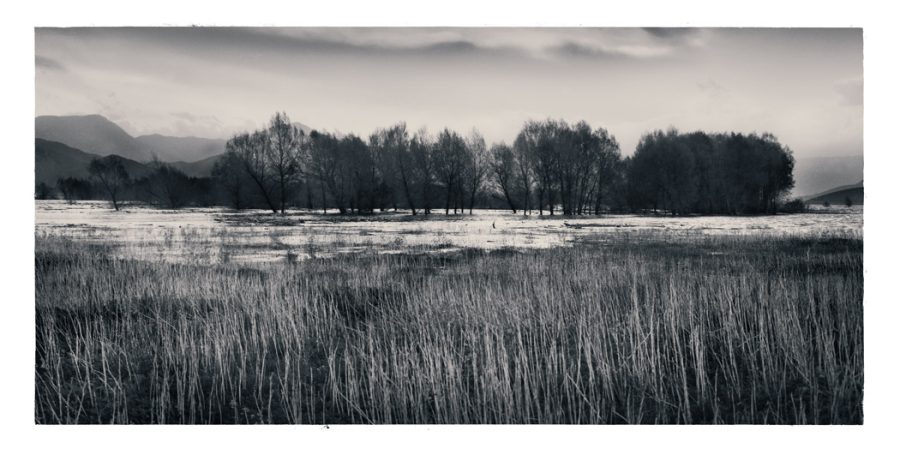
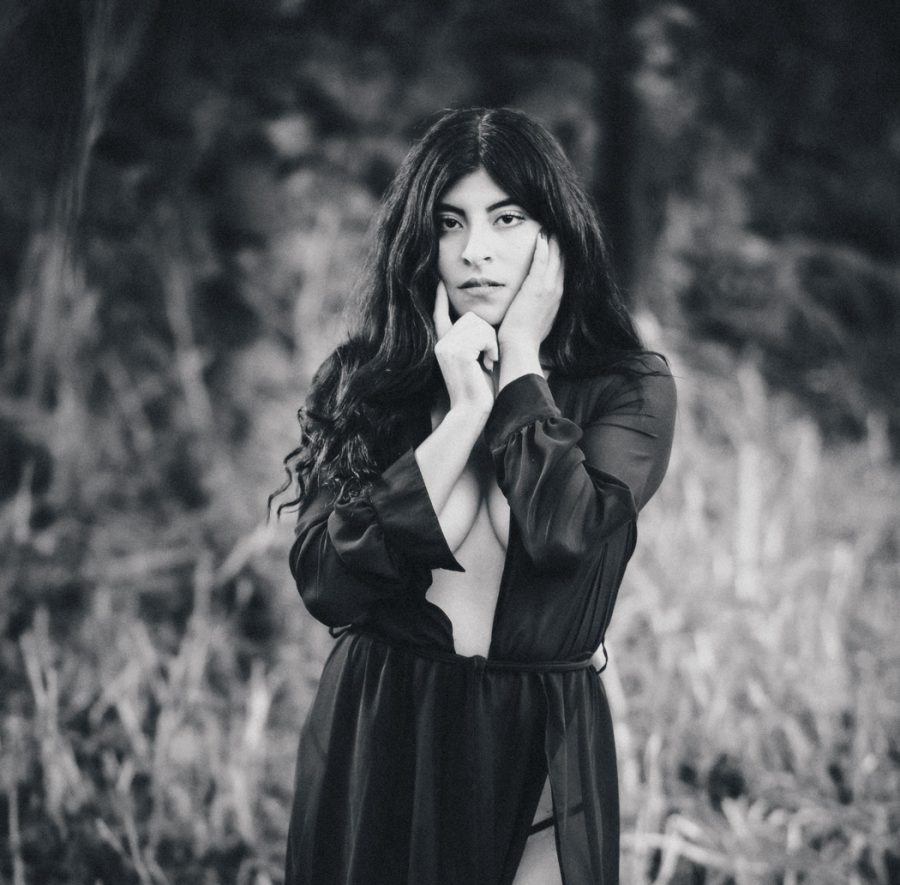
Here I used the 1:5% ratio mod. You see this brings tones more into highlights as it represents a stronger bath. I added a natural border from the Naked Darkroom texture to finish the presentation.A light clean bath in this portrait with the main tone layer at about 40% and the paper softness option turned up a little giving a natural Selenium tone that still feels black and white. Many love Selenium for this reason.
Selenium toning can also be a tinting effect in its own right.
Selenium is also popular in adding contrast. In EMuslion 4 actions you can even add a tone thinner which adds contrast and pushed highlights more as we get in a darkroom.
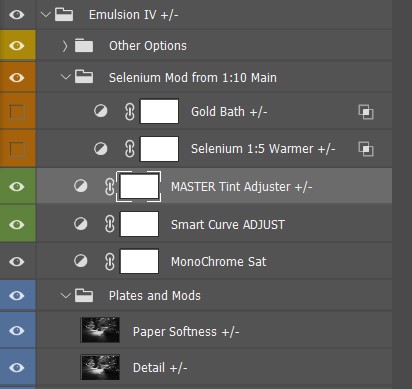
The layers in the main Selenium effect of Emulsion 4
Using the tone tool can quickly adjust the layers to like in other effects make the Selenium process lighter or heavier, emulating darkroom mixes and times. Paper softness lets me emulate a more matte vs contrasty process to infer an older paper.
I can also run the texture action to get paper-type looks. Of course, I can disable these for a more neutral print and retain a pure tone if I want to use a specific digital pepper for a certain look.
At times Selenium effects can be almost imperceptible, only used for the smallest tone or to add contrast while maintaining a pure black-and-white feel. Like in the darkroom, you can push in up or down using the options and mods in Emilsuon 3 and quickly get anything from a tiny adjustment to a bold Selenium that’s bluer or even mixed with other hues that replicate for example a stronger ratio or even gold mixed with the print during the process.
Don’t skip the toning that most people don’t even know is there.
Another light process of the base tone. It just looks black and white but the natural cool tone brings out the contrast.
As always the goal of Emulsion 4 actions is not to forget about the rich darkroom processes but to learn from them in how we create digital prints and images and honor the legacy that we have from the darkroom.
I hope you enjoy the new Selenium process and please let me know if you think it’s lacking in any way. Like all the looks in Emulsion from Platinum to Wet plate, I am always improving the tool. There’s a good article on Darkroom selenium tone prints and some of their variations here.
However you apply selenium whether it’s the slightest touch or a heavier warm tone, I think you’ll find this addiction to be not only authentic but very versatile for our black-and-white photography.
Keep making stuff and here’s another video of how I use Emulsion 4 to get various platinum and darkroom chemical looks. You can get my Emulsion pack here for Photoshop.
I work a lot in black and white. I love its emotion and simplicity. But what makes black and white amazing? Let’s find out!
Also if you use my black and white master tools like Silver 4 presets and Blackroom actions you’ll also get some get bonus tips here. But no matter how you do your black and white photography, this video is going to help to improve your black and white
These are the 3 biggest tips I’ve discovered to make to black and white photography that makes people say, wow that’s amazing.
I loved black and white since my early days as a photographer. But I can’t tell you how many times I’ve struggled with the fact that the iconic black and white photos make the ordinary look incredible in black and white.
My years of creating tools to edit black and white have been a big part journey in finding solutions to make iconic black and white a common occurrence in my work. Today I’m going to share what makes black and white photography stand out.
The Birds, Balckroom actions final black and white edit ready for IPC competition.
Those of you on my shadow hunters list know the bottom line. If you want great black and white, the presets, the actions, the styles the app. They are all just means to an end. The key isshadows.
But today we’re going beyond shadows and looking at what hides behind those shadows that create iconic complex atmospheric black and white. The kind they make within the film in the darkroom.
Watch the video and let me know if the comments what you learn.
Gavin Seim
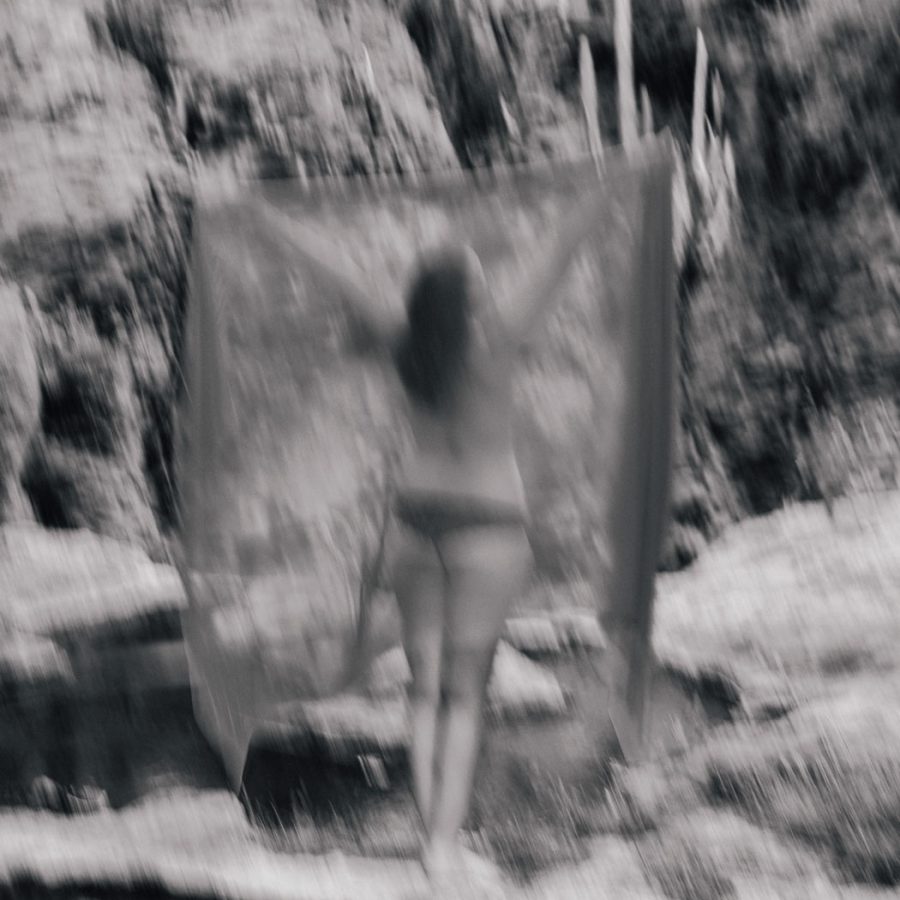
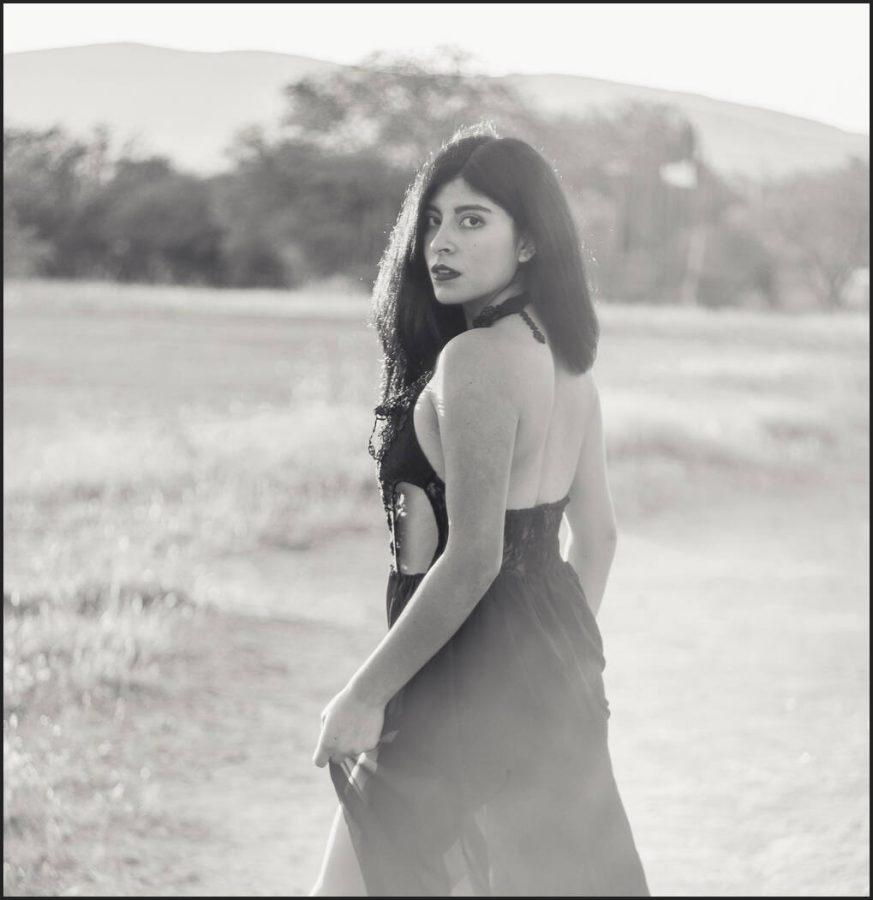
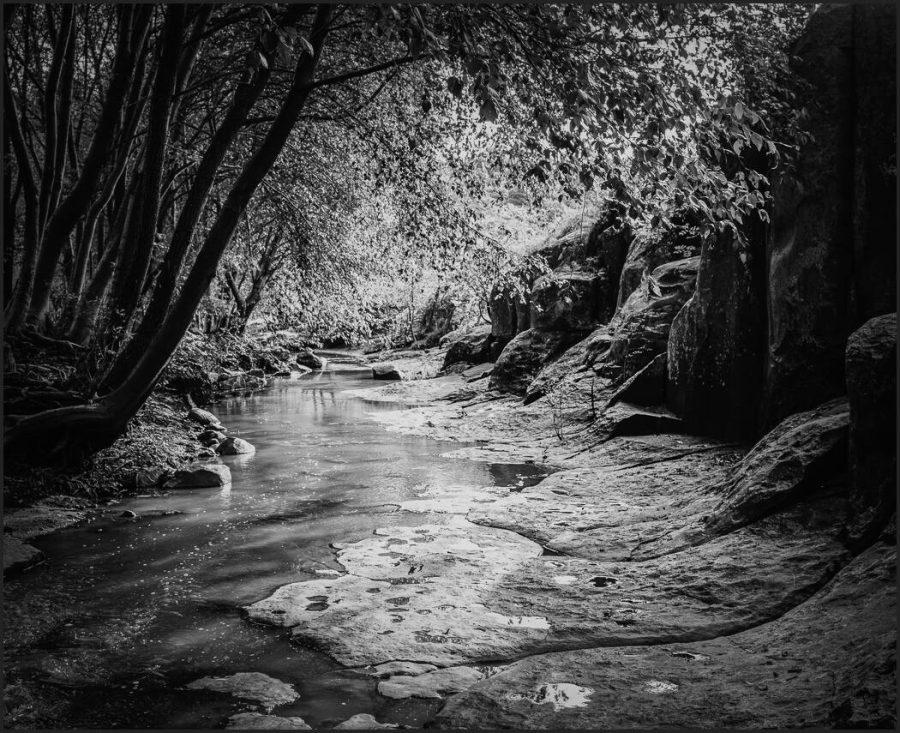
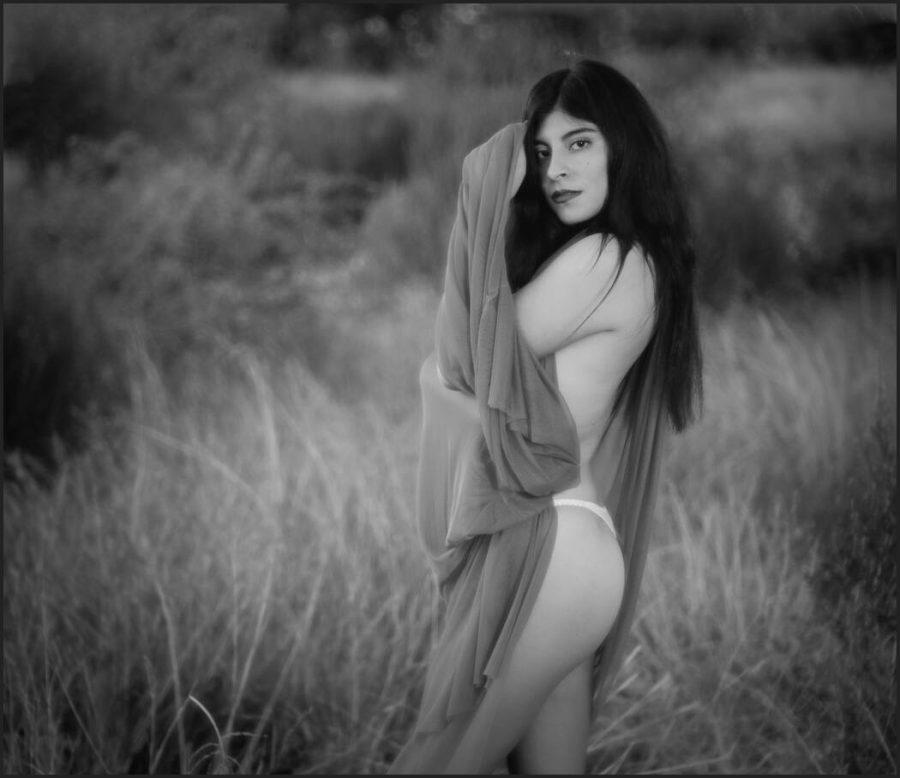
Model in Mexico Ivanna – Helios 44-3 lens with Silver 4 Lightroom only edit.On the river in Mexico State, edited in Blackroom to increase atmosophere. X100vIvanna, Model, Mexico. Helios 44-3 Lightroom and Then Blackroom actions for final edits.