By Gavin Seim
I’m amazed how often the control of light and dark is ignored in today’s photography. Our tools are more powerful than ever, but most images lack the subtle tonal control that made photographers like Ansel so famous. Such control is essential to making an image look as good as it can.
“Tone” may be the least understood and least utilized factor in composing and finishing images.” That’s a quote from master photographer, Ken Whitmire. He’s eighty-two and one of the world’s most renowned pioneers of wall portraiture.
I wrote an article called 5 Essential Keys to Photographic Perfection on Pro Photo Show. One of these keys is arguably the most important, and that is tonal control. Lights and shadows and how they look in the final image are critical. To best achieve them, you should have a “visualization” for your final image and be a master of essential tone control elements.

An image can look good with just a quick global correction process, but not nearly as good as it could be with proper tonal control. It starts in camera as you see the scene in your mind’s eye . The way you expose and set up your image can control those values. The best way I have found to see this in my mind is by using the Zone Scale (see Fig. 1).
For example, a perfect light is splitting through the clouds and shining on your subject. You expose for the subject’s skin, visualizing it for Zone 6. Perhaps that bumps the foliage and other elements (the supporting cast) of your scene down to Zone 4. That could be perfect because it makes your subject dominant. Perhaps the light is more even, however, and to achieve that visualization, you need to do tonal corrections later to bring that foliage down to Zone 4. It could be done in many other ways, but you get the initial idea. For an in depth look at Zones check out, Why You Need the Zone System for Digital.
Following are three things to watch for when visualizing and mastering an image to control tonal values. If you understand and apply these principles at every step, your images will improve by giant leaps. Follow through on tonal values and your images will sing.

1. Expose For Tonal Value.
I mentioned the zone scale above. While the zone system was an entire system that applied heavily to film, that does not mean the concepts of zones and visualizing are outdated. In fact, I’ve found nothing better to control tone. If you don’t understand the basics of the zone system, at the very least, read the wiki entry to get you started.
A camera, even in spot mode, will meter whatever you point it at, placing it in Zone 5. That means middle grey. But that does not mean it’s the correct exposure, and our cameras and meters don’t really deal with that. A light element like a white rock might be a lit brightly, say Zone 8, while a darker elements like the shadows of the tree might be darker, like Zone 3. To expose perfectly, we need to compensate, using Zone 5 as the basis but then moving our exposure up or down to place the element being metered in the zone it rests in, or the zone we want to place it in.
The bottom line is that exposure is not an absolute, and your camera can’t do it all for you and nail it. You have to expose based on what zone you visualize the element you’re metering to be. Otherwise you’ll always be compensating later, and that reduces image quality. See the Six Keys.

2. Channel Process for Light.
So once you have that great exposure, the next step is a good process. Depending on the light in your scene, there may be elements competing for attention with your subject. These must be controlled, and it starts with the process. Now basic settings like contrast and other global adjustments can help, but it goes far deeper than that.
First, you can help control tones using curves. This controls existing values. For example, lightening the shadows, darkening highlights, etc. Also, the color channels can vastly effect where two different elements are placed and can be altered in most editing software. I use LR for this, and these elements are used extensively in my preset collections to control tone.
But let’s say you have green trees in a scene that are not your subject and a red stone face that is. Maybe you exposed the stone perfectly, placing it at Zone 7, but the trees were nearly as bright as the stone. They are also in Zone 7, when you envisioned them in Zone 4. Using your channels, you can selectively darken those greens and subdue them closer to where you need them. Digital tonal value control can be invaluable.

3. The Burn & Dodge.
This is perhaps the single most under-used tool in the world of digital photography. If you say you understand the Burn & Dodge, yet don’t use it all the time, then you probably don’t understand it. Because once you do, you’ll use it on nearly all your best work.
Most images I see have not utilized burn & dodge as much as they could have to maximize their potential. It seems to be a bit of a lost art, perhaps because no plugin or software can do it for us. It’s not hard and does not take that long, but it requires the maker to have a vision for a scene and direct it themselves and not rely on tools.
Not everything can be done with global edits such as channels and the like. When all that is done, I burn and dodge, lightening area of an image to place them in the zone I envisioned. It can literally take a clutter scene full of competing elements and turn it into a scene with a dominating subject full of great supporting cast. You don’t always need to crop things out. You just need to control them.
Sometimes, I’ll burn and dodge with LR brushes. It’s fast and effective for basic edits. But for my best work, I’ll nearly always go into PS. Why? Because in Photoshop (yes, even in Elements), you can Burn & Dodge selective tonal ranges. This means you can darken only shadow areas, lighten only highlights, etc. This is a level of control early photographers did not have, and, used well, it’s like magic for manipulating light. No plugin or automatic effect can replace it.
I can’t tell you instantly how to burn and dodge, but it is something I discuss in detail in my HDR Magic, video workshop. There are also some other posts about it in the archives here at Seim Effects.
In closing, remember that Burn & Dodge is the last line, the final tool for perfecting your tonal values. With it, you can control where the viewer’s eye goes, how it gets there, and everything in between. Start working with it relentlessly, and you will soon master it.
There’s so much more that could be said on this, but I’m already well over a thousand words. I’ll let you go and work with it and share your successes and ideas in the comments.
Gav


Good article Gavin, thanks.
Nice article 🙂
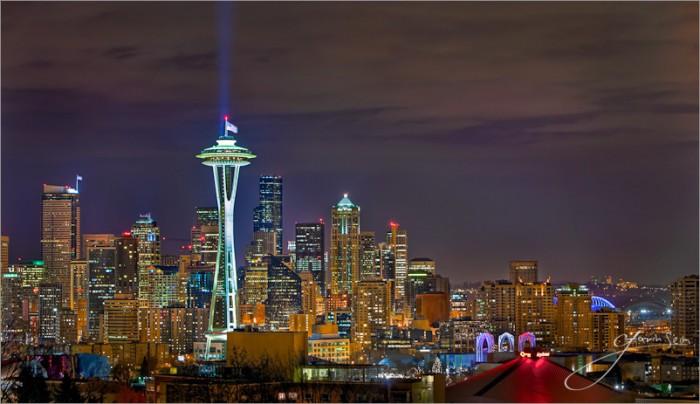
If you don’t mind can you share the location you were in when you took the Seattle skyline.
Thanks D. As to Midnight Seattle. All the details on that image are on my journal… http://f164.com/midnight-seattle-nightscape/06/2009/
Thanks mate 🙂
Now a days not many people are willing to share the locations of techniques with others.