November 5, 2008

by Gavin Seim: I had a call recently from a photographer who lost all her preferences, settings and actions because of a crash. For some reason Photoshop lost all it’s preferences and went back to default. The thing is, PS is not meant to hold all our settings permanently. You need to have them backed up. The key is being prepared so when something’s lost, you can take it in stride. Today I’m going to tell you how to do it. Remember that once you’ve stored these settings, re-loading them is as simple as double clicking the file. Click the images to get larger illustrated views as we go along.

1: Give Them A Home:
First, decide where you’ll be backing up your settings. Be it a folder on your hard drive, a CD/DVD or an offsite storage service. Wherever it is find a consistent place that will be separate up from your main computer should you have a total crash.

2: Archive your actions:
Photoshop is not a place to store actions. When you download a new action don’t just load it in the actions palette and expect it to stay there. PS will retain the actions so long as the preference to keep it loaded remains. Also deleting an action in PS does not actually delete the file, it just removes it from the action palette. As long as you have your action files safely stored you’re good. But, if you load an action, and then delete the file expecting PS to retain it forever, your doom is sealed.

I like to make a “favorite actions” set that I store with my other actions. This way all my commonly used actions are in one set that I can load fast. I keep it in PS all the time, but it’s backed up should I have a crash. My other actions are nearby as well, but I load them only occasionally since all my favorites are in one set. You can do this by making a new action set (folder) within PS, then drag your favorite actions into it from other sets, then save your favorites set in a safe place.

Read More

October 12, 2008

I want photography to always feel like play, even though I’m getting paid to do it. Often what separates work from play is how we think of it, and changing how we think is not always easy. Good photographers are photographers because they love photography (say that three times fast)

As a professional photographer with a growing business, I often find myself needing to step back and review. What, how and why am I shooting? Obviously I want to to make a living, but in the hustle the stress of keeping clients thrilled I can forget that I’m doing a job I love, and start thinking all business. Being paid for something you love doing is a real blessing, and many of us have worked/are working hard to attain that.

I think it’s easy to get burnt out if you don’t try new things. When you get burnt out that means you’re less creative, and passionate about photography. Both you and your clients suffer for that.

Lately I’m turning to nature and landscape. If I MAKE time to go and just shoot, I relax and start to think about my work. It breaks the mold and helps me learn new things that I can apply to my “real” jobs. Sure I sell my nature photography, but I don’t really make any money from it. It’s just my way of slowing down remembering what a beautiful world God has built around me and that I became a photographer, not to worry about how much money I make per hour, but because I love photography.

Not always nature. A few minutes ago I went out in the backyard with my wife and shot portraits using only my 50mm 1.4. It was a way for me to experiment and learn, but without deadlines or requirements. Once I started It was really fun and my wife loves the attention; double win. The problem is that often I put such things aside because I feel I’ve been shooting more than enough with other jobs.

Maybe you’re with the crowd who’s not trying new things, but should be. Or maybe your somebody who doesn’t easily get burnt out and can stay relaxed. Or maybe I’m just a stress case and nobody else deals with this. Speaking of relaxing, I’m off to call a square dance. Relaxing doesn’t always have to be photography you know 🙂

What do you do to stay inspired, relaxed and on your toes? Let’s hear it in the comments.

by Gavin Seim

Read More

September 26, 2008

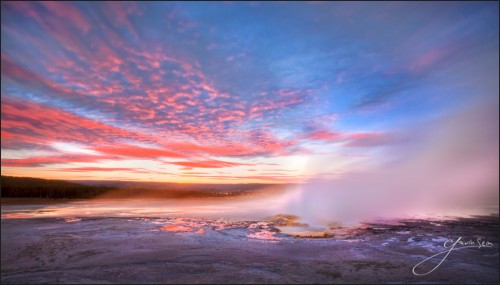
Ghosts of Clepsydra Geyser - f164By Gavin Seim: (updated 09/11): I often hear from photographers asking me to look at their work and tell them how to be better photographers. In ten seconds I can usually tell them how to improve because we often overlook simple things. There’s nearly always something we can improve, no matter how much experience we have.

Most rules are universal to photography of any style or any experience level. Of course these rules are meant to be broken, but general concepts help us stay on track and we should only break rules for good reason. These are some tips I keep in mind with my own work. Hope they give you a few reminders. When your done here some join us in the forums to get some personal feedback. OK let’s roll.

  1. One primary subject. If you have more, you’ll have distraction.
  2. Omit needless objects. Getting them out will clean up your scene.
  3. Slow down. Many images are ruined because of RTC (Rush To Click).
  4. Tonal control is essential. Use the Zone Scale, Burn & Dodge.
  5. If a background detracts from your scene, change or carefully blur it.
  6. See Light. Where’s it coming from, how can you use it.
  7. Learn the rules photography. Then you’ll break them for good reason.
  8. Don’t just center things. Use the rule of thirds & others. They work.
  9. Eyes. Watch close, keep them sharp. They hold emotion.
  10. Use the Magic Hour. Around sunrise/sunset, light happens.
  11. Keep it sharp. Watch your shutter speed & subject movement.
  12. Space is valuable in a frame, keep clutter away with comp & tonal control.
  13. Harsh sun can be bad. Learn to manipulate it and find good light.
  14. Shadows are critical. Without them the light gets ignored.
  15. Great images start in camera. But don’t underestimate careful editing.
  16. Use fresh ideas, but also go for those old reliable images.
  17. If the weather is foul, it doesn’t mean the photos will be.
  18. Lines lead the eye. Pay attention to where they go and intersect.
  19. Change hours. Different times of day will transform a scene.
  20. Think about shadows and dimension. Flat light is usually boring.
  21. Motion Blur can be very powerful, but use it carefully.
  22. Take time to really LOOK at your subject before releasing the shutter.
  23. Study. Photography has 150+ years of history. Go learn about it.
  24. Remember… Slow down, refine, simplify. Analyze your scene.


seim-bridge-600x400
This award winning image has a lot going for it. Notice the balanced intersecting lines, bold colors, and simplicity of the scene. It leads the eyes and tells a story.
Focus Blurring was an effective tool here. The light at the ceremony was great but I wanted the focus on the couple. I used a Lensbaby to give me the soft edges and then some work in post production to make the viewers eye go right where I wanted. The blue could have also been done in post, but I enjoy the Lensbaby.
Silver Waves of Grain: Motion blur was used heavily in this 5 min+ exposure. This gave a ghostly feel to the fields and clouds, completely changing the feel of this scene. Then detailed tone work was done to add depth and dimension. You can click the image to read a detailed article on f164.com about how it was made.
Watch the details. Look To the Wind, is one of my early (and more recognized) HDR portraits. The space gives it a bold cinematic feel and the simplicity of the deserted beach adds strength to the scene. Looking back however I could have watched my lines more. The way the horizon cuts at the shoulder is not ideal. It's still a great image, but if I was doing it over I would try being higher with the camera for an even more powerful composition.

Over 5000 Facebook Fans say it best. Seim Effects Tools set the standard.

Use Promo Code PPS to save 15%

Read More

September 17, 2008

by Gavin Seim: With the introduction of Lightroom2, we got localized corrections with brushes for neat things like exposure, brightness, clarity etc. I made some pre-designed brushes for Burn, Dodge, Skin Soft and the like. Nothing fancy, just simple functional brushes.

Download Gavin’s FREE LR4 brush presets here –

– Watch an install video in the Elegance Brushes Demo

  • How to install LR Brushes…
    Adobe has not made a really simple way to import the brushes, but it’s not that hard. Just follow these directions. This is a bit of a workaround. I’ll update it when Adobe makes an easier way. I’m on a Mac, but it will be basically the same for you Win users. Shortcuts are in parenthesis, and remember you can click any image for a big view.

Step 1:
Go to your “Develop”  module (D) and open your presets panel on the left. Right click on one of your develop presets. This will bring up the contextual menu and from there click “Show In Finder” or on a Windows machine it should say something like “Show In My Computer”.

install-lr-brush-presets2.jpg

Alternatively, you can get to the presets storage folder by simply going to Lightroom Preferences (Settings) then to the preset tab. Click the button that says “Show Lightroom Presets Folder” (see image below).

Step 2:
Now you’ve brought up the folder that contains your develop presets. Now that we need to back out of that folder to it’s parent folder. In the parent folder you should find the “Local Adjustment Presets” folder. Simply drag, or paste your brush presets into the “Local Adjustment Presets” folder, then restart Lightroom.

install-lr-brush-presets3.jpg

install-lr-brush-presets4.jpg

Step 3:
When your back in Lightroom you can simply go to the “Develop”  module (D) and select the “Adjustment Brush” (K) Click the the “Effect:” menu/drop-down. You’ll get the brushes drop-down and inside you’ll see a few defaults, as well as the new brushes you just added.

install-lr-brush-presets5.jpg

install-lr-brush-presets6.jpg

It’s that simple, using this method you can download and install brush presets to your hearts content. You can also save your own brush presets from the same menu.

Read More

August 7, 2008

wordpress-logo.png

Note: There’s are web designers who will build WP sites. While I don’t offer web design services myself I do offer consultation by the hour for those that need advice or want to manage it themselves. You can find that here.

By Gavin Seim. Updated 01/10: With a Word Press site I can probably do anything you can with your site and more. It’s a good platform with great add on’s and it’s easier for me because I have control. I can pick from thousands of free themes on the net, mod them how I want and get my own look.

Besides Pro Photo Show here’s a few of my other sites built entirely in WordPress.

Word Press is a platform that many bloggers use. Many photographers use it for their blogs in fact. What many don’t realize is how much of a content management system WP is, and how good it is for building a complete photographers website. It’s like the simplicity of blogging, but for your entire website.

I use it on all of my sites and can make my blog and website all one. I like that integration a lot. Images can be posted equally easy on static pages or blog posts via your online admin panel. Flash or HTML slideshows can easily be made in Photoshop, or one of my favorites ShowIt Web, and embeded right into the pages for my galleries.

Here’s some thoughts on using WordPress for your next website. Besides the fact that it’s FREE.

  • 1. Ease
    I could go on all day about the cool things you can do with WP. It’s not just function, it’s simpicty. Granted to really customize things you either need to be willing to take the time to learn, or simply get someone who’s a web geek. As an example. I can start with a theme, and build a good looking site in an afternoon. After that making changes is only a web browser away, and can be done without much experience. It’s so much more powerful than a traditional HTML site, and far easier to manage than a flash site.
Read More