DXO is working overtime to get influencers to talk about Photo Lab 9. They all imply it’s a Lightroom Killer! I declined the partnership, and today we’ll do a real-world torture test.
Can Photo Lab 9 Beat Lightroom this year?
I’m gonna be hard and honest today. Because I’ve been reviewing this for 3 years running, and DXO has seen my reviews. So I will hold back nothing on whether they fixed the failings.
You can download a trial of Photo Lab Here. You can get my free Filmist sampler pack and you can use the LUTS in Photo Lab also. You can get my Alchemist 3 Actions here. Also Click here to download the experimental test presets I made for DXO Photo Lab.
DXO Photo Lab 9 has Ai masks now. Are they good?
As you’ll see in the video, I had a lot of trouble getting masks to work due to errors despite using current drivers and a high-end 3080Ti. This seems to be a common problem, and even after downgrading the driver, DXO glitches at times. But hopefully this will be fixed soon.
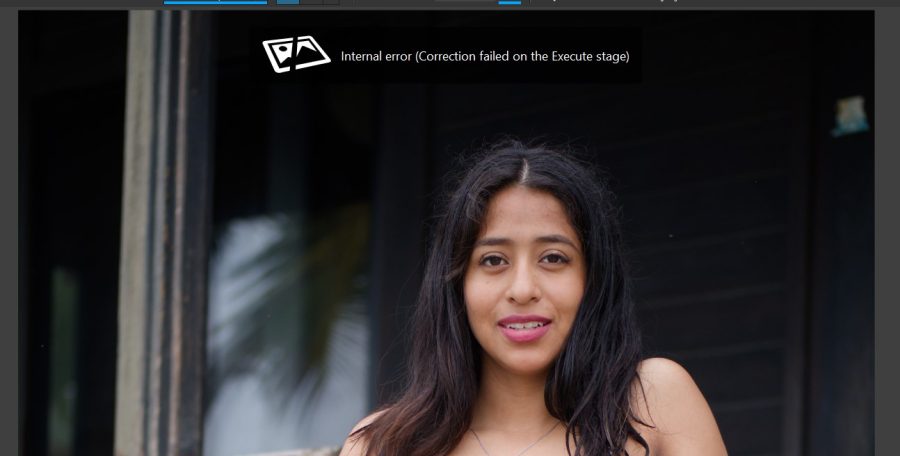
Once working, masks seem pretty good. Lightroom overall seems better at subject detection. But DXO is not playing. The U Point style masks are also handy. Capture One also has this type of masking also, but Lightroom has to stay within predefined masks.
That said, Lightroom does have things like clothes. So I could do the same edits on both, and overall, Lightroom was faster and felt more full-featured in what I could do with the masks.
The biggest problem with masks, aside from stability, is the limitation of presets, meaning you cannot save them as Speed-Masks like I show you with Elegance presets, in LR and C1. In practice, you have to do a mask each time or manually copy and paste settings.
But I do give a nod to the new masks feature. It just needs tuning.
The Biggest Problem with DXO Photo Lab – Quality
Aside from lacking features like compare, a good collections system, Split Toning or grain (unless you buy extra add-ons). The biggest problem is the image processing engine of DXO.
As in years before, it takes moments to find and totally break it down like we see here and in the video. Other things can be overlooked by many. But the inability to rely on good IQ with basic tools like HSL makes DXO Photo Lab NOT a serious choice for professionals despite being just as expensive as other options.
I have 25 years of experience. I was there when all these apps started, and I know what a good process looks like. Until the RAW process engine is fixed. DXO is a non-starter for me. And this is now the 3 year running that they have ignored this problem.

DXO Photo Lab Noise Reduction and more…
Yes, Nouse Reduction is good in DXO It’s known for that. It really is better this year, and even advanced modes can render in-app, and you can see the full quality, not just a loupe view like before.
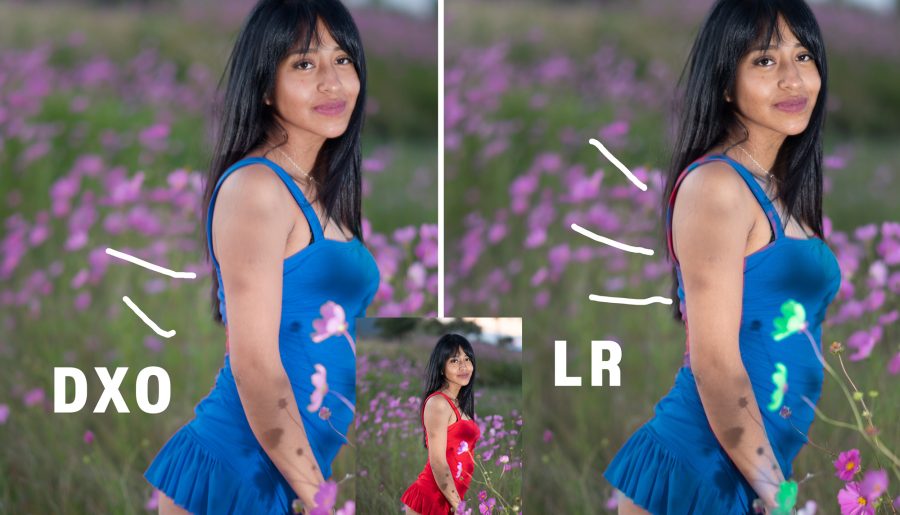
IN the videos side-by-side tests, you can see it is equal to Lightroom, and some may say better because it has various modes and even an Xtrans option for Fuji users. Though in real lifeLightroom handles Fuji files just as well. Check out this post for more on that.
In practical results, they are equal. But the extra options are useful. There are also various sharpening, detail, and of course, lens correction tools, and DXO is known for doing well in all of these.
In practice, Lightroom images held their own to DXO without problem and despite the noise reduction in DXO, which in not for the artifacts introduced by its own RAW engine. In some images detail was worse in DXO than in Lightroom. But in many photos it was equal.
Conclusion…. Can DXO Photo Lab replace LR or C1
If you’re a professional with high standards, absolutely not until they fix the process engine.
If that were fixed, it has a lot of potential. Only it still lacks many features. There are some tools on DXO that don’t exist in the other apps like DXO Smart Lighting. But more tools do not always mean better editing.
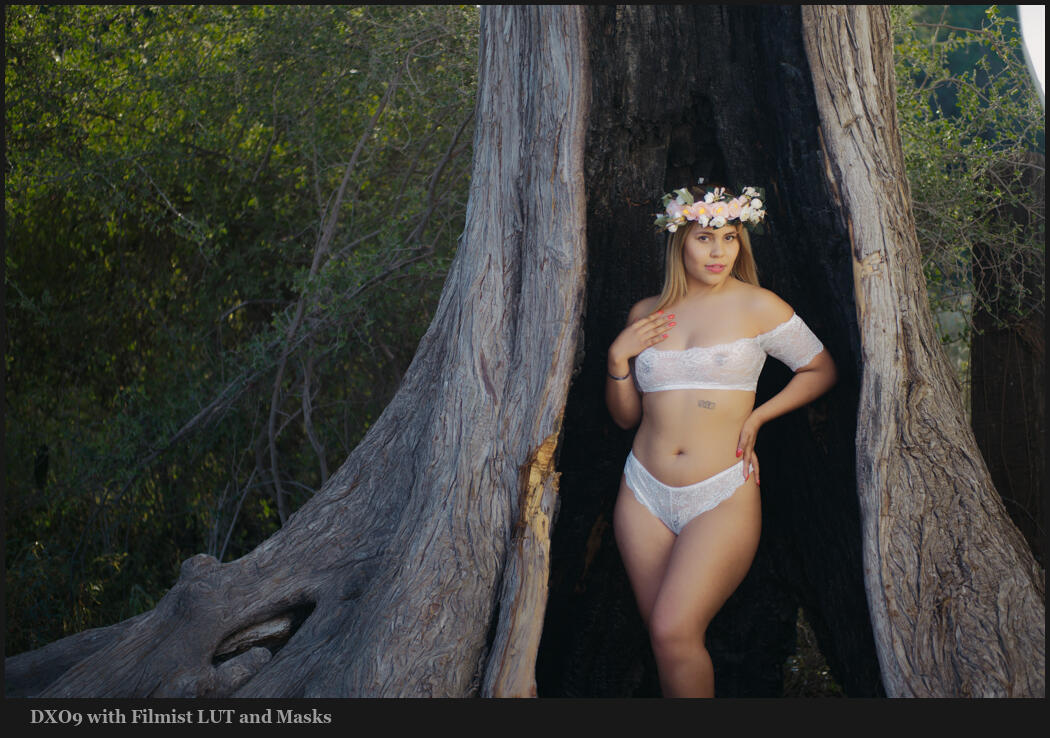
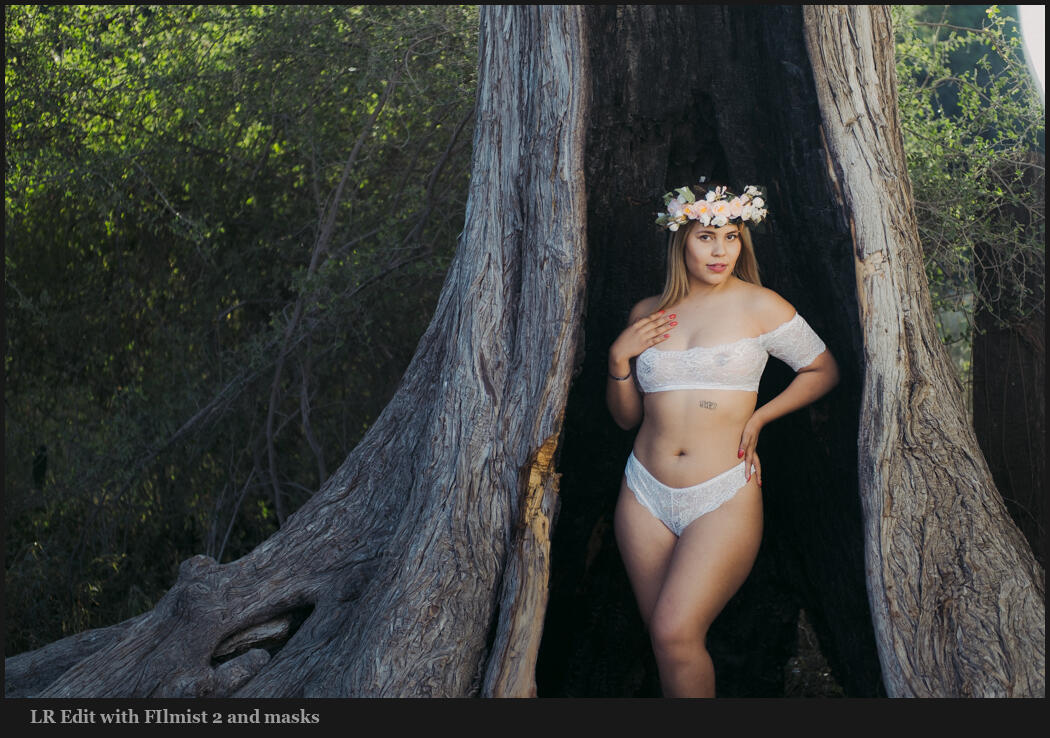
If you look at this image edited in both, they both look good. But despite having masks and even being able to use film looks as LUTS, my options in refinement were more limited in DXO.
I should mention Speed. Like Lightroom Ai masks can bring even a strong system to its knees.. No catalog can be good for speed. But I find it annoying that the constant reloading and re-rendering of previews, even on images I just used. So simpler, yes, better. Not exactly.
A perpetual licence. Sort of… While you can buy it outright. It should be noted that it’s not a true perpetual licence, because it has to check in with DXO server every month or so. Clippy would disapprove.
But I think the bigger question is why DXO Photo Lab? It’s not cheaper, and it lacks many features compared to Lightroom and even Capture One. The only reason to choose DXO that I can see is to support the small guy. But DXO still does not feel like the small guy, because they continue to ignire feedback.
Until the basics we mentioned today are fixed, I could not recommend it even for amateurs, as they will get frustrating results that are simply not a problem with Lightroom, which also has more features, a great mobile app, etc.
Tell me your thoughts in the comments — Gavin Seim
None of this video or post was generated or scripted with Ai.