February 25, 2011

by Gavin Seim: Updated 11/22/12. There’s a lot of confusion out there about resolution as it relates to making prints, so I want to help clear it up. I make mostly large prints and spend quite a bit of time studying factors that effect my image quality. Often I use a 5D MK II, which is 21MP. I also use 4×5 film because of it’;s vastly higher resolution. It scans in at closer to 200MP. But to start with lets use an average 18MP file as our example.

First let me say that digital has a long way to go in terms of resolution. Today’s camera’s are amazing, but lets get a perspective. Ansel Adams did much of his work on 8×10 sheet film. It’s hard to compare film to digital exactly, but using a good film he probably would have had a rough equivalent of around 400 million (mega) pixels. This makes our digital cameras look pretty paltry at times and it’s one of the reasons I’ve started working with 4×5 film for some of my projects, as it can give me  200+ effective megapixels when scanned (more of that on my pictorials website).

Say we have a full size file from a Canon 7D. The resolution of that file would be 5184×3456 pixels. About 18 mega pixels (roughly 22x less than that 8×10 film). Our file comes in at just over 11 x 17 at 300 PPI. Note that PPI and DPI refers to Pixels Per Inch or Dots Per Inch (a printing term). For today’s purpose I’ll refer to it as PPI as it’s becoming the more common term.

First and foremost, PPI and actual file resolution (or pixels) are not always the same. For example I could take our file in Photoshop and set the size to 30×20. Unless I told PS to Resample (or increase the resolution) of the file, the computer would now see this file as a 20×30. Only now it would show as being just over 172 PPI instead of 300 because the pixels have not changed or increased, which means there must be less pixel per inch when printed at that size – It’s still an 18MP file. I’ve just told the computer it’s larger in physical print size. What really matter however is if you have enough overall resolution. Here a screen capture to show how I was changing PPI. The PPI on each is different, but the pixel quantity is the same.

So what if I printed this file as a 4×6. I’m not sure why I would want a print that small (see the wall portrait article), but bear with me. At 4×6 our 18MP file would print out at just over 860PPI if we left it at full resolution. That’s a lot since most human eyes can’t see any difference above 300PPI. Bottom line, my file has more than enough pixels. Printing with that extra PPI won’t hurt anything. Though depending on the printer, all that information may not be used.

Why does all this matter. Well mainly so you don’t get confused. PPI has relevance in sizing and printing because it can quickly tell us something about how good our print will be. That brings us to larger prints and how this all relates.

Click for larger view – Gavin’s 30 inch canvas, Bull of the Mist. This a medium sized print. Taken in early morning at ISO 3200 made the detail on this slightly less, but it was needed for shutter speed. As you can see, the detail is good, but not flawless. The canvas helps give it an organic art feel. This was made from a file that was 5464 x 2732 pixels. It was up converted to 9000px wide before print. More about this image here.

Resolution VS Large prints.
This is where things get subjective. I’ll speak from my own experience as I regularly produce prints 40 inches and beyond. With our 18MP file we know we have plenty of information for a baby print. What about a serious print meant for the wall. Lets look at that 20×30 again. Lets go into the “Image Size” box of Photoshop and changing the file dimensions to 20×30, without altering the resolution as I did above. I left Resample un-checked which means I changed the print size but not the amount of pixels in the file. We’ll now have 172PPI at a print size of 30×20. Are you getting it? This is telling us how much information we have to lay on paper in terms of real life printed pixels – 172PPI is not bad. Most peoples eyes can probably see a bit more detail than that, but the print should still be good.

Read More

January 22, 2011

Click To Listen>> Photography Podcast. PPS #74
Review in iTunesVote on Podcast AlleyDirect Podcast Feed

Today’s Host... Gavin Seim.

Today we’re going in depth on digital quality and the Six Keys to Image Quality. Gavin discusses what he’s learned about getting down and getting the best image quality possible from digital files.

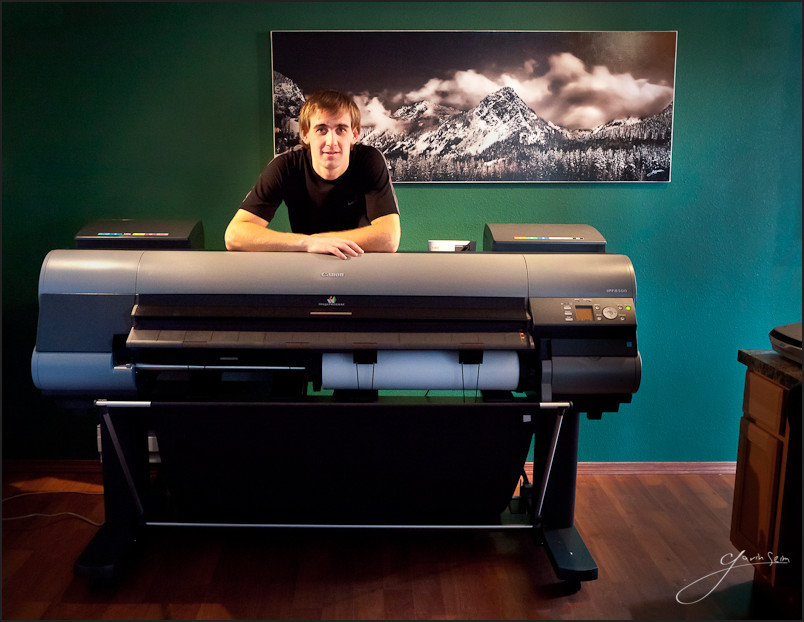
Gav with the new printer. The image links to the post about it.

Podcast #74 forum discussion:

Notable Time Indexes:

  • 00:00 Introduction. The Challenge
  • 07:05 The Six Keys to Quality.
  • 26:07 Editing Process in depth.
  • 29:18 Film resolution thoughts. More process.
  • 49:05 Thoughts on cameras, sensors & lenses.
  • 51:23 The new printer. Canon IPF8300.
  • 56:52 Picks of the week (links below)
  • 59:20 Coming workshops and closing thoughts.
  • 1:04:32 The after show.

NOTE: The Pro Photo Show Christmas contest winners will be announced soon. Stay tuned.

The Six Keys to Getting Great Image Quality.

The Fuji X100 looks really good.

A look at RAW vs JPEG.

File degradation article.

Read More

December 20, 2010

The folks Nik Software always give PPS readers a discount, but 12/20/10 thru 1/03/11, their having a bonus Christmas special on nearly all their products. Just use promo code: PPS and get the discounts listed below. If you’re finding this post after the sale ends, you can still use the PPS code for the regular 15% discount. Enjoy… Gav

  • Complete Collection Ultimate Edition $439.95 ($160 savings)
  • Complete Collection Lightroom/Aperture Edition $239.95 ($60 savings)
  • Color Efex Pro 3 Complete $224.95 ($70 savings)
  • Dfine 2 $74.95 ($25 savings)
  • Silver Efex Pro $149.95 ($50 savings)
  • Sharpener Pro 3 $149.95 ($50 savings)
  • Viveza 2 $149.95 ($50 savings)
  • HDR Efex Pro and Dfine 2.0 together for just $199.95 (a savings of $60).

Visit Nik’s website. Use code PPS for discounts.
Check out the Deals Page for other vendor discounts.

Read More

July 15, 2010

by Gavin Seim: Dynamic range is a big deal in photography and I’ve been making a point to study it over the past few years. Last week I joined Kerry Garrison on the CameraDojo podcast, for a new episode on HDR. In fact however, it’s not just a discussion of traditional HDR, but on all things dynamic range.  It’s always fun guesting on other shows (not to mention a lot less work) and I think we pulled together something good here.

Thanks to Kerry for having me. Head over to CameraDojo to give it a listen. Then stay tuned because there’s also a brand new PPS Roundtable coming real soon.

Read More

April 15, 2009

photo sofware promo codes

There’s some great photo tools and plugins out there and we all hate paying full price. To get you more bang for your buck Pro Photo Show has been arranging deals and discounts for you readers. We’re getting a nice collection of savings compiled in one place. I’ll keep

working on more deals and update this page with the latest. In the meantime you’re welcome to pass these along to your friends and help them save them some money too. PPS also gets credit when you buy using out codes. Know a company you think should be on the deals page. Email us, prophotoshow@gmail.com and we’ll see what we can work out.


PPS Discount Codes…

  • Seim Effect Tools. Save 15% Promo code: PPS
    Gavin’s simple and fast editing tools.
  • Topaz Labs. Save 15% Promo code: PROSHOW
    DeNoise, Adjust, Enhance and more.
  • Imagenomics. Save 15% Promo code: PPSIMG
    Portraiture, Noiseware and more.
  • Photomatix Pro. Save 15% Promo code: PPS15
    A favorite HDR processing software.

Read More