June 11, 2011

I’m going to talk about cloning today. On photo’s that is. I don’t know much about the other kind. Cloning, patching, retouching. Whatever you call it, it’s all about making an image as perfect as it can be. Really it’s been around since long before computers. I’ve seen an airbrush artist do the same thing we do with cloning, but directly on a print with paint. It’s amazing. But thankfully we don’t have to do that.

Thing is you can do almost anything with cloning. But that doesn’t mean it’s easy and it doesn’t mean you should. I’m a big fan of getting it right in camera, and sometimes it’s best just to leave things alone. But often the goal is a perfect image and there’s some things you simply can’t, or didn’t change in camera.

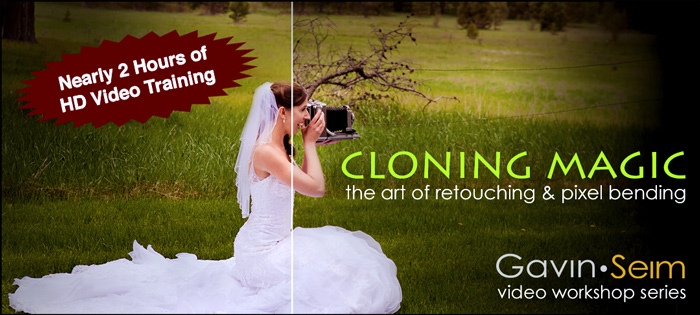
I have a new online workshop that focuses on how to make perfect clones and retouches and I thought it would be a great time to share some of my favorite tips on how to do it better. If you want more, check out my Cloning Magic Video Workshop.
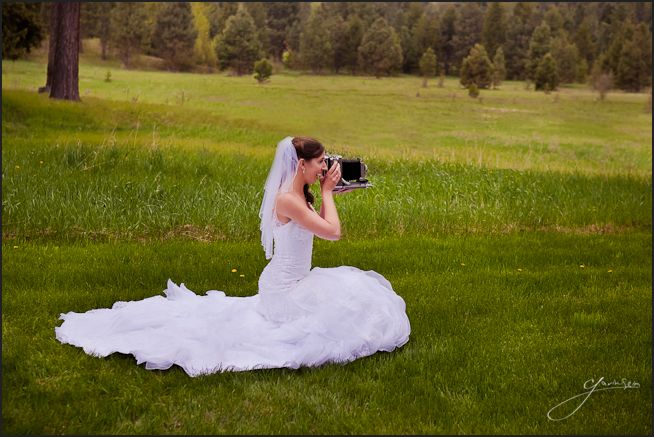
Mouse for before/After. I could not move the clutter in the field and time was fleeting. In post I thought of leaving it, but then though how much cleaner it could be and what a good exercise in challenging clones it would preset... Gav
  • 1. Visualize.
    Look at your image on the screen and consider and what you need from it. Then analyze closer for similar areas and information you can copy from.
  • 2. Make a layer.
    Never clone on your base layer, but a copy of it. This way you can mask in and out if your clone gets messy on and edge of you change your mind.
  • 3. Zoom Both Ways.
    Don’t be afraid to get in very close and make sure it’s right. Then for a broader scope, zoom out and make the image small on the screen. This is a secret to checking for halos or bad edges that can easily be missed when zoomed in. The mark of good clone is that it’s invisible to large printing and scrutiny.
  • 4. Change brush size.
    A soft large brush is usually where I start. Too small or too hard a brush can leave lines when you zoom out. That said don’t be afraid to change your brush size, not only to avoid pattens of sameness, but also to better work details. Large and small. Work it all.
  • 5. Try different tools. A regular clone brush is a good start. Even a Lightroom or Aperture clone can work well for basics. But no one tool does it all. Sometimes spot healing gives a more natural look. Sometimes the Patch tool nails it. Content aware fill and healing can also be perfect. Sometimes you need to manually brush color. If one does not satisfy you, try another. Good cloning is a process and sometimes it takes them all.
  • 6. The Final Cleaning. The best clones are usually refined. Do your main retouching, then come back and look again. Use the tools (sometimes at lesser opacity) to blend in areas, reducing blotchiness and repetitive objects. For example, you may have a clone with little rocks that match from somewhere else. To avoid repetitive problems, you can clone in a smaller patch erasing only one pebble of rock from the spot, breaking the repetition. Also watch for halo’s on edges and missed areas. again. It’s so easy to miss when you’ve been looking at a print for an hour.

That’s all for today. Have fun… Gav
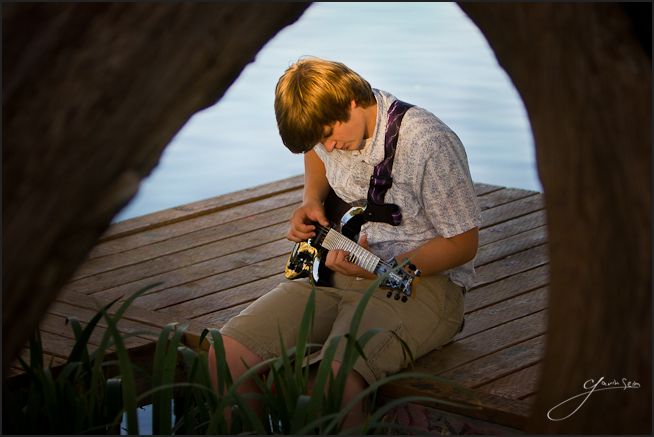
Mouse for before/After. This was more of a screw up. An older portrait, the client came back and wanted a wall portrait made. I had neglected to remove the crud from the dock and it did not seem to be adding. I did a lot of detailed retouching to remove the crud and make the image shine for it's 30 inch canvas... Gav

Check out Gavin’s video workshop…

Read More

March 20, 2011

You users been asking about these for a long time. The truth is I’ve avoided it because I really like teaching photography workshops in person, and for some, like my  Lights & Shadows workshop, it’s the only way to fly.

But reality says I have a lot of tricks up my sleeve that I can teach online. With that in mind I’ve decided to stop resisting it. Coming soon is an all new series of digital learning workshops. Separated into bite sized chunks, inexpensive, live and online.

It’s going to start with a Lightroom Power learning series. Workshops that start at basics and work into very advanced editing skills. You can pick the sessions you want based on your current skillset. Cool part is these will be about 90 minutes each and will only cost about twenty dollars. Spend an evening at the live online workshop, then take time to let is soak in before the next one.

After Lightroom I plan to take it further. I may even do a seasonal series. Focused workshops on things that seem simple, but can go so deep. Burning and dodging, cloning, prepping files for print. I’m getting excited because with this online format I can host a workshop on nearly anything, no matter how focused, because there’s no travel and no venue overheads to take into account.

Stay tuned for more details. Registration for The first webinars will be opening soon… Gav

You can follow the Facebook Page. All workshops will be announced there. You can also join the newsletter over in the sidebar >>

Read More

March 11, 2011


    So I’ve nailed down the second of my Spring workshops in CA. After Oakland I’ll be hitting the road down to Grover Beach Morro Bay area. I know the Pismo area is not a bustling metropolis, but I hear it’s an amazing destination and I think we could all use to spend a few days on coast. Lights & Shadows is on the 25th and 26th and we’re gonna go make some great images.

    There’s also room left in the Oakland workshops as of this writing. Hope to see you there. Please spread the word… Gav

    Read More

    February 17, 2011

    I’ve planned another road tip, along with a few Spring workshops I’ll be teaching. We’re hitting the road early April and heading to SF area for two workshops in Oakland. I’m really exited. Loading up the RV and spending about a month on the road. After the workshops I think we may head up towards the Grand Canyon as I hunt for stock and landscape images, then who knows. Here’s the workshop lineup for CA.

    On April 16-17 I’ll be teaching my Lights and Shadows workshop. This is a fresh 2 day event that covers HDR and beyond. It’s an intimate workshop limited to about 20 people. We’ll be doing work in the field and editing back at base. More info here. There’s also a Facebook event page here.

    Next on April 18th is the Lightroom Power workshop. This has something for everyone. We’ll cover basics, but also get deep into power user stuff. Another fun hands on workshop, so bring your laptops with LR and prepare to think differently about editing. More info here. There also a Facebook event page here.

    I’m also working on setting up something in Fresno. Still working on the details of that. but stay tuned to this post or the Seim Effects FB page for details. Hope to see you there… Gav

    Read More

    February 17, 2011

    So I’ve got things nailed down for Spring workshops. I’ll be hitting the road early April and heading to SF area for two workshops in Oakland. I’m really exited. We’ll be loading up the RV and spending about a month on the road, exploring and hunting  for landscapes in between workshops. Here’s the lineup.

    On April 16-17 I’ll be teaching my Lights and Shadows workshop. This is a fresh 2 day event that covers HDR and beyond. It’s an intimate workshop limited to about 20 people. We’ll be doing work in the field and editing back at base. More info here. There’s also a Facebook event page here.


    Next on April 18th is the Lightroom Power workshop. This has something for everyone. We’ll cover basics, but also get deep into power user stuff. Another fun hands on workshop, so bring your laptops with LR and prepare to think differently about editing. More info here. There also a Facebook event page here.

    Hope to see you there… Gav

    Read More