The Fuji worm invasion came after the film! In today’s video, I’ll show you how to fix it.

I want to tell you a story as we continue the LR vs C1 experiments because today I going to show more important ways to control details like the wormy artifacts sometimes caused by ISO noise.
I was starting photography in the late 90’s when I saved up for a Canon EOS 3. Oh I thought I was the coolest ever (hint, I was not)
I devoured the magazines. In those days we talked about fine-grain films like the new Portra 400, but words like worms and color noise were not topics. 1600 ISO was about the limit and it was noisy. Take it or leave it!
These days I’ll sit for hours and tinker with a formula for presets like Natural HDR 4 to get the best detail and tone from our files. Photographers that use presets actions and tools get better results. Because they see more without working harder.
35mm film was like having 10-20 megapixels.
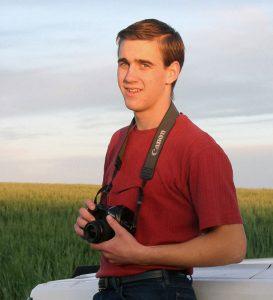 This was me in the early 2000’s with my prized EOS 3.
Serious pros of the day said 35mm was not enough. Strangely they downgraded a few years later to the 6MP generation of digital SLR’s.
No matter. My EOS 3 cost $1000 without a lens and I used it for years, starting out my portrait and wedding work and being the official photographer at the local speedway. It had eye control focus, meaning it focused where you looked in the viewfinder. It did not detect the subject’s eyes like today’s cameras. It was just cool and it worked, some of the time.
Each Saturday I would go early to the speedway and pre-sell photos for 15 bucks. Then I would sit all night in the center field taking photos, playing with pans, and getting dusty. On Monday I developed 6-10 rolls of film, sort 4×6 prints, store the negatives and give the prints to my racers, hoping to profit about $200
That 35mm film with it’s noisy ISO 800 grain was what I had and I made it work and I learned a lot in that dusty center field.
But noisy was relative and more organic then. It was silver. These films were classic and looked beautiful. The formulas I’ve created in Filmist presets are more high-res than we had then, but they look great because they look like film.
PS: Download my FREE Filmist pack to get my noise presets and the film looks if you missed it. You’ll see what I mean about film color and detail.
Download Filmist mini here to get my free noise formula preset.
Today I think about the hurdles we had to get a good print and how many stages of noise and artifacts and dust and scratches could be introduced.
Today we pixel peep and panic over a little blip in a sensor or a little noise that as I showed in last weeks video is easy to clean up with good use of detail and grain tools
Watch my worms video and learn how to control detail.
I love doing testing. It’s experimenting like in this week’s video that help us understand more. It’s that hunt that results is tools like my presets and like Emulsion 3 and Lumist for Photoshop.
So this week I uploaded another video looking at more grain and noise. It’s a focus on Fuji files, but also another look at LR vs C1 and how it will handle noise regardless of what camera your worms and artifacts come from.
That’s all for this week. I’m hitting the streets looking for light like I found here and processed with Filmist. Come Monday I’ll be back to my experiments, working on formulas and ideas for next week’s email.
See you then, Gavin Seim