Speed-Masks and Lightroom’s new Object Masking take your edits to level 11.

Here’s how to Speed-Mask and why it changes everything.

But with the new object to select Lightroom Ai masks everything goes up a level. And with the new Elegance 4.7 Speed Mask update and with Ai masking coming to Capture One soon, who knows what’s next!

First, the video, and I’ll show you how to be a mask power user.

You can get Elegance 4 for LR here and there’s a great bundle combo with Natural HDR. If you have V4, just login and update. This also all works in Camera RAW masks and LR CC.

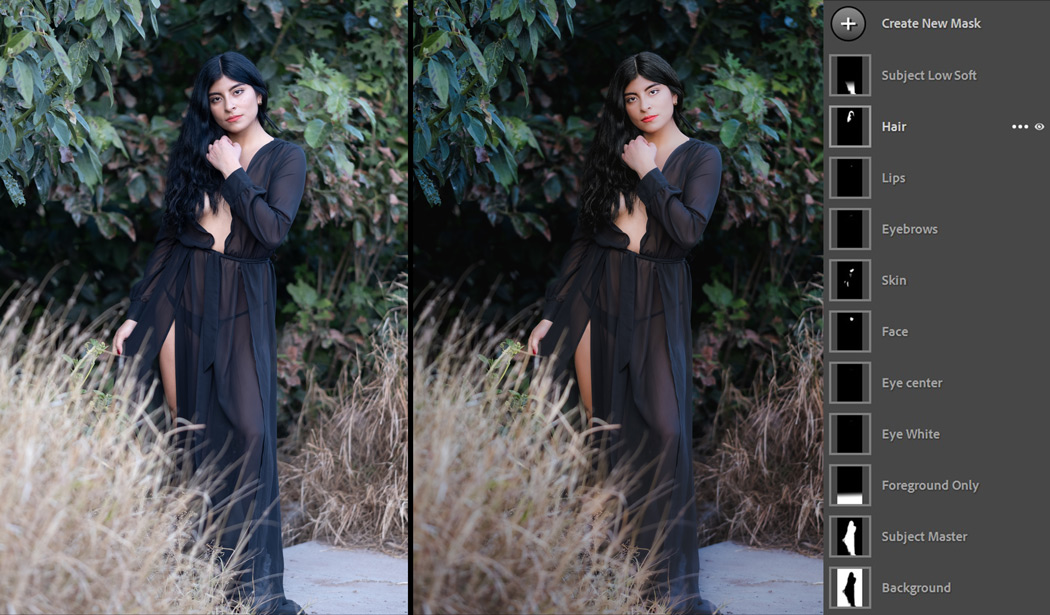
You don’t need to use object masking most of the time.

As you’ll see in the video using the extra time to add an object select mask on a thing the AI already has covered like a portrait project usually results in a worse selection.

So I’ll start with a Speed Mask and then add object select as an extra layer when needed. Honestly not that often, but when you need it it’s amazing.

Use the most specific mask for the job and the main list of Ai masks covers it. IE, subject mask, us that first because it can be used in a speed mask, copied and pasted to over images, and is more accurate.

I just used the POrtrait Glamor Speed Mask from Elegance 4.7. Here pushed to 200%. 11 Masks were added in a click and all adjusted with one slider. Good Speed-Masks should be optimes to turn up and down.

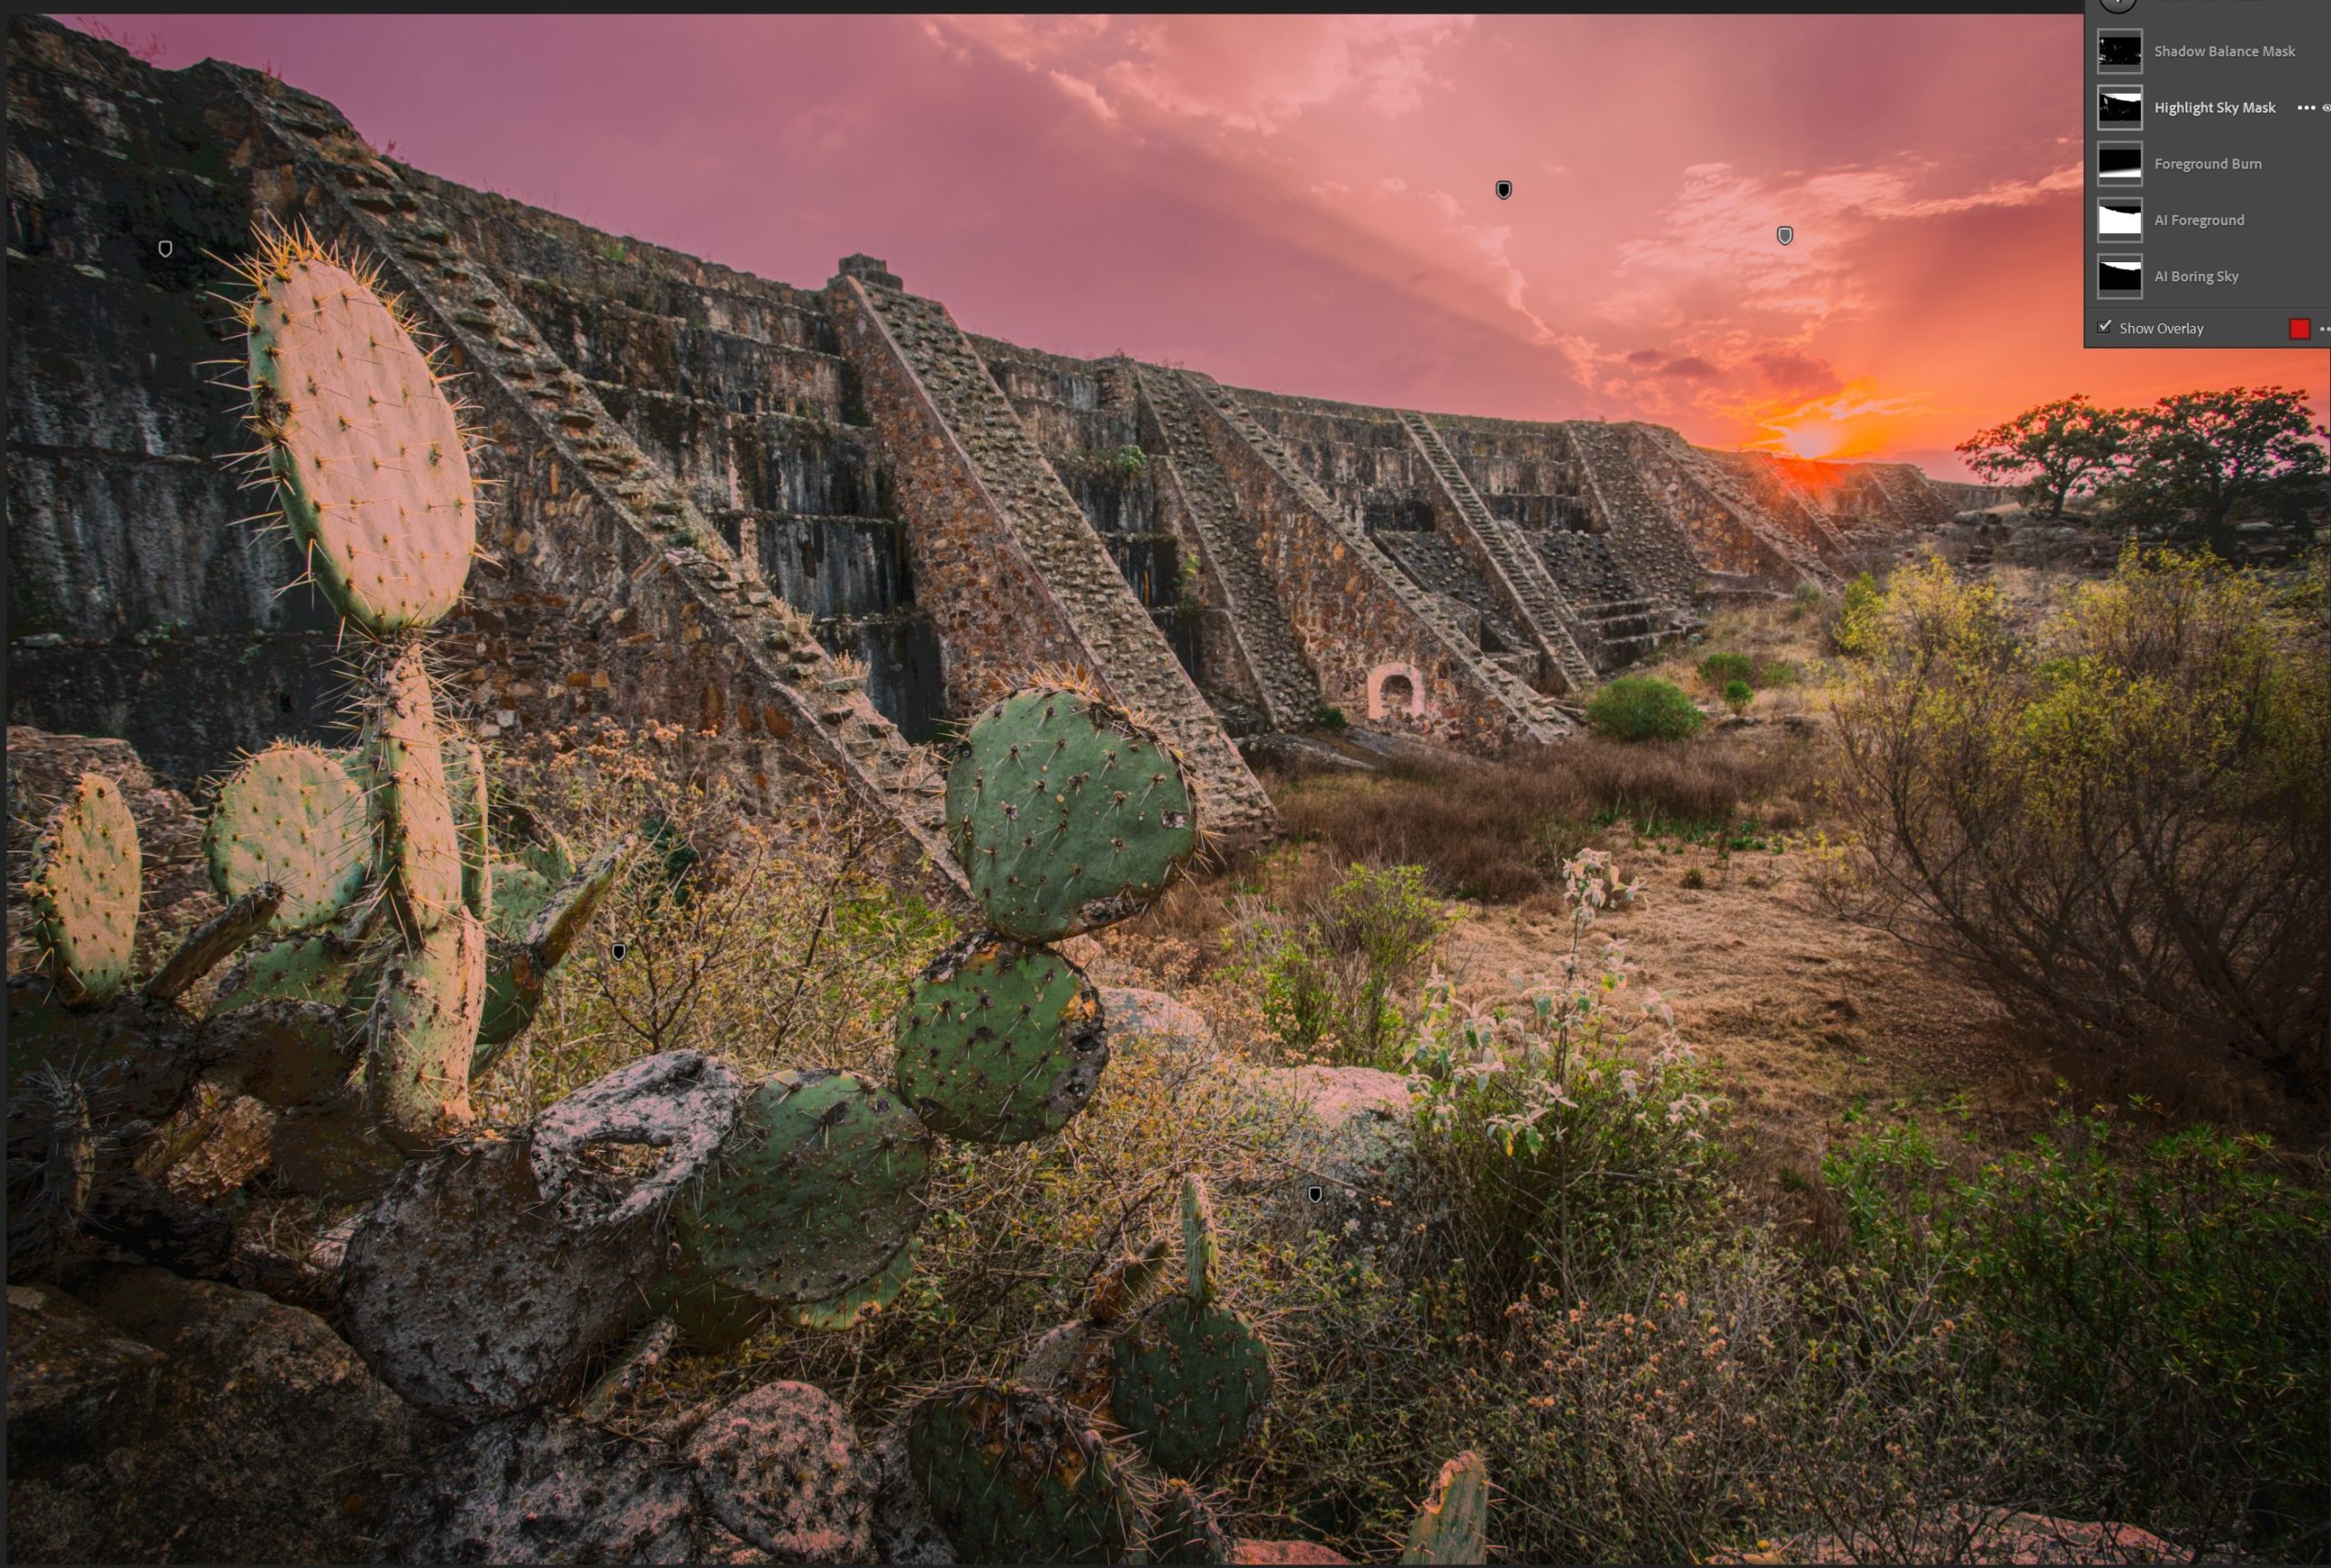
Watch how your masks combine.

As you build up all these masks much like layers in Photoshop, things can start to get strange.

This is why even with one or two mask edits, saving as a speed mask will not just be faster it will give better results if you optimize those mask layers to be versatile on all image types.

So… Develop, then Speed Mask, then Details.

I recommend starting with a base development process. That means I’ll use Filmist, Silver, etc then tweak the main process.

Aftet that I add my masks. Then copy all those finals to other images as needed and let it render. Then if needed use object selection masks.

You find specific speed masks across my preset packs like in Filmist but the important masks are all included in Elegance 4. If you want to make your own just keep the tips I give in the video in mind.

Doing masks last speeds you up because even when you’re not actively editing a mask having a mask on the photo uses more system resources and can really slow down the development module.

If you’re having speed problems check out my recent video about Making Lightroom Faster.

Have fun with this and I hope you like Elegance 4.7 to make it easier.

Gavin Seim

Related Posts...

New Fuji Pro 160 preset for FIlmist 2 is beautiful. But teaches us something about color.

New Fuji Pro 160 preset for FIlmist 2 is beautiful. But teaches us something about color.

The truth about the Exposure slider and how to use the Alternative to make perfect contrast.

The truth about the Exposure slider and how to use the Alternative to make perfect contrast.

Secrets of film color and the best way to scan 35mm Film in 2024

Secrets of film color and the best way to scan 35mm Film in 2024

Inspire your photography using modern pictorialism instead of high-tech!

Inspire your photography using modern pictorialism instead of high-tech!

Tell me your thoughts....

Leave a Reply


Your email address will not be published. Required fields are marked

{"email":"Email address invalid","url":"Website address invalid","required":"Required field missing"}

About the Author

Glad you're here.

I'm from WA State USA and started studying photography in 97. I started work as a pro (using that word loosely because I sucked) using film at age 16. I learned fast but was not as easy to find training then. Sometimes I beat my head against the wall until I figured stuff out.

As digital dawned I went all in and got to study with masters like Ken Whitmire. In 09 I founded the Pro Photo Show podcast. I started promoting tone-focused editing. When Lightroom arrived, I started developing tools to make editing and workflow better.

20 years of study and photography around the country earned me a Master of Photography (M.Photog) from PPA. I got to see my workshops and tools featured in publications across the industry. Once I even won the prestigious HotOne award for my "EXposed" light and tone workshop.

Wanting something calmer, I moved to Mexico in 2017. It's a land of magical light. I'm here now exploring light and trying to master my weak areas. I make videos of that for my Youtube channel, sharing what I learn. I hope you'll stick around and be part of Light Hunters Tribe... Gavin

Gavin Seim

>