Here’s how I get my one file HDR from styles and presets in Natural HDR 4. And free presets for you.
Thanks for checking out my Natural HDR presets. The way to create better HDR formulas. I’m also uploading a free sampler pack of Natural HDR 4 here for LR, PS, RAw, and C1.
This week’s video is training on my HDR presets, but it’s also full of secrets of how I edit single files into HDR using LR, RAW capture one, and more. It’s truly amazing what we can get from a single file, especially a raw file if you edit well.
Today’s editing techniques come from years of tinkering and I’m going to upload some free presets to help you get started fast without buying anything.
Photographers keep under-editing their work. But just dragging the sliders won’t fix it. Heck, that was the theme of the Muse editing pack that we originally shot this session for. So lets edit portraits better with some simple techniques.
It’s always harder in real life I know. We are gonna dig into that today as we take on the cute photo session we did for the Muse launch and I’ll show you hands on how I edit with it.
How do I edit portraits better. How prevent myself from under-editing blues. I always use tools that push be to go past the basics. I stay sharp Lightroom presets or Styles for Capture on to edit fast, I use actions or watch videos like this one. BUT I also use those manual tweaks to get your look perfect. I’ll show you in this weeks video. It’s time to edit portrait better. It’s time to to stop under-editing your photos, so let’s tale this bull by the horns.
Here’s some useful links related to the video as well.
There’s a couple more in depth training videos from this shoot for PhotoKit members where we dig more into the session and some more advanced edits.
The winning formula to get a better portrait edit here, was starting that edit in camera. Finding the light, getting a great look and then being unafraid to edit like we meant it. Even though we have not taken any of these into Photoshop, used actions or made detailed fashion or skin edits, they still look great and from here we can go wherever we like. Hope you enjoy, let me know if you want to see more like this.
Gav
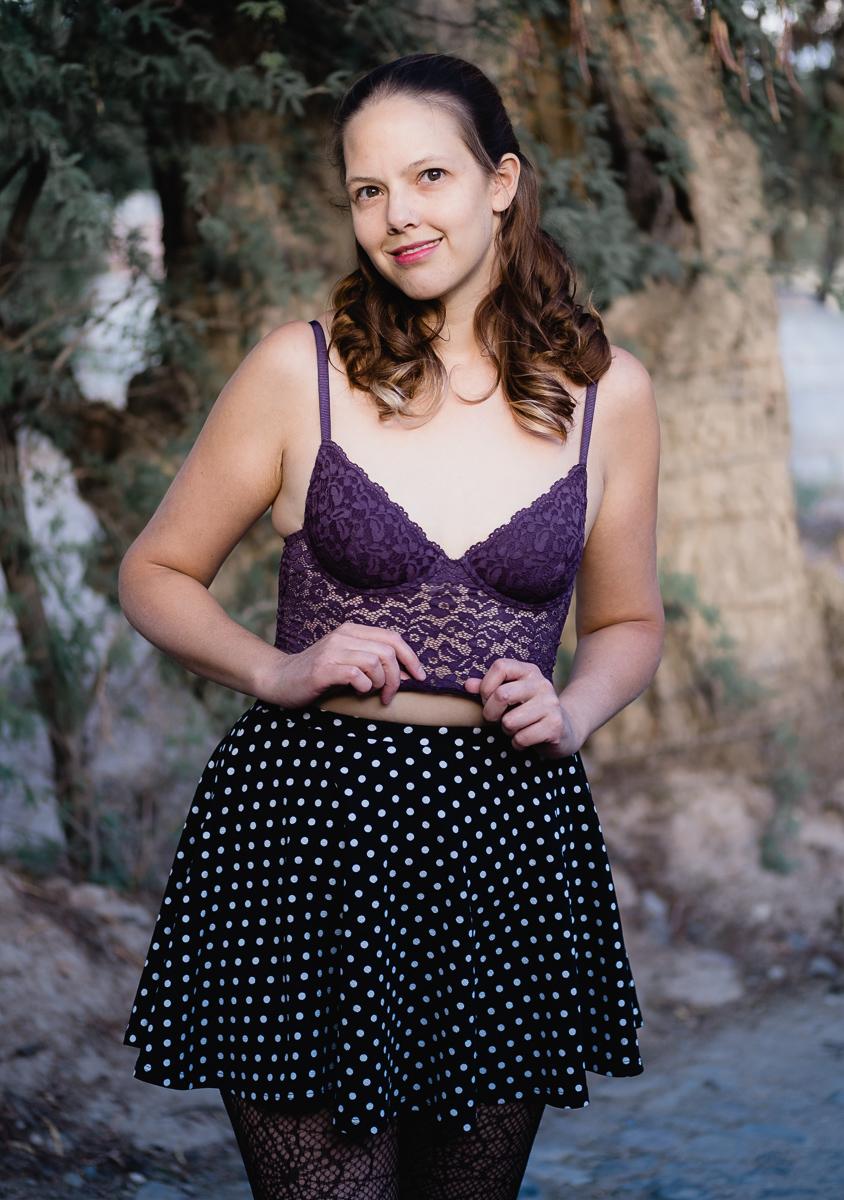
Golden sunset shot edited with muse lightroom presetsA soft edit from muse of this cute bustier. It’s all about editing portraits better.
Does C1 give better results on Fuji or other files? Today we look at some hard-to-process files from a Fuji XT-3 and see what the results say.
We’ll take a few FUJI RAW files and see what really hap[pens when we do the same process in LR and C1. To do that we’ll use the Classic Negative look from Filmist which will process the images almost identical in both.
Let me know if the comments what you think about the results and what you prefer.
Sometimes I get these amazing shots and think, maybe I should leave this in color. But no. In this video I’m going with my vision, converting this to a great black and white with Silver 3 and going all the way to print and frame. I think going all the way to print is an important thing for any photographers no matter what you shoot and on this week YouTube I’ll show you why. You can also check out more video and subscribe to my channel.
Talk to em in the comments and let me know what you think about printing.
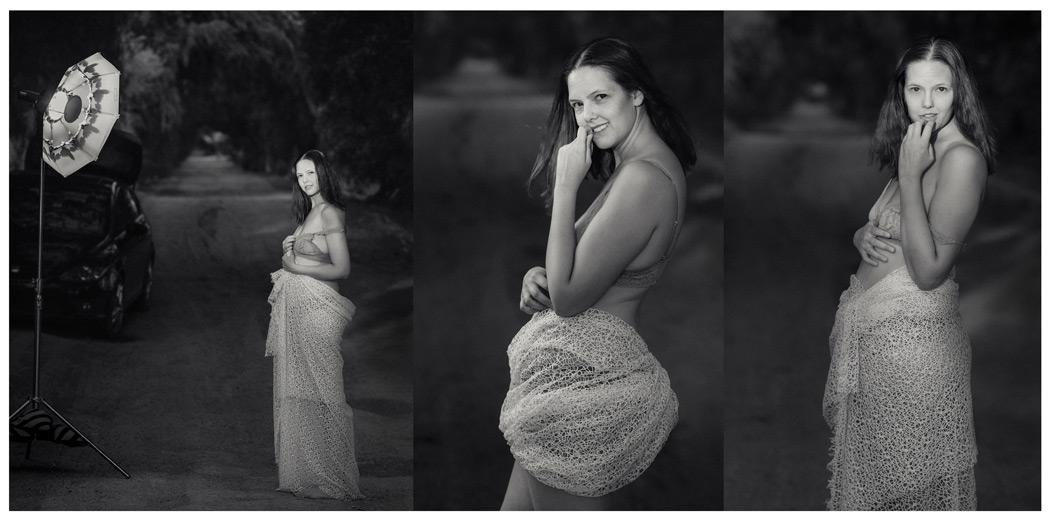
Shot notes: On all 3 of these I used Silver Skin process from my Silver 3 presets collection for C1 and Lr on all three. I did some burn burn and dodge cleanup in Photoshop also. I used a Fuji XT3 with a 90mm f2.
Environmental portraits were a bit part of my training and my late mentor who was one of the finest portraitists in the past 100 years; he crafted environmental images for walls for an entire career.
So I asked myself as I looked at these. Why do I need to remove set elements for this shot. Which tells a better story? I picked 3 poses but my favorite was the environmental scene and it looks great large. I decided to test it on the world of Facebook photo groups. By the way you can comment below or discuss this here on the Facebook post.
There was no grand plan here. Maybe that’s WHY I like it. The internet is full of confident critics who have no idea what they are talking about. I’ll never forget standing around the image salon at competition with Ken Whitmire and others and having strong opinions to this or that. Ken usually had a more objective view to offer. I guess what make me blog about this shot is that I realized I did’t care if they thought it was “wrong”, I knew it would probably not go loan in competition and that did not matter. I like the image and realized that that was good enough and that we often worry to much about what others say.
This caused some controversy.
More people liked my image that hated it. But I found it interesting that a lot of “experts” came to call and they decided that I sucked and if I would not heed their advice, I should be disbarred from photography! I didn’t actually post the image asking for critique but I always consider critiques because mentally accepting or rejecting what people say about your image is useful.
I learned it’s fine to post your behind the scenes photo so people can peek on smartphones, but to post that image as art another matter. Digital has made us prone do doing whatever software tells us, small screens have taught us planning for print is less important than cropping for a four inch screen and social media has taught us to argue everything and insist we are right. It makes me feel we should go back and study the painters a bit more because often what’s being said by self proclaimed “experts” flies in the face of art history.
When I started entering international level PPA competitions in 2009 on the road to get my masters, I learned I was NOT as good as I thought. It was very humbling and I’ve been learning it ever since. I teach and study photography and I have for 20 years. So despite being called arrogant at times, I don’t just take every comment from someone online with no portfolio or reputation and obey; neither should you!
Online, everyone is the smartest instructor in a class where only YOU are the student
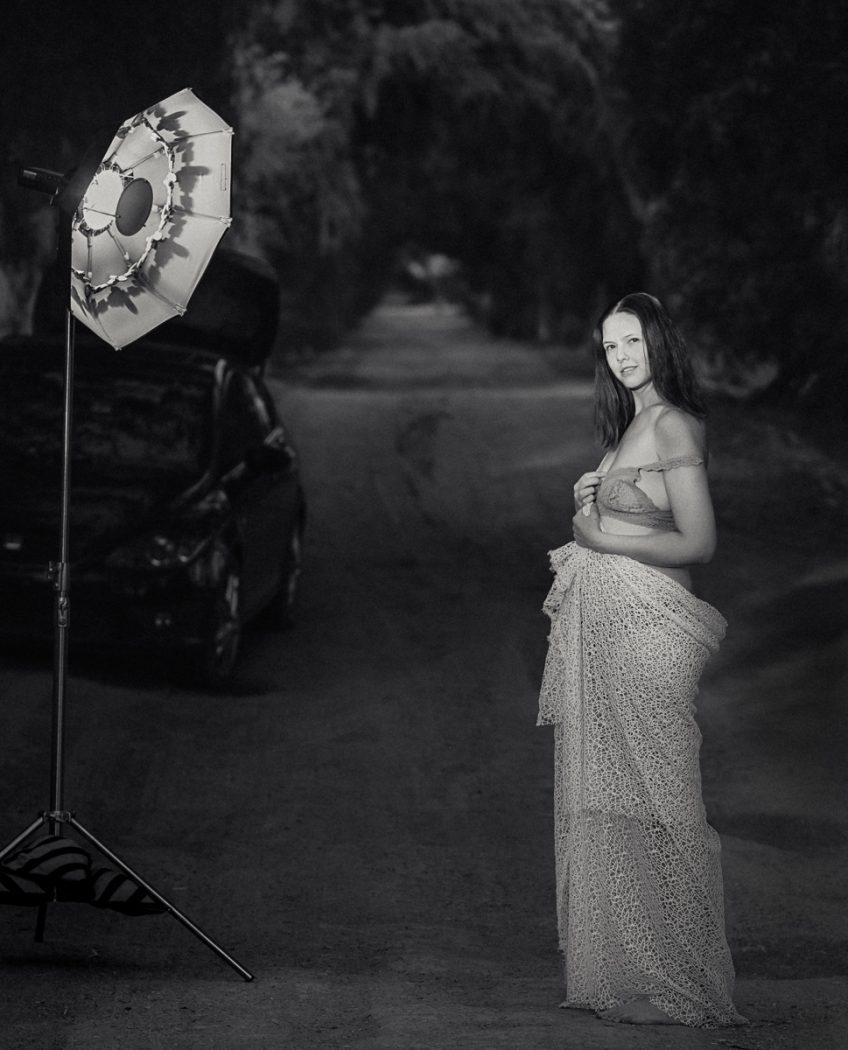
Is there a rule that says we can’t have the lighting visible in a portrait? No, not if leads to the subject. So that’s what I told people, but some said they ONLY see my strobe in this first image, or that the going back and forth which disqualified this as a proper photo. They said my story was not clear and that I was arrogant for calling this a good shot and not admitting my mistake. Of course I have more traditional closeups also, the wide shot was made for fun and I ended up liking it!
A counterbalance like we see here forces the eye to go back and forth, it’s a powerful tool of composition that we study deeply Photo Perfect master class. Now that’s not to say you always have to have a strong counterbalance, only that it does work. The light value is about equal to the models face. Is there a rule that says it must be less. Of course not! The car is a bit odd, but we’re telling a story of a photo shoot out in the countryside. The car shows that we drove somewhere. The eye goes around, to the model to the light and repeats. To me it’s not that easy to leave this frame and I don’t care what object you see first because I know they will lead you to my subject.
The moral here to is is not that this image is the award winning environmental shot of the season. There’s things to nitpick and I admit this wider shot was not the specific intent of the shoot. I picked it because it resonated to me. To you maybe not and that’s OK. Here’s the bottom line.
The internet is not the final word!
In my experience most feedback on photo groups often comes from people with little experience. People that want to sound like experts because they are insecure. Listen for honest well intentioned feedback, but don’t let the insecurity of others be your own.
Sometimes an image sparking discussion is proof to me that I did something right. If someone trashes it, the first thing I do is look to see if they have a portfolio and how much actual experience they are speaking from. I learn more from the accountability of real world competitions and qualified instructors than from ego driven comments where everyone dreams of being smartest instructor in a class where only I am the student. We should always be students, but not everyone is our instructor.
Photographers can be ego driven jerks and we can’t let that define us.
I have the experience and confidence to say this works. Of course, you can disagree and you can like the others better, or hate them all. I can even change my mind next week. But that’s not my point. The legendary Ken Whitmire. Ken taught me to use space and to print it unashamed as we fill-walls with the story we want to tell.
The main “crop” in image #1 is not it’s visual edge. The stops are the shadows and the objects to lead the eyes where I wanted. Sometimes these environmental shots get picked apart on small screens, while in wall prints their majesty shines and and people are amazed. Many “experts” in photo groups have never printed a wall print. We we need to have enough vision to see the goal as well as hear the noise around us. Some images are meant to be seen larger and that’s a good thing. Light itself is rarely our subject, it’s merely our paint! Consider Arnold Newman’s iconic 1949 portrait of Danny Kaye, cluttered with elements of the set and glaring light yet so balanced.
Do you choose wide, thoughtful, safe; or trash them all?
#1 is a useful example of leading tones and counter balance.
The other images are nice portraits and perhaps more logical to some. But I would print the environmental, because it tells a story that I want to know more about rather than just showing a pretty model. Think about it.
If your objects. light and lines hold the eye in the frame and lead it back to the subject, there is no escape from the viewer seeing what you want them too see. I like this because it says something more and your eye gets to roam. It’s both the beauty and the challenge of an environmental portrait and I think most shoots should include one if nothing else for perspective and practice.
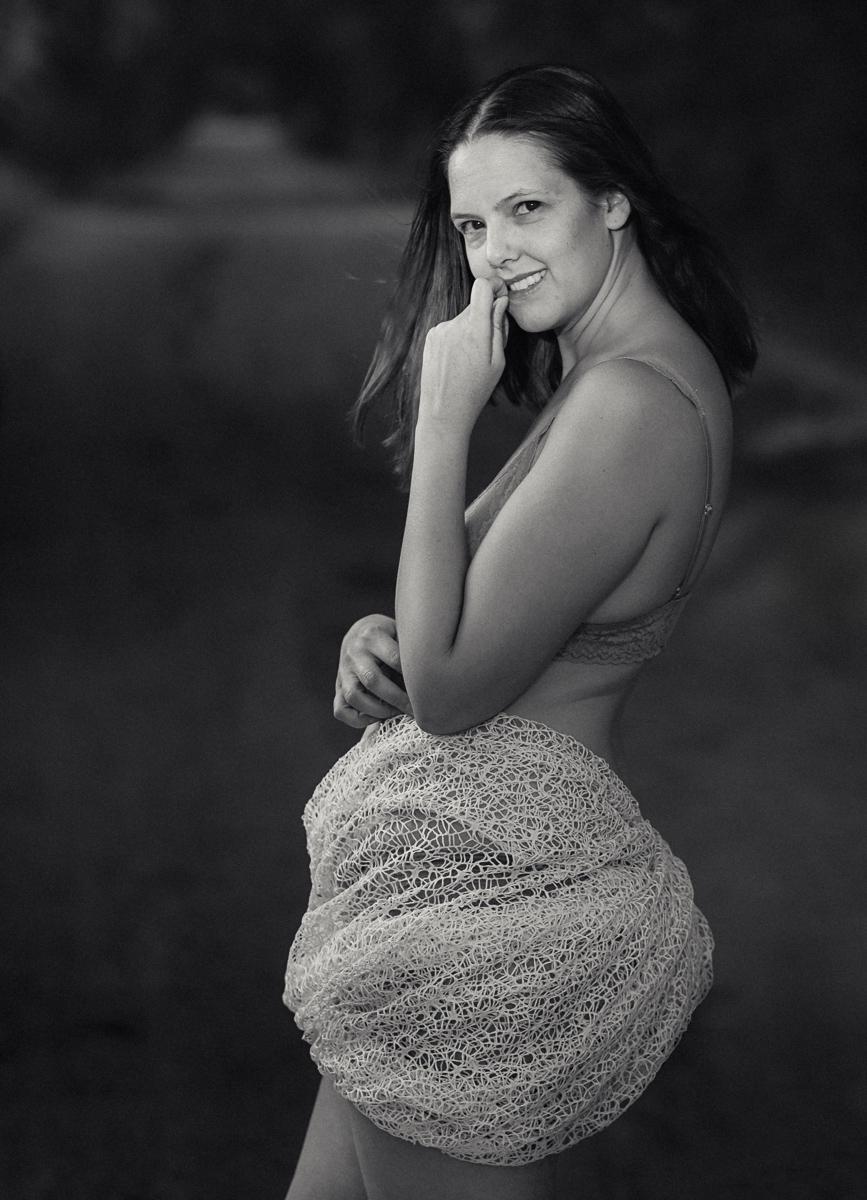
#2 feels thoughtful.
It’s not the safest but the pensive look and the hand lead me to the eyes. The pose is not the most sensual or classic, but I can’t stop coming back to those eyes.
#3 feels safe.
It’s got decent lighting, a nice smile and a pretty fair pose with good mends in fingers elbows and a wrist that’s maybe a tad too straight. It’s a nice client portrait and you will probably forget it soon.
People believe their eyes have a choice. In most cases, I don’t believe that’s true. When we use counter balances with tone and line, we can force the viewers eye go where we intend. Not everyone needs to know the story for the story to exist. The use here of the set environment gives us the chance to show a glimpse of the story that most never see and leave them asking questions.
The more experience I get, the less absolute I become about whether a photo is WRONG!!
I can always spot a ego driven feedback because its’ from people who think they know everything and the rule they read about once applies to your image 100% and if you don’t honor it, you are a bad photographer. I can always critique an image, and while there are “rules” (guidelines) like lines, lighting or an image needing a main subject,I’be found the more I learn the less know.
If you reject feedback because you know all your images are amazing you will hurt myself. But If you filter feedback because it seems ego driven, some someone with something to prove, someone with little demonstrated credibility or experience, that just means you have enough confidence and experience to also critique yourself. Just be careful with confidence because it’s a sharp sword!
A perfectly lit portrait that has no soul, no question in it’s eyes, it’s photo of the light, not a portrait of a person. I think sometimes we need to be reminded of that. — Gav