We’re going to talk about the 3 Lightroom and Capture One presence sliders today, but I’m not going to teach them the way Adobe does! We’re going to reverse things!
Presence – Clarity VS Texture VS and De-Haze are important!
These all affect the atmosphere. I make use of them in nearly every edit. You’ll also see them used in subtly different ways when I make Lightroom Presets and Capture One Styles pack like Filmist, and Versus when I make tools like Natural HDR.
You’ll also see me use all 3 of these deeply in Lightrooms Ai presets that I include in Silver 5 and Elegance Speed Masks.
I simplify Clarity, Texture and De-Haze in the video. But here’s an overview of what the presence sliders do.
You know about the presence sliders in Lightroom or their equivalents in Capture One. But do you know that these sliders are often used really badly? I’ve taught Lightroom since version 1, but I’ve rarely seen these sliders taught well. Today I’ll show to use them for near-magical results!
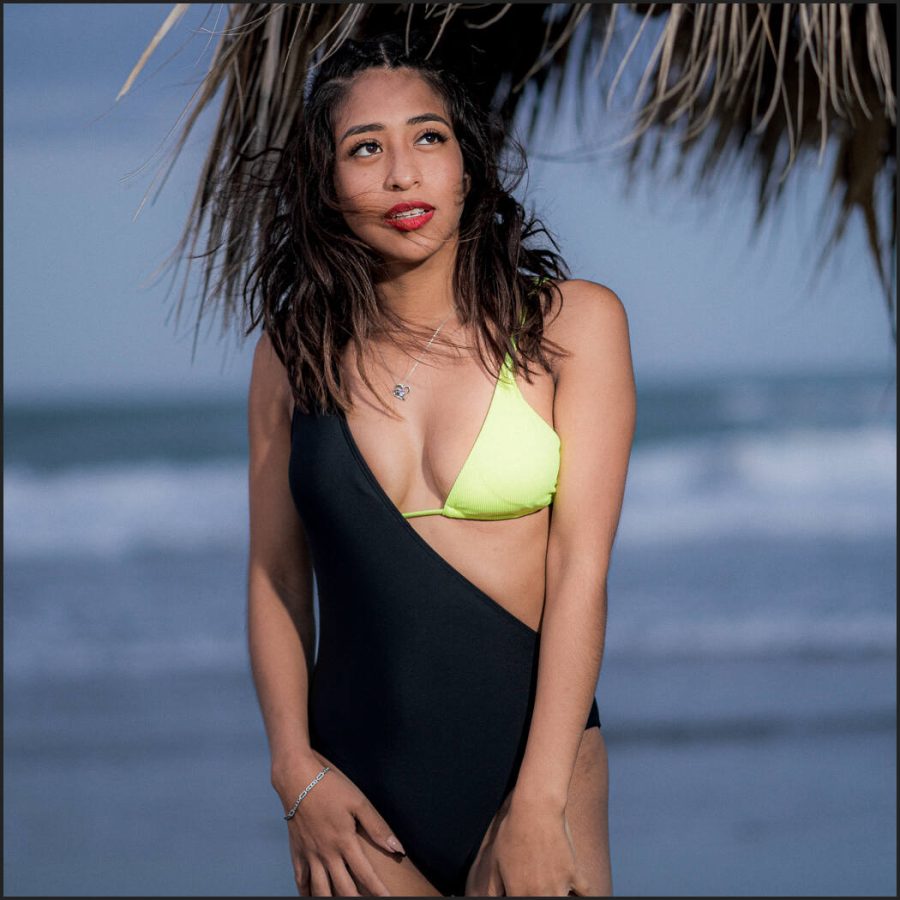
The clarity in Lightroom and Capture One allows you to adjust the midtone contrast of an image. By increasing clarity, you can add depth and mid edge definition to your photos, making them appear more detailed in a gritty vs softness sense. Clarity can soften the appearance of an image and give it a more ethereal or dreamy look.
Mixing them up for more presense. Here Elegance Ai masks are used to bit globally we lowered Clarity while increasing Texture. This combination can give a perfect mix of detail and softness.
The texture is a newer but more important feature in both Lightroom and Capture One. It allows you to adjust the amount of detail and texture in an image, which can be particularly useful for enhancing the appearance of skin, fabrics, and other fine details in a photo without the ultra-fine lines and artifacts that come from heavy sharpening.
By increasing the texture, you can make these elements of your image appear more detailed and realistic. Conversely, decreasing the texture can smooth out rough or bumpy surfaces, giving your images a softer look. This can be magic in portrait edits.
All the presence sliders are up a bit here because it brings our richness and texture. But don’t assume that just because it’s food or streets you always want to turn them up. Go down also and watch good things happen.
The De-haze is a useful feature in both Lightroom and Capture One also. It allows you to remove hazey feeling from images. By using the de-haze feature, you can remove this haze and restore the detail of your images in a broader contract sense that’s almost like combining Blacks and Whites. BUT… Don’t always turn this up…
Reversing De-Haze is really taught and VERY powerful. I’ll show that!
I turn Dep-Haze down as much as I turn it up. Maybe more. Because when creating authentic films, organic feeling portraits, and gentle tones, photography ten to use these contrast and presence sliders altogether too much.
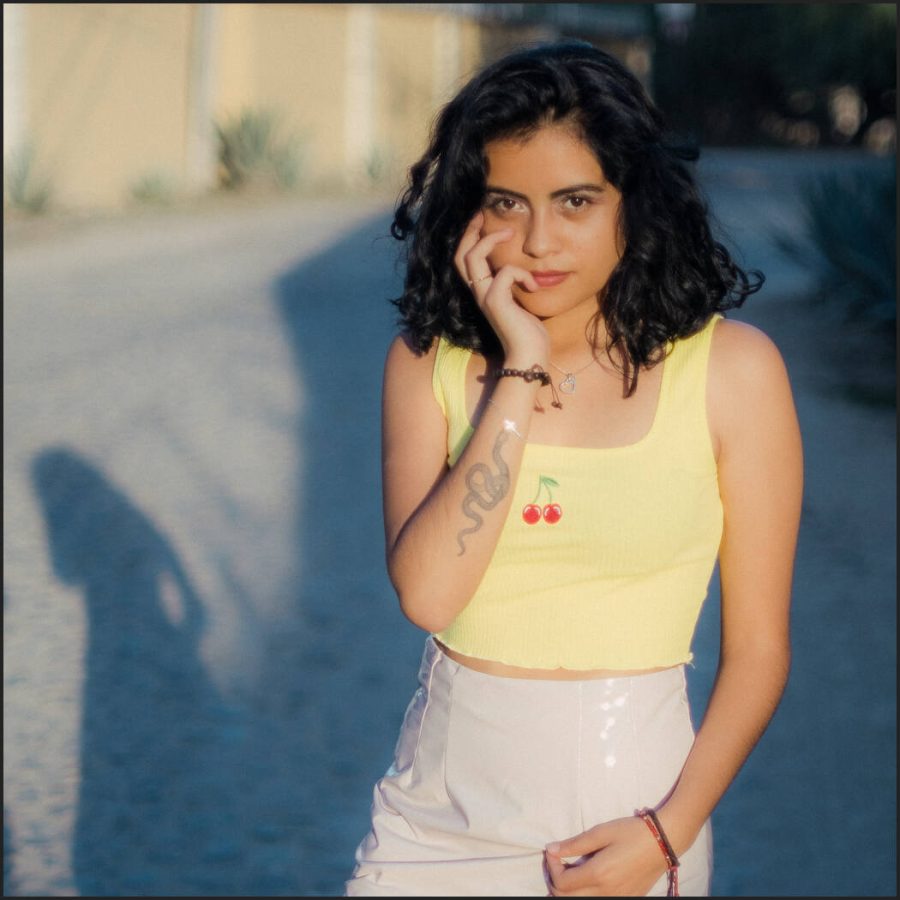
IN this POrtrait I used the FIlmist Portra 160 preset and then pulled down Clarity, Texture, and De-Haze a bit to give a natural organic lens feel that reminds me of how we used portrait filter on the lens all the time in the film days.
Clarity, texture, and de-haze are powerful tools in Lightroom and Capture One that allow you to fine-tune the surface of your photos.
I hope you enjoy and share this because if you know what these sliders can do for your photos, you will improve your ability to edit with them. If you use my presets, pay attention to how I apply these 3 sliders. A little can go a long way and really perfected looks can be created using these settings.
Gavin Seim
People often confuse clarity for HDR. But as I show in Natural HDR presets, they are not related. This is too much clarity for this portrait. There are times for a gritty high-pass style portrait. Or maybe you are creating a theme that;’s intense. But unless it’s for a solar reason, avoid too much.
So what did I produce after 4 four months on the road? Come find out. July 27th 2012 is my first big opening of the here in my Central WA gallery. Come by and enjoy the images, the food the latest master prints and editions. Talk shop and learn about my latest projects. You can find us at 227 HWY 28West in Soap Lake WA. And if you can’t make the big day, you don’t have to miss out. I’ll be around for a few weeks during the summer showcase. Hope to see you soon… Gav
On this weeks 2nd live roundtable, we get over some technical issues with the live feed and then jump into the latest news and thoughts about what’s happening in photography. A few little debates and some ideas on how we can all get better. And check out the after show for a bit of unscripted fun and a few tips for Facebook.
Something one often hears tossed around in this industry is the word ‘style.’ “It’s my style” or “love your style.” Sometime it can get pretty funny: “My style is, uh, everything.” Now, this is not a bash session. We’re all at different levels, and that’s OK. This is just another post to get us thinking, something to get us all to raise the bar. I think the idea of style bears consideration and refinement. So let’s start where I often start, with the word, itself.
Webster’s Dictionary – Style. 1. a distinctive manner of expression (as in writing or speech) 2. a distinctive manner or custom of behaving or conducting oneself 3. a particular manner or technique by which something is done, created, or performed.
Hunters Bridge - 2009, HDR Portrait.
SO perhaps a photography style is just what you thought it was. But look carefully. “Distinctive, distinctive, particular.” I see photographers (especially new ones) frantically trying to define their style. But they don’t. It may change from week to week and month to month. If you go to their site right now, that high contrast, over saturated look is their style. But really, it’s probably because they know nothing else or saw someone else doing it. Your style is a big part of your brand. But developing it is not quick or easy. It’s a process.
NEXT let’s get one thing out of the way. Just because you do something does not make it your style. The most common “style” I see is “high contrast” or “edgy” or “bold” or “fun”. Now all those things can be a style, but they’re generally non-distinctive and used by people who don’t really know their style. Sometimes these vague styles are used by photographers who are inexperienced and use “art” or “style” as an excuse for their work. (I.e. “The high contrast look is my style” or “The flat light is my style” or “The blown out highlights are part of my style”)
NO. Those are not your style. You just don’t know what you’re doing. The first step in developing your style is to STOP trying to be something you’re not. It takes years and years to become a good craftsman. If you’re a new photographer, stop trying to fake a style that you don’t really have or convince people that that thing you do (because you don’t know any better) is your style. Don’t do it. Using style as an excuse just slows your career because it allows you to make excuses and avoid learning to things properly.
BUT can’t high contrast, blown out, journalistic, be a style? Sure. But often it’s not, because people who are comfortable, experienced, and have really found a style generally know better than to take the cliches and call them a style, because the result tends to appear like a generic copy of everyone else.
SO WHAT makes a style? Sure, it can be somewhat subjective, but let’s go back to the dictionary for the facts. A style is “distinctive.” It’s “particular.” That means it has the ability to stand out on its own. So based on that, if your style looks like 80% of the rest of the world’s photographers, it’s not much of a style. That is, not unless you call your style generic, which does not sound too appealing.
Now, I’m not saying a style can’t be inspired by the work of another photographer. In fact, it’s almost impossible to do something completely new. But there’s inspiration, and there’s outright copying. Most photographers don’t have a style because they have not yet taken enough time to refine their craft and develop that style. This can apply to a newbie as easily as to a 25 year veteran.
A STYLE is not simply taking photos. It takes something more. It requires thought, planning, and skill. But even further, a style is your brand. It can be combined with your personalty, the products you make from your photos, and the way you present them on your website. It does not mean being in a rut or always being the same or applying a particular technique to everything. It’s a process.
WHAT is my style? I’ve been making photos for over 14 years now, and in just the past few, I’ve started feeling I understand my style. It took me that long. I know what I do, and I know how to make it come out nearly every time. I feel I have a style, but I’m still improving on it.
If you were to go to my portrait or wedding site, you might see me describe my work as “A natural cinematic style inspired by the masters and tempered with modern flair.” But the text is merely the beginning. I have an visual in my mind of the kind of image I make, and while every one is different, I have a focus. Also, the way I display my final prints as carefully crafted wall portraits is a very relevant part of my style. It’s taken me about 13 years to pin myself down this much. And I’m still discovering and refining my style.
WHAT does all this this mean? Well, my goal here today is not to say you can’t have a look, or that you can’t describe your work. It’s not to make this style thing abstract and confusing. Maybe you’ve truly found your style, maybe not. But my intent is to get us all thinking. To raise the bar on our style, study, and practice, and become such proficient craftsman that we truly understand our medium and our style. Maybe you’ll be faster than I was, maybe not. But either way, it’s a process. A valuable one.
SO, STYLE is important. But it’s not something you can simply make up. Before you can really define your style, you have to know your craft well enough to understand what you’re doing with it. You have to have worked enough to find that distinctive consistency in your images. Imagine a singer. A singer does not have a style until they learn to sing and perform. It takes time. They have to work it out. Photography is no different.
WHY do most NOT have a style? Because they’ve not refined their craft . It does not mean they’re all bad photographers. But in truth a lot of photography today lacks distinction. Admittedly, it’s hard. Finding your style take more than just doing a wedding every weekend. It takes more than copying the latest trend you see your friends using.
I often see photographers who are really busy with jobs, but it’s all they can do just to keep up and get the jobs out. They’re generic. If you’re paying the bills that way then fair enough. If volume is your business approach, it may work for you. But it’s not usually distinctive. Rushing offers too little time to experiment and define your work. You probably want something more. To define a unique style, you have to take your extra time to study and refine what you’re doing until you draw out something unique about it. Until there’s a pattern. Until it becomes a style, not just the latest fad.
How to Find Your Style. A style is images, personalty, presentation, branding, and more. Really finding it takes enough experience to know what you do and how you make it unique. I think the way to find your style is to stop looking so hard. Stop trying to rush to having it all figured out, and spend more time figuring. Study your craft and be content with the fact that you’re making good images and improving. Forget about your style for a while and learn how to style better. In time, you’ll find your own unique approach. You’ll find your STYLE naturally.
WHAT AM I GETTING AT? Stop having confidence? Stop charging for quality? Heavens, no! I’m not even saying at what point you have a style. I’m just saying slow down and think about it. Take the time to make images just for the joy of it. Explore ideas and techniques, read books, go to workshops. Do that, and your style will blossom, as will the quality of your work. Photography is not a quick journey. It’s a long one. It’s OK to be starting out. Just be honest with yourself. Keep working on your craft and always raise the bar.