I talk a lot here about Shadow Hacking, exposing better in camera zones and beyond. But today I was to show you something that almost no one is using in Lightroom, Raw, and Capture One. Recently I made a video about the least-known secret in Photography.
Now I’ll show you a way to edit exposure beyond the slider.
Learn more about exposure and shadow in my Shadow Hackers Live class and grab some free presets From Natural HDR and Filmist.
#1 Don’t think of Exposure as a slider.
Thinking more like you’re in the darkroom gives you a more complex view of how exposure works and relates to contrast, shadows, and lights.
The exposure slider in any app is just one way, one mix of volume and tone for those pixels. When you use curves, levels, and other methods you’re just adjusting the volume of those pixels in different ways like using EQ on your stereo.
Thinking this way keeps you from always doing the same thing and will let you easily adjust for higher or lower contrast situations like we did by pushing or pulling the film.
#2 Don’t do it all manually.
You don’t have to buy anything, you don’t have to use my presets. Or you may use mine but then make your own variants. That’s the beauty is saving things. It lets us repeat, then refine more with time. In doing so your entire process will improve.
Make these as presets, styles, and actions like I do in my mods and packs and you nyou will be glad you did.
They are simple recipes really and not like making a Film or advanced combo. Just a simple push and pull of tone and then you can turn them up and down with amount sliders or opacity layers. It’s magic.
#3 Mix it up.
In the video, I showed you different photos and how the same photo can work in more than one way. Exposure is not an absolute. Once you understand shadow hacking you know that with every photo you take.
Sometimes you want light, sometimes you want dark but those shadows are hard or soft and how they create contrast matters and the way you mix your exposure and tone boost makes a big difference.
On your stereo you have volume. But you also have EQ which is just volume targeted to specific frequencies or tones. Editing photos is the same and once you really get that there are no limits.
Scanning film for natural film color is not as easy as it seems and most of the labs are sending you scans that won’t look like your film. So what the best and cheapest scanning method (at least for 35mm) and how does film affect our non-film photography every day?
Good scans will change your digital photos also!
I’ve scanned pretty much every way and it can be hard. In today’s video, I’ll show you my new favorite way to scan 35mm film and how you can use it to make better colors from your digital camera. This is exactly what I used these better scans for in the Filmist 2.2 film presets update.
See the before-after results of how these tests improve Filmist presets on the Filmist2 page. Also, download some free film presets from the sampler pack of FIlmist.
How negative scans help you edit digital files better.
Today I reviewed the TTArtsian 40mm 2.8 Macro with this Film Scan Adapter. But we’re also reviewing film color itself see you can scan film better and edit digital in a more natural way.
It’s that grounding I’m always talking about and why I always start edits with FIlmist presets. If you use Filmist you will see that grounding as you edit your photos.
You’ll also see how the scans we worked on today are improving the quality of those p[resets so they work more like film instead of working great on one file and horrible on another file.
The film has real shadows and atmosphere. Let it
Film is not a slider. So when you scan it don’t be like most lab techs trying to make it HDR and getting nasty shadows. I see this a lot with lab scans. We’re so conditioned by digital. But reversing that lets our edits be grounded in an organic process that is real.
Studying film does not make me stop editing black and white with Silver, Using Natural HDR for bold color, or going to Photoshop to add Alchemist to a portrait.
But that starting point gives constant edits that are fast and always stay on point. Whether you use film presets or shoot and scan your own film you will see this result.
Everyone wants to define what great skin tones are, or the perfect greem They criticize us on social media of we don’t comply with the “norms”. But in truth, like every eye sees different, every film sees different but they all work in almost any situation and feel RIGHT!
That’s harder to do on digital. Pushing sliders may not be bad, but it often results in edits that are really extreme and unnatural. Unless you are creating those edits with intent, they will usually come back to bite you and often what looks good on one photo looks bad on another.
So in studying film color and using that same chemical-inspired process on Film Lightroom presets and styles, we see that a balanced process on digital can also work on nearly everything. And where it’s off a bit, I can quickly correct it with Chem-Kit to turn things up or down.
You can do the same in your workshop and get sessions that are edited with the consistency of a true pro.
We say gear or new tools don’t matter, but sometimes they kick our inspiration into high gear and that does matter. I bet you’ve felt this too. Photos being too perfect was the topic of today’s Pro Photo Podcastso go listen in the background.
1. What is modern pictorialism
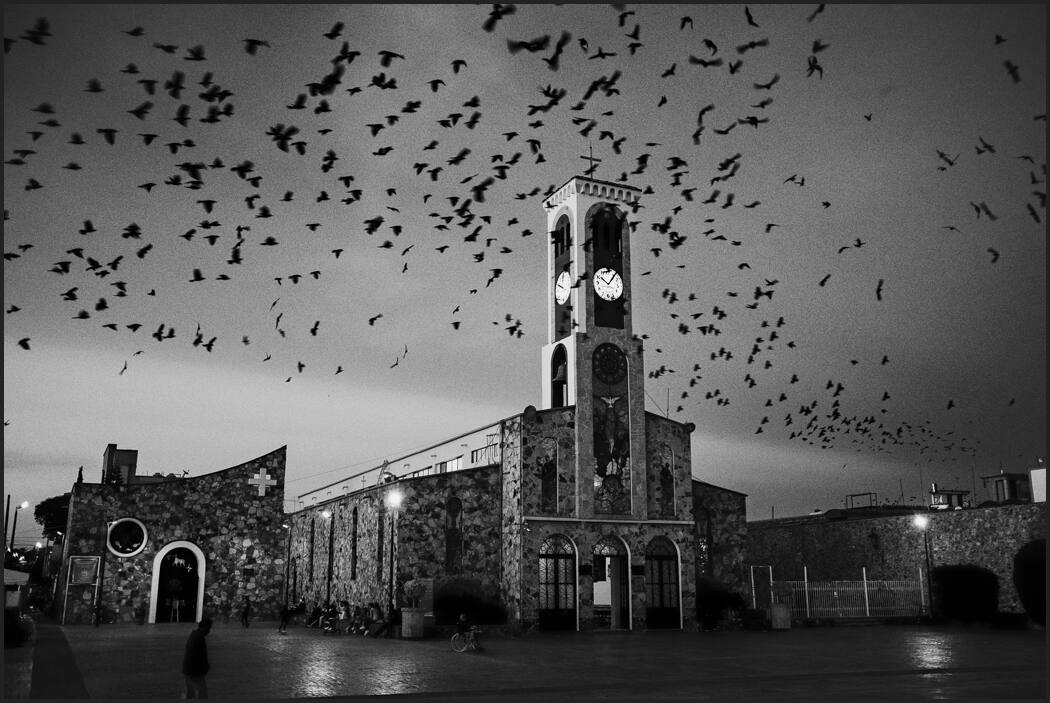
A blur like in these birds gives a natural emotion but the photo is still natural after my edit in BlackRoom.
A new camera is exciting and gets us shooting. But sometimes simple things do that better.
There’s a lot to be learned from history that we usually ignore. And the deep shadows drawn by pictorialist photographers are no exception.
In those days low detail drawm was more natural to the limited cameras and films. But it was still international. Today we have digital, clean details and sharp lenses but we can create that mood using modern tools and techniques in camera and in post.
I’ve bought expensive new lenses and stood with an empty wallet and a little excitement. Yes, they made my vivid landscape photography perfect and shape and I took good photos. But often it’s the imperfect that helps me discover shadow.
You don’t actually want every detail…
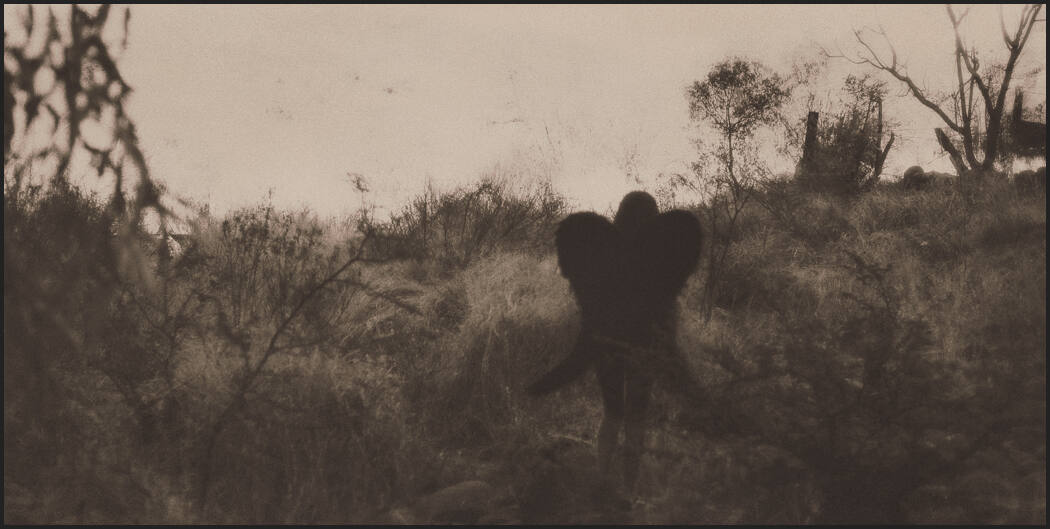
This frame was off. It was blurred but it had feeling. So I edited in more of a Stieglitz style and tone. You may love or hate it, but it gave me a fresh perspective on the session.
When I started buying old vintage lenses for a few dollars they had beautiful often soft details. Each one was like getting new gear even though it did not cost me that much. I pushed myself with them and realized that shadows not light and drama not sharpness were secrets to great photos.
The bridge into this neighborhood was flooded and the dark blurred photo of the cyclist leads the eyes out of the shadows and into the other side. A light platinum edit from Emulsion was used here.
2. Old lamps and tables can teach us about photography!
Have you thought about why are rustic lamps and 19th-century lights so popular in 2024 and how that relates to photography? I love coffee and art.
On the side, I’m in charge of ambiance and design in a large cafe in Mexico. Some of the most popular things are table games, worn-out photo books, and handmade rustic lamps with Edison lights and burned wood tables creating an atmosphere. It is the Cafe of Light, it’s warm and relaxed and in Mexico, a very unique experience.
These details are planned, but imperfect and they make people feel at home!
Now let’s take some photos….
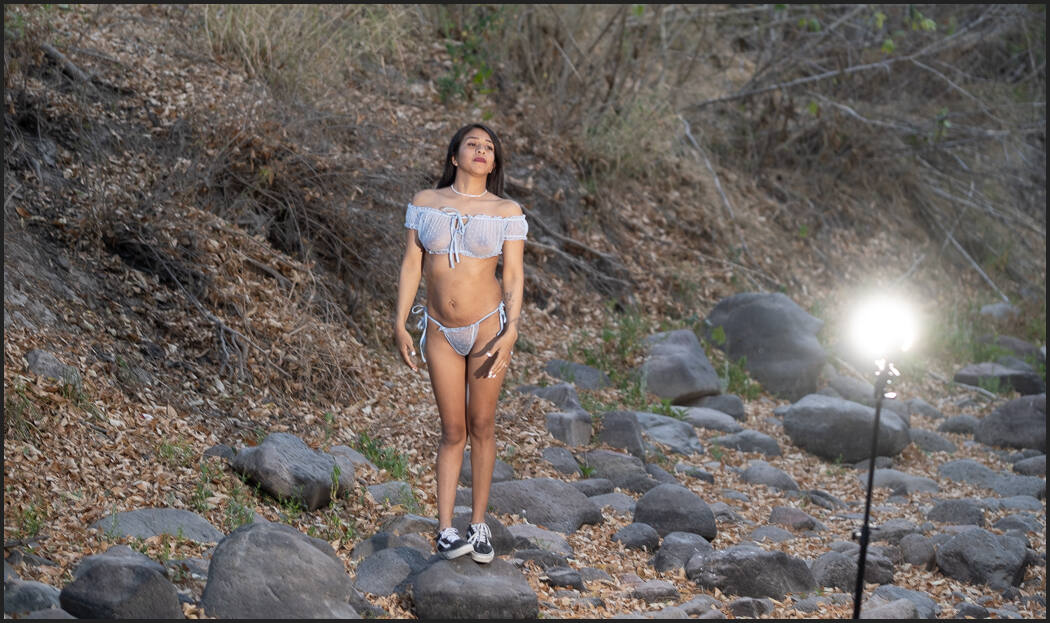
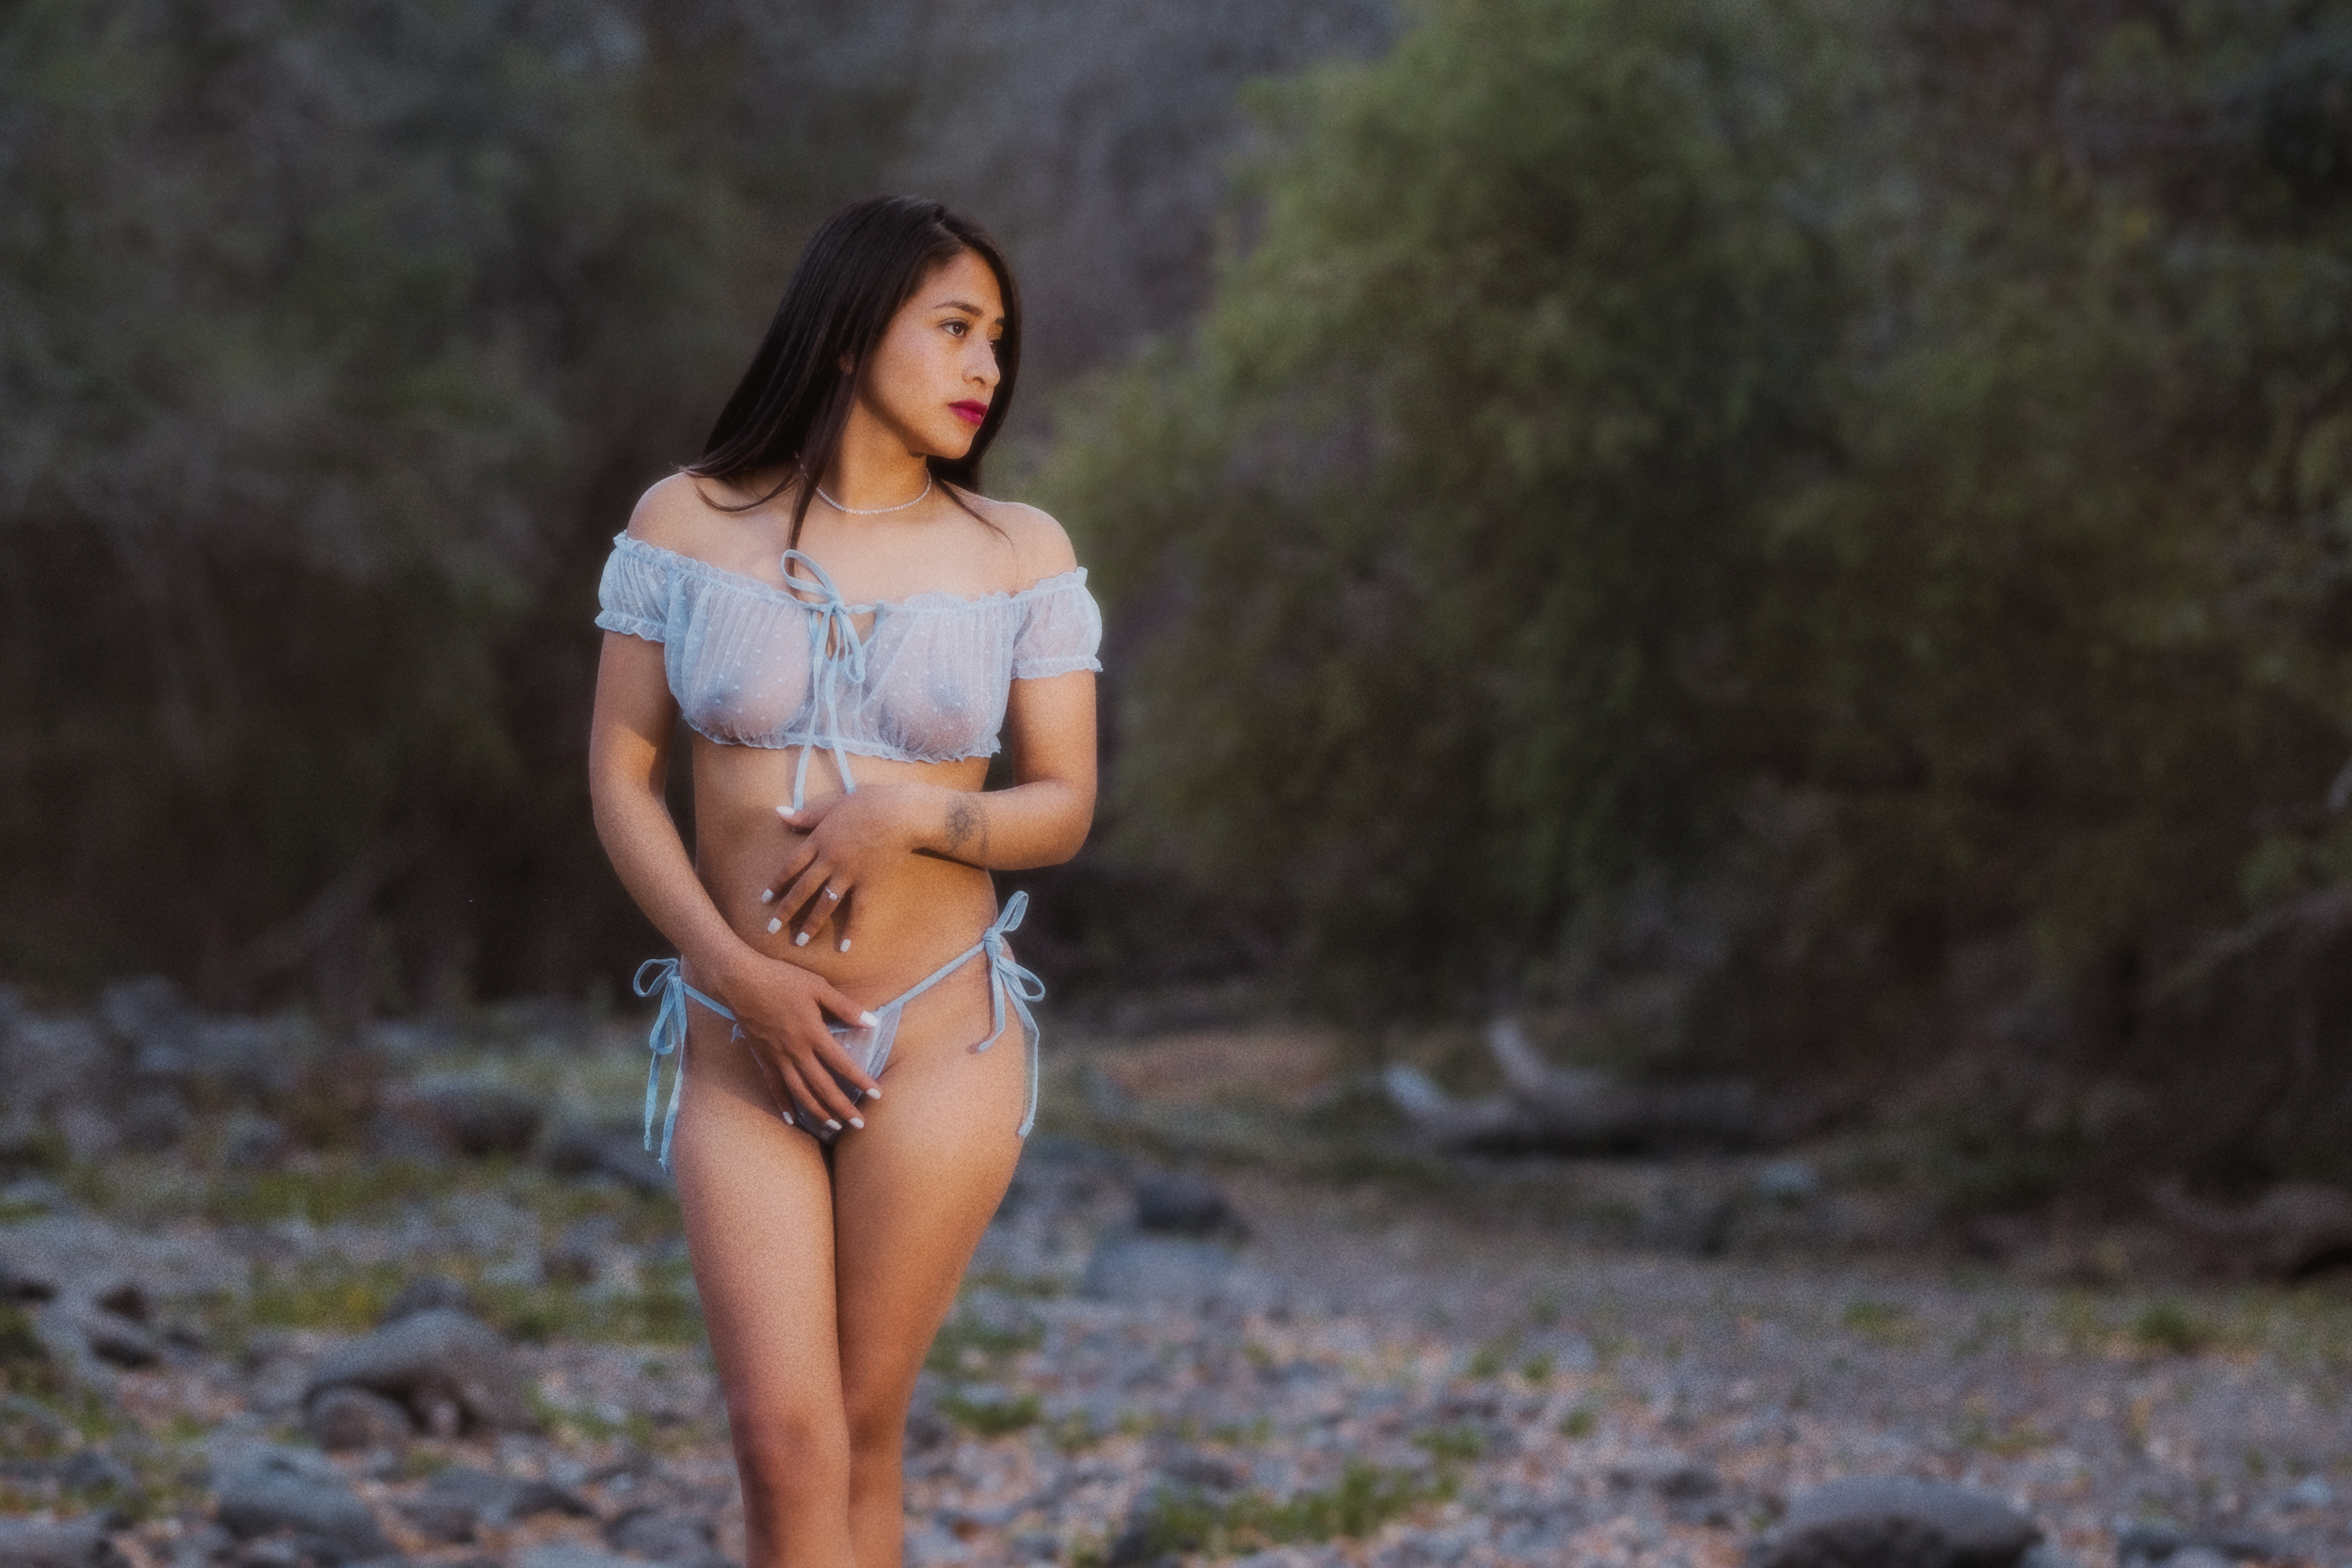
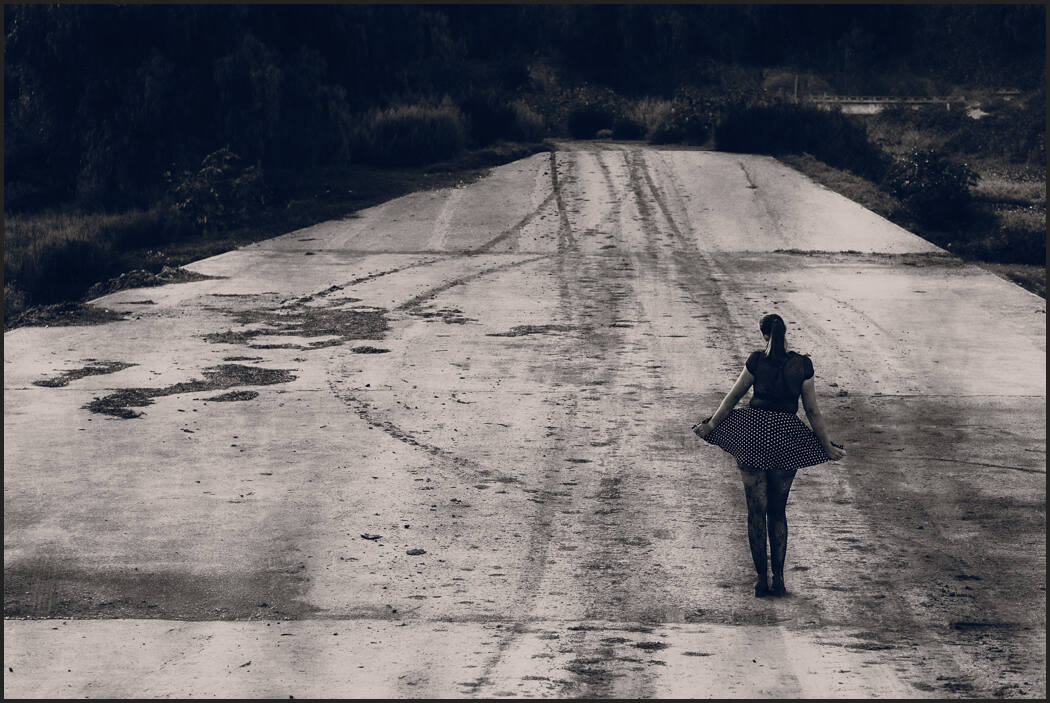
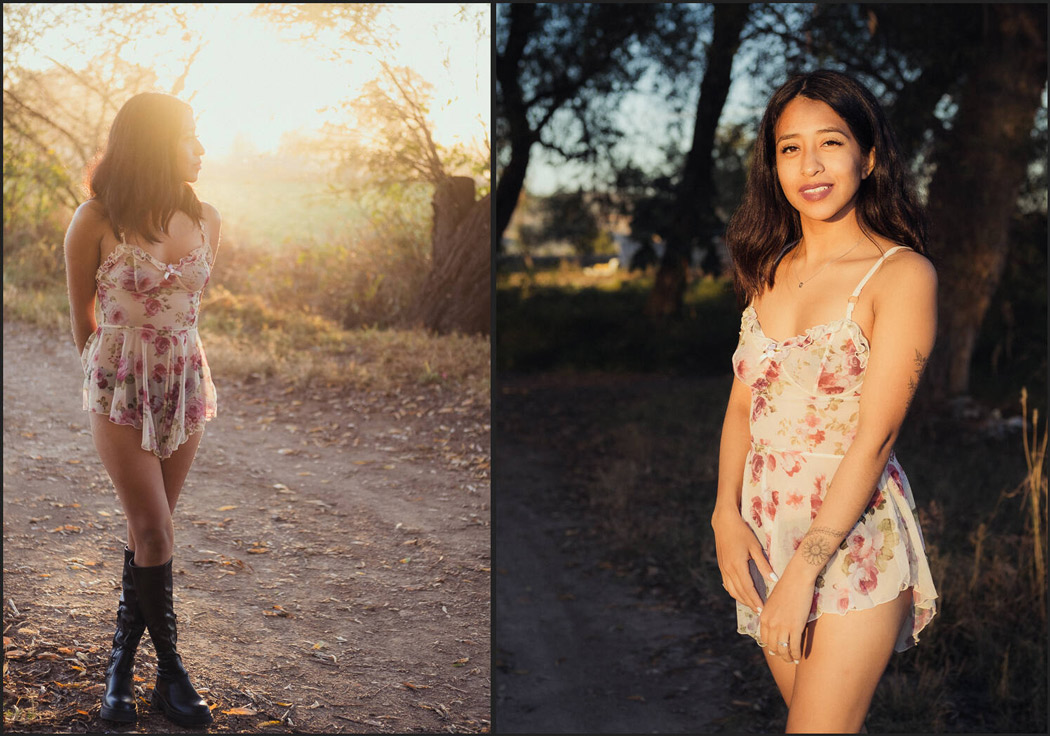
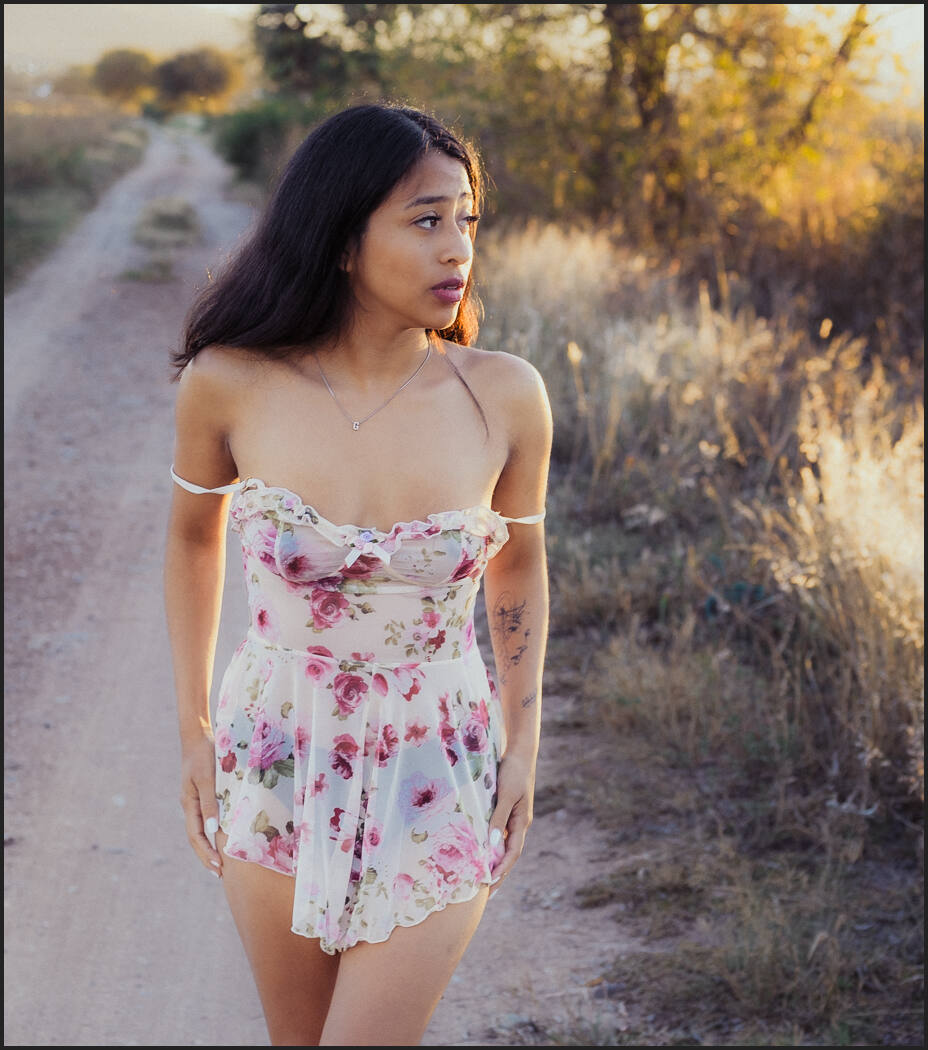
THE SETUP: In a recent session, I had a lovely model and a single small strobe. I wanted a photo that was sensual but classy. Natural light, a dry river bed. One light let me create deep shadows and drop the background tones.I got some beautiful results and edited with Filmist2 using Fuji 400H. Filmist2 is amazing but my edit was still sterile. I wanted more atmosphere like I’ve been exploring in my new project.I took the FIlmist edit to Photoshop and used a process of layers and mixing inspired by the legendary David Hamtol’s work. It’s the same Filmic photo but gentler, more imperfect, and more magical. It’s not sterile. This is why I’ll use actions like Alchemist or this new pack I’m creating because they give me complex edits that I can adjust to the vision in my head today.
3. The pictorialists were not just abstractionists!
You can still have sharp detail. It’s not all blurs and abstracts. It’s about the atmosphere.
If you go back to the era of Alfred Stieglitz and the early pictorialist photographers or forward or forward to the 80’s era of partial fashion like David Hamilton you see a pattern. I’m going to share photos and their notes today to make this point.
Being a photographer who stands out is hard in the 21st century. Perfect photos are so easy and often automated. But are they perfect or boring? As someone who teaches and prints wall portraits, I value detail and high quality. Sometimes you need megapixels. But it’s not that simple.
Alfred Stieglitz used the camera imperfections of the day to create more dramatic images., I’ve been studying his use of shadows and tonality as I create new tools and projects.I’ve always loved this 1940’s Kodachrome on the streets of London by Chalmers Butterfield. It’s a little soft, but it’s on the move and it feels like real life.
4. The best Details are not always the sharpest ones.
You see this especially when shooting film. It’s organic and feels like life in an Ain world.
Over the past few months, I’ve been working on a new editing pack to go along with Alchemist, backroom, and Emulsion. But this time I’ve been digging into iconic analog methods and getting inspired by implementing these techniques in my session and editing.
I edit a RAW photo. Say I use LR and C1 with Filmist or Silver. I get this edit and it’s good. But I’ve always said if I take the best photo and go to Photoshop, use layers, use Lumist or Blackroom or manually burn and dodge. I’ll also add something more.
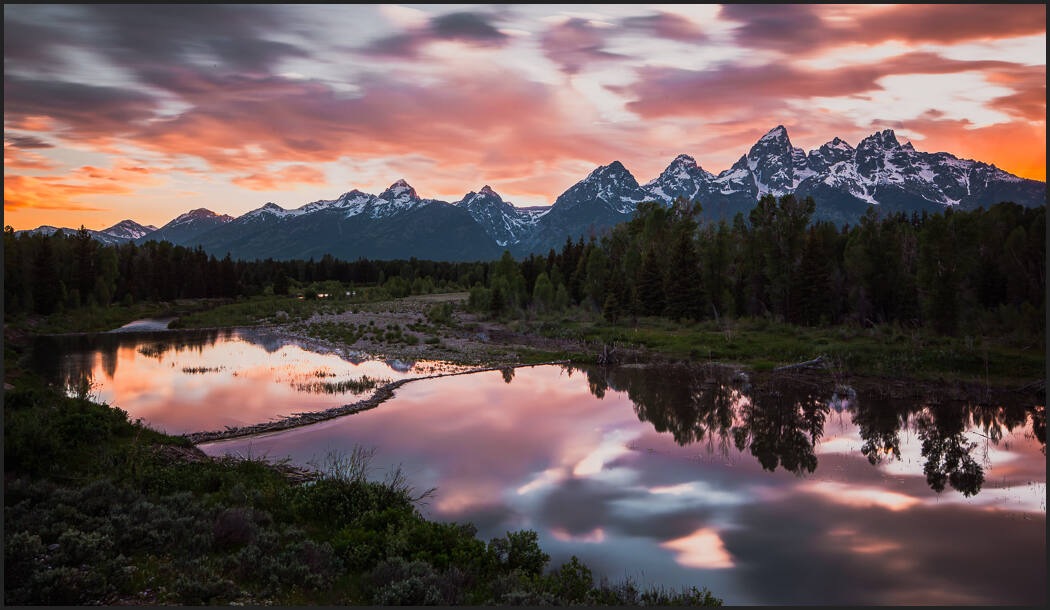
I’m no stranger to high-detail razor-sharp photos so I can print large. But even in my landscapes, I’ve learned that deep shadows, nature clearing of clouds or trees, and mixing high detail with the atmosphere, lets us feel more about the place without faking it using Ai or pasted skies.
Look at this film test and see what I mean…
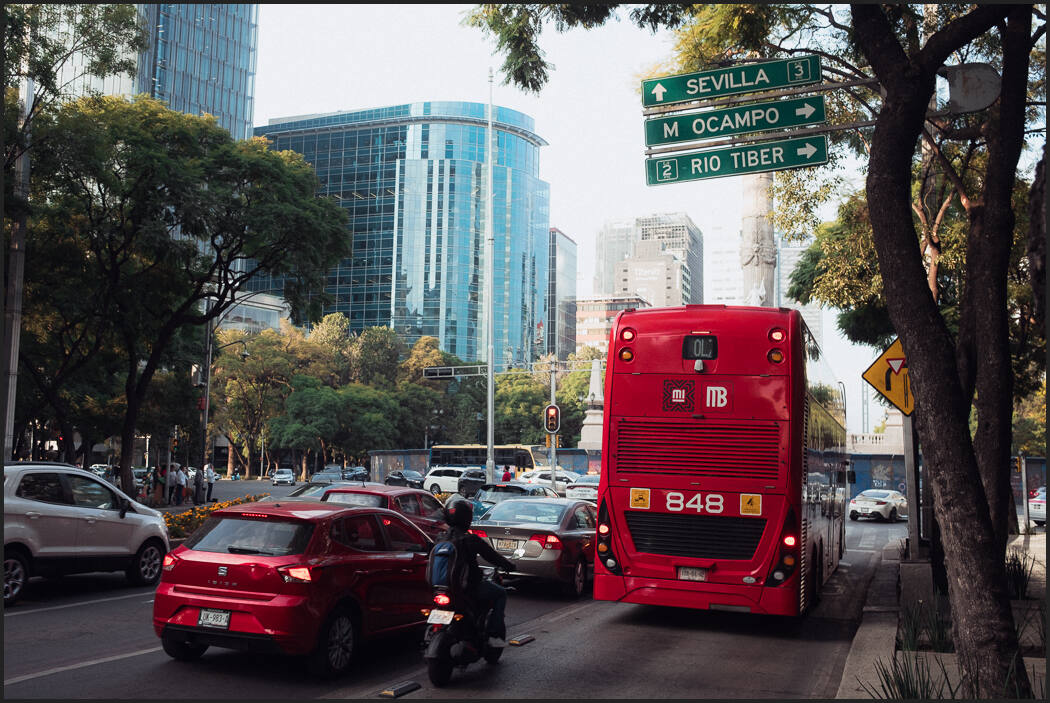
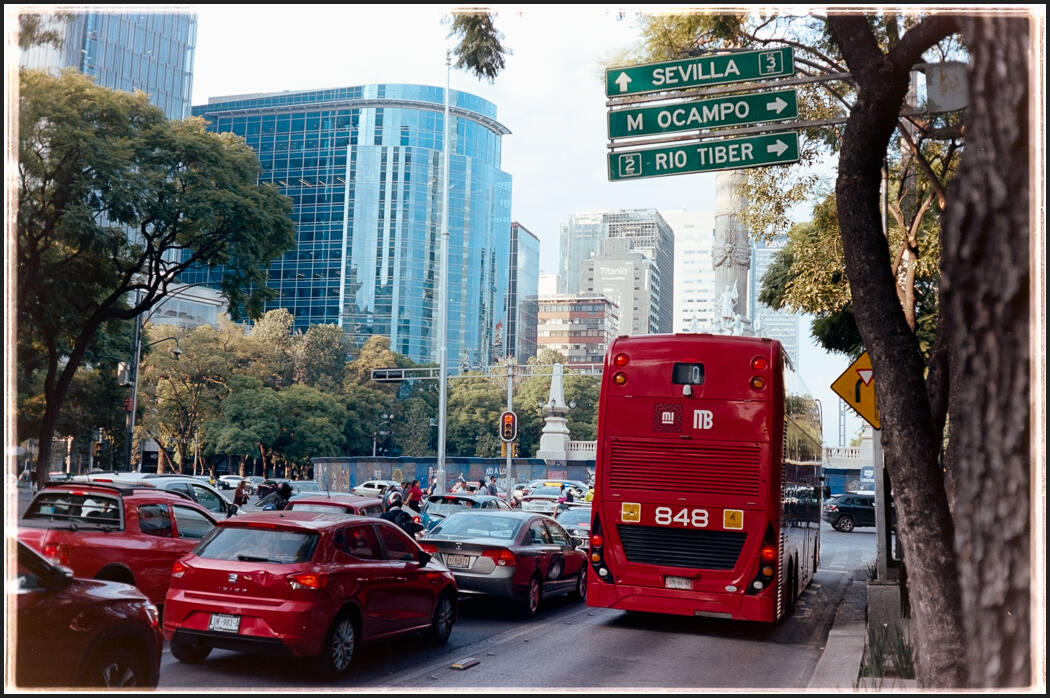
This is Mexico City, taken on my fuji and edited with Ektar 100 from Filmist 2. It looks good and it[‘s true to the film. But let’s look at the film reference.My own scan of the shot made on Ektar 100 film. There’s an organic lack of perfection in the film. The preset does great and I love it. But sometimes less perfect shots will give us a more real feel.Another un-retouched film scan was taken on Kodak Ultra 400. Film in itself is almost pictorialist in nature compared to clean digital files. There are flaws, imperfections scratches that make it feel like a different medium entirely.
But if we stop shooting safe and sterile and go all in with shadows and trying things. Not every photo will work but we will get inspired and new direction.
If you go on a trip to a beautiful place, I find a vibrant street or make a session with a beautiful person you can get inspired and create something fresh.
But I also get that when I am trying old techniques, trying to create new effects, and just going out with my camera trying extremes and not being afraid of detail but focusing on emotion and atmosphere.
Also a bit flawed. But this blut was natural and I let it ride to create a mood that worked with this dark shadowy pictorialist style edit. These may be extremes but they help me think.
7. Staying flexible matters in taking photos.
Using new software or atmospheric editing effects will inspire not only your edits. It will make you think more about what you create on camera like it has done for some of my recent sessions.
Maybe you should wedding, or school photos. I know from experience it’s easy to get it a rut. So little things like an old lens that flares, making your glass dirty like David Hamilton or keeping some of the blurry photos and editing them in a more haunting way can change how you see the world.
Some of these photos may speak to me and not you. Some may be great and some not. But each photo I shared today affects how I feel and then the emotion of tone when I create the next session. It pushed that inspection we always need as artists.
I hope you found some inspiration and will share your comments below – Gavin Seim
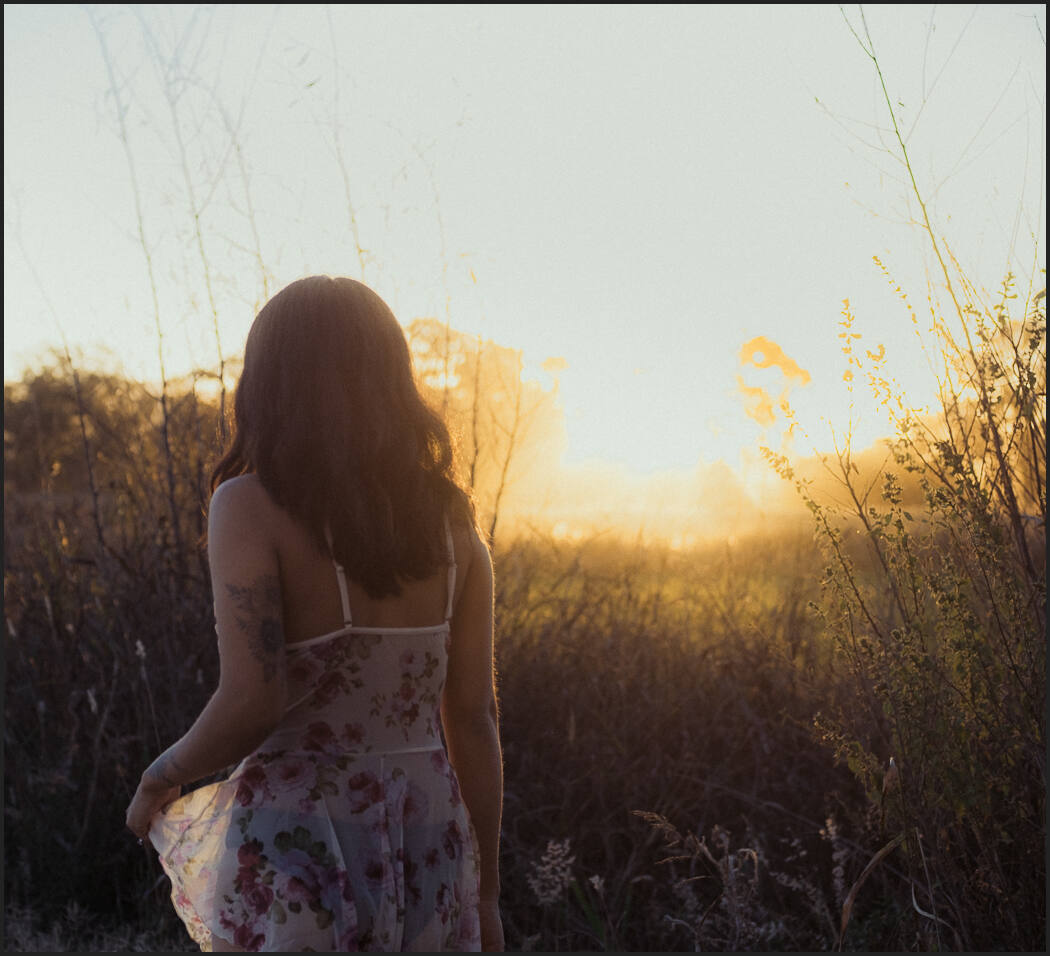
If you’ve been to shadow hackers you’ve seen this example. The darkness along with with a platinum and cyan edit from Emulsion 4 is the opposite of how we normally light a portrait. Yet the subject is still dominant. I’m doing a video soon on why we need to stop lighting everything the same.
Today’s session was great for this because the light changed fast and was very mixed. But in the real world, this is usually the kind of photos you have.
I’ve talked about white balance before here but I felt like we need another visit. Photos end up lesser when we focus too much on what a card tells us is the correct white balance.
Due to varied lighting conditions in any one frame, these cards are often not even accurate. In today’s video, I’m going to show you how White Balance should be a flexible tool to balance your color and you should not let it lock you in.
So should you buy a white balance tool?
FIlm pretty much has two white balance settings. Dayl;ight and tunsgten. You had to create around that or use filters in the post. Digital lets us have total flexibility.
There’s certainly a place for color charts. But even as someone who does a lot of color research and testing to make Filmist and other presets perfect I find them often unpredictable in real-world edits.
What’s certain is you don’t need an expensive White Balance tool for photos. If you are working in mixed light it’s mostly just a distraction. In a studio where light stays the same it could be useful but any grey card will work fine in my experience.
But in general. Don’t distract yourself. Focus on the shadow and the way you use line and tone.
Stop using the WB Card.
Yes, I mean that in most cases. Leaving it behind will let you focus on getting your photos right in camera and in post you can focus on the vision you had and make the edit perfect for you rather than what a card or guide tells you.
Just like I taught you in my Shadow Hackers LIVE workshop to not trust a camera meter to make your exposure, you should not trust a grey card to decide the warmth or coolness of your color.
Of course, there can be exceptions. But I will say that in almost no project or session do I use a white balance tool anymore. It simply does not improve my work.
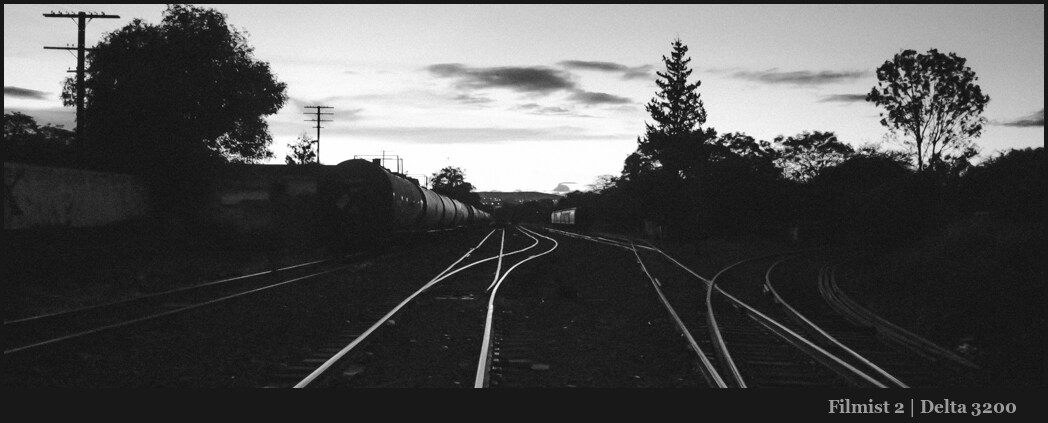
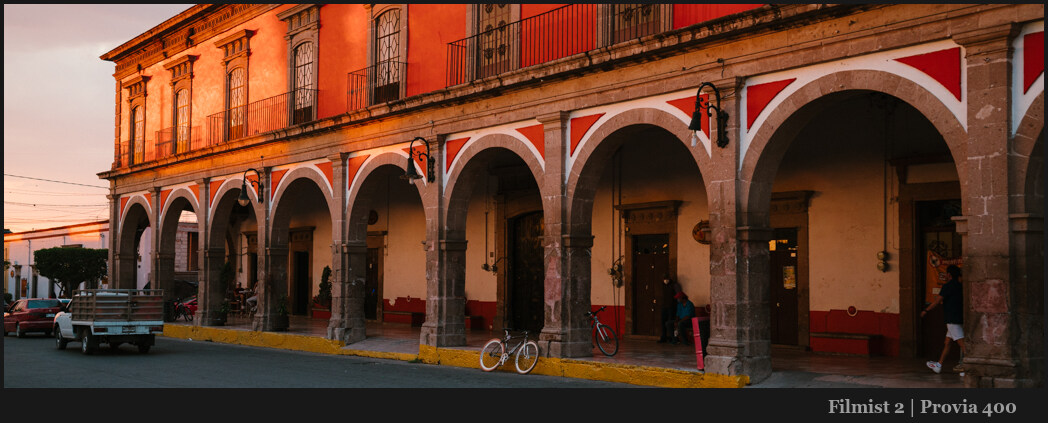
Today’s video has been over a year in planning. Because I wanted to show you how powerful this is and how to use any camera in Xpan Mode and change your perspective.
Xpan Panaormaics are expensive. Unless you make a digital Xpan
Anyone with any photo app can crop a pano. The secret to a digital xpan look is to commit and shoot that way in camera. The lines are fine. But the more blocked your screen is the more you commit.
How do you mark your Digital Camera for the Xpan mod?
Nothing here is permanent. Use a screen protector to avoid damaging the glass.
When I first started I used a marker to cover the entire cropped area. This means camera info could not even be seen unless I looked into the electronic viewfinder. Shooting this way meant I planned everything around that Xpan digital crop I was doing in post.
Every crop is the same!
Don’t go halfway. There are many ways to crop a pano. But by sticking with this consistent 24×65 ratio you get that authentic xpan look on digital and it’s just a perfect panorama formula that’s not too wide and not too narrow.
You’ll also end up with a collection of work that has this beautiful constant because every frame is the same size.
Shoot Horizontal and vertical Xpan formats.
Panos can be hard to share on social media. But in prints, they look amazing and don’t be afraid to go sideways or vertical with your panoramics. The Xpan format works perfectly on both and gives very distinctive images that suck in the viewer’s eyes.
The more you shoot Xpan digital crops in camera rather than just cropping in post the more you will see in unique ways and push the limits of your space, line, and tone. Combine that with Shadow like I teach in my Shadow Hackers workshop and you have a magical mix.
The Framing Guide for Digital Xpan crops.
The biggest hassle can be finding where to draw your mask lines. So to make it easy I made this mask frame. Just take a photo of it with your camera with the white reaching to the edge of the frame on each side.
They review that photo and use the mask to draw the lines which will be the 24 x 65 X pan crop ratio. I’ve linked the image to the larger file so you can open it in a separate window.