July 22, 2011

Gavin's new video training collection on cloning and retouching.

This has been a long time coming and I’m really excited about it. Every time I made a video, taught a webinar, or planned a lesson. Somewhere in the back of my mind it was planning for video collections. People kept asking for them and I kept wanting to do them, but it was always daunting. I needed a plan and I needed to buckle down and make it happen.

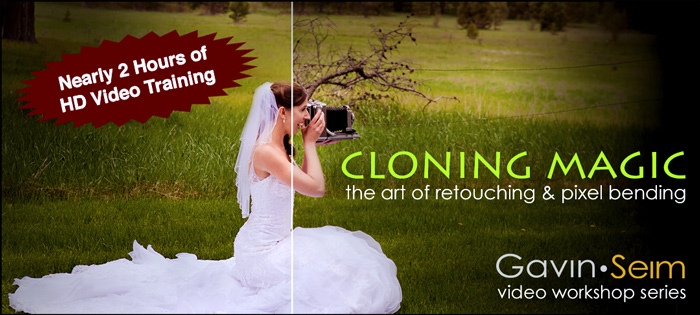
Well it finally has and it’s in the form of my new Digital Darkroom training videos. Each video collection will o in depth on it’s topic, sharing ideas and techniques to really master it. No holds barred training that’s organized and concise. Kicking it all off is the Cloning Magic video workshop. A deep look at mastering the cloning and retouching tools that will change the way you edit and take your work to new levels. Check out the introduction and a free chapter from the complete new series right here. Enjoy… Gav


Read More

June 11, 2011

I’m going to talk about cloning today. On photo’s that is. I don’t know much about the other kind. Cloning, patching, retouching. Whatever you call it, it’s all about making an image as perfect as it can be. Really it’s been around since long before computers. I’ve seen an airbrush artist do the same thing we do with cloning, but directly on a print with paint. It’s amazing. But thankfully we don’t have to do that.

Thing is you can do almost anything with cloning. But that doesn’t mean it’s easy and it doesn’t mean you should. I’m a big fan of getting it right in camera, and sometimes it’s best just to leave things alone. But often the goal is a perfect image and there’s some things you simply can’t, or didn’t change in camera.

I have a new online workshop that focuses on how to make perfect clones and retouches and I thought it would be a great time to share some of my favorite tips on how to do it better. If you want more, check out my Cloning Magic Video Workshop.

Mouse for before/After. I could not move the clutter in the field and time was fleeting. In post I thought of leaving it, but then though how much cleaner it could be and what a good exercise in challenging clones it would preset... Gav
  • 1. Visualize.
    Look at your image on the screen and consider and what you need from it. Then analyze closer for similar areas and information you can copy from.
  • 2. Make a layer.
    Never clone on your base layer, but a copy of it. This way you can mask in and out if your clone gets messy on and edge of you change your mind.
  • 3. Zoom Both Ways.
    Don’t be afraid to get in very close and make sure it’s right. Then for a broader scope, zoom out and make the image small on the screen. This is a secret to checking for halos or bad edges that can easily be missed when zoomed in. The mark of good clone is that it’s invisible to large printing and scrutiny.
  • 4. Change brush size.
    A soft large brush is usually where I start. Too small or too hard a brush can leave lines when you zoom out. That said don’t be afraid to change your brush size, not only to avoid pattens of sameness, but also to better work details. Large and small. Work it all.
  • 5. Try different tools. A regular clone brush is a good start. Even a Lightroom or Aperture clone can work well for basics. But no one tool does it all. Sometimes spot healing gives a more natural look. Sometimes the Patch tool nails it. Content aware fill and healing can also be perfect. Sometimes you need to manually brush color. If one does not satisfy you, try another. Good cloning is a process and sometimes it takes them all.
  • 6. The Final Cleaning. The best clones are usually refined. Do your main retouching, then come back and look again. Use the tools (sometimes at lesser opacity) to blend in areas, reducing blotchiness and repetitive objects. For example, you may have a clone with little rocks that match from somewhere else. To avoid repetitive problems, you can clone in a smaller patch erasing only one pebble of rock from the spot, breaking the repetition. Also watch for halo’s on edges and missed areas. again. It’s so easy to miss when you’ve been looking at a print for an hour.

That’s all for today. Have fun… Gav

Mouse for before/After. This was more of a screw up. An older portrait, the client came back and wanted a wall portrait made. I had neglected to remove the crud from the dock and it did not seem to be adding. I did a lot of detailed retouching to remove the crud and make the image shine for it's 30 inch canvas... Gav

Check out Gavin’s video workshop…

Read More

June 6, 2011

by Gavin Seim. Texture on photographs can be powerful tool. You take a texture image like a stone surface for example, lay it over your photograph in Photoshop or a similar editor and subtly overlay it by changing blending modes, opacity etc. This can be really cool, but it’s also easy to fall into the fad. Not that trends are always bad, just be aware of them.

Some of you reading this already own my Naked Elements texture collection. I’m proud of the set and I thought it would be useful to give a few thoughts on how to make best use of the textures in your photography. But no matter what texture you use, these ideas still apply.


A bold texture overlay. This intense is usually a bit much for me, but we all have our own look. You can certainly tell texture has been added. Bolf can be great but use it with care. Mouse over for original.


  • 1. Don’t simply fall for the fads.
    Texture can be great, but don’t fall into the trap of thinking every image needs super duper texture just because others are doing it. Visualize what you want from your image and how a texture will help you get there. Don’t just try to mimic everyone else.
  • 2. Use balance.
    Texture overdose is a passing fad. Great texture is often so subtle that most would not even know it’s there. Bold texture is good at times, but remember that subtle can add character and dimension without any distraction. Always consider if what you’re doing makes your image better.
  • 3. Change the modes.
    Don’t be afraid to play with different blending modes after you overlay the texture. “Overlay” mode is the mode common for texture overlays, but it’s sometimes shocking how blending modes can change the look of your image.
  • 4. Use The Masks.
    Don’t just overlay a texture and call it good. Once it’s in place use layer masks (here’s a video i found in case you don’t know masks). Blend areas in and out using the mask to manipulate the texture and draw subtle attention to your subject. For example you might want to erase most the texture from a face to keep it natural, allowing it to complement the scene in the foliage and surrounding areas.
  • 5. Don’t get in the rut.
    It’s easy to find something new and then use it all the time. Avoid it. Most texture collections have variety. Change it up and see what works. Texture is not a way to be lazy, it’s a way to be creative on your best images and make them shine.

That’s all for now. Simple stuff, but if you keep it in mind your textured works will become more refined. Also if you don’t have a good assortment of textures you can check out my Naked Elements. I also have a freebie pack you can download here to get you started. Have fun and use texture wisely… Gav


A gentle process. The texture is subtle, imparting a warmth and slight texture to the scene. Mouse over for original.

Read More

March 20, 2011

You users been asking about these for a long time. The truth is I’ve avoided it because I really like teaching photography workshops in person, and for some, like my  Lights & Shadows workshop, it’s the only way to fly.

But reality says I have a lot of tricks up my sleeve that I can teach online. With that in mind I’ve decided to stop resisting it. Coming soon is an all new series of digital learning workshops. Separated into bite sized chunks, inexpensive, live and online.

It’s going to start with a Lightroom Power learning series. Workshops that start at basics and work into very advanced editing skills. You can pick the sessions you want based on your current skillset. Cool part is these will be about 90 minutes each and will only cost about twenty dollars. Spend an evening at the live online workshop, then take time to let is soak in before the next one.

After Lightroom I plan to take it further. I may even do a seasonal series. Focused workshops on things that seem simple, but can go so deep. Burning and dodging, cloning, prepping files for print. I’m getting excited because with this online format I can host a workshop on nearly anything, no matter how focused, because there’s no travel and no venue overheads to take into account.

Stay tuned for more details. Registration for The first webinars will be opening soon… Gav

You can follow the Facebook Page. All workshops will be announced there. You can also join the newsletter over in the sidebar >>

Read More

March 16, 2011

Setting up strobes outside, especially with an with an umbrella or softbox can quickly turn into a fiasco of tipping. Not ideal when your trying to get a job done before the light changes or subjects start calling you names. I put this together last summer while planning a family session with over forty people. One common method is to use sandbags, but I wanted something small, light and adaptable. Behold, my DIY quick release light stand cords.

I left these up all afternoon without reservation. They make even portable stands VERY stable and should handle heavy winds. Do some tests of your own and if in doubt just add a few extra cords to make it as strong as you need. I found three per stand was adequate. Obviously these are not the best choice for paved surfaces, but in most situations they’re fast and effective.

Cost in only $5-10 to make a set of three and they can also be used to tether other things as well. Here’s is a good video on how to tie the Tautline Hitch. Also here’s the tent spikes I like, here’s nylon cord and here are some S hooks (you can also get them at your local hardware store). Enjoy… Gav

Read More