February 17, 2012

by Gavin Seim:

Ready in 60 Seconds: After you choose the subject but before before you release the shutter, try taking a full minute to think about your scene and how you’re about to capture it. Really. Don’t just look at it. SEE IT. Sometimes we feel pressured to click. But even with a portrait, learn to take a little time and you’re images WILL improve. With some scenes you can even spend longer. Check out the 111 Project.

Sparks: I stood outside well before the exit. Experimenting, considering the scene, trying to predict the light. The effort paid off with a great candid from a challenging scene.

Cut The Trash: I know, you’ve already taken 60 seconds, you have a plan. But look again. Maybe even take a test frame. Controlling tone, removing clutter and distracting elements is one of the most neglected elements in art making. If something is not adding to the image, it should not be in the frame. Either you move, move it, or it will move the quality of your final image down to LOW.

Read More

September 26, 2008

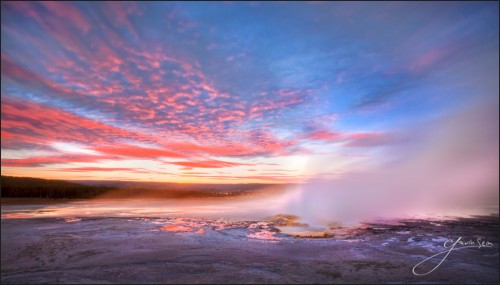
Ghosts of Clepsydra Geyser - f164By Gavin Seim: (updated 09/11): I often hear from photographers asking me to look at their work and tell them how to be better photographers. In ten seconds I can usually tell them how to improve because we often overlook simple things. There’s nearly always something we can improve, no matter how much experience we have.

Most rules are universal to photography of any style or any experience level. Of course these rules are meant to be broken, but general concepts help us stay on track and we should only break rules for good reason. These are some tips I keep in mind with my own work. Hope they give you a few reminders. When your done here some join us in the forums to get some personal feedback. OK let’s roll.

  1. One primary subject. If you have more, you’ll have distraction.
  2. Omit needless objects. Getting them out will clean up your scene.
  3. Slow down. Many images are ruined because of RTC (Rush To Click).
  4. Tonal control is essential. Use the Zone Scale, Burn & Dodge.
  5. If a background detracts from your scene, change or carefully blur it.
  6. See Light. Where’s it coming from, how can you use it.
  7. Learn the rules photography. Then you’ll break them for good reason.
  8. Don’t just center things. Use the rule of thirds & others. They work.
  9. Eyes. Watch close, keep them sharp. They hold emotion.
  10. Use the Magic Hour. Around sunrise/sunset, light happens.
  11. Keep it sharp. Watch your shutter speed & subject movement.
  12. Space is valuable in a frame, keep clutter away with comp & tonal control.
  13. Harsh sun can be bad. Learn to manipulate it and find good light.
  14. Shadows are critical. Without them the light gets ignored.
  15. Great images start in camera. But don’t underestimate careful editing.
  16. Use fresh ideas, but also go for those old reliable images.
  17. If the weather is foul, it doesn’t mean the photos will be.
  18. Lines lead the eye. Pay attention to where they go and intersect.
  19. Change hours. Different times of day will transform a scene.
  20. Think about shadows and dimension. Flat light is usually boring.
  21. Motion Blur can be very powerful, but use it carefully.
  22. Take time to really LOOK at your subject before releasing the shutter.
  23. Study. Photography has 150+ years of history. Go learn about it.
  24. Remember… Slow down, refine, simplify. Analyze your scene.


seim-bridge-600x400
This award winning image has a lot going for it. Notice the balanced intersecting lines, bold colors, and simplicity of the scene. It leads the eyes and tells a story.
Focus Blurring was an effective tool here. The light at the ceremony was great but I wanted the focus on the couple. I used a Lensbaby to give me the soft edges and then some work in post production to make the viewers eye go right where I wanted. The blue could have also been done in post, but I enjoy the Lensbaby.
Silver Waves of Grain: Motion blur was used heavily in this 5 min+ exposure. This gave a ghostly feel to the fields and clouds, completely changing the feel of this scene. Then detailed tone work was done to add depth and dimension. You can click the image to read a detailed article on f164.com about how it was made.
Watch the details. Look To the Wind, is one of my early (and more recognized) HDR portraits. The space gives it a bold cinematic feel and the simplicity of the deserted beach adds strength to the scene. Looking back however I could have watched my lines more. The way the horizon cuts at the shoulder is not ideal. It's still a great image, but if I was doing it over I would try being higher with the camera for an even more powerful composition.

Over 5000 Facebook Fans say it best. Seim Effects Tools set the standard.

Use Promo Code PPS to save 15%

Read More