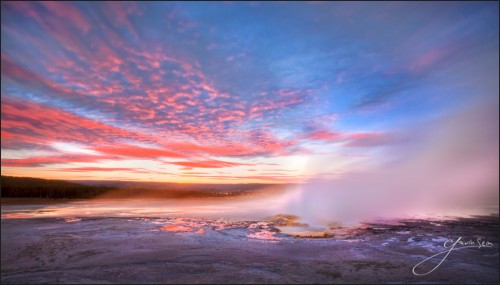
February 10, 2009

This weeks cool product is the Itoya Art Profolio series. I really like these for presenting and storing prints. They solve the problem of displaying images in an easy and portable fashion. Having images in print simply makes a better impression than looking on a screen.

Profolio’s come in various styles, but the bottom line is that their a reasonably priced simple way to present your work. Coming in a broad range of sizes such as 5×7, 8×10, 11×14, and even 13×19 (which is the odd print size that comes out of my Canon Pro 9000 Printer).

Here’s a few available styles and some Amazon links. I also found them on B&H Photo.

Standard Art Profilio: This has a simple hard plastic cover with plastic sleeves inside. It’s not the most finished and while I would not sell it as a client album, but it’s simple and clean looking for a REALLY low price. This is basic presentation that’s inexpensive enough to double as print storage.

itoya-profolio
Itoya Art Profolio Std from around $7

Read More

October 15, 2008

<<Click To Listen – Photography Roundtable Podcast #10 – PPS #51

Subscribe in itunes
Rate/Subscribe in itunes, or Vote on Podcast Alley

Todays Panel:
Gavin Seim ~ Seim Studios

Dennis Zerwas ~ DZ Photography

Paul Walker ~ Paws Pet Photography
Erik Guggenheim ~ CopperBreaks.com

Scott & Adina Hayne ~ Hayne Photography

Notable Time Indexes:
3:55 News & General Talk
52:33 Scott & Adina on selling Weddings & Portraits
1:04:06 Paul on Pet Photography
1:14:25 Erik on the Nature business

Listeners can Save with these codes:
15% from OnOne software with promo code PRPHTPC
15% on Seim Effects with promo code FALL

Roundtable 10 Forum Discussion:

Links:
Kodak Launches Ektar 100. Yep real film

5D MK2 is here

Pet Photography NOW: by Paul Walker

On This Earth: Photographs from East Africa: Nick Brandt

Orphan Works act may be dead

Freebies on the Seim Effects Facebook fan page.

Some articles of note…
90 seconds to better photography
Managing LR catalogs and images for Pro’s

____

Picks of the week:
Adina:
Shoot Cue Studio Software

Scott: Brinkmann Maxfire Dual Xenon Spotlight

Paul: Our Peaceable Kingdom: The Photographs of John Drysdale

Eric: Molar Bean Bags

Dennis: Moon Phase for iPhoneLed Headbeam Lamp

Gavin: Good Printable Disks: Taiyo Yuden Water Shield Printable CD & DVD –  Overnight Prints for postcards and bussiness cards.

Read More

September 26, 2008

Ghosts of Clepsydra Geyser - f164By Gavin Seim: (updated 09/11): I often hear from photographers asking me to look at their work and tell them how to be better photographers. In ten seconds I can usually tell them how to improve because we often overlook simple things. There’s nearly always something we can improve, no matter how much experience we have.

Most rules are universal to photography of any style or any experience level. Of course these rules are meant to be broken, but general concepts help us stay on track and we should only break rules for good reason. These are some tips I keep in mind with my own work. Hope they give you a few reminders. When your done here some join us in the forums to get some personal feedback. OK let’s roll.

  1. One primary subject. If you have more, you’ll have distraction.
  2. Omit needless objects. Getting them out will clean up your scene.
  3. Slow down. Many images are ruined because of RTC (Rush To Click).
  4. Tonal control is essential. Use the Zone Scale, Burn & Dodge.
  5. If a background detracts from your scene, change or carefully blur it.
  6. See Light. Where’s it coming from, how can you use it.
  7. Learn the rules photography. Then you’ll break them for good reason.
  8. Don’t just center things. Use the rule of thirds & others. They work.
  9. Eyes. Watch close, keep them sharp. They hold emotion.
  10. Use the Magic Hour. Around sunrise/sunset, light happens.
  11. Keep it sharp. Watch your shutter speed & subject movement.
  12. Space is valuable in a frame, keep clutter away with comp & tonal control.
  13. Harsh sun can be bad. Learn to manipulate it and find good light.
  14. Shadows are critical. Without them the light gets ignored.
  15. Great images start in camera. But don’t underestimate careful editing.
  16. Use fresh ideas, but also go for those old reliable images.
  17. If the weather is foul, it doesn’t mean the photos will be.
  18. Lines lead the eye. Pay attention to where they go and intersect.
  19. Change hours. Different times of day will transform a scene.
  20. Think about shadows and dimension. Flat light is usually boring.
  21. Motion Blur can be very powerful, but use it carefully.
  22. Take time to really LOOK at your subject before releasing the shutter.
  23. Study. Photography has 150+ years of history. Go learn about it.
  24. Remember… Slow down, refine, simplify. Analyze your scene.


seim-bridge-600x400
This award winning image has a lot going for it. Notice the balanced intersecting lines, bold colors, and simplicity of the scene. It leads the eyes and tells a story.
Focus Blurring was an effective tool here. The light at the ceremony was great but I wanted the focus on the couple. I used a Lensbaby to give me the soft edges and then some work in post production to make the viewers eye go right where I wanted. The blue could have also been done in post, but I enjoy the Lensbaby.
Silver Waves of Grain: Motion blur was used heavily in this 5 min+ exposure. This gave a ghostly feel to the fields and clouds, completely changing the feel of this scene. Then detailed tone work was done to add depth and dimension. You can click the image to read a detailed article on f164.com about how it was made.
Watch the details. Look To the Wind, is one of my early (and more recognized) HDR portraits. The space gives it a bold cinematic feel and the simplicity of the deserted beach adds strength to the scene. Looking back however I could have watched my lines more. The way the horizon cuts at the shoulder is not ideal. It's still a great image, but if I was doing it over I would try being higher with the camera for an even more powerful composition.

Over 5000 Facebook Fans say it best. Seim Effects Tools set the standard.

Use Promo Code PPS to save 15%

Read More

July 19, 2008

I’m super excited to announce the release on Creative Essentials. This is an action set you’ll use all the time. I’m using them like crazy on Seim Studios shoots and loving them. Even if you have no other actions, this set will keep you more creative, and more efficient.

C.E does not replace the popular Hollywood Effects Action set. It’s more like the missing link between my Lightroom presets and Hollywood Actions. It’s a set of workflow enhancing effects and tools that include sharpening. There’s a Video on the page that will show you all the power of Creative Essentials.

Check Em Out

Read More

April 22, 2008

how to be a wedidng photographerSo, you’re going shoot your first wedding. Maybe you’ve been hired, or maybe your doing it for a friend on a budget. Either way you want to get great results, have good referrals for the future, and make the clients super happy!

So what do you look for? What about wedding photography is so intimidating, and how should you take on this challenging but rewarding type of photography?

1. Don’t Oversell Yourself.
If your just getting started with weddings don’t pretend to be something your not. Chances are the reason your shooting their day, is because it’s not in the budget to hire someone who’s experienced with weddings! That’s OK, and an opportunity for you. If you feel it’s too much, then let them know and maybe get someone else to help. Chances are however that your thinking “I can handle it fine” That’s cool, but be realistic, and remember you can’t do a retake of a wedding.

2. Do your Homework
If you lack experience with weddings do some research. Take the time to read a few books and get a feel for what is expected of you at the wedding. A couple books you might check out are Digital Wedding Photography, The Complete Guide to Professional Wedding Photography, and The Wedding Photographers Handbook. There’s many more, just search around on Amazon.

If it makes you more comfortable, have the bride give you a list of shots she really wants, but don’t expect the couple to know everything you need to shoot. Once you know your way around you’ll probably outgrow lists for the most part, since you’ll already know what to shoot and when. Also take the time to look at great wedding pictures from other photographers and note what you like and dislike about their images.

Read More