July 6, 2011

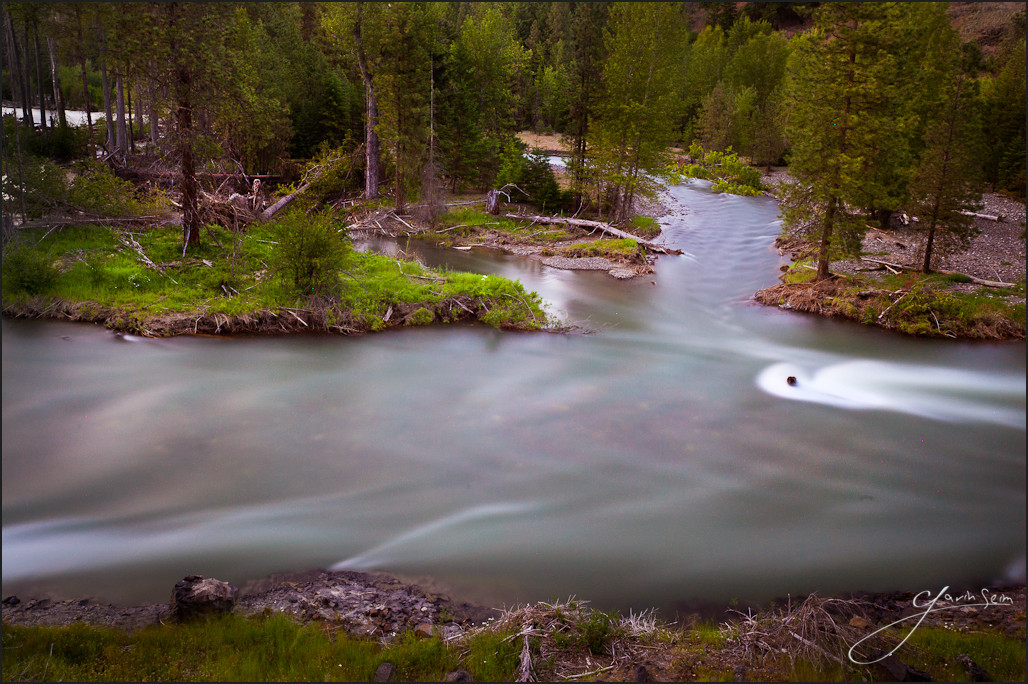
River Forks, Snoqualmie National Forest, Summer 2011. Non released example image, 8 minute exposure at ISO 100.

This is for you photographers. It’s an 8 minute exposure I did just after sunset on the river. I processed it with the Velvius preset from Power Workflow3. It’s not a stunning image and that’s not why I posted it. I felt it was a good image to use to talk a bit about pixel science.

To me, what merits discussion is the noise. I’ve done images much longer than 8 minutes. The longer the exposure, the more potential for noise to be generated as the sensor heats up. But, as myself and some others have found, the warmer the environment, the worse it seems to get. It was probably in the low 70’s here in the mountains, and the warmer temperature seemed to make a great deal of difference compared to images I’ve done in cooler environments.

Look at the image and the crop section I posted below. The noise produces a banding-like effect on the frame that really reduces quality. The large color artifacts are easy enough to fix, but there’s an almost patterned, under-the-surface noise that really is a challenge. And this was with in camera long exposure reduction turned ON.

I talked about this type of noise in depth in the making of 140 Minutes of Night ( 2+ hour long exposure) and looked at techniques to deal with it, but it’s not easy to correct. When you get into bad heat noise, the plethora of noise plugins and tools we have won’t just take it away. Well, they will, but only at the cost of losing a lot of detail everywhere else. And that’s just not acceptable.

Read More

June 24, 2010

by Gavin Seim: I’ll be talking more about Lightroom soon, but I wanted to make a quick post about what I found most significant in LR3. It’s the processing. It may go unnoticed at a glance, but is so much better, that by itself makes LR3 worth the upgrade. This first example shows an ISO 50,000 image from a 1D MKIV, showing just how impressive the new noise reduction and processing in LR3 is (not to mention the camera). I did this in LR3 by simply switching it back and forth from new to old process version (in the camera calibration settings).

Next is a lower 640 ISO example. For this one I actually processed the first in LR2 itself and the other in LR3. While not so obvious (click for the large version) it shows the subtle quality of not just the noise reduction, the the quality of how the file is being processed. Notice in the large version how the LR3 version feels more organic, almost film like in quality. I love it and you can be sure I’m getting under the hood in LR3 to see what’s possible for workshops and my Seim Effects presets.

Read More

February 26, 2009

NOTE: This article is a few years old. Most of the products mentioned here have newer refined versions. They arr all viable options. Look over our review. But also check out the latest offerings from each company and see what they offer.

by Gavin Seim. Updated 04/2010: Even with cameras getting amazing at high ISO, low noise images, there’s still room in our kits for good noise reduction software. It allows us to push the limits and keep our images clean and vivid. Nearly every serious photographer should have a good noise reduction tool in his arsenal. That said I don’t think we need to use NR all the time like we did in the past. A little noise is not always bad, especially the more appealing grain like noise coming from today’s cameras. I keep various NR tools on hand however so if I want to reduce, their ready to go.

Today the showdown has come. I see lots of talk about what’s the best noise reduction software, but mostly it’s all talk. Rather than just talk, I’ve made comparisons. Lots of comparisons. I’ll give you examples with various products, images, cameras and ISO settings, including some HDR. At the end I’ll give my final opinions of each product and let you decide for yourself. Let’s get started.

The Contenders:
Neat Image VS Noise Ninja VS Noiseware VS Dfine VS Lightroom VS Topaz Denoise VS Photoshop:

All tests were made using the Photoshop plugin versions of the products but some are available as standalone apps. Settings varied, but I used mostly default settings and automatic profiles, with occasional tweaks to get the results I felt looked best. This means these images represent the results you would get with a single pass and minimal hassle.

Often I found that one product maybe great on one image, while another product may work better on the next. Tweaking the settings would perhaps improve results a little depending on the image, however I wanted a real feel of the results we’ll get everyday. You can click any image for a large view, but some results are similar so you may want to download the large image bundle linked below.

Download all HR Images in bundle

1_4-5d2-3200-ninja

1_1-5d2-3200-none 1_2-5d2-3200-dfine 1_3-5d2-3200-neat 1_5-5d2-3200-topaz

1_6-5d2-3200-noiseware 1_7-5d2-3200-cs4 1_8-5d2-3200-lr

Read More