I’m on the road, headed to Minnesota for my HDR & LR workshops. It’s a month trip with my wife and kids and we’re getting to see amazing things. Many of which were in Yellowstone. I just did an episode on Photo Couch on Yellowstone, so if you listened to that, you know I was awed by what we saw there.
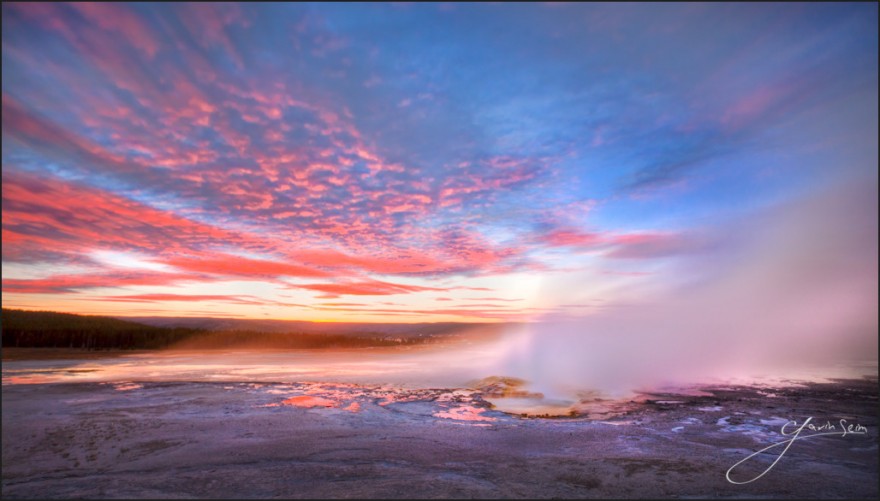
We discovered Clepsydra at the Paint Pot Geysers during our first drive into the park. Just in front of it out of the frame is the bubbling Spasm Geyser. It turned out to be an incredible sunset and after walking the boardwalks a bit, I knew that this was what I wanted to focus on. I set up the tripod and spent some time planning my frame in a way to being out a beautiful but ghostly feel. This is the result.
For Photographers. How it was made:
I don’t like to be boring, but I’m going to get a bit technical for those of you who want it. The rest can just enjoy the sunset. Because this scene was so stunning I did a few setups, but as I mentioned in the last Photo Couch I’m trying to take more time in composing an planning my fine art images. In the end I think we end up with better work by doing so, than just trying to shoot every angle.
Bracketing for HDR was a no brainier with this kind of light. I bracket for HDR on nearly any landscape scene so I can use if needed, but I knew I wanted a true bracketed HDR here. I’ve also be enamored with my B&W 10X ND filter lately. It reduces light by 1000x and with it I get real control over how slow my exposures are. I used it a lot at Yellowstone, attempting to get a more rare perspective on one of the most photographed places in the world. Bring out the ghosts as it were. We would normally see this geyser spewing and vivid rather than slow and blurred. It’s not necessarily better or worse. It’s just my perspective today.
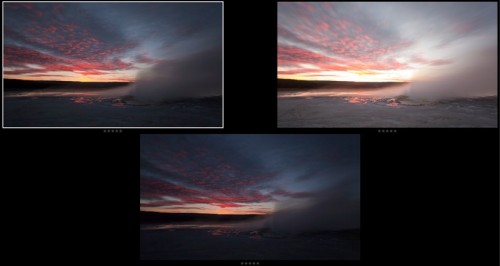
Here’s my exposure settings – ISO 400, f5.6, Canon 17-40 L lens at 22mm
- Mid Exposure, 5sec
- Over Exposure, 25sec
- Under Exposure, 2.5 sec
Whoa, now I’m getting nerdy. Below are my three resulting RAW frames. Generally I find three are enough. Though I sometimes do more and indeed more can be needed in scenes with extremely drastic light differences.
I processed this in Photomatix for the HDR merge. I went, as I often do with a gentle process. Bringing out the bold color and range, while avoiding artifacts and that Flickr HDR feel. After Photomatix, I went back into LR with the worked Tiff file. Rendered HDR nearly always needs some work to bring it to full glory. I used the Super Simple Preset fro PW3, along with a few manual tweaks to color channels and the like.
Next I went into Photoshop for a few minutes. My best fine art pieces usually go into PS. We can often understate the subtleties it can perform, until we go in and try them, seeing before and after. I did not spend a lot of time. I mainly I focused on subtle dodging of highlights and some burning, to clear of the gray flat tones we can get in landscape images and even more so in HDR.
The above image is what I achieved. It may not win a prize, but people seem to like it. I feel I was given an incredible sunset and did something a little different from the average. I like it, and it will probably appear on a canvas or metal as a signature piece.
Your thoughts welcome… Gavin
Ghosts of Clepsydra Geyser – West Yellowstone
Related Posts...
This makes your black and white better Instantly.
Fake photos are everywhere. You need to re-wire your process with Cinematic Technique.
Creating Emotional real Photography Pictorialism in a sterile Ai age
Tell me your thoughts....


Amazing as usual. The sky color is wonderful along with the reflection in the water. Also, thanks for the technical info!!!