[like]
I’ve seen amazing things in my travels. So at first glance it just seemed like a beautiful landscape. But as I took what little time I had to really look at Yosemite through the eyes of an artist, I soon begin to realize why Ansel Adams loved it so much and to see that those giant slabs of rock towering above me were true wonders of natural beauty.
I had just one afternoon for this, as it was the tail end of our Fall 2010 tour and we needed to move towards home. I was hoping to take away at least one really good frame that afternoon. I think I did just that. I made various compositions throughout the day, and though we did not get to see a fraction of Yosemite’s beauty, we wound the narrow highways and hills, seeing what we could in the time we had. We ended up down in the village and roamed a bit, taking time to visit Ansel’s gallery and peek at some of his legendary images.
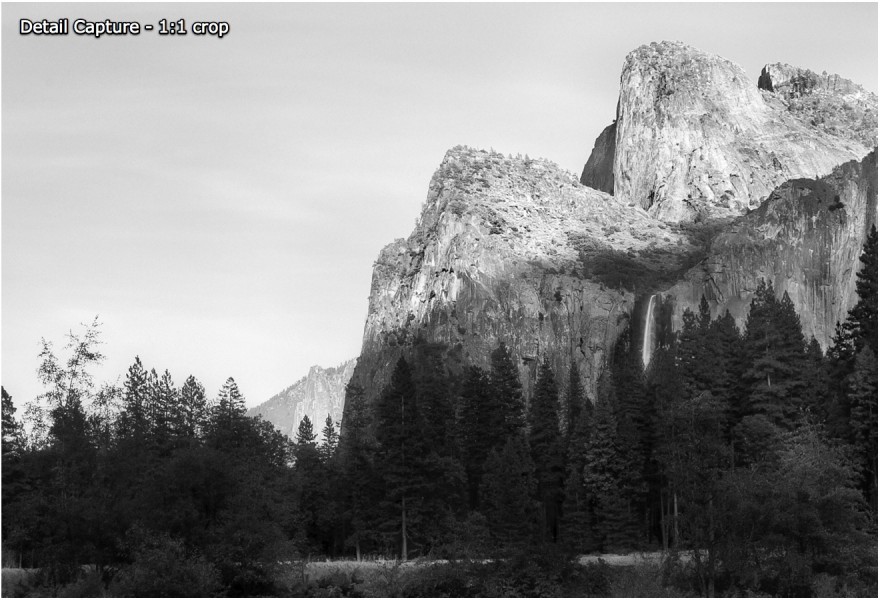
We were heading out of the village, working our way back to camp near Mono Lake. I was hoping to see some sort of sweeping sunset as the night drew in, but we barley got a mile before I rounded the bend and experienced this view for the first time. Gateway to Yosemite is a sight. With a view right cross the river and down the valley. Bridal Veil falls in the distance. Some others were in the pull off, snapping photos and enjoying the view as the low evening sun cast sprawling light on the crags of El Capitan and it’s surrounding landscape. I knew this was it and I was going to take my time.
Those of you who know me, know I’m a fan of silver prints and of Ansel. I don’t want to copy what he did, but his and others work have allowed me to gain appreciation for quality silver images as I continue to refine my own approach. In the past few years I’ve started spending time in the study of monochrome. I love color, but sometimes I just want to take it away. Allowing me to explore the canvas that is tone, depth detail and density. This was one of those times.
This this was one of those places that get’s photographed often, but I wanted something above average and was willing to wait for it. I set up the tripod and gear, waiting for some people to move so I could get right where I wanted. I meticulously analyzed the composition and setup for the image. I think I spent a good twenty minutes planning it and running few test frames, refining the focus manually and just making sure I didn’t miss this.
Finally it all came together. The light, the plan and the moment. I made my final frames, then packed up. I don;t believe I took any more photos that night. This was what I had come for and I felt satisfied. After I was back in the trailer, final process proceeded. I could try it describe the scene, the flowing river, the driftwood, and the tiny distant waterfall. But I need not because I have the result of many hours of labor to show just how it felt to me on this evening in September 2010. I’m currently doing test prints on metal and this one should be officially released this year.
For Photographers. How it was made…
Canon 5D2, 17-40L, 20mm, BW 10ND Filter f16, ISO200, 45sec, 85sec.
All told I’ve spent many hours making this image. I’ve gone into detail above on setting up the shot and taking my time to get the light and composition right. Now lets talk about the process, because it’s critical to how this image was made.
First you’ll see I used two frames. I did not go for a full processed HDR, but used the frames to maximize dynamic range while keeping a natural contrasty punch. Starting with Silver Shadows presets I got a good overall tone on both frames and then did some refining. After that I did did layer blending in PS to get the dynamic range the way I liked. Now the real work begin.
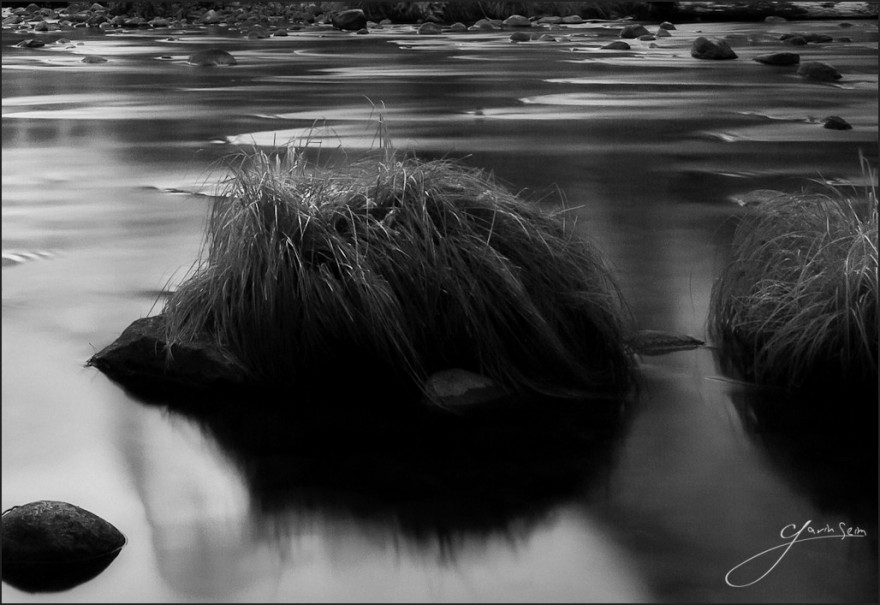
This has a lot of dark shadows. Not because I did not have range to make them lighter, but because I wanted the rich moody tone of a great silver image. I wanted the foliage dark, but not too black. The was water silken and smooth thanks to the long long exposures and the grasses have a flowing feel. The crags are not blown out, but they have contrasting tones. Finally, working the light in the tiny waterfall to gives the eyes a reward when they search for what gives this image it’s title.
I’ve become passionate about my silver processed images. To top it off this trip has found me digging deep to maximize details, get richer blacks, less artifacts and just an overall better quality image from today’s digital gear. I was determined to avoid those muddy, artifacted blacks, so I worked the details. A lot. Starting back in LR with careful working of the black levels and contrast using curves, blacks, burn and dodge. I was careful not to lighten areas that should be dark and I even burned some of the blacks to clip away tiny artifacts that could only be seen at full zoom.
I worked in LR, then went into PS. I did a lot of very meticulous burn and dodge in there, including plenty of subtle highlight dodging to give better illuminessence to things like the flowing grass blades in the foreground (one of my favorite details on this image). Highlight dodge is easily overdone, but very magical when used right because it brings out light that is there, but may be getting overlooked. I worked and worked until it felt right. Even updating the first version I had posted here, with the final print version you see above. I am very happy with this piece and have already started making test prints for it’s official release.
Finally. For the sake of clarity let me recap the file management that I used to try and keep this as high quality as possible. I started editing in LR with my two original RAW files. Then I went into PS for detail work. I finished in PS, then returned the 16bit PSD file to LR for some final tweaks. Before the final updated version you see above however, I went back into PS various times, making changes to the same PSD as I noticed things that could be improved. Since I stayed on the same file, I avoided extra degradation that comes from new file exports, yet retained my active LR settings. The whole process was based on the two RAW files and the one PSD from PS. That gave me a high quality master I could export JPEG’S from. For detail reference, I’ll add a screen capture of a 1:1 crop below.
I know I’ve been long winded on this one, but it’s already a favorite and I wanted to give it some time for you readers, and for my future reference as the exact details of my processes fade from my mind over time. f164 is my photography diary as well as a blog. Hope you enjoyed. I’ll keep you posted on the print release via my Facebook Page… Gav


Holy Majesty…. Brilliant Image!
great photo. Inspiring
I love this! I can’t wait to read how you made this. It will be fun to see if my own guesses are in the ball park.
I think ive been to yosemite a dozen times, and ive never seen this. What a great photo. I also enjoy your pro photo show podcast. I started listening by downloading the photo minutes on my Zune player. Makes my horrid 1-2 hour commutes enjoyable since im learning a lot. Thank you,.
Wow. Nicely done Gavin. What a breathtaking shot….
Gorgeous! Spellbinding picture, I appreciate being able to read all the details on your creative process.
Gorgeous. Thank you so much for your ‘How it was made…’ explanations. As a hobbyist, I am always keen to learn if and how digital images are post processed. Do you ever show your SOOC images alongside your explanations of processing? I would love to see how this image, or any of your others that you discuss, looked straight out of the camera.
Thanks Vikki, glad you enjoyed it. I don’t often show original files in posts like this where a new work is being showcased. I want to keep the focus on my final visualization and in fact, I rarely post more one one image file. Though I often show originals in my video training and workshops.
Thanks again… H