Today’s video is a focus on the 3rd phase editorial edit. If you start using this, your published images will take on a new level of professionalism that really will make people see your work differently.
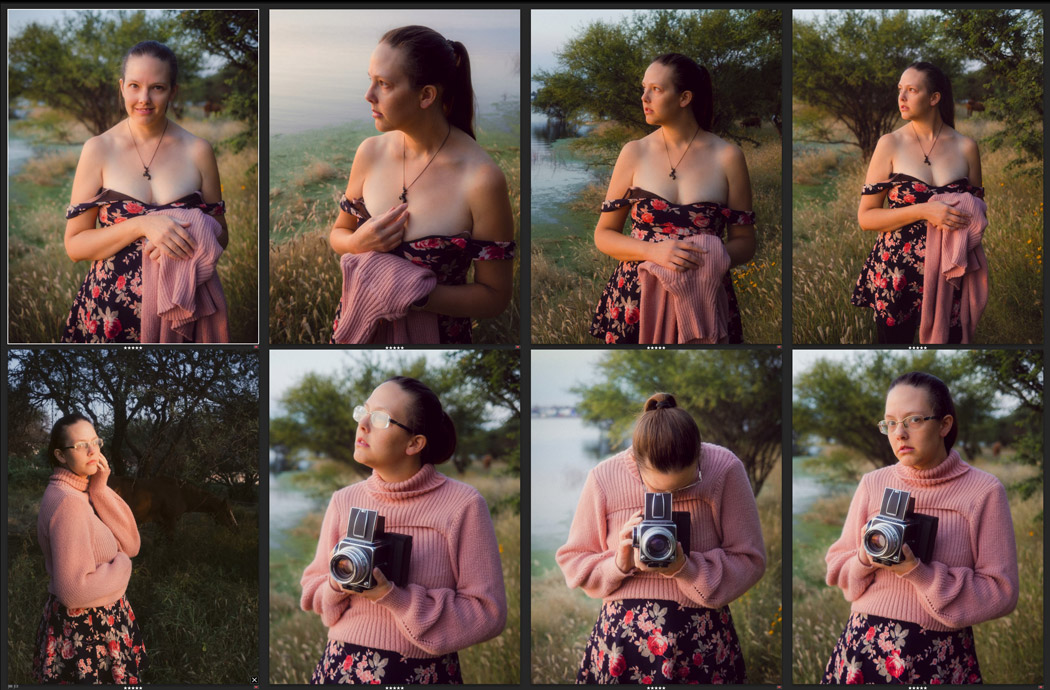
But to set a foundation, let’s briefly cover how the edit starts while you’re shooting, and I’ll show you how I even use film to remind me to be better at this critical step. It’s not just about slowing down. It’s about editing as you take the photo.
It’s the small things.
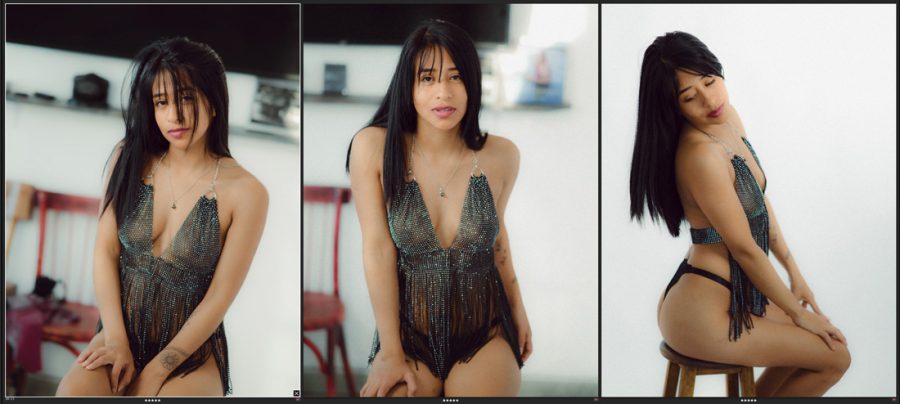
A grouping is about refining a set to make it have a perfect balance. It can just be connecting color and tone, a quick white balance, or maybe I did deeper edits in Alchemist or Pictorialist. But then, seeing that one image in the group is that way, and doing the rest in the same style, so they all fit together.
But that one Image…
From a strictly artistic point of view, I think we should be more like the painters, thinking about the best image. That’s the wall portrait, poster, the headline shot.
But from an editorial point of view, we branch out. IN a book, a magazine, or a great Instagram post, we often need a few more photos.
So you start the edit in camera, you find and sort the best photos in phase 2. You know your best shot. In the final phase, you take that group, and you edit them to all have the same vibe, and you create an editorial work. A mino collection. And makes people see you as the master you are meant to be.
Go try it and watch your published work improve – Gavin Seim
Does film matter. Yes, it kind of does. Especially now and here is why.
For digital, download my free film presets and see why film impacts digital edits so much. And for more magic that you learn from film and tone, come to my next FREE Shadow hackers class.
It’s just a fad….
They have been saying that for a decade now. But as a Master Photographer, I know that when I shoot film I still get better at photography.
Yes, I do shoot film a lot to improve Filmist presets. That’s why they’re amazing. But that’s not the topic of this video. I’m going to show you a bunch of film photos and cameras and explain…
It improves your digital.
Film is cool, but most don’t realize that using film helps ground you in tone and emotion. Tools like I made like Pictorialist and Silver are heavily;y influences by it. One reason they are so good, is because I study film constantly.
But Film is boring…
If something does not inspire you, maybe it’s not for you. But most serious photographers will get the film bug. Because once you feel the magic that it has to impart, it’s hard to walk away.
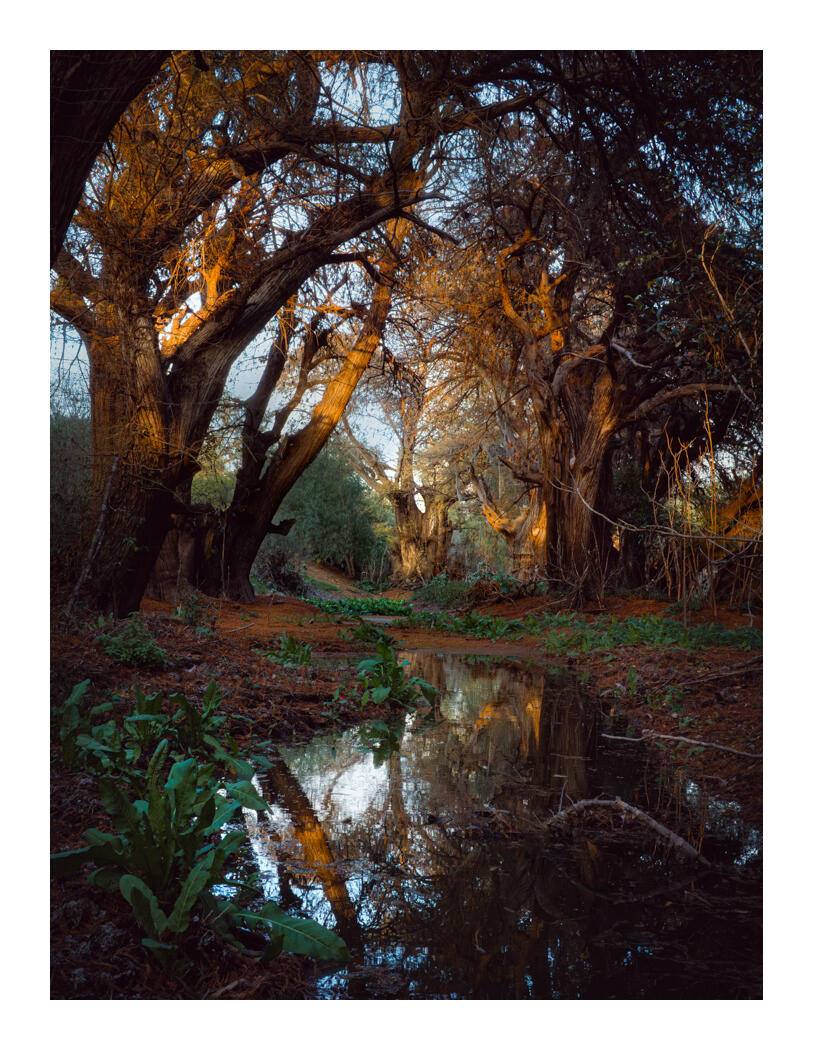
Just like film looks on digital improve you editing, shooting real film now and then is a pretty small investment in your skills. Look at the film photos in this video. Even on a screen, there’s something more to them that’s hard to explain but that you can feel.
In the digital era we are making photos too light. Always pushing sliders and exposure UP. But darker photos are not what you think. In today’s video I’ll show you.
I don’t underexposing everything. The big secret of exposure is that your meter has no idea what it’s doing. The secret is to use darkness, shadows to reveal the luminescence in the frame.
ETTR is another bad method. It tell you to exposes right to save shadows. But the shadows don’t need saving. It’s a dated method based on negative film, not on how digital cameras work and usually promoted by people who lack experaince in tone.
I’m also not proposing ETTL either. Or that Exposing to the LEFT is a rule. Only that the awareness shadows truly transforms your photos. My exposure workshops won awards because I have studied every aspect of exposure for decades in master classes like Exposed.
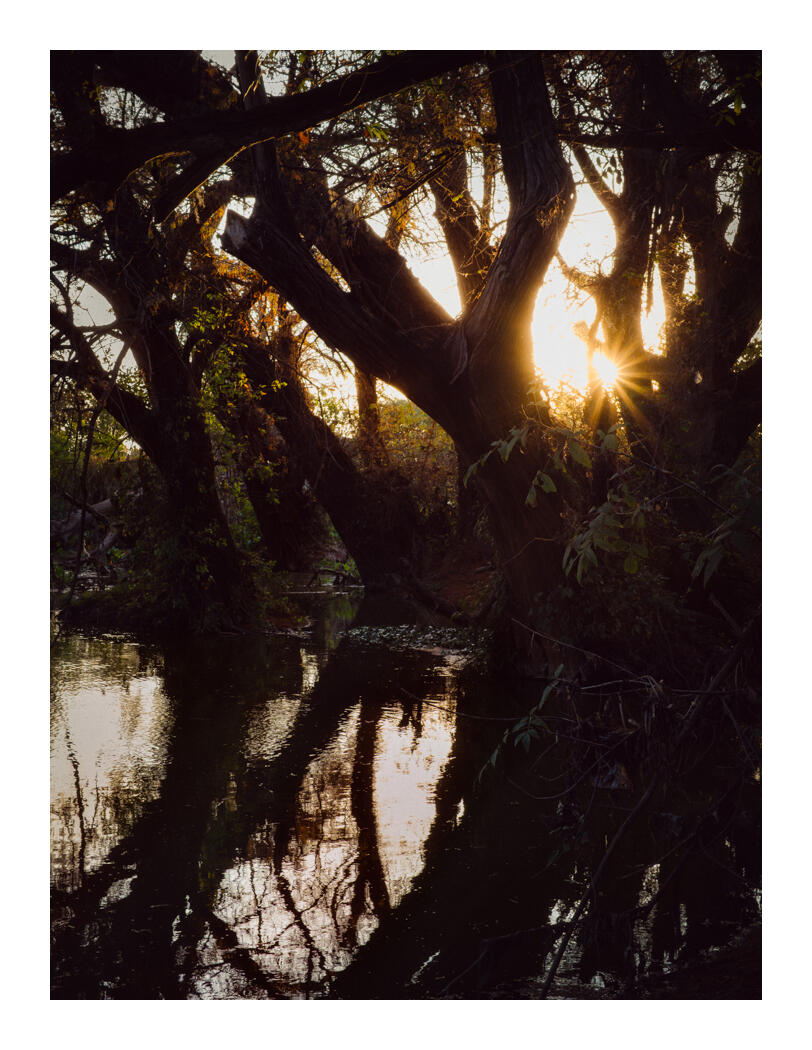
Well placed shadows make light visible.
If you’ve been to one of my Shadow Hackers classes this will apply easily to your work. But if not you can go make it work right now.
You see in the video how in each photo it’s about just ab out being dark. I lean dark in the photo and the edit but I let the bright areas shine, using that shadow to make a path that leads you thru a scene or to the subject.
Your meter is clueless.
So stop doing what it tells you.
Remember that this control of shadow and tone comes from ignoring your meter. Not that you should not see your meter to read light. It ignore it in the sense that it does not know what a GOOD exposure is.
So whether you shoot manual, or use exposure compensation only YOU can take the zones, histogram and tone and decide what create the rich feeling in your image that you want. Use the meter. But YOU place the tone where it should be.
So so start with expose down a little. Edit with rich tones and darker more shadowy presets and processed. Let the light shine out of that and you will be amazed how much more drama your photos have.
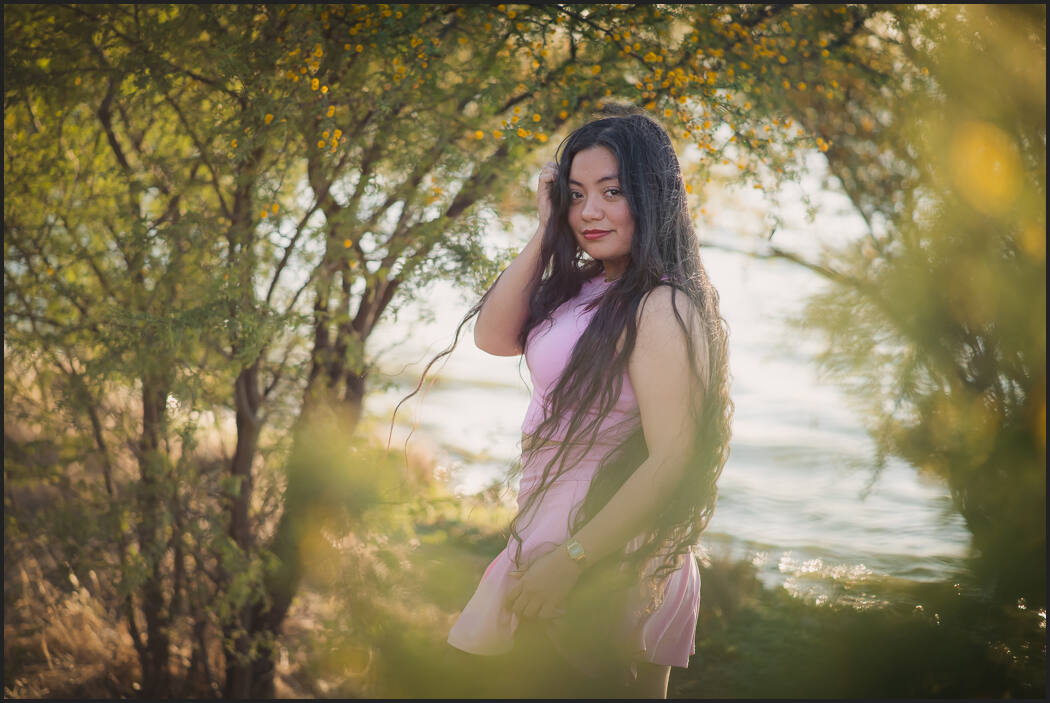
We usually talk about harsh light in terms of how to eliminate it with flash or fix it in post. That is important. But there is another way.
We can make any light work for us…
In the edits today I used Filmist, but also tools like Elegance, Natural HDR and PowerFlow which all have presets I’ve designed for sunlight and problem light.
Hard light is not what we think.
As I talk often in my free Shadow Hackers workshop. We often don’t realize that the the biggest problem if hard lights is not only clipping, but how it create hard shadows.
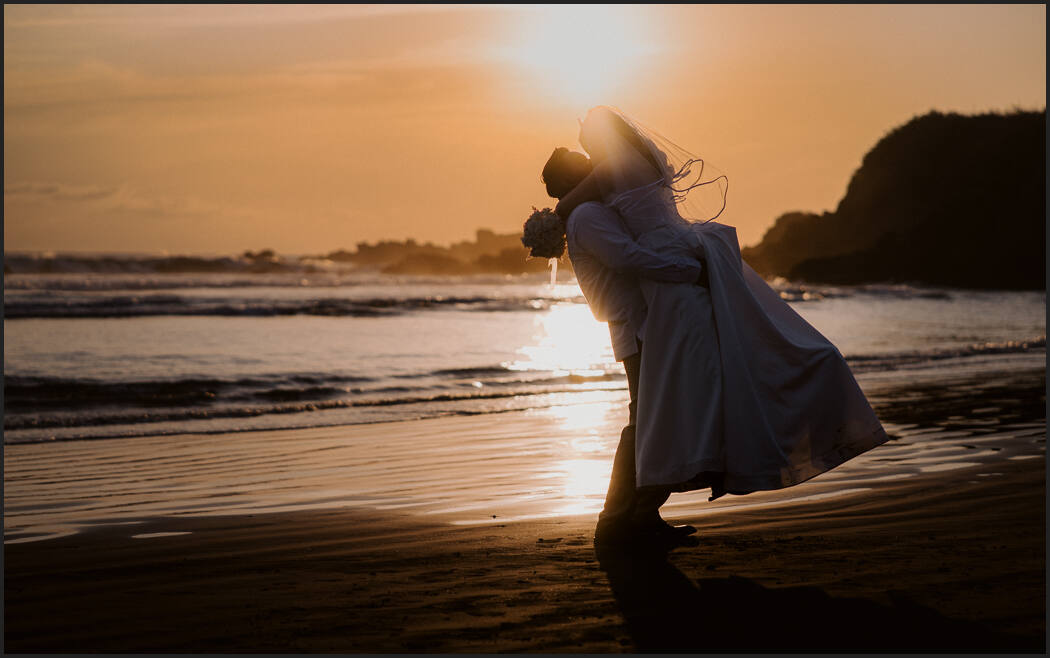
You want to stay around for the final tip because it’s not just the lend or the process, How we think about the light we are presented with is often more important than anything.
Look deep as why the light is hard and what the shadows are doing and everything can change in a single frame.
The way we look at the light we are faces with often defines photos more than the light itself.
Do side quests
When you’re under the pressure of a paid session you tend to play it safe. Value your work. But sessions, collabs etc are like a gym for a photographer.
Start trying thinning and making challenges for yourself and watch your photography grow faster than ever.
This video is packed full of real world in camera photography tips and I hope you mad it till the end and found something that helped you.
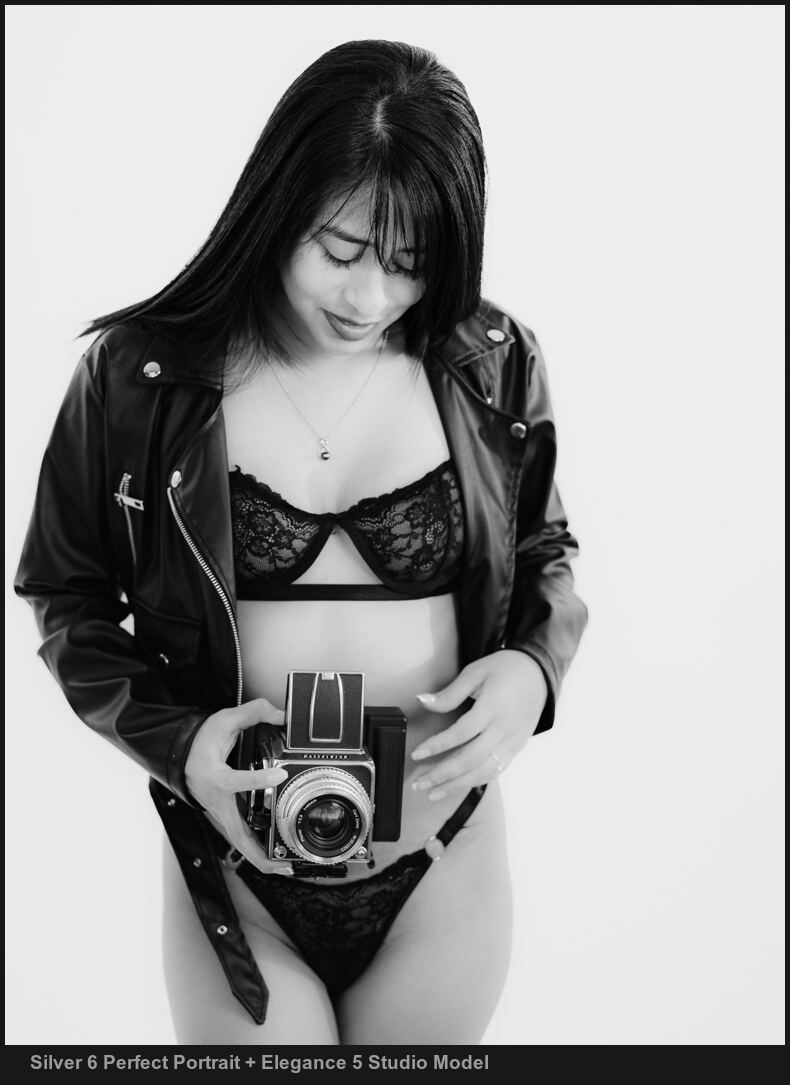
This is a black-and-white method study. I will add notes on each photo of why they work and what details mattered most ot me. I used the amazing new Silver 6 Pack on all of these.
Some photos work great in black and white. Especially the ones you planned for black and white. Others go monochrome, and it’s chaos. But it’s not always what you think. The way you edit for tone changes everything.
These photos all have my personal notes. My tools are not essential here. But the method they show us is game-changing.
Notice the use of tonal range here. We always tend to lift shadows, but it’s the shadow that creates contrast and leads the eye.
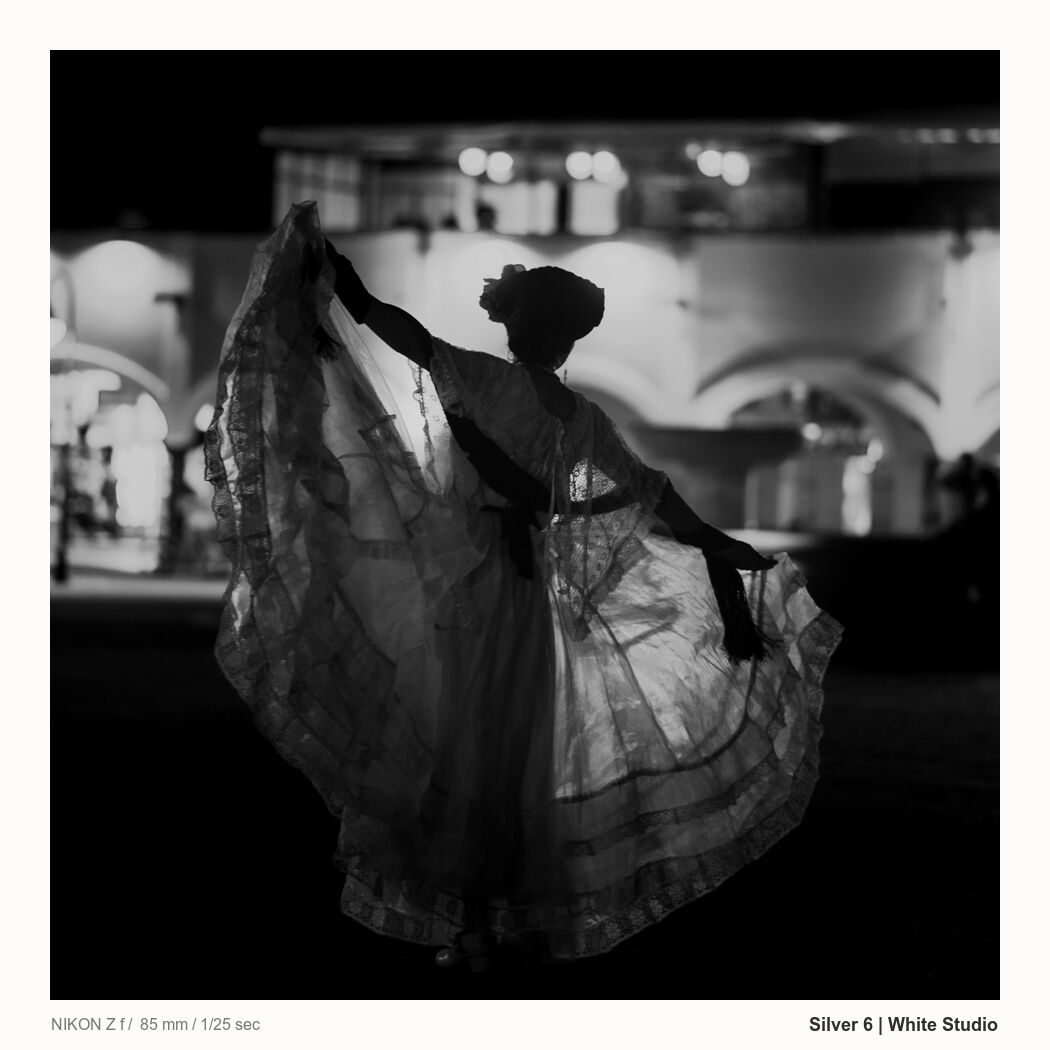
This could be another video because often in busy scenes, isolation is a big problem. Be brazen. I used a dark filmic preset, but I also burned heavily on the edges and dodged (brightened) the subject to use the ghostly blur of these street portraits and extract the feeling of the scene.
Should this have a hair light? Some would say so. But this soft portrait focuses conversion, lets the shadow frame the model. I like it. If you use Silver, you’ll notice that the portrait-focused recipes dial back on clarity and detail more like we would have achieved in film. Clarity sliders are way overused.
This was shot on 4×5 film, and what I had ignored in the archives. Like the one below that I made last week’s video, I used an Aspen recipe for extreme contrast that let the brilliance shine.
This was a rejected photo, and you can watch the video here. It was all about isolation. Sometimes, a black and white gets too busy, and you must tone down everything but your subject.
I show this in my Shadow Hackers classes a lot as a reminder that basic lighting methods are not always what a photo needs. The shadow category of Silver 6 really helps me find things I would not otherwise see.
This is so dark. I could have lightened it instead of using the shadow recipe so you see the whole scene. But this leaves you wondering. letting people see everything is one of the biggest mistakes in color and more in black and white.
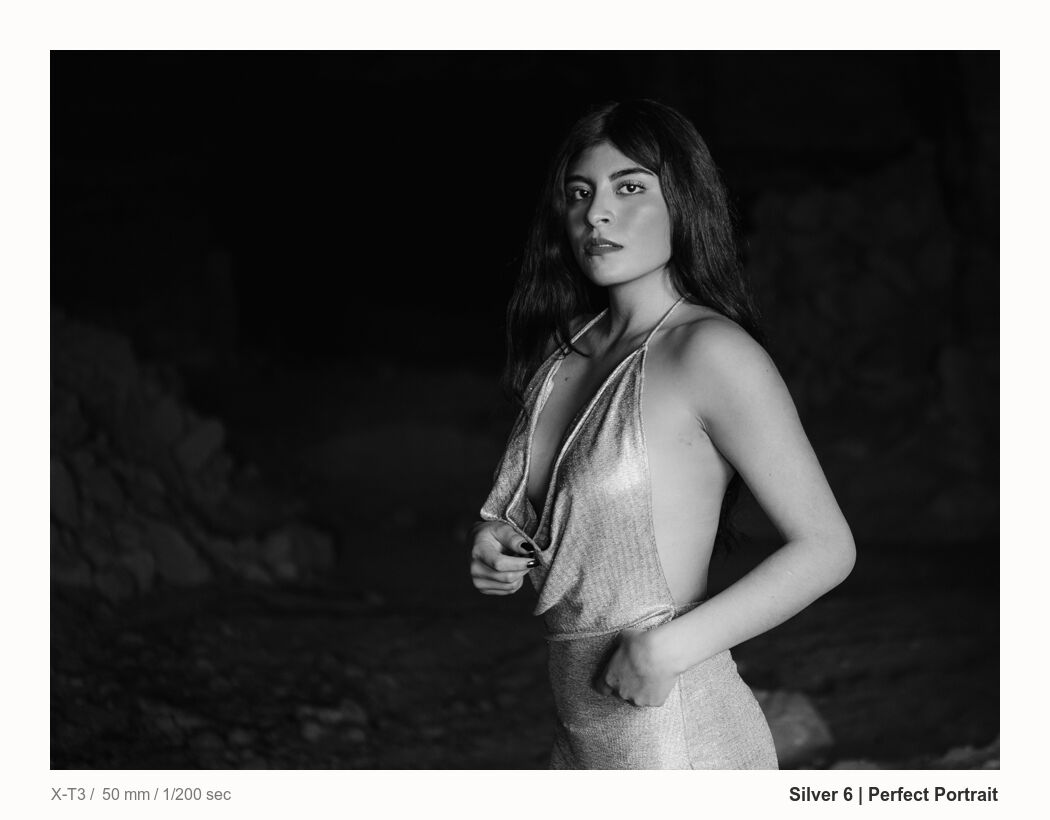
Soft tones, dark blacks. They work in portraits. I darkened the background a little so her face is dominant. But I did not try and do perfect lighting or follow all the rules. It’s a girl in a car, and the rest is left to the viewer.
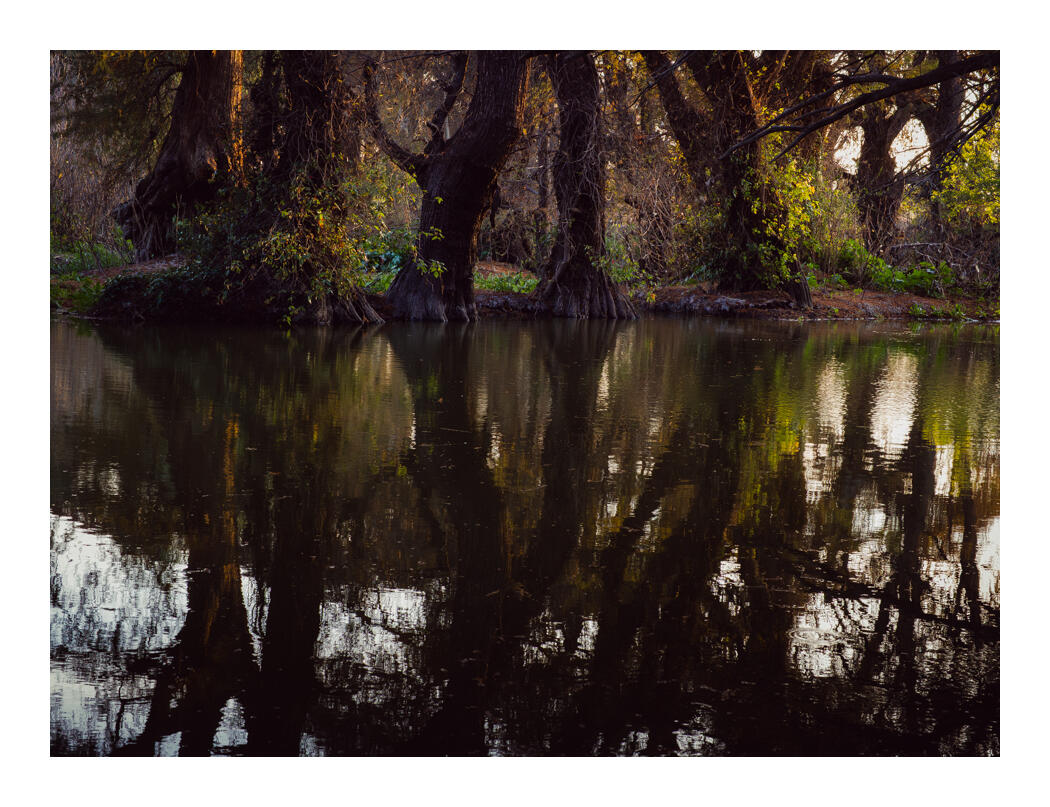
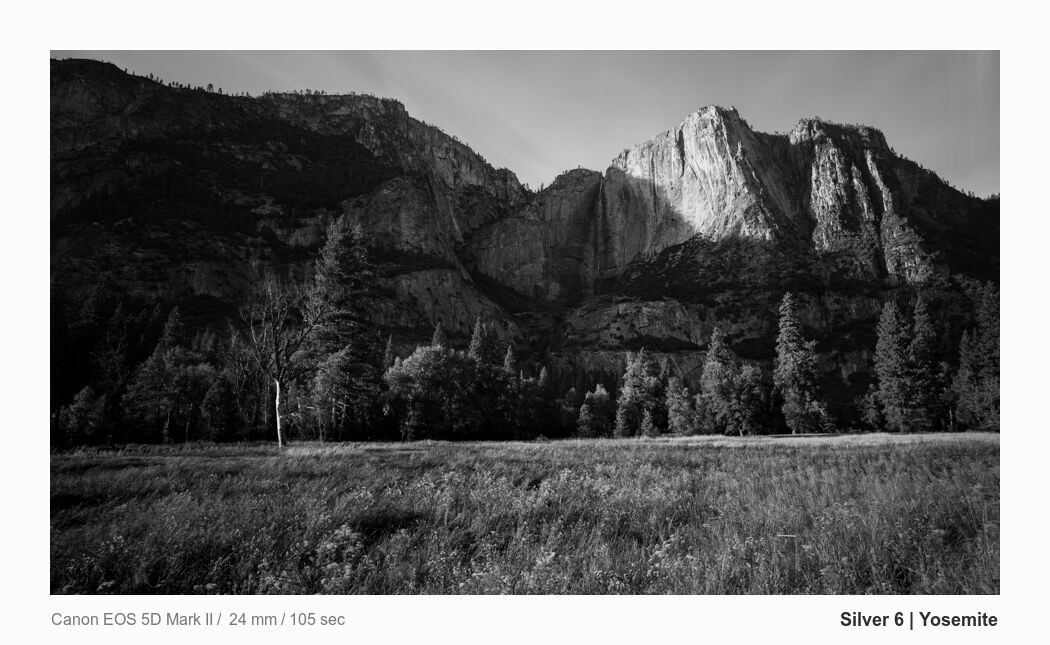
Minimal scenes work great in monochrome. But again, people make the mistake of lifting shadows instead of letting them drive the show. I left the tree very dark, but you can still know what you are seeing and wonder what surrounds it.
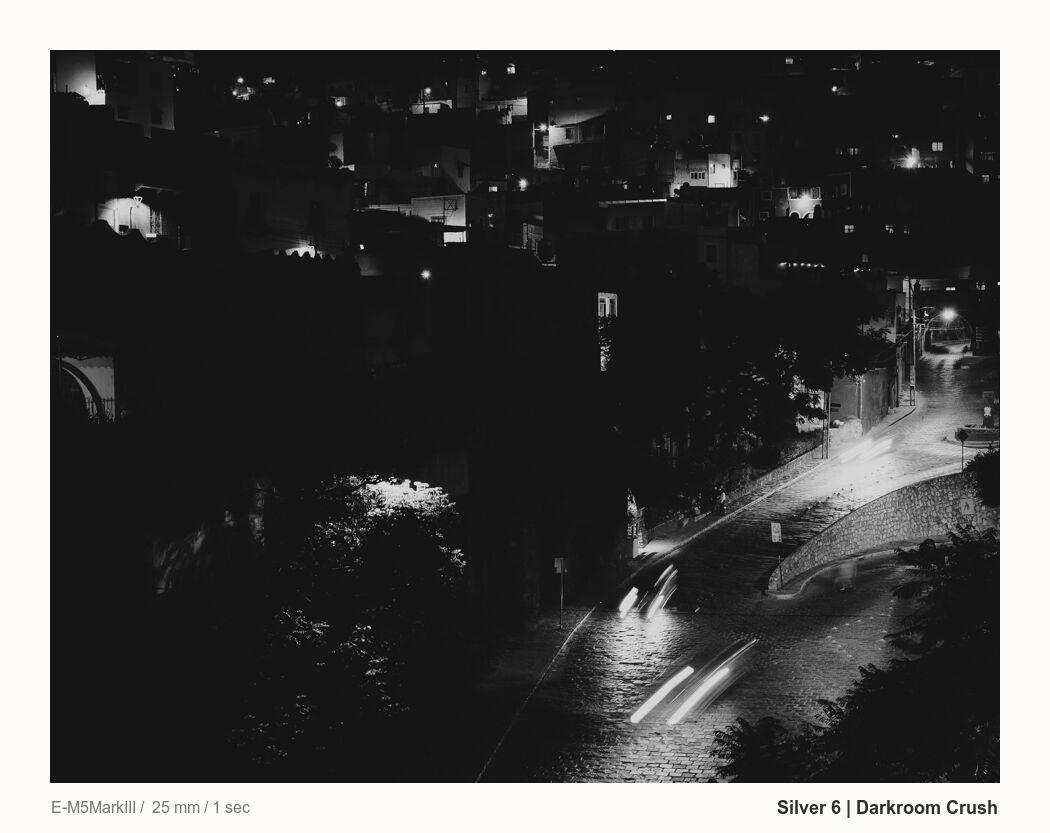
Back to busy night scenes. These are hard in color or black and white. Look for moments always. But then you need to frame them with backlights and pools of shadow. Don’t be afraid to burn edges and background to help them pop. Movement also draws the eye to the subject. Be liberal with shutter speed. More in my recent post on photographing events.
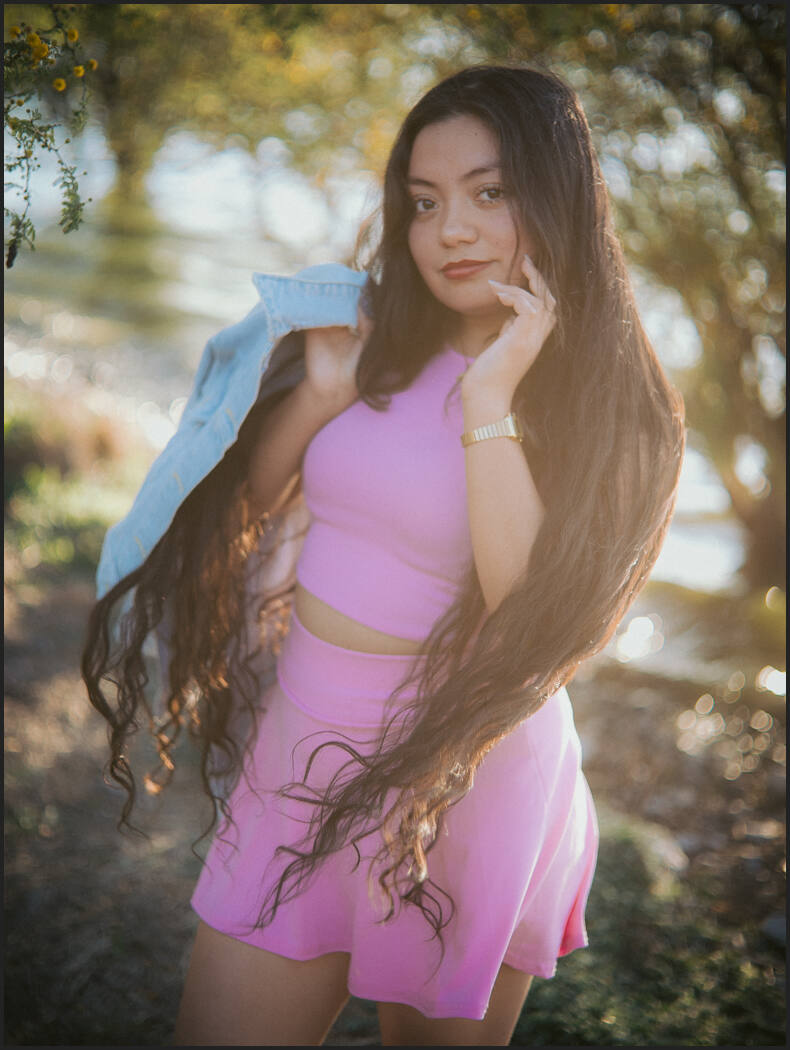
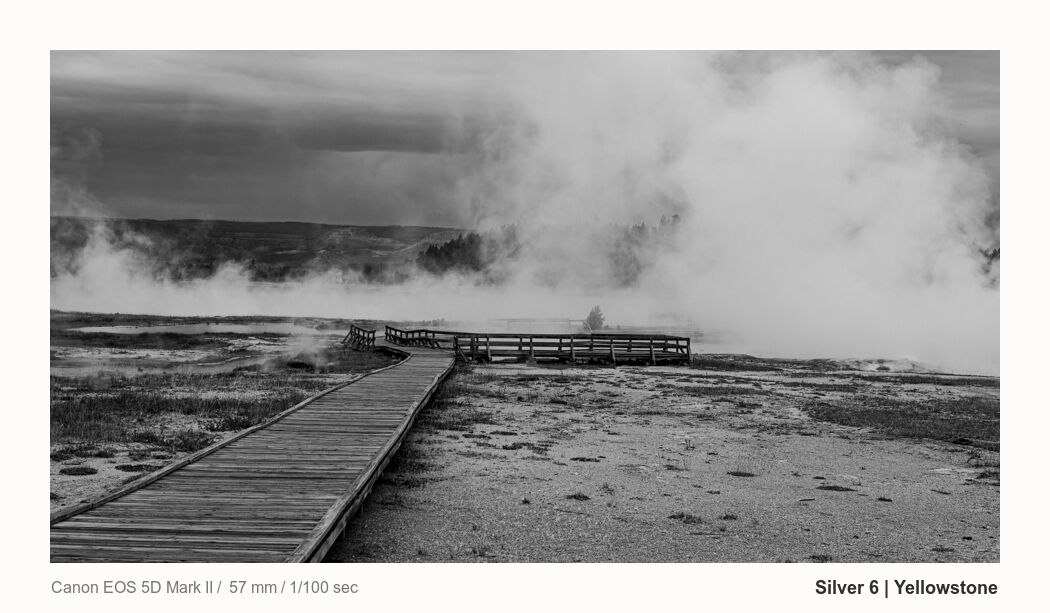
Yet another that said for years because it felt flat. Then I made Silver 6. This base preset would usually not be good for a portrait. But for these natural misty scenes it brings life to something that you might have thought was too flat.
The backlight showcases the subject and texture here. But the large pool of shadow and letting it be shadow is what frames the entire thing.
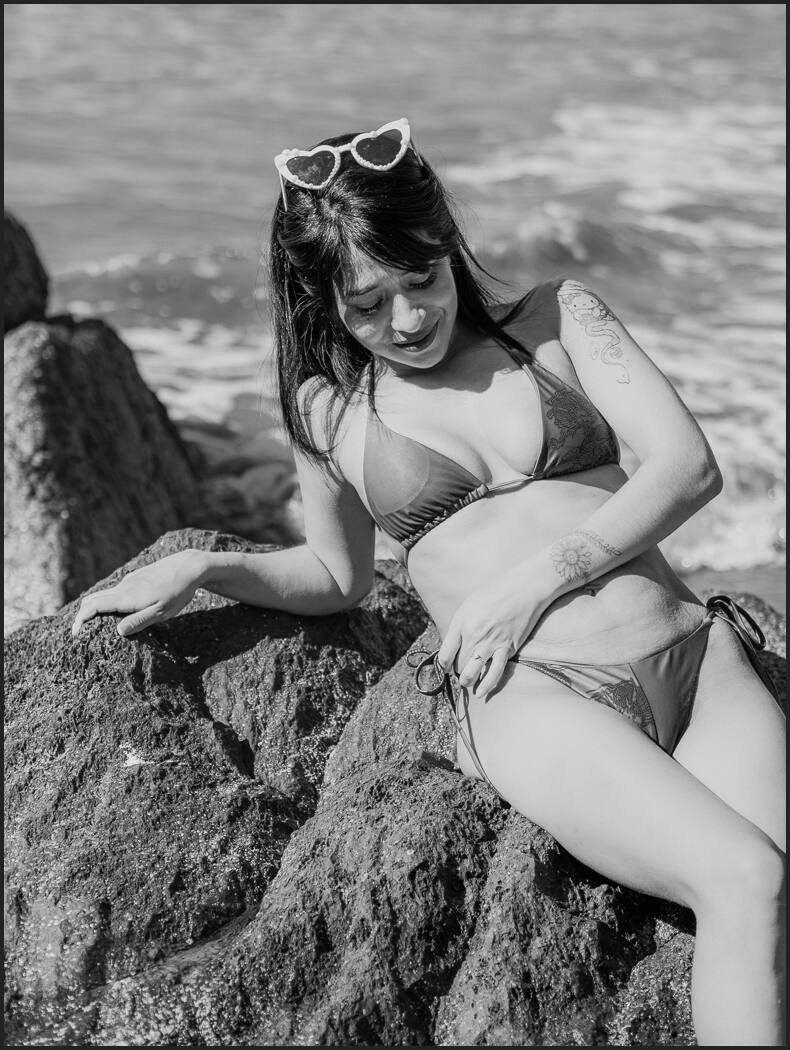
Here we are backlight again. The model is almost all in shadow. It leaves her curves natural and imperfect but leaves you wanting to know more.
You’ve probably seen this one before, but it’s a favorite. It works again because of the shadow. I didn’t try to lift the foreground and let you see everything. I let you wonder what all those details are while the birds create mystery in this Mexico town square.
Great edits will find what you could not!
You see a theme here. Always focusing on the shadow. That’s what I teach. But it does not have to mean dark photos. It’s about using your eyes in the camera to frame, backlight, surround or lead eyes.
Then it’s about what legends like Ansel Adams and en Whitmore taught. Using the tone. Darken the lighting and, with digital processing and test those recipes to get the perfect values.
Not all photo work. But some photos work years after when you discover how to use tone better. Whether you make your own or use my Silver 6 pack, we can take shortcuts. Great recipes will do what you will not in your edit. But once you see it, you will realize that it’s exactly what the photo needed.
The method – Isolation
Eyes follow lines and framing, and most of all tone. If you use shadow and mix it with light, you can do light or dark scenes, and they work. Sometimes you just have to push tones around to let your subject be seen. That’s the key here.
The key is not following trends. It’s about finding how tones can mix to create the feeling and emotion that you saw in that scene when you pressed the shutter. It’s in there, look deeper.
The method is simple. Ask yourself what your subject is. Then see the shadow and how light is flowing, just like the masters of the darkroom. Don’t be afraid of black or pure white. Push as hard as you need until that subject is ISOLATED, the true focus that cannot be avoided.
This seems simple. But in reality, we rarely push that far. With it, you will often create a photo that creates more questions than it answers. But you will also either make the photo work, or learn why it failed, and do better in camera the next time.
The real story is making people imagine the story!
As I created Silver 6. I pushed myself really hard in this method. And I started discovering many photos I had failed to finish that just worked.
You can get Silver 6 here. But you can also start tinkering and creating recipes like I have spent years building and saving them, and you will be surprised by what you find.