Photography has seen many transitions. Glass plates to film, black and white to color. One of the biggest was the film to the digital which saw many photographers unable to transition.
Will we photographers be needed in a world of Ai?
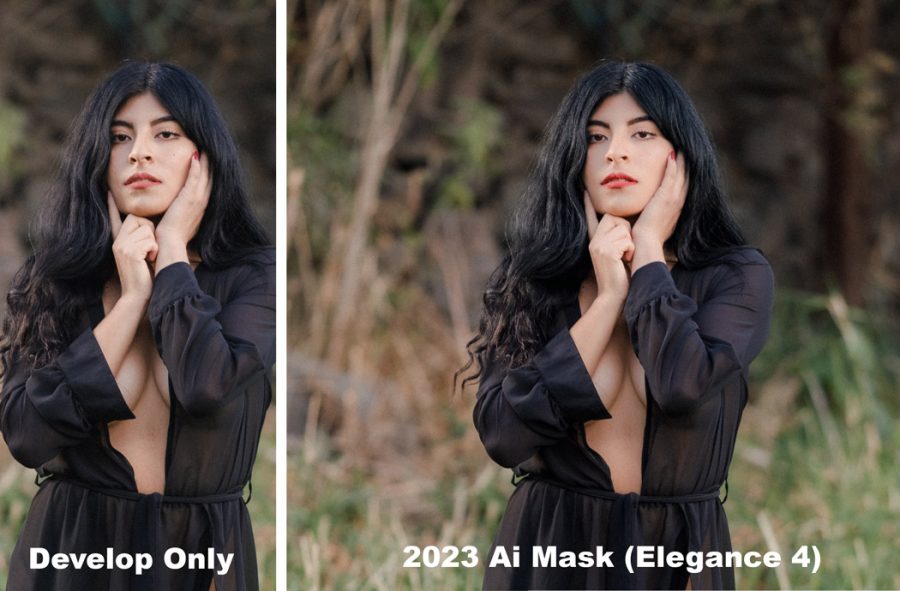
I’ve shown you in recent videos how the Lightroom Ai with tools like Elegance Speed mask presets makes advanced retouching of portraits unreal. Watch that video here. But while we can’t do this in Capture One yet, it’s perhaps not as big a deal as it looks. I’ll show you why…
There’s more than one way to develop a photo.
I’ve always started edits with presets like Filmist or Natural HDR. These work across LR and C1. Then I would go into Photoshop and use Alchemist or BlackRoom and others to refine. I still do all of this, but the new Ai tools make me do more in Lightroom.
We need to stay ahead of the curve but we don’t need to let every new tool change our look. Artificial intelligence is the buzzword. But tools like the Lightroom Ai masks are still not really that intelligent. They do however bring a sign of what’s to come.
For now, things like Lightroom Ai are about saving time. But do we really need the Ai, Is Lightroom really better than Capture One because of it? Is it the best way to edit or should we still use a little Photoshop or Affinity to refine our photos?

It’s pretty amazing what the Ai masks can do. This transformation was virtually instant using my Elegance Speed-Masks which define the parameters and stack the LR Ai masks in one click. But as we see in the video, other methods might take a tad longer but can yield nearly the same result.
In the end, it’s what we create in the camera that defines our photos. Let’s not get blind-sighted. But I also think software can be overhyped. A focus on creating with emotion and soul comes before the edit. The shadow hunt. I think those things are still king.
Don’t miss my next live Shadow hackers workshop so we can talk more about this. Also, leave a comment to share what you think about all these Ai tools such as Lightroom Ai.
Keep creating – Gavin Seim
Add on’s I used in today’s edits… Elegance Speed Masks, Filmist Presets, BellaDonna presets, Alchemist Actions.