Your everyday carry could be any camera. But your cup holder camera is the one that does not live in a bag or even with a lens cap. It’s your cup holder camera.
This is the camera that will actually transform your work.
It can be a better photographer than any premium new body.
New overpriced cameras abound. But most of them are just copies of each other as camera makers ignore what photographers are saying and try to push every more premium toys on us.
But your Cup Holder Camera is rarely that expensive. Sure, you want a good camera, but as you know, if this video is a decade old, it will still be amazing. It’s about the agility of a camera that’s always ready and that makes you want to take a photo.
My CHC is usually a cheap to mid-priced camera that is really well-made and small. I know it’s going to get knocked around, and I know it will handle that, and that if something does happen, it’s not a huge deal.
Thinking like a journalist.
Whether you like landscapes, portraits, sports, or crazy events, the CHC is really about being a journalist. Being able to take any situation you find, grab your camera with a second thought, and get the photo.
Speed and agility are king. And if I jump out in the middle of a street fight to do something or say something, I also don’t want to be worried about how much I will lose if I get robbed or someone breaks my heart.
I’m not saying what you need to do is get a small camera so you can run into a police standoff. I’m just saying that a journalist’s mindset will make you take photos more, with more confidence, and improve every area of your work.
If you want to carry a Leica or get the high-priced Sony RX1R III, that’s fine. The main thing is that it’s a camera you will never have an excuse to toss in your cup holder and grab at a moment’s notice.
But a Pocket is even more accessible, right…
Maybe… In 25 years of doing this, the Cup Hold Camera I have found is the most convenient.
Even a pocket camera can get left behind. For example, my Sony RX100 was powerful if a little uninspiring to me. It was also very expensive and felt delicate. So in real life I neither wanted it kicking around the car or collecting dust in a pocket.
Perhaps the most “POCKET” camera in these times is the Ricoh GR, and while I don’t have one, I’ve been eyeing it as an even smaller solution for when I don’t even want a camera seen on my neck.
You want a camera you love. But it’s not about being trendy. The Fuji X half is more of a fun overpriced toy than a true pocket camera, and it’s not even well built, so as a CCH it’s not the best choice either.
Camera companies are trying to make expensive fashion accessories instead of really great cameras. They think if they can become Apple and trendy, they will get those numbers back. It won’t work in the long term.
So I think the lack of a truly pocketable camera in 2025 is a problem, and I hope we’ll see more quality compact cameras in the coming years. For now, I think buying used is the best way to send a message and get a great, always-ready camera that you will always take with you.
It’s honestly simple. But we are in an age of “experts” teaching us things about cameras that are often false. It’s today’s video, and we’ll debunk all of that today.
#2. Aperture and sensors with lenses at the same focal length
Video #1 – Sensor size does NOT affect aperture value
Equivalent F-Stop is not a real thing in Photography.
I made this video on a whim. I didn’t know it would be such a hot topic, and I’m meeting a lot of resistance. I did not fully see how much non-photography education is being promoted as fact.
When I started in the 90’s it was said that real photographers used medium format. But NO ONE said, a 50mm 1.4 on your Nikon was a 50mm f4 because of the medium format.
Aperture is a measure of light transmission. The exposure of an f1.4 lens on medium format, full frame, M43, or a phone is exactly the same! Equivalence was created for the internet and by influencers who want to sell you bigger lenses or sound smarter than you.
By their reasoning, I should be calling their full-frame f1.4 lens an F8 because of my 4×5 large format lenses that literally cover 4×5 inches. On that a 90mm is a 24mm wide-angle after all.
But no. There’s a darker theme here. Over the last decade, the industry has gone from master Photographers sharing true experience, to visual spectacles from YouTubers who shill gear to the unsuspecting, more than to learn or teach real photography methods.
Sensor size changes, F stop does not
Some “experts” start copying and pasting math formulas that relate to how lenses are designed, not how they are used. The idea that a full frame gets more light because it’s a bigger lens covering more area.
No… The amount of light you get on the sensor and the corresponding exposure is exactly the same as we can see demonstrated in the video. On FF, M43, Large format or your cell phone.
Yes… You will get less bokeh on 25mm lens than you will on a 50m at the same aperture. That is a feature as much as it is a negative. The aperture is the same and there’s no Equivalent Aperture. That’s not a real photography term nor is bokeh is measured in fstops, They measure light transmission to the film or sensor based on the opening in relation to the focal distance.
Sensor sizes change things. But itg does not mean one is better…
We’ve been fed the idea that full frame is good and others are cropped. That’s not really true. Each sensor is a full frame of its intended size. You can choose what works best based on your needs. But they all get the same light.
We could spend one day talking about distance, opening size, circle of confusion, or how T stops are a bit more precise. But those are not what teach you photography or take good photos.
But there’s more light…
The idea of sensor crop is also new. We didnt call a hHasselblad a crop compared to a large fromat camera. They were designed at that natice size. I’ve been seeing this light gathering argument all over. It’s nonsense once you understand photography basics. Aperture numbers exist to provide a constant so we don’t need to think about complex math while taking a photo.
It’s like saying if you have a projector filling a 5-foot wall and another filling a 10-foot wall. Obviously, to cover the bigger wall with the SAME luma value light in each MM, you would need a brighter light, because its over a larger area. That’s why full frame lenses need to be bigger and to cover the same amount of light onto more area.
This makes zero difference in how aperture works since the light hitting each respective sensor space or film is the SAME.
I repeat: Exposure is EXACTLY the same on the sensor in relation to its size. This is the point of aperture numbers. They create a constant.
It’s not LESS bokeh. It’s MORE depth of field.
People often promote these smaller lenses or smaller sensors as worse. They are not. I’ve lost far more photos to out of focus from being wide open than from having enough bokeh.
Bigger sensors have less tightly packed pixels which in essence let them be more sensitive to light and often have less noise. Remember the exposure is exactly the same on both, but the larger sensor will often receive the light with less noise. No, this does not mean the aperture equivalence is real. It’s the sensor that’s different, not the aperture.
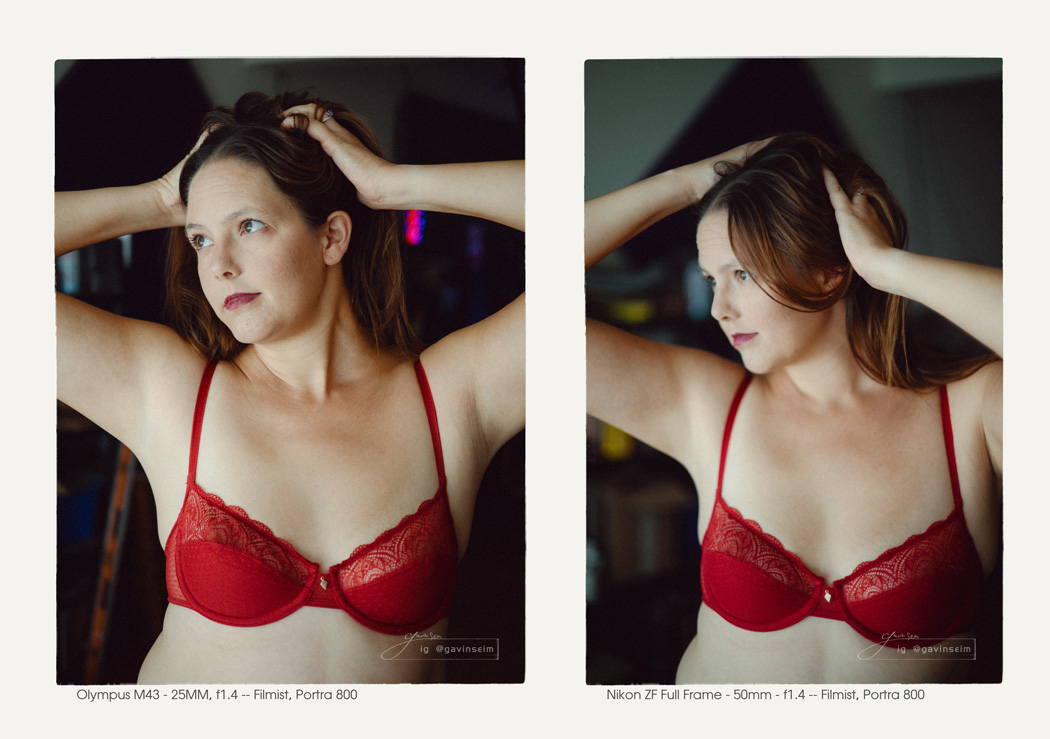
Smaller sensors, like on an M43 camera, can result in a smaller camera, but more importantly, smaller lenses. By a lot. This makes the camera much more portable, which means I take it more and use it more. The same quality lens also tends to cost less as it needs less glass.
But also because a crop sensor lens of the same field of view length is wide for example, my 25mm vs a 50mm on full. I get more depth of field. No still not aperture equivalence. It’s just that on the m43 I’m shooting at 25mm and get the DOF a 25mm lens affords. When I don’t want background blur, the M43 camera actually improves my hit rate and makes focusing easier.
Yes there may be a tad more noise in low light. Then again, maybe not because these small bodies often have better in-body stabilization. Yes they can have a tad more noise at high ISO. In reality, this rarely matters. Modern noise is more like grain and in most cases does not even need to me removed by any fancy tools. See my video on why you don’t need to de-noise.
The dark side of photography
Yes there’s a point where images get a lot more limited like cell phone-sized sensors. But on pro and prosumer cameras, it’s just a preference and all formats have advantages.
Everything has a cost in photography just as in life. Everything is a trade-off.
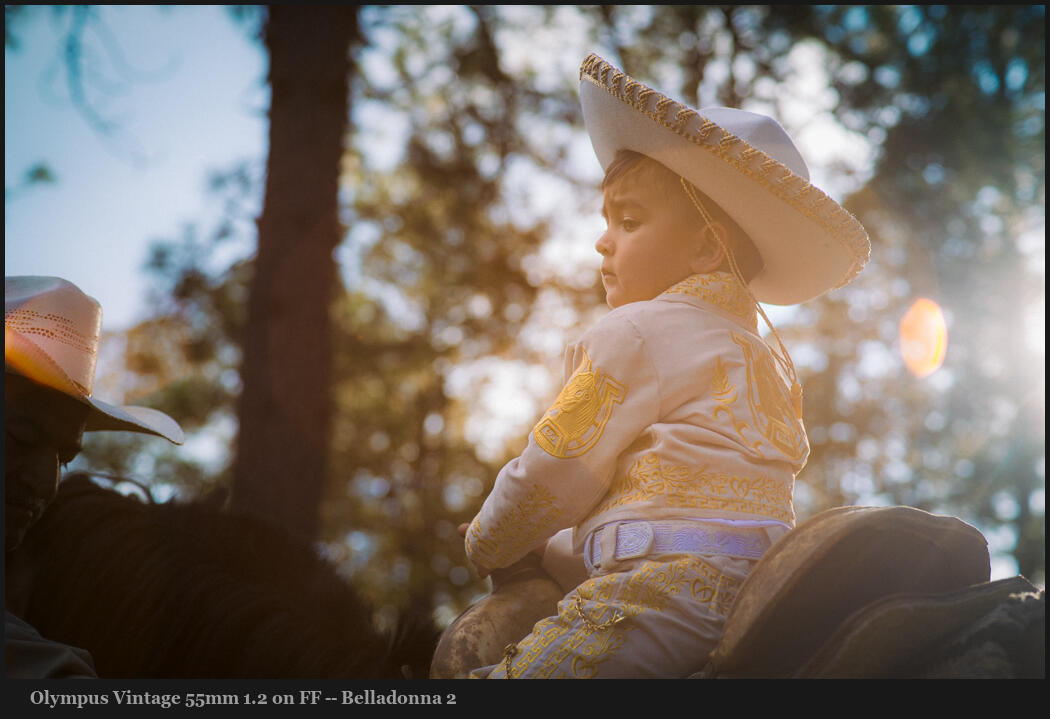
I have a Nikon full frame because, yes sometimes i want a bit more blur. But the truth is I usually grab full frame because my beautiful vintage lenses fit at their intended field and I can even use them with an auto focus-adapter of view and I can mount anything to the Nikon.
But more often, I will take a small crop sensor camera. My results and just as good, only slightly different and I take it more because it handles so much easier.
I’m glad to have both. But if bigger was better, I would have to say we all need medium format. But it’s not so don’t let people selling you stuff convince you it is.
Complex spin repeated by influencers and then by people trying to sound smart to others has a darker side. Real photography education is being lost by pretend experts and people selling you new gear. The basics of photography are becoming a lost art, and we need to change that.
Deciding what lens to take when you head out is not always easy. But in this debate, few talk about the parts that make us better photographers. Today I’ll do just that…
Maybe it was in part because early Zooms were often poor. Especially cheap ones. I remember an old cheap Sigma 70-300 I used in the late 90’s. One day, the plastic barrel just unscrewed and fell off in the dirt – A far cry from the quality Sigma Lesnes we see today.
When I started my career in earnest, I invested a lot in Zooms for my wedding, getting a Canon 79-200 2.8 and a Canon 24-70 2.8. The first was a great lens that I used until a few years ago. The second was fine, but soft compared to primes.
But these days, a sharp prime like the 12-60 in this video or a Sony 24-105 can be had for under $1000, and they are clean, sharp lenses. So quality is less of an issue in today’s world.
Magic vs Price…
Sometimes you need bokeh. Sometimes not. Primes are better for bokeh, but price does not always follow magic. Some of my most expensive lenses spend the most time on the shelf.
It’s pretty easy to get a bad Zoom. I usually don’t bother with a Zoom that’s not in at least that constant F4 Pro category. 2.8 zooms are great, but heavy, not to mention the cost. And of course, there are cheap Zoom exceptions.
Primes, on the other hand, are usually faster and look good on nearly anything. Even cheap primes like the 40mm plastic fantastic kit lens on Nikon cameras are actually great lenses. Some are sharper than others. But they handle like primes.
Sure, there are expensive primes. But no one really needs an 85mm 1.2. It’s just cool to have. The 85 1.8 is smaller and cheaper and does everything you need. In fact, it’s often a game-changer, and the longer lenses will transform even your street photos, not just portraits.
Most basic prime lenses in the 1.8 to f2 range in full frame or crop sensor are good. You can often pick up great primes for cheap and in vintage glass, a manual focus Minolta Rokkor 50 1.4 or the like gives amazing results for super low cost.
Zooms vary widely in cost. But there are very good f4 zooms easily found, lightly used in the 500-600 USD range, like the Leica zoom I used today.
The truth is that the lens that inspires the most is often not the most expensive and well-reviewed. Your thing of beauty might be an old Helios 44 for its swirly bokey, or a used compach 24-105 that is small and lets you fly free.
The real Secret of Lenses
I usually take 1 to a max of 3 lenses when I head out. So a lot of thought often goes into it. I think that planning gives better results and vision than a huge bag of everything. But which lenses?
You can often have 3 quality primes for about the same price and weight as one good zoom. Say a 25, a 50, and an 85. And it’s faster glass.
Then again… A great zoom, especially a compact f4 zoom, can be a world in itself, as we saw in the video, and you can do a little of everything.
I stated where I stand in the video. But in the end, I think having a Zoom for when you need it is useful. You just have to decide which one and where it belongs in your kit.
The real secret of a lens is not only the look it gives the photo. But how it make you feel using it and how it help you be creative? Because if you don’t create photos with soul, they won’t even stand out from AI slop.
A lens should make you feel, just like your photos should make viewers feel – Gavin Seim
Masking has come a long way in LR and C1. Today I’ll pit them against each other. But I’ll also show you the best ways to use masks, how I use Elegance 5 and why masks are actually old school.
Is TONE! The great Ken Whitmire drilled that into me years ago and it changed everything. For more on that come to my next Shadow Hackers workshop.
Tone is what created separation and depth. It’s Luma value, color values and the way shadow plays with light. It’s the oldest and least understood thing that separates master from amateurs.
Digital kids think all this is new in Lightroom and Capture One. But all that;’s new is the tools available to do it fast. What we’re doing is the same stuff we did in the darkroom.
The little Mask that Could
Masks are just a way to control tone. Not unlike burning and dodging in Photoshop, the saturation brush or the curves tool. Speed masks are just the most effective way to manage them.
There’s a reason I’ve spend years now refining this process. Because if you don’t use Speed-Masks, you might as well skip masking in these apps and do it the old way manually in Photoshop. Yes it’s that slow to do these complex meshed masks manually.
The keep is creating masks combos that direct the tone the way you want and making sure they are dialed in well so you can use them on any image. That’s what I’ve done in Elegance 5 but you can do this your own way as well.
But is Photoshop still better?
Yes and no. For a general workflow Lightroom, Raw or Capture One are better because you can edit all images from sate with the same process and consistency. A film preset, then a speed-mask, then copy the setting to similar images.
In Photoshop pr another layer style editing you get more control. More manual, but more. You can paint in details and move tone. I automate this in PS as well with looks like Alchemist actions and Lumist. T he image refined in Photoshop is MORE refined.
So while it’s fair to say Photoshop is more refined it does not mean it’s better for every image but also you should not ignore it.
In the end and what I hope you see from this video is that shadow and tone are the important factors. These tools are just how to there faster and better.
It’s time for an honest talk with photographers because we keep forgetting to do this.
I seriously mean this….
Good photos. Good edits. Sure, I get that clean, iconic look in my Photos by editing with tools like Filmist 2 or Pictorilaist. But what I’m talking about today is where great photos START!
In the war against being the same, creating more to achieve perfection, and Ai lawlessness. The photo with feeling is about stopping time, but not always at the perfect moment. I didn’t get my Master’s in photography by spraying and praying.
I’m not saying don’t take lots of photos of life. Of your kids, your dad or Grandma is at the wedding, and you’re working this weekend. I’m saying stop working in 20FPS and start compressing one single moment at a time.
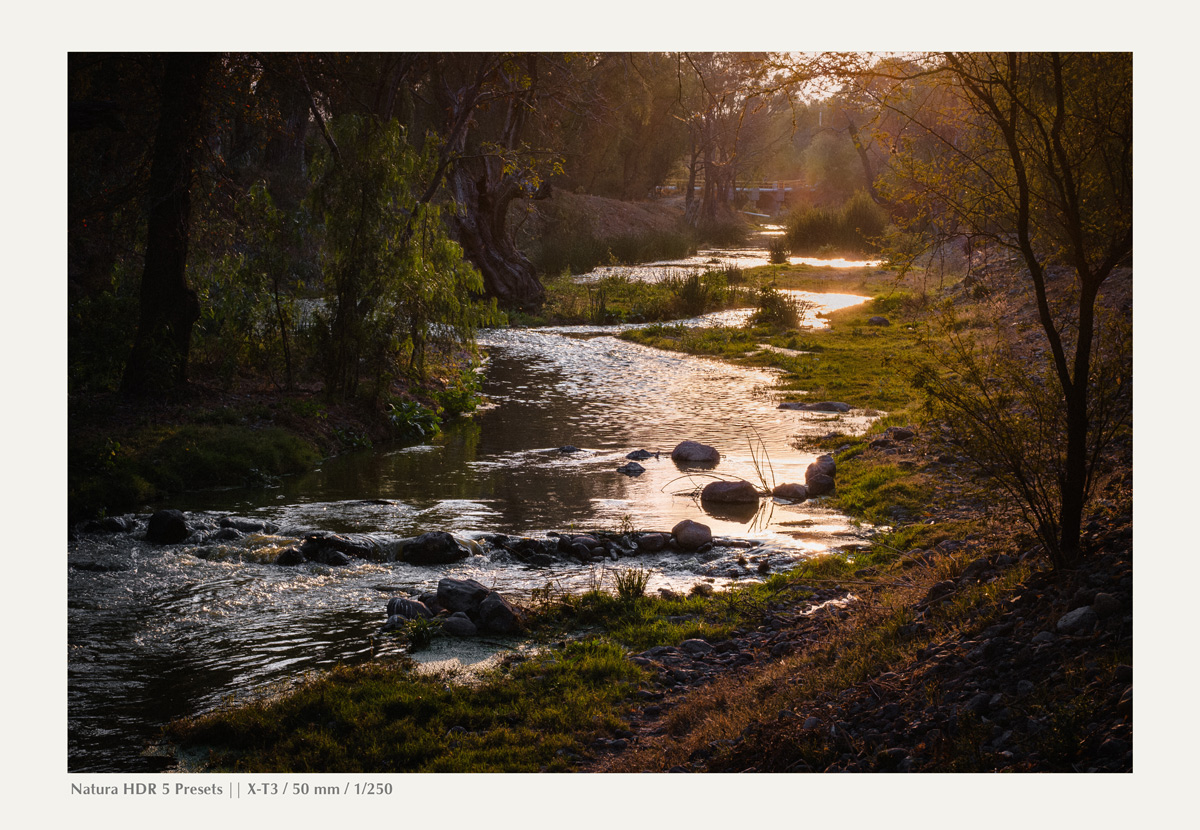
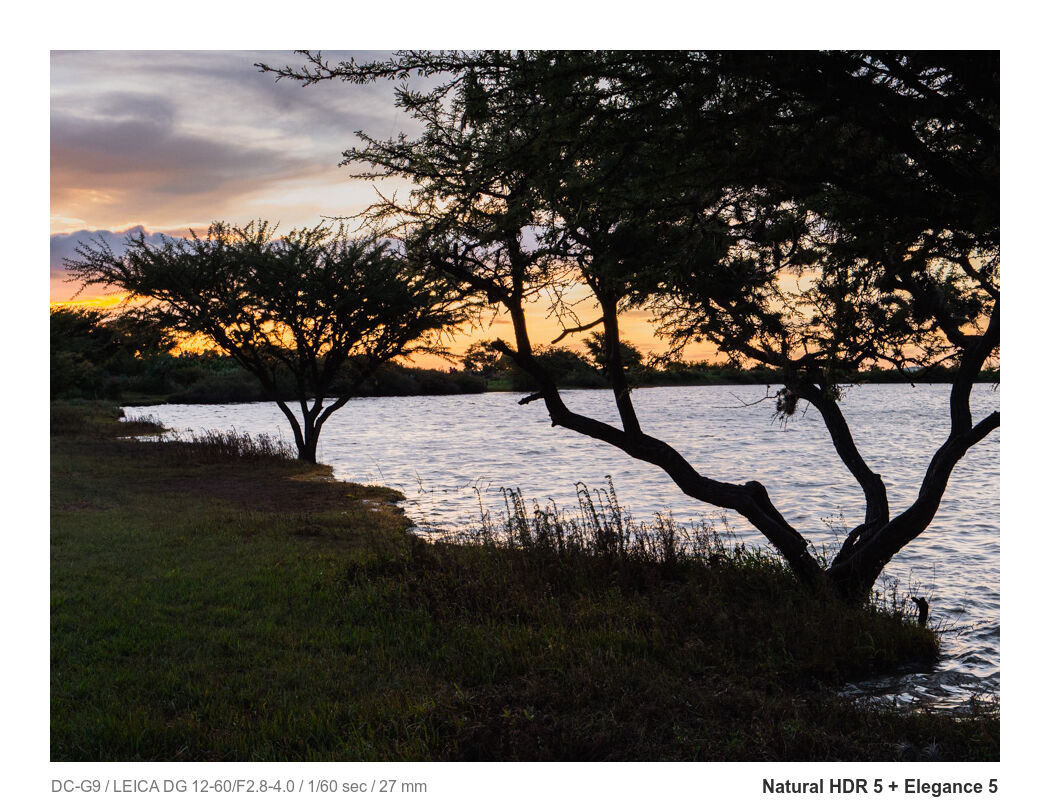
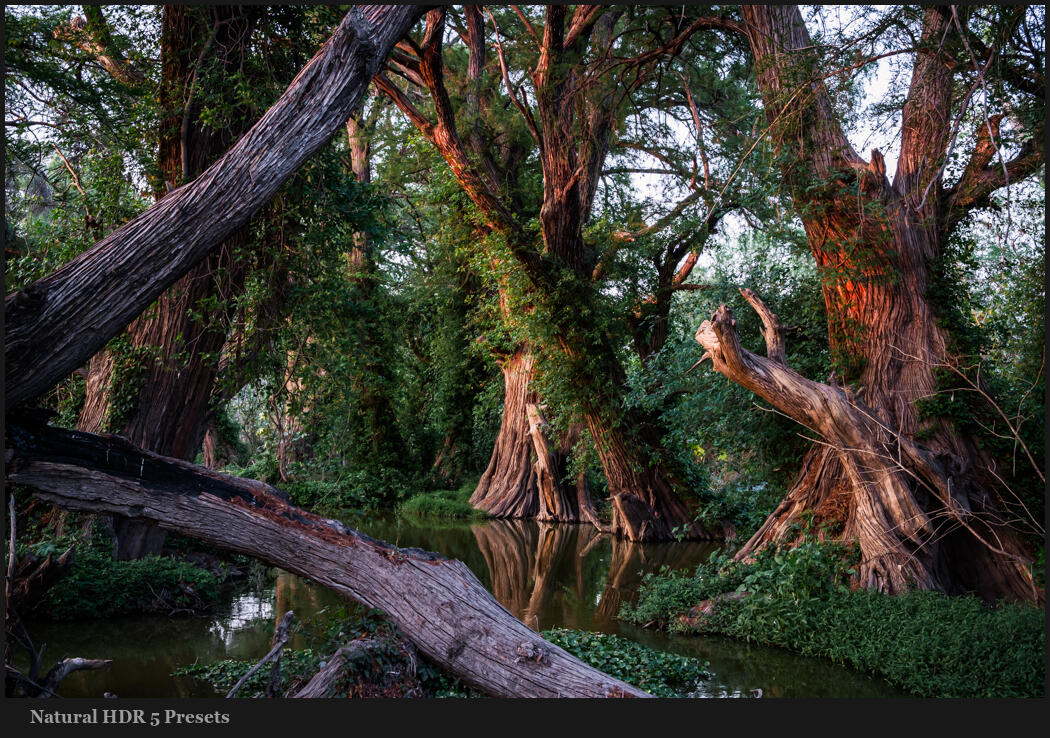
When I shoot fast, I think less. If I’m on this river shooting slow I think about where lines intersect and how tones lead the eye. IN fast mode, I can tell myself to think about details, but I quickly get distracted.
The art of compressing time…
I shoot a lot of video. In a video, you do the same thing, though. You don’t want a 3-hour video. You want a moment, even if it’s at 30FPS. So this idea of not trying to capture everything can even be applied to video.
The essence here is that when you see a moment or a scene and visualize it for real instead of just holding the shutter. You stop stressing the concept of your photo into a hundred ok photos and compress it into two or three great photos.
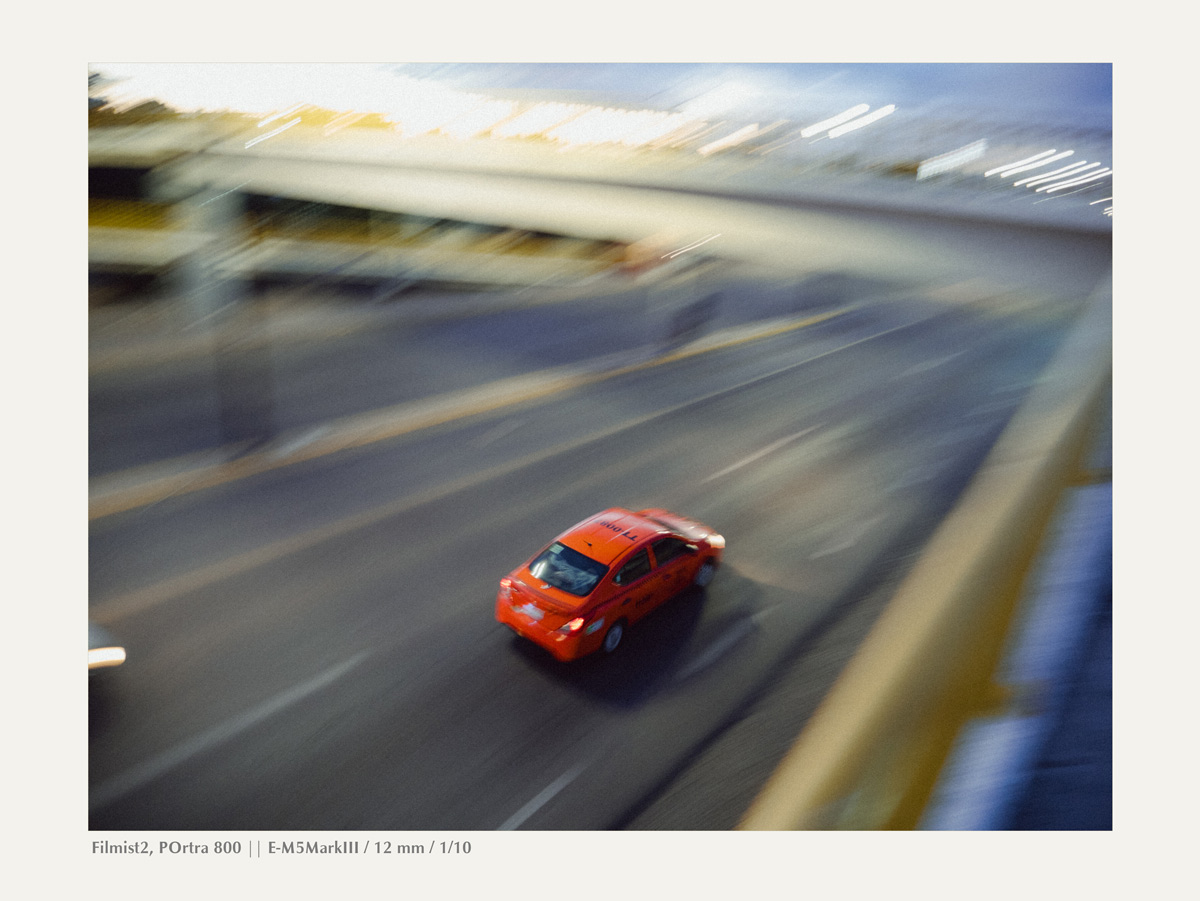
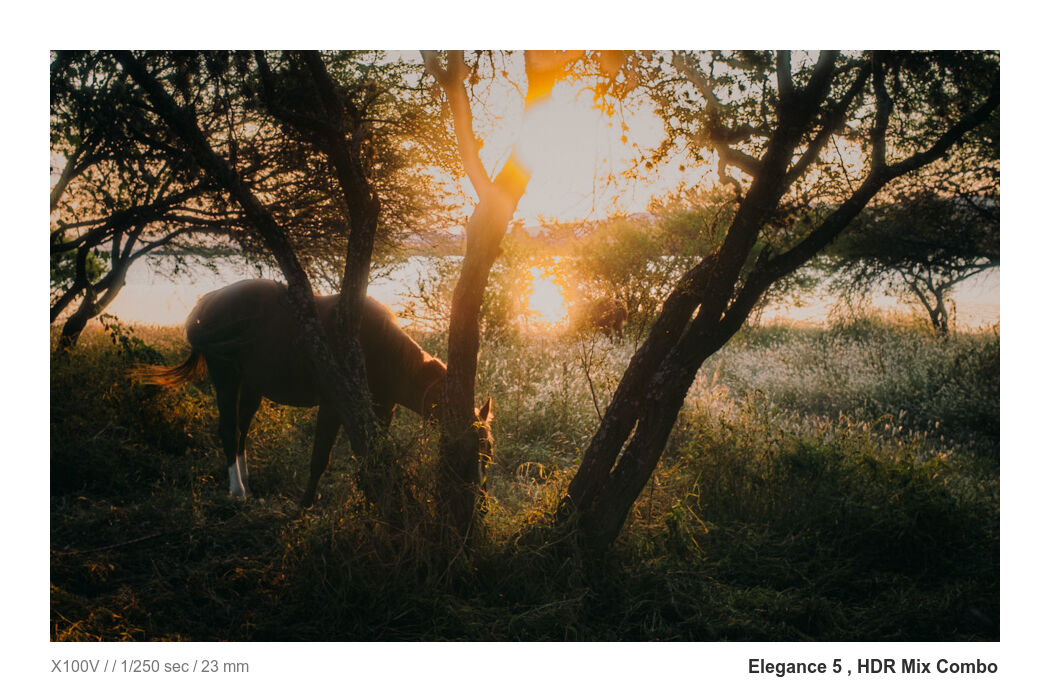
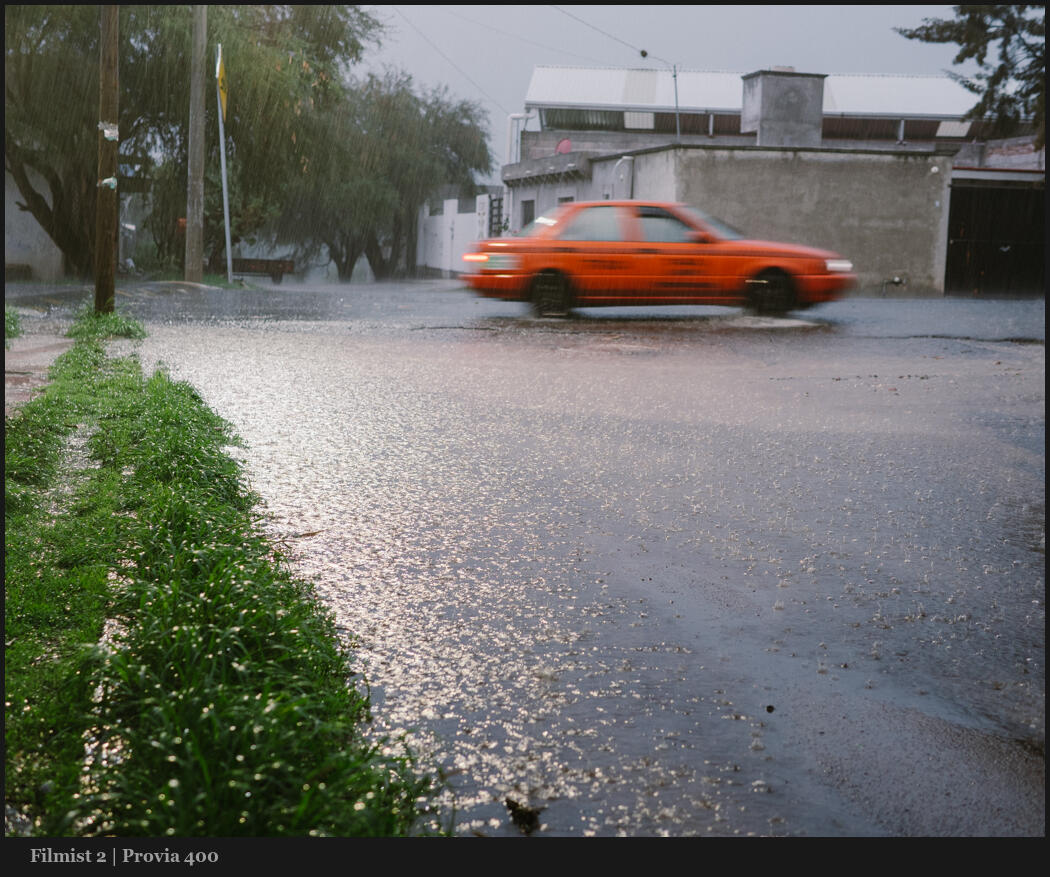
Let’s look at the photo below…
I stood in the rain watching cars go by. I lowered my shutter speed to 1/15th. I did not use continuous shooting and hope for the best. I did not track. I framed the scene, held, and waited for the car to arrive.
You may think this is a good photo or trash. But what matters to me is it’s the photo I saw in my head, and shooting fast would have taken my focus away from that.
Why single shot is usually the best shot?
Even though I may lose a photo now and then shooting single-shot mode. I always come back to it because the single shot gives me moments more real and thought out.
My goal here is not that there’s never a timer for faster frame rates. Only then, when the default mode is one photo at a time when you slow down, and when you truly THINK about every frame. Every photo you take gets better.
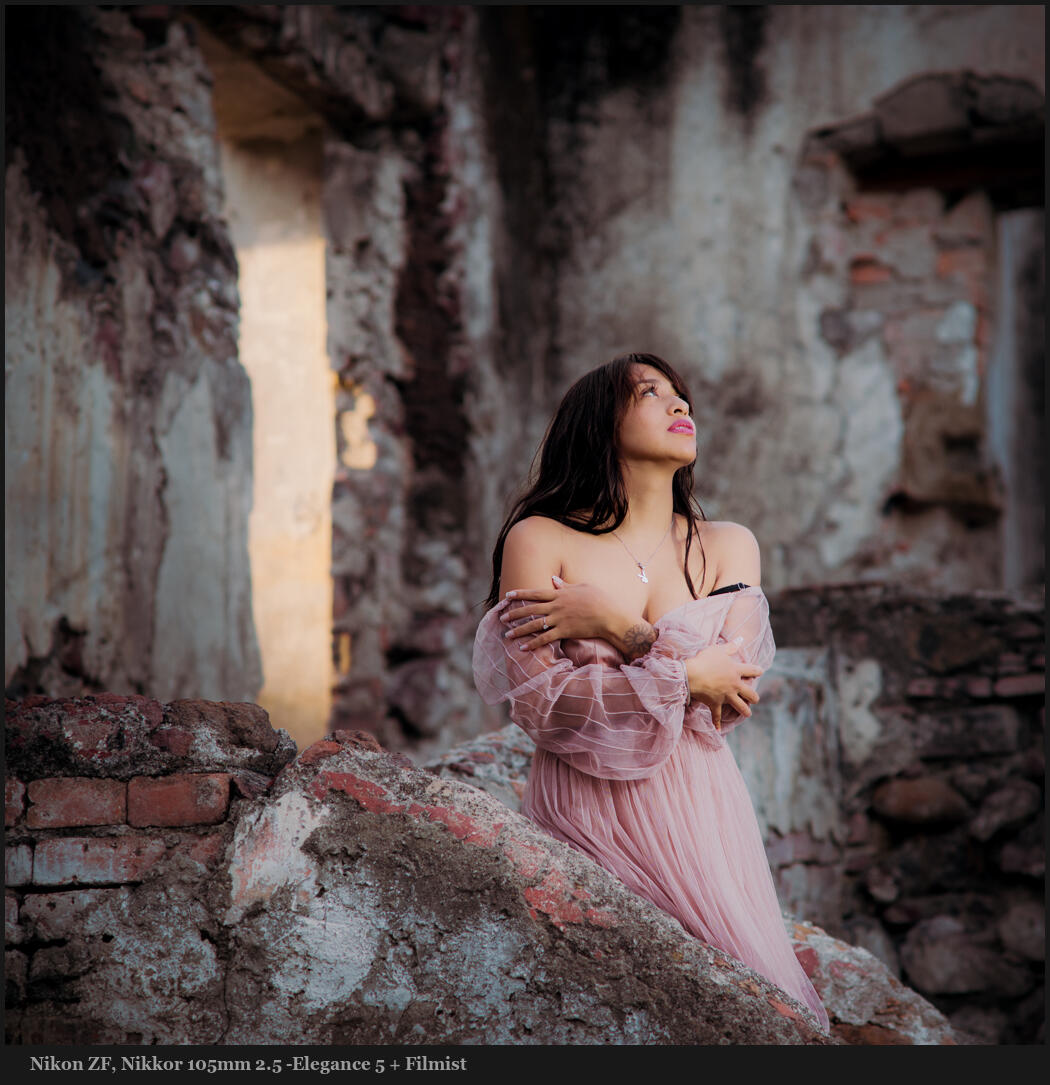
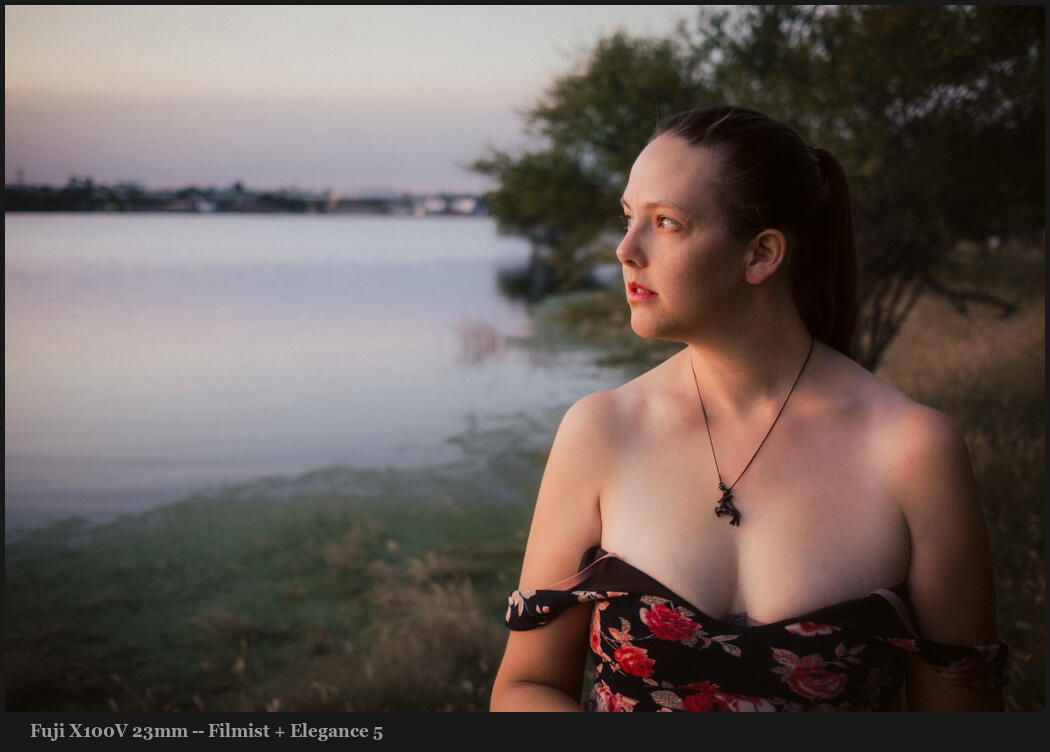
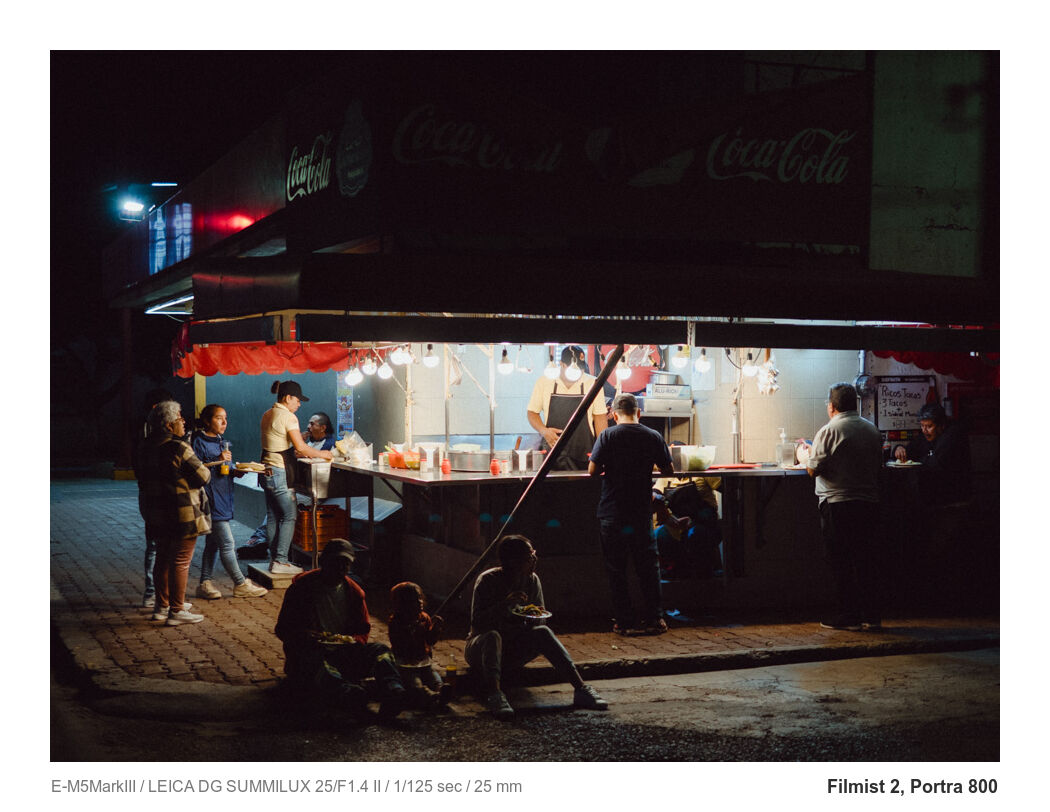
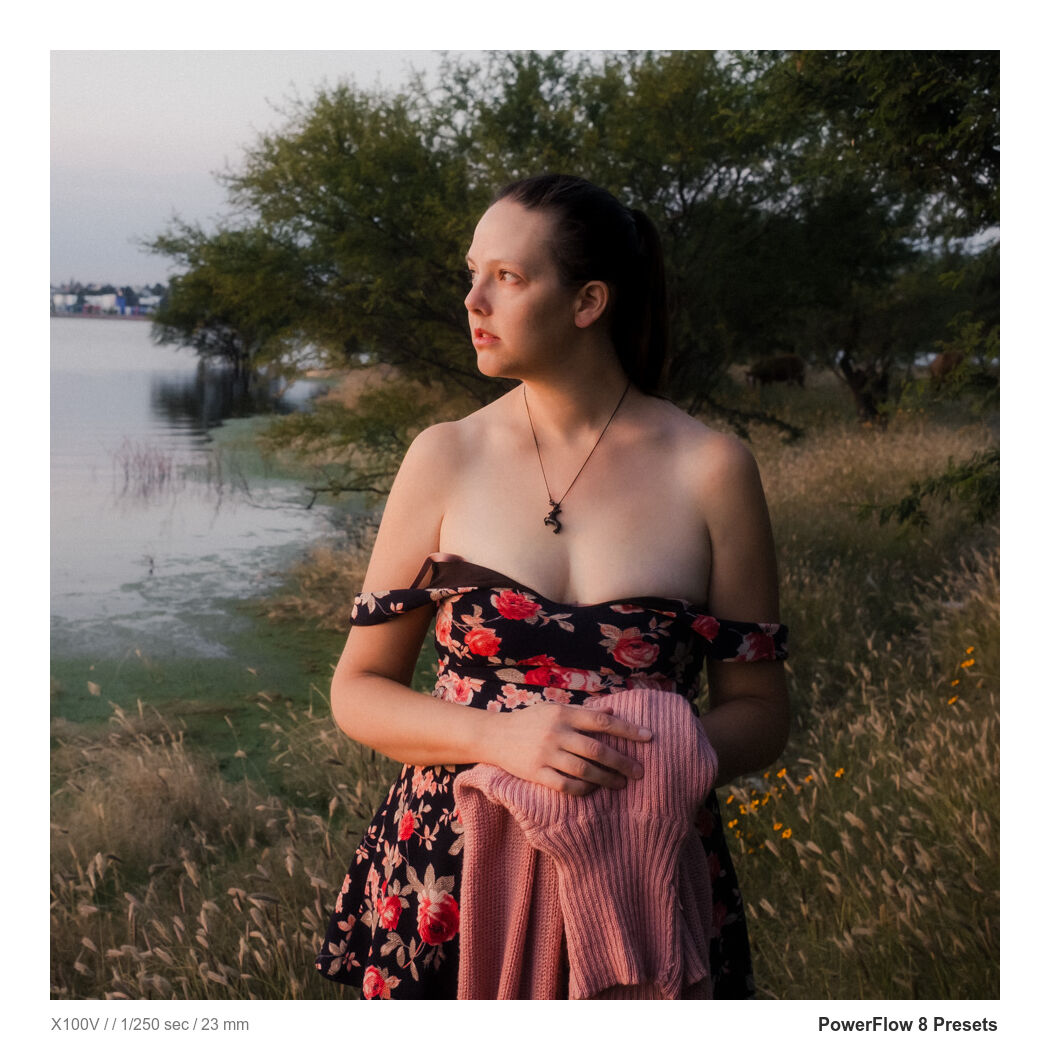
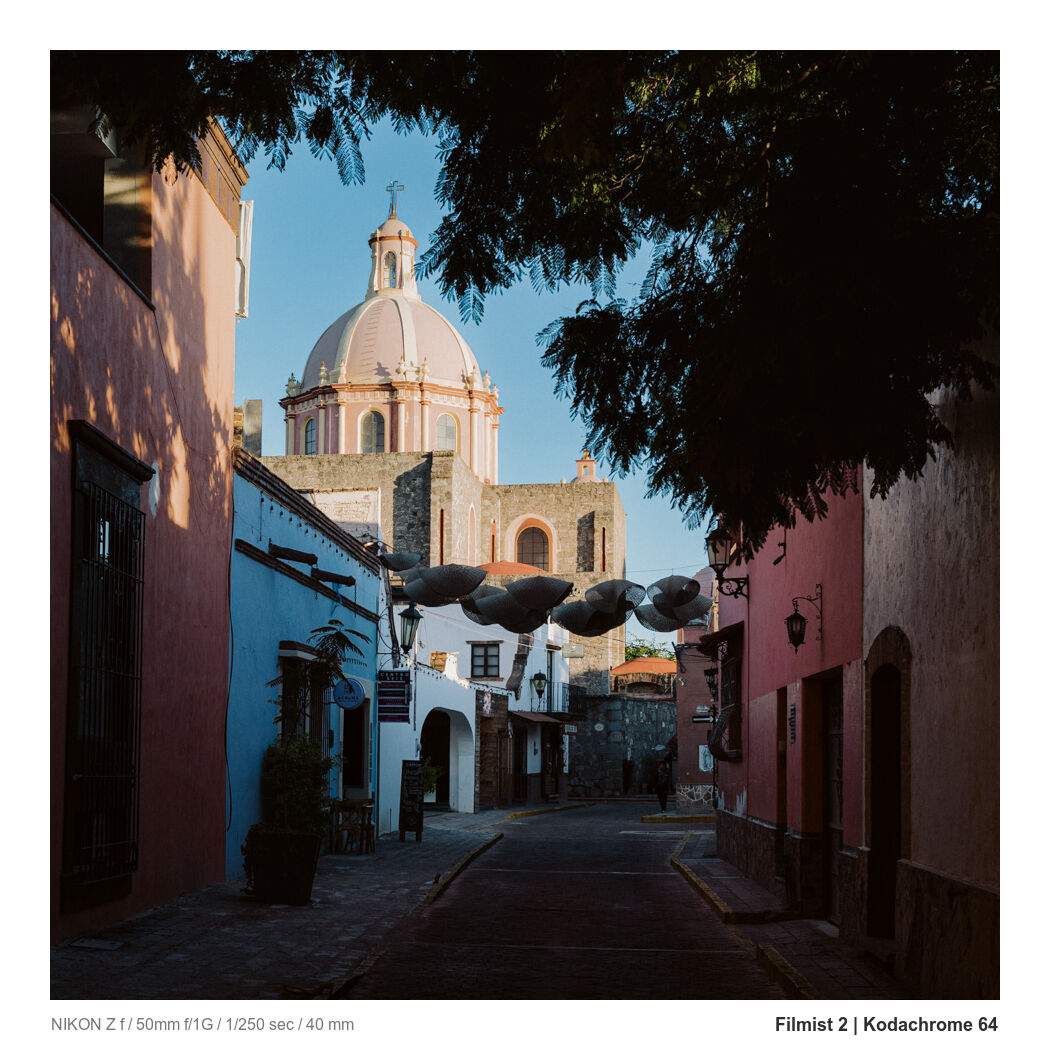
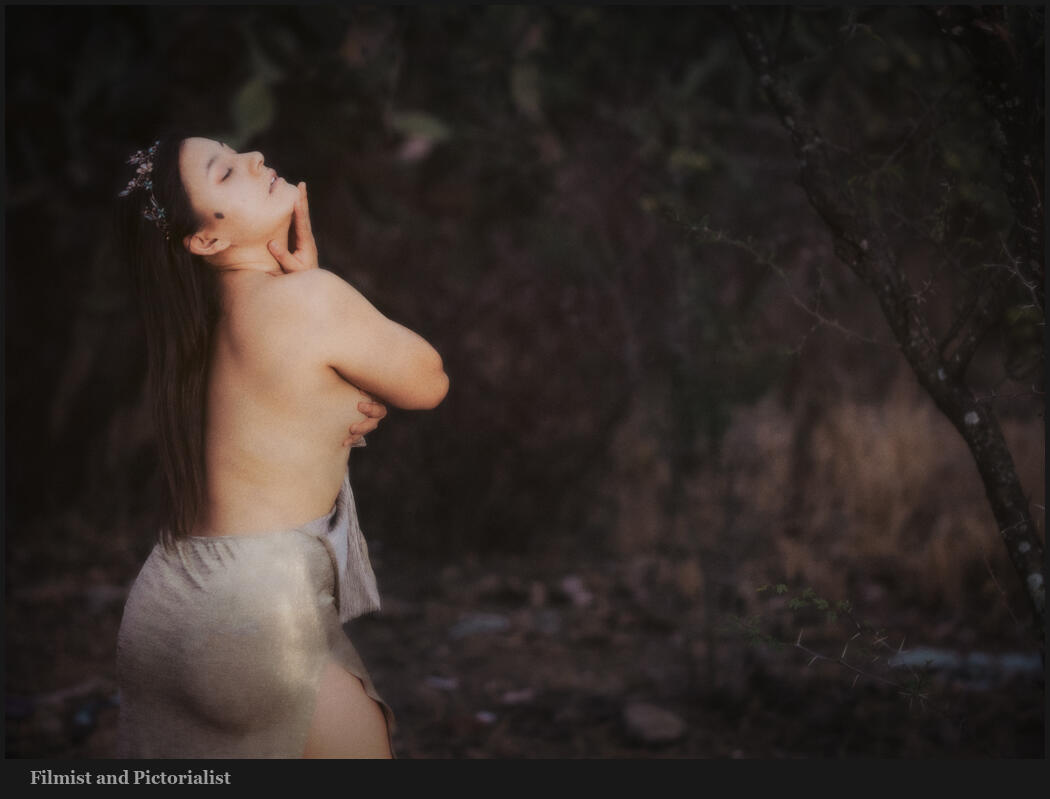
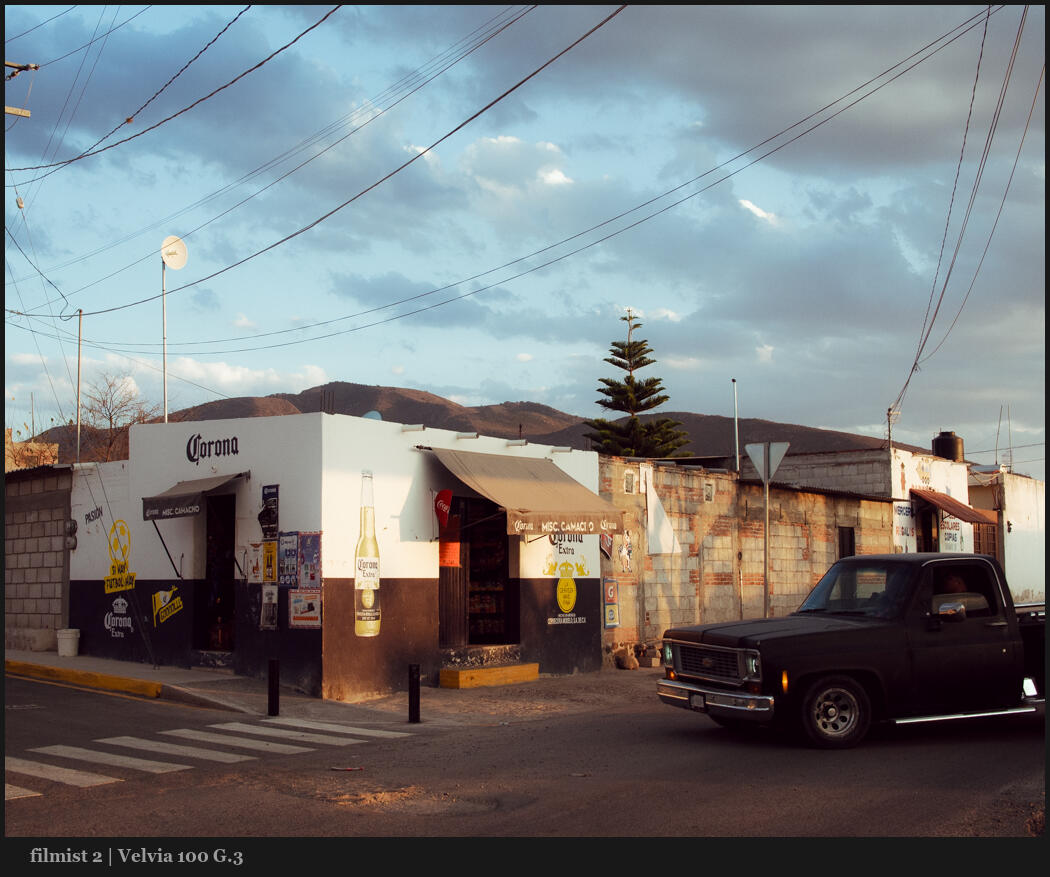
Even in the photos below. The portrait is dark with lots of outdoor space. But I went slow, I extended that into editing slowly and imperfectly. The street scene is a bit broken by the car entering, but because I wanted to, not because it was one of 20 frames.
When I take a photo, I want imperfection on my terms. Because that reminds us we are real.