September 10, 2022

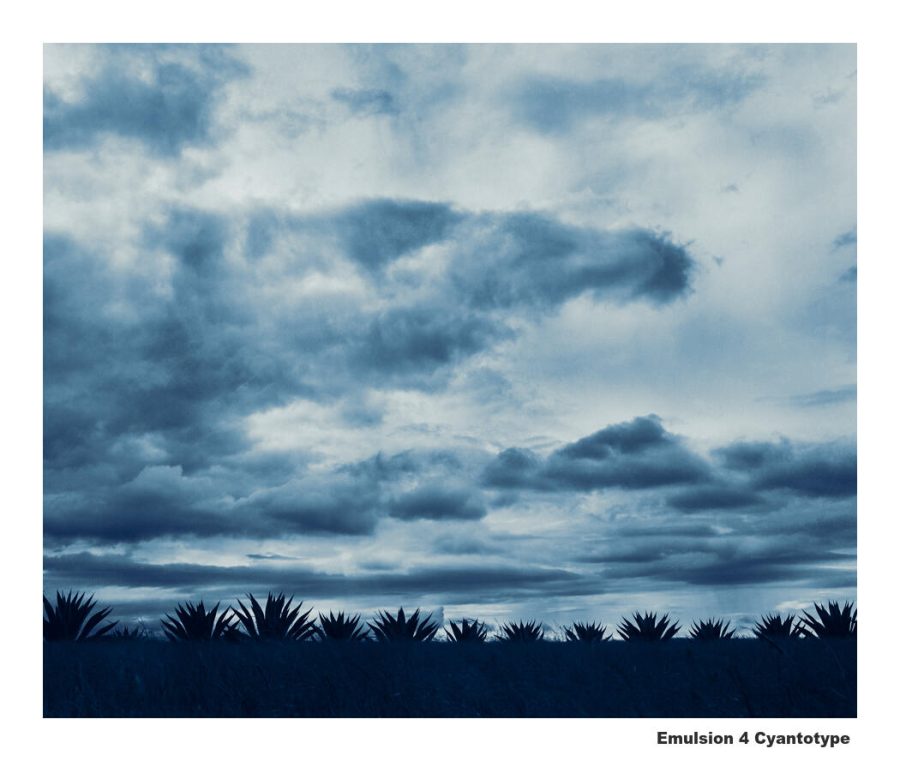
Platinum, Cyanotype, Colldoain, and Seleneum are all inside the Emulsion 4 darkroom actions pack.

Emulsion 4 has been out for a week making dakroom actions easier than ever. Now I made a complete series on how it works and how to create amazing effects with them. And I finished the Emulsion 4.1 update which brought even more refinements including my new favorite Platinum mix based on very finely made soft platinum prints from the darkroom.

If you don’t want to read this… Go watch the complete playlist on my channel.

A lot of people avoid actions because they don’t want to use Photoshop even though they have it. There missing out because there is no easier way to use Photoshop. The experienced user is more creative and saves countless hours while the new user gets advanced effects simply and learns more along the way.

Emulsion takes completed layer mixes in Photoshop and makes them easy regardless of Photoshop experience level. But I’ve been listening. People have been saying, Gavin, we want more detailed videos So for Emulsion 4, I just finished a complete training series and uploaded it as a playlist on YouTube.

This is basic training, but you can watch the complete playlist here.

There are videos on installing Emulsion 4 all the way to advanced user guides that show you how I like to each use of the chemical emulsion in the action pack.

There is a separate video for how to create Cyanotype, how to manage all the PLatainum Palldidum effects, how to use Selenium toning for digital, and how the Wet Colldoain effects can be mixed in many ways.

The main thing to remember as you use EMulsion or any of my other actions like Blackroom, Lumist, Naked Darkroom etc. Is that I develop these to make complex tasks easy, not take away control like so often happening in plugins.

After every action, you have all the layers and all the control. If you are not very experienced in Photoshop it’s fine, just use the look as you see it and gradually start playing with layers. If you are experienced, the sky is the limit and you can tinker more. Either way, you’ll save a ton of time because Emulsion 4 is doing the hard work for us.

Please leave a comment and tell me what you think of Emulsion and this training format. Or tell me what videos I need to make to add to this playlist. Either way I’m here tp help you with Emulsion 4 so you can creat amazing chemical tones photographs.

Gavin Seim
Read More

January 25, 2019

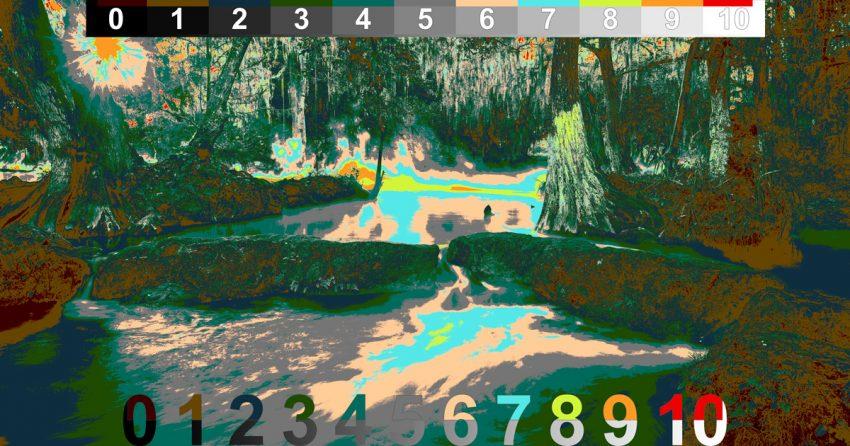
Lumist is one of the easiest tools you’ll use in Photoshop. But designing it pushes both Photoshop and my brain to the limit. It’s a strange beast because it’s adding a feature to Photoshop that should have existed years ago but does not. The ability to see and control luminosity perfectly. The goal is to make the process of our one of a kind tone system work as if it was meant to be part of Photoshop.

Behind the scenes, however, it’s the most complex set of actions you can imagine. Every time I do major updates on Lumist it’s a battle of math, functions and usability going on in my head. This update does not change a lot on the surface of Lumist but I’ve spent days puzzling out how to make things do what I need.

Lumist 2.2 is a big update. First I resolved a pesky bug that was causing Zone section to be incorrect when more than one Zone was selected. I’ll spare you the details but suffice to say your Zone selection should be perfect now as you select and edit in real time using the Live Map.

Nex,t I totally revamped the Total Scale. Both of them. That’s the numbers scale that shows you each zone and the colors that it corresponds to in the map. The ends of the scale show pure highlight and shadow clipping that is also shown in the map.

A brand NEW Scale!

This will the an obvious change, in 2.2. Speed is always something we’re looking to improve. The problem was the Total Scale has to build every time you run the map. So we made a new scale that’s cleaner and FASTER (bottom). The top half of the numbers show the color of a Zone on the map while the bottom shows the grey scale zones they represent. It’s clean and it runs a lot faster. That said you can still ad the newly revamped Classic Total Scale (top) using the button at the top of Lumist. If you really hate the new scale you can even switch back to classic by simply switching the names of the actions “Seim Total Scale” and “Seim Total Scale2” down at the bottom of the Lumist set.

There’s no need to resize the scale on lower resolution images anymore.

It should place perfectly when you run the map automatically. This apples to both the new and the old style scale.

So that’s Lumist 2.2. You can delete old versions and install this. All the features are updated on both the CC version and the CS5-6 versions of Lumist. And if you’re still using Lumist V1, what are you waiting for. Grab you upgrade code and start enjoying V2. If you can’t find you upgrade code email us, effects@seimstudios.com


Read More

April 6, 2018

UPDATE 04/24/18
So after weeks Adobe sent 7.31 today which does address some of the biggest problems. While there are still some issues, I would say it’s safe to update to 7.31 to get the new profile features. All of our current collections like Silver 3, Natural HDR, Belladonna and others should work great. You may find 7.3 even slower than 7.2 but everything seems to be working.

  • Preset sorting seems to be corrected (though our largest presets already worked around that)
  • The bug that was resetting presets from BW seems to be fixed.
  • No ability has been added remove the rest of the built-in presets that clutter up our workspace.
  • An option to disable the full image preview when you mouse over a preset has still not been added. This seems to make things run slow.

Orginal post, 04/06/18

Adobe just released LR CC Classic 7.3 and frankly, it’s a mess.  While it brings some cool updates like presets working in both Lightroom and Photoshop Camera Raw, that gets mostly washed away in the face of all the bugs it has introduced. It’s like Adobe said, hey let’s release an update but not test anything first. Lr 7.3 broke the sorting of presets. For everyone! We have an update for that and a workaround in the video below, but sadly there’s more.

The forums are abuzz and people are looking for solutions. Lightroom 7.3 feels slow, applying many presets in black and white causes images to revert to color and unless you like being a beta tester you will probably get more done in Lightroom 7.2 until Adobe fixes this.

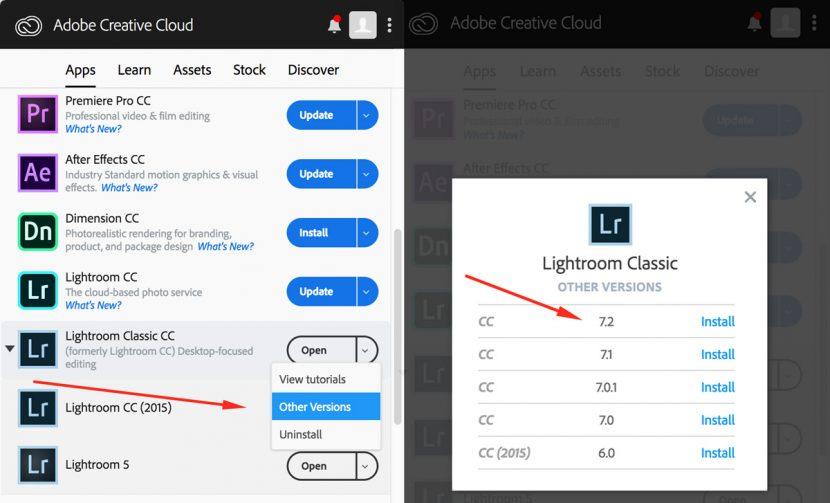
We just sent an update to Silver 3 that will get your presets in order and you should have received an update email if you own Silver 3. Also, we’re working on updates for our other preset collections, so watch your inbox. We will also update this post when Adobe patches the other bugs or we find workarounds. In the meantime, save yourself a headache and stick with Lightroom 7.2 for now. If you already updated, you can go back to version 7.2 from your Adobe CC app as shown in the graphic below.

We have updated all our current presets collections so they sort properly. Check your inbox if you are a Seim presets user. If you didn;’t get the update email us, effects@seimstudios.com

Some kinds folks have been scripting over the weekend. Here’s a terminal script for mac that fixes the files. And here’s a LR plugin meant to do the same. These do not fix the bugs Adobe has given us, but they so change filenames on your original preset files so presets will sort correctly when updated by LR 7.3.

You can go back.

Here’s where you go in the CC app to downgrade if you don’t want to hassle with all this. Go tell Adobe to get their ducks in a row and that we’ll be waiting, with the old version.

Read More

October 31, 2017

[poll id=”3″]

[poll id=”4″]

Does video work?

We study marketing a lot over here and put a lot of work into it, especially our promo videos. Most companies don’t make a promos everything but I’ve always felt it’s important. I thought we could  share and maybe learn something about how to reach our customers better.

Does it matter, do people watch the videos or do they just read the copy? Honestly we agonize over promos here. Everything from the soundtrack to the humor. For example we started including outtakes because some people thought I was a bit too intense and artsy. It’s fun, but it’s something we use for balance.

We decided we to make two promo videos for the new Nitty Gritty collection. So first, which video is better? Second, do product videos effect how you buy? After that, let’s talk. Comment and tell us more. Do you make promo videos of your work? How would you do things differently? Let’s share some ideas that we can all use.

Tun into our Facebook page next week and I’ll share results on what worked here and why we did it.

Thanks for taking part. As a bonus we extended the $50 off deal on Nitty Gritty for another day. Get them here.

Promo Video 1:


Promo Video 2:

Read More

February 17, 2012

by Gavin Seim:

Ready in 60 Seconds: After you choose the subject but before before you release the shutter, try taking a full minute to think about your scene and how you’re about to capture it. Really. Don’t just look at it. SEE IT. Sometimes we feel pressured to click. But even with a portrait, learn to take a little time and you’re images WILL improve. With some scenes you can even spend longer. Check out the 111 Project.

Sparks: I stood outside well before the exit. Experimenting, considering the scene, trying to predict the light. The effort paid off with a great candid from a challenging scene.

Cut The Trash: I know, you’ve already taken 60 seconds, you have a plan. But look again. Maybe even take a test frame. Controlling tone, removing clutter and distracting elements is one of the most neglected elements in art making. If something is not adding to the image, it should not be in the frame. Either you move, move it, or it will move the quality of your final image down to LOW.

Read More