Most people shy away from Luminosity masking because it’s kinds of over the top on nerd stuff so today I’ll show you 3 easy ways I use luminosity masking, made even easier with Lumist 2.
We’re going to look at using single layers, group and multi group masking methods that eliminate the need for channel madness and huge files. Don’t forget you can go full screen 4k on this video. Enjoy – Gav
Vertical editing is an incredibly powerful tool, and I believe it is a major route to more control in our images. It’s really easy, but not widely used to it’s full potential.
In this weeks vlog I’ll show you how I use it to make advanced Photoshop layer edits easy!
I always shoot RAW because JPEG means data is thrown out and the more data you have the more dynamic range and color gradients and detail you get. In post that’s important. Don’t ever let someone tell you that JPEG is the same as RAW. Mexico is forgiving, JPEG is not. It has it’s place, but no software or wishing will restore information that has been thrown away.
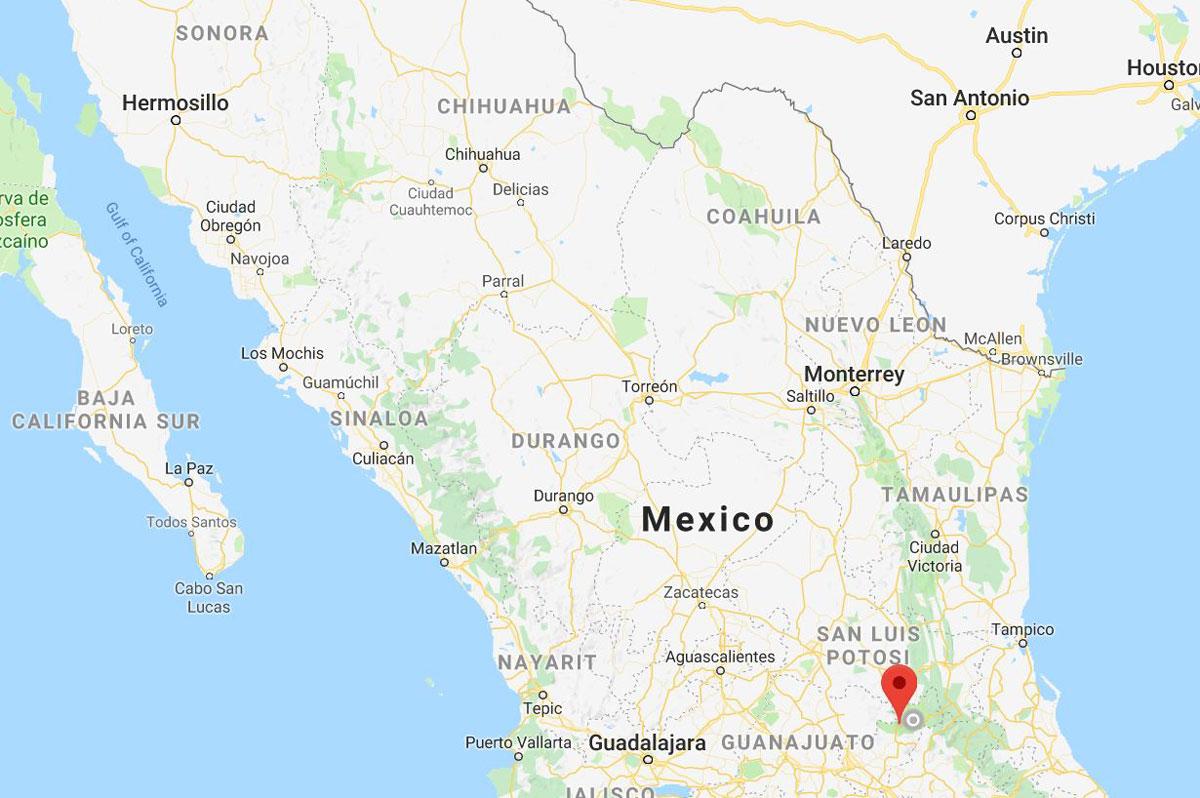
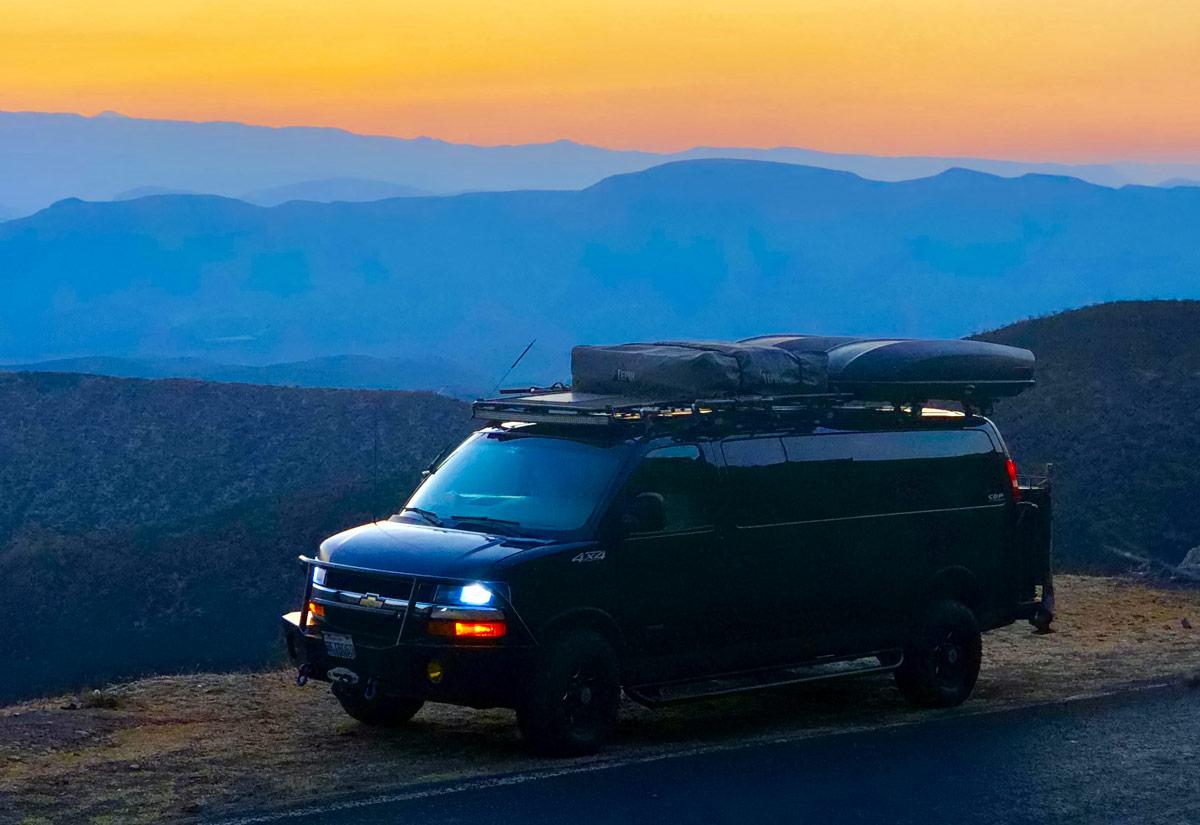
This week we took a drive in the van up into the high mountains of La Huasteca Mexico. It’s a magical place in many ways but this time we headed up Hwy 120 towards the tree-line and the jungle of Pinal de Amoles, which sits at about 8000 ft. I took my new Fuji XT3 and a few compact prime lenses. In this case the 35mm f2. We headed up the San Juan side of the mountain which is a but dry dusty side this time of year leading to some dusty long distance views. But when the sun sets behind those, it’s impressive.
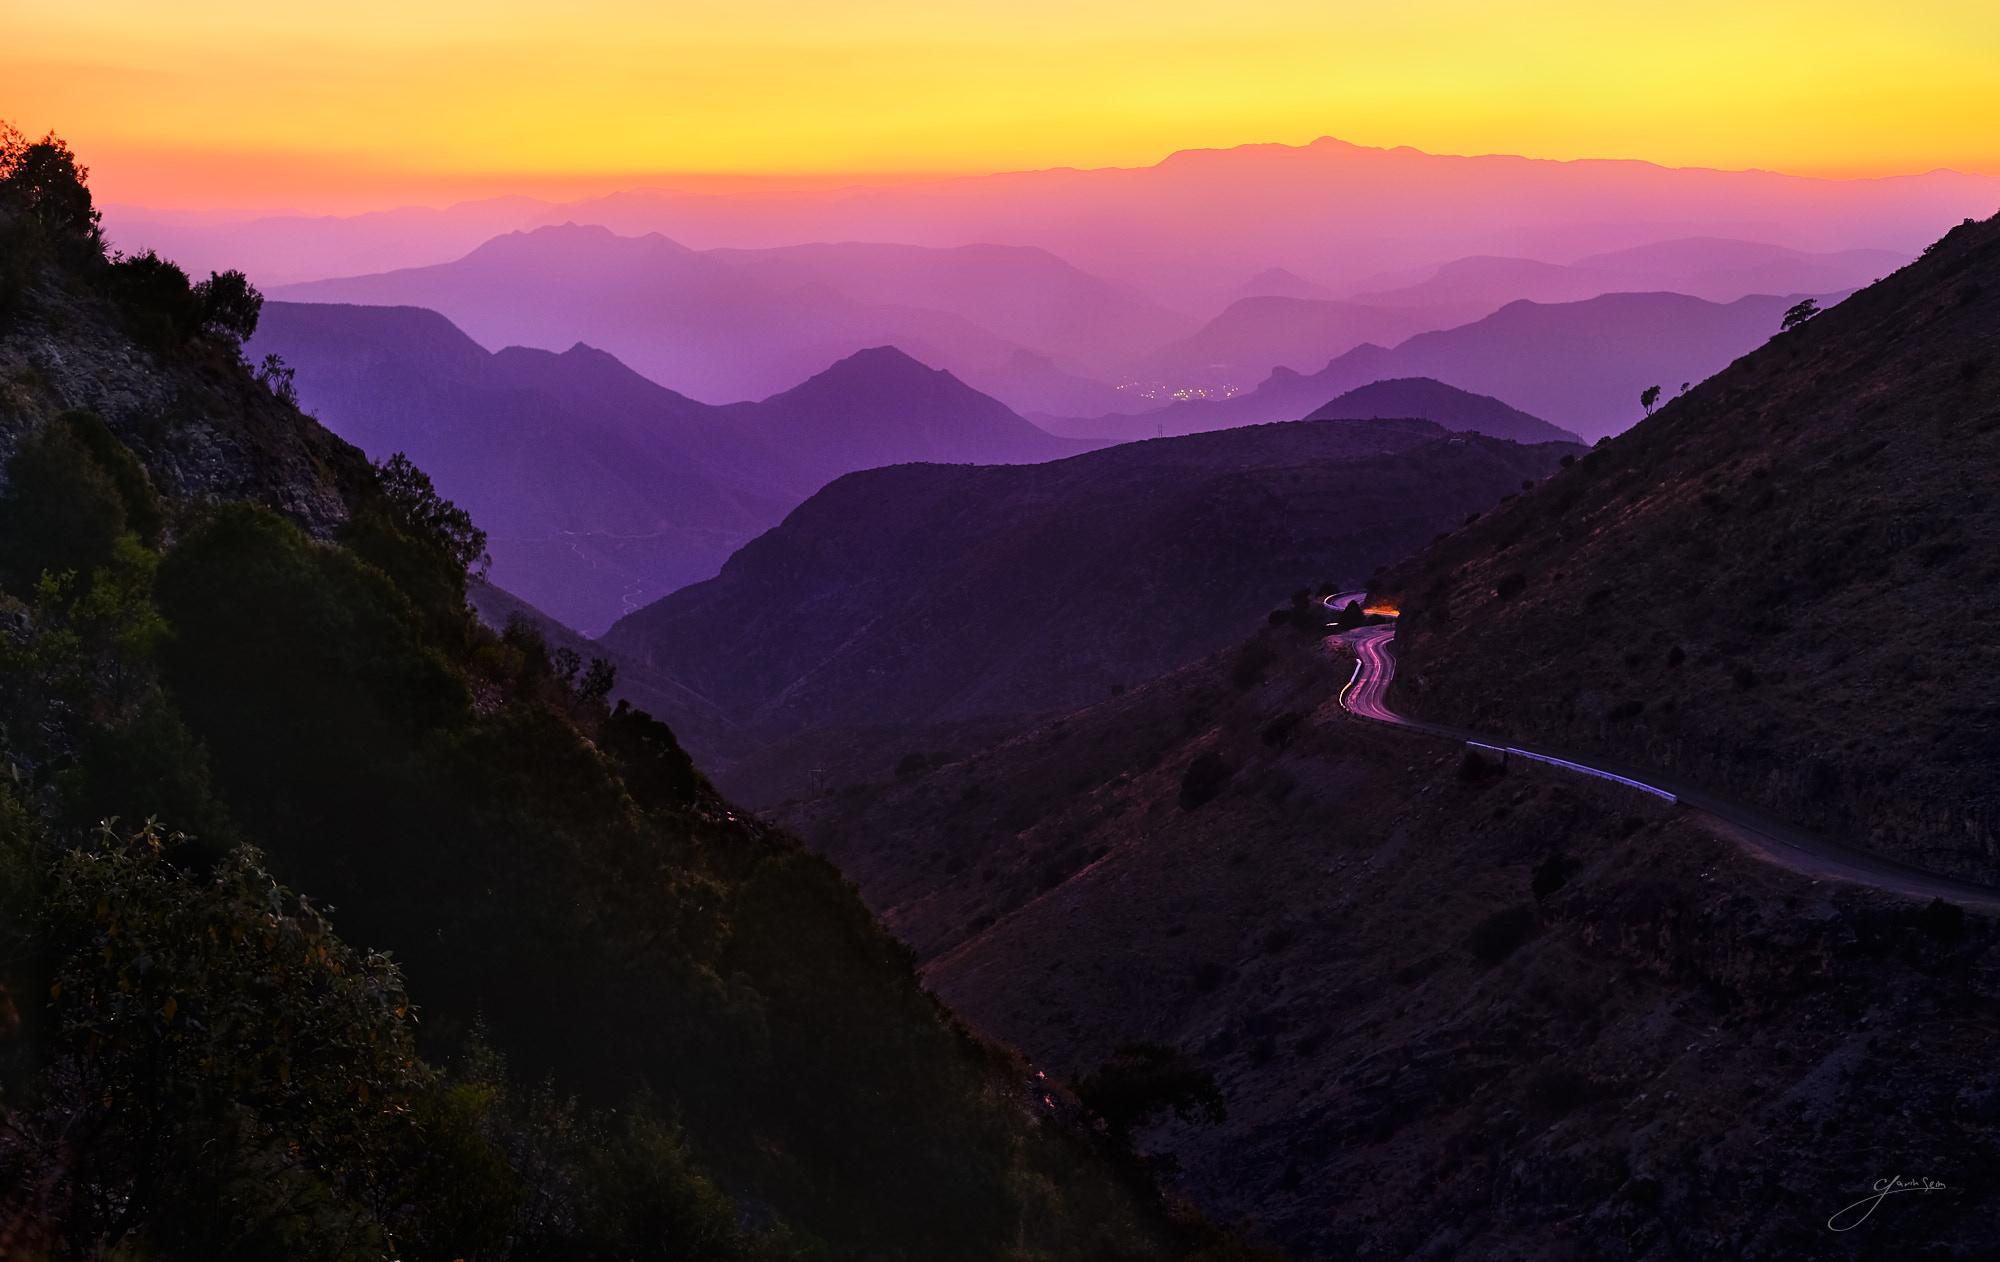
That sun was setting as we wound up the hairpins toward the jungle treeline and looking back over the valley above a small town called Carmango was the purest high gradient color sunset I could hope for. It actually reminded me a bit of the smokies back in the USA, but the color was stunning and alive. Just like Mexico.
I got the shot, but I found out after returning home that I accidentally switched the menus of my Fuji XT3 to JPEG. My editing flexibility was now limited and I was kicking myself. Sure the built in profiles from the Fuji look good, but it’s still a JPEG and especially in high dynamic range scenes like this, I want every ounce. With subtle smooth color gradients like this you have to be careful or you will get artifacts. The more you edit the more that can be a problem. Especially if you’re not in 16 bit.
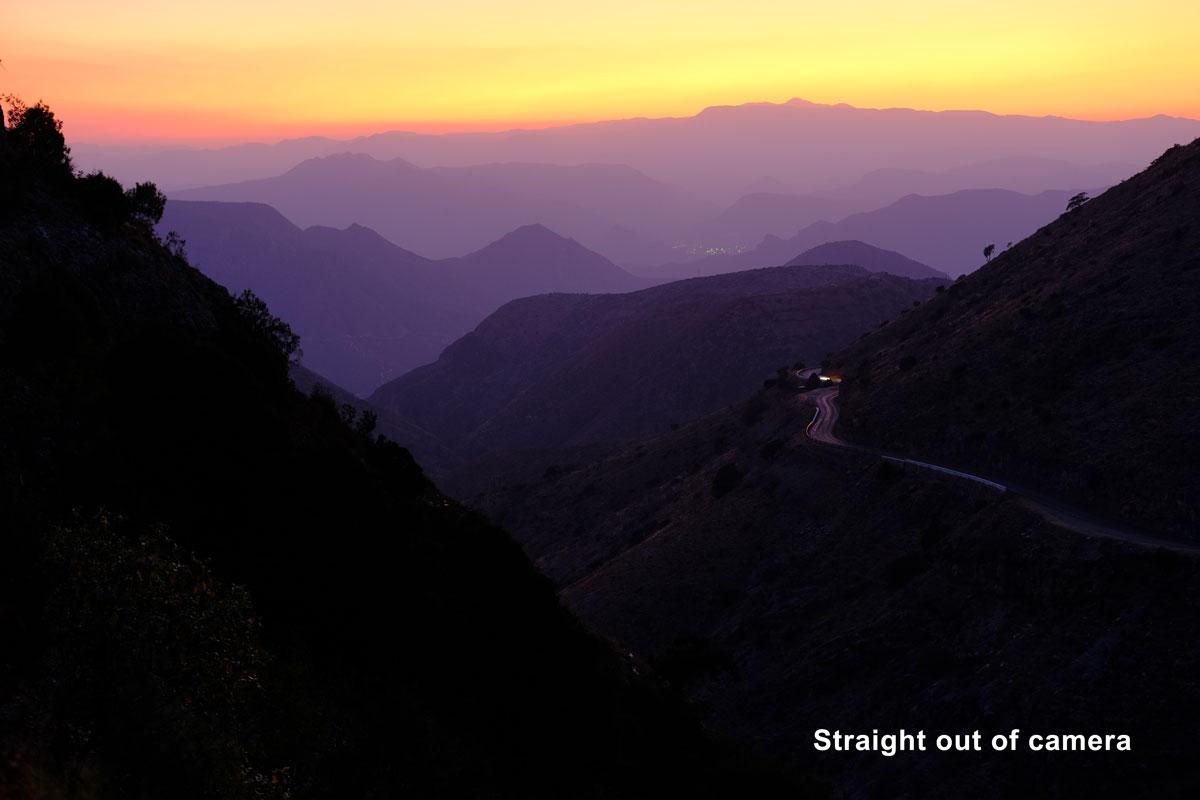
So I started with the original untouched JPEG filer in Capture 1 (LR would also have worked fine). If you look at my our of camera file it’s nice but check out the tonal map from Lumist. It’s already pure clipping. Before anything else I did some brushing to recover a bit of shadow detail on the left foreground. Fully black there will be too much negative tone. After that I opened the file as a 16 bit TIFF in Photoshop. I can’t create more range out of nothing but by switching to 16 bit we get smoother colors and less artifacts as we edit. Here’s what I has our of camera. Not bad. But can we edit it.
The good thing was that I had a few image to choose from. I had taken a few frames and then realized it was beautiful and I should NOT be hand-holding at a higher ISO to make it fast. So I got the tripod and ended up at 1/2 sec, ISO400 f4. I did a bit of bracketing since I had little time to micro analyze the tone. This yielded me a sharp image in with balances zones. Even though I thought I was shooting RAW I kept the highlights down on this, not to compensate, I expose where I want. But because it was more about the color and contrast in the hills. I did not want a washed out sky. That paid off because had I needed to recover highlight from the JPEG, it would have been tough.
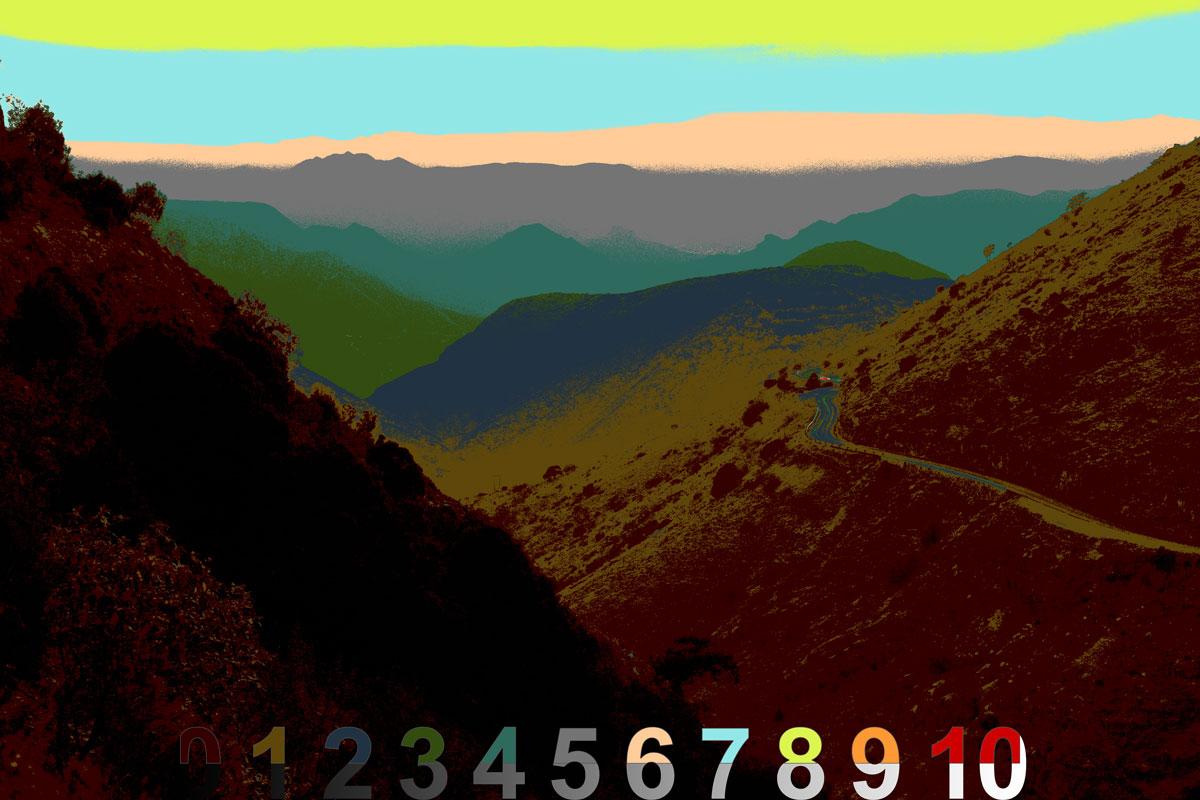
Here’s the tone values of that I took into PS and you can see those shadows really were lifted after that first shadow edit keeping some detail in my black. I didn’t want a lot of detail there so even on the JPEG, this did not introduce a lot of artifacts.
Looks decent. Now into Photoshop.
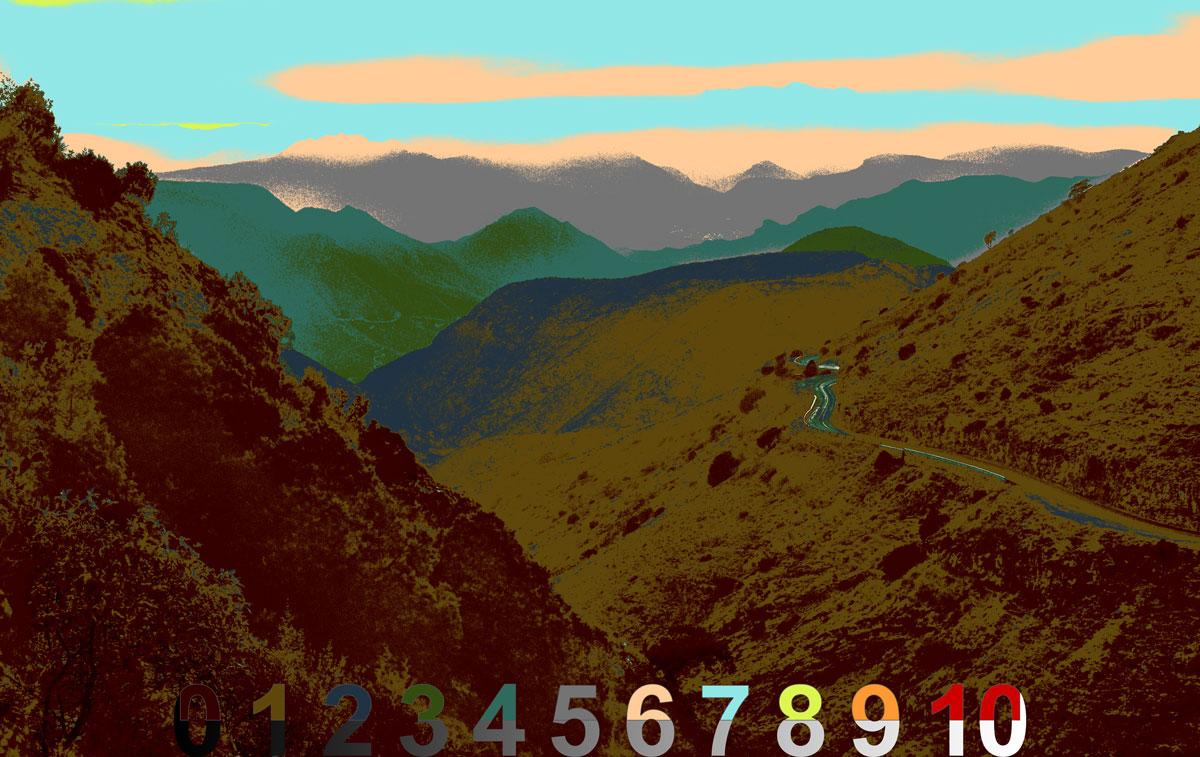
I used Lumist to examine the tones and see what to change. I wanted to boost thing a little but keep editing to a minimum. The next thing I did was some sky work using selection from Lumist, including a fire paint overlay. I enhanced the natural purple and the oranges of the sky and mountains a little using these. I finished by watching my tones and doing some burn and dodge. A little shadow burning in particulate helped me define the lines between the mountains.
Below you can see the tonal map of the fished image that’s at the top. I kept my sky fiery but with no tones above Zone 8, which is pretty dark for a sunset sky, at least for me. But because the shadows of the image go all the way to Zone 1, we still have rich contrast and a full 8 stops being in the tonal range of the image from Z0-Z8. No muddy crushing of everything into mid tones here.
So Can JPEG Work?
Yes the JPEG worked out and I have a printable image, this time. But this is a good lesson in paying attention. Images minutes before were in RAW and tinkering around in menus I switched over and din’t realize it. I exposed well, but had I shot like this all day at an important event I would have lost images due to highlight and shadows being thrown out. Even here a raw would have given me a tad more subtle quality and that does matter when printing.
Always shoot RAW for art images. The fact that the image was exposed well in camera like we talk about in the EXposed Workshop and processed carefully in post kept it looking good. JPEG’S can look great, but they can also fall apart when you push them hard and while I don’t always push a file hard. I always recommend the extra latitude of a RAW.
Lumist is one of the easiest tools you’ll use in Photoshop. But designing it pushes both Photoshop and my brain to the limit. It’s a strange beast because it’s adding a feature to Photoshop that should have existed years ago but does not. The ability to see and control luminosity perfectly. The goal is to make the process of our one of a kind tone system work as if it was meant to be part of Photoshop.
Behind the scenes, however, it’s the most complex set of actions you can imagine. Every time I do major updates on Lumist it’s a battle of math, functions and usability going on in my head. This update does not change a lot on the surface of Lumist but I’ve spent days puzzling out how to make things do what I need.
Lumist 2.2 is a big update. First I resolved a pesky bug that was causing Zone section to be incorrect when more than one Zone was selected. I’ll spare you the details but suffice to say your Zone selection should be perfect now as you select and edit in real time using the Live Map.
Nex,t I totally revamped the Total Scale. Both of them. That’s the numbers scale that shows you each zone and the colors that it corresponds to in the map. The ends of the scale show pure highlight and shadow clipping that is also shown in the map.
A brand NEW Scale!
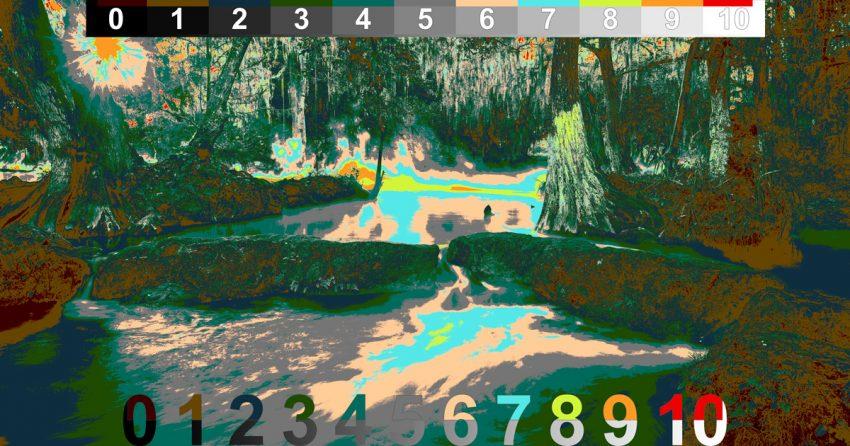
This will the an obvious change, in 2.2. Speed is always something we’re looking to improve. The problem was the Total Scale has to build every time you run the map. So we made a new scale that’s cleaner and FASTER (bottom). The top half of the numbers show the color of a Zone on the map while the bottom shows the grey scale zones they represent. It’s clean and it runs a lot faster. That said you can still ad the newly revamped Classic Total Scale (top) using the button at the top of Lumist. If you really hate the new scale you can even switch back to classic by simply switching the names of the actions “Seim Total Scale” and “Seim Total Scale2” down at the bottom of the Lumist set.
There’s no need to resize the scale on lower resolution images anymore.
It should place perfectly when you run the map automatically. This apples to both the new and the old style scale.
So that’s Lumist 2.2. You can delete old versions and install this. All the features are updated on both the CC version and the CS5-6 versions of Lumist. And if you’re still using Lumist V1, what are you waiting for. Grab you upgrade code and start enjoying V2. If you can’t find you upgrade code email us, effects@seimstudios.com
It’s the end if the Autumn season and depending on where you are the color maybe turning white. I wanted to close the season with some tips on getting better light in your photos no matter where you are in nature, especially with those Fall colors around the world.