I have something new for you all that I’m really excited about. HDR and dynamic range is something I became passionate about years back. Since then it’s become more than a “look”. It’s become a way for me to better understand and manage light on every level. I think understanding dynamic range is an everyday essential for the serious photographer. It goes deep.
People have been asking for a recorded segment on HDR for years now. I’ve finally got a collection finished. And it’s more than basic HDR. Enter, HDR Magic. Over 2 hours of fully downloadable HD videos where I show you how I make HDR images and manage dynamic range. Their divided into sections, looking at every aspect, from bold HDR to gentle dynamic pushing and pulling. And going forward I plan to refine the set even further and send out free updates.
Head over to the HDR page for all the details and and the first video. It’s time to see light in a new light. I think you’ll enjoy them… Gav
Updated 12/11. Never has raising the bar on quality been so relevant to photography than in today’s crowded market. But never have the tools at our disposal been so powerful either. So today I want to share a few quick ideas on inching that bar up, each time we release the shutter. And few tips to help us shoot better and make our images as perfect as they can be.
1. Visualization. Really seeing.
It’s often said it starts in the camera. Well in truth it starts before that. I’m certainly no pioneer in visualizing, but I’ve learned how valuable it is. Sometimes our digital generation brushes aside with a chuckle the tried and true techniques, as if they were insignificant. As if because we have cameras with screens, it’s no longer necessary understand such things. But if there’s one thing I’ve learned in nearly 15 years of pursuing photography. It’s don’t ignore the techniques of the old masters. My generation sometimes thinks they have a better way. They usually don’t.
I recently recorded a short podcast on how I use visualization right here. But the bottom line is you have to do more than just look and click. Visualizing takes practice. It’s NOT about not just seeing something that’s in front of you, or even just seeing an object or composition. It’s about seeing what you want in your final image. Everything you want. The objects, the lines, the tone light and dark of various elements, the colors, the composition. Even down to seeing in your mind the edits you plan to do in the real, or the digital darkroom.
I find using the Zone System to help visualize your scene and place the tonal ranges helps a great deal. Not to mention helping you expose better. But even if you don’t use the Zone System at every step, the zone scale can be invaluable in visualizing. And with practice will become second nature and will effect your work at every stage. You can learn about the Zone system in my article about Zones. Also here’s a classic video with Ansel himself talking about it.
Sunsets Hidden Falls, 2010. Having a pre-visualization of the scene I wanted helped me plan the exposures and edit this properly. More on this image at.. http://bit.ly/bVa0hm
2. The Camera.
This is step 2. These first two could go together. But visualization deserved that first category. Do it before you raise that camera, because it’s easy to get caught in the moment and forget about truly visualizing. But after that visualization, the camera is where a great image is captured. Not the computer. You have a visual for what you want to capture, now you need to use your tools to make it happen.
Consider what you’re trying to do and how you need to leverage your equipment. Shutter speeds, supports, aperture, focus, timing, light. Read the Six Keys To Photographic Image Quality for more thoughts on the technical side of this. And of course, don’t forget your visualization and composition to help make it all happen. This is something to think about in a digital age where we tend to spray and pray. I’m a firm believer that as a whole, our industry needs to slow down. More images does not make better quality and I find taking your time with your camera and image setup makes a great deal if difference in your final result.
I’m going to talk about cloning today. On photo’s that is. I don’t know much about the other kind. Cloning, patching, retouching. Whatever you call it, it’s all about making an image as perfect as it can be. Really it’s been around since long before computers. I’ve seen an airbrush artist do the same thing we do with cloning, but directly on a print with paint. It’s amazing. But thankfully we don’t have to do that.
Thing is you can do almost anything with cloning. But that doesn’t mean it’s easy and it doesn’t mean you should. I’m a big fan of getting it right in camera, and sometimes it’s best just to leave things alone. But often the goal is a perfect image and there’s some things you simply can’t, or didn’t change in camera.
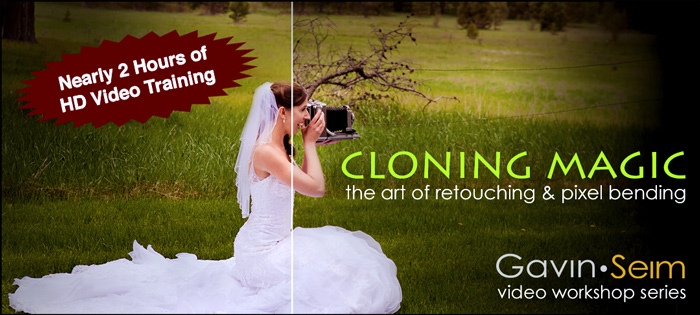
I have a new online workshop that focuses on how to make perfect clones and retouches and I thought it would be a great time to share some of my favorite tips on how to do it better. If you want more, check out my Cloning Magic Video Workshop.
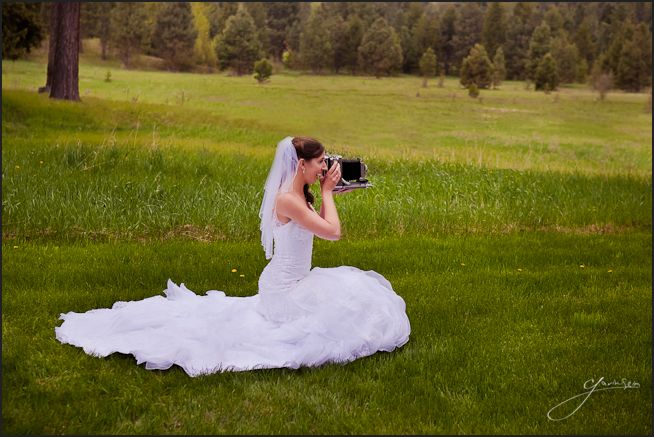
Mouse for before/After. I could not move the clutter in the field and time was fleeting. In post I thought of leaving it, but then though how much cleaner it could be and what a good exercise in challenging clones it would preset... Gav
1. Visualize.
Look at your image on the screen and consider and what you need from it. Then analyze closer for similar areas and information you can copy from.
2. Make a layer.
Never clone on your base layer, but a copy of it. This way you can mask in and out if your clone gets messy on and edge of you change your mind.
3. Zoom Both Ways.
Don’t be afraid to get in very close and make sure it’s right. Then for a broader scope, zoom out and make the image small on the screen. This is a secret to checking for halos or bad edges that can easily be missed when zoomed in. The mark of good clone is that it’s invisible to large printing and scrutiny.
4. Change brush size.
A soft large brush is usually where I start. Too small or too hard a brush can leave lines when you zoom out. That said don’t be afraid to change your brush size, not only to avoid pattens of sameness, but also to better work details. Large and small. Work it all.
5. Try different tools. A regular clone brush is a good start. Even a Lightroom or Aperture clone can work well for basics. But no one tool does it all. Sometimes spot healing gives a more natural look. Sometimes the Patch tool nails it. Content aware fill and healing can also be perfect. Sometimes you need to manually brush color. If one does not satisfy you, try another. Good cloning is a process and sometimes it takes them all.
6. The Final Cleaning. The best clones are usually refined. Do your main retouching, then come back and look again. Use the tools (sometimes at lesser opacity) to blend in areas, reducing blotchiness and repetitive objects. For example, you may have a clone with little rocks that match from somewhere else. To avoid repetitive problems, you can clone in a smaller patch erasing only one pebble of rock from the spot, breaking the repetition. Also watch for halo’s on edges and missed areas. again. It’s so easy to miss when you’ve been looking at a print for an hour.
That’s all for today. Have fun… Gav
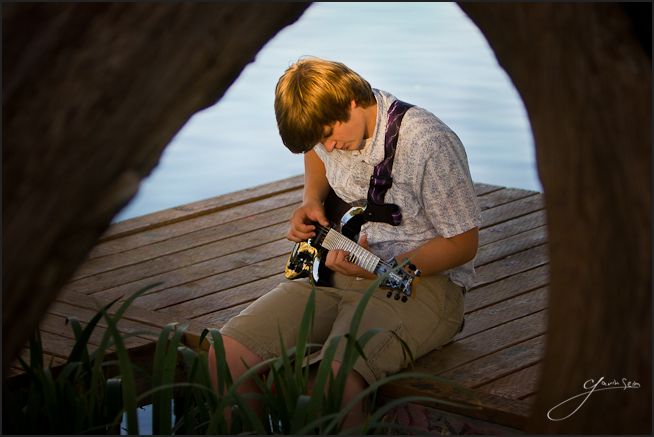
Mouse for before/After. This was more of a screw up. An older portrait, the client came back and wanted a wall portrait made. I had neglected to remove the crud from the dock and it did not seem to be adding. I did a lot of detailed retouching to remove the crud and make the image shine for it's 30 inch canvas... Gav
You users been asking about these for a long time. The truth is I’ve avoided it because I really like teaching photography workshops in person, and for some, like my Lights & Shadows workshop, it’s the only way to fly.
But reality says I have a lot of tricks up my sleeve that I can teach online. With that in mind I’ve decided to stop resisting it. Coming soon is an all new series of digital learning workshops. Separated into bite sized chunks, inexpensive, live and online.
It’s going to start with a Lightroom Power learning series. Workshops that start at basics and work into very advanced editing skills. You can pick the sessions you want based on your current skillset. Cool part is these will be about 90 minutes each and will only cost about twenty dollars. Spend an evening at the live online workshop, then take time to let is soak in before the next one.
After Lightroom I plan to take it further. I may even do a seasonal series. Focused workshops on things that seem simple, but can go so deep. Burning and dodging, cloning, prepping files for print. I’m getting excited because with this online format I can host a workshop on nearly anything, no matter how focused, because there’s no travel and no venue overheads to take into account.
Stay tuned for more details. Registration for The first webinars will be opening soon… Gav
You can follow the Facebook Page. All workshops will be announced there. You can also join the newsletter over in the sidebar >>
Setting up strobes outside, especially with an with an umbrella or softbox can quickly turn into a fiasco of tipping. Not ideal when your trying to get a job done before the light changes or subjects start calling you names. I put this together last summer while planning a family session with over forty people. One common method is to use sandbags, but I wanted something small, light and adaptable. Behold, my DIY quick release light stand cords.
I left these up all afternoon without reservation. They make even portable stands VERY stable and should handle heavy winds. Do some tests of your own and if in doubt just add a few extra cords to make it as strong as you need. I found three per stand was adequate. Obviously these are not the best choice for paved surfaces, but in most situations they’re fast and effective.