November 13, 2008

by Gavin Seim (Updated 01/10) — With winter on and economic downturn in many parts of the world, you may find yourself looking at the numbers in horror. OK maybe I’m going too far, but many photographers are concerned about the amount of work on their schedule. I’m a blessed man. And while things are moving along, I too am looking at ways to put more on the calender.

Now I’m not the worlds chief authority on marketing. What I do know is that amazing service is a never fail approach. Beyond that there’s is no instant solution, but hard work pays off and these tips will get you thinking. I’m going to assume you already have great service (you do right?), then keep it short with six tips that can help you get noticed in this competitive market. I also found another cool article by Sean Clayton about getting your phone to ring that you might want to check out.

  • #1. Give Some Classy Freebies:
    Sometimes the best way to make profit is by giving something away. You don’t have to devalue your work by shouting FREE prints to the world.  Try sending  gifts to past clients for anniversaries or graduations. They don’t need to be photos. In fact something else might make a HUGE impression. Chocolates, a gift card for dinner. Maybe coffee or a bottle of wine. They may have loved your photos, but clients need a reminder to talk about you. I know it sounds expensive, but it will WOW past clients and usually pays. There’s various ways to give gifts and perks. Just be creative and see what matches your style.
  • #2. Send Images to Venue’s:
    Sending out promo images from a venue is a great way to make yourself memorable and build venue relationships.  A pile of 8×10’s for their book or some web files for their site is fine, but lately I’ve been taking it to the next level by giving notable things like larger canvas images and albums. Venues nearly always need great images to show off to potential customers and what can be better than them showing off yours. Make sure you put your name on them in a classy fashion and send some business cards along. The venue will appreciate the images, and you can get free advertising, which is always the best kind.
Read More

September 26, 2008

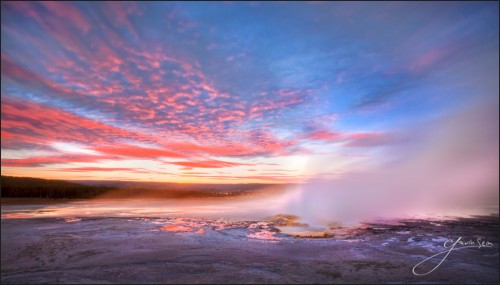
Ghosts of Clepsydra Geyser - f164By Gavin Seim: (updated 09/11): I often hear from photographers asking me to look at their work and tell them how to be better photographers. In ten seconds I can usually tell them how to improve because we often overlook simple things. There’s nearly always something we can improve, no matter how much experience we have.

Most rules are universal to photography of any style or any experience level. Of course these rules are meant to be broken, but general concepts help us stay on track and we should only break rules for good reason. These are some tips I keep in mind with my own work. Hope they give you a few reminders. When your done here some join us in the forums to get some personal feedback. OK let’s roll.

  1. One primary subject. If you have more, you’ll have distraction.
  2. Omit needless objects. Getting them out will clean up your scene.
  3. Slow down. Many images are ruined because of RTC (Rush To Click).
  4. Tonal control is essential. Use the Zone Scale, Burn & Dodge.
  5. If a background detracts from your scene, change or carefully blur it.
  6. See Light. Where’s it coming from, how can you use it.
  7. Learn the rules photography. Then you’ll break them for good reason.
  8. Don’t just center things. Use the rule of thirds & others. They work.
  9. Eyes. Watch close, keep them sharp. They hold emotion.
  10. Use the Magic Hour. Around sunrise/sunset, light happens.
  11. Keep it sharp. Watch your shutter speed & subject movement.
  12. Space is valuable in a frame, keep clutter away with comp & tonal control.
  13. Harsh sun can be bad. Learn to manipulate it and find good light.
  14. Shadows are critical. Without them the light gets ignored.
  15. Great images start in camera. But don’t underestimate careful editing.
  16. Use fresh ideas, but also go for those old reliable images.
  17. If the weather is foul, it doesn’t mean the photos will be.
  18. Lines lead the eye. Pay attention to where they go and intersect.
  19. Change hours. Different times of day will transform a scene.
  20. Think about shadows and dimension. Flat light is usually boring.
  21. Motion Blur can be very powerful, but use it carefully.
  22. Take time to really LOOK at your subject before releasing the shutter.
  23. Study. Photography has 150+ years of history. Go learn about it.
  24. Remember… Slow down, refine, simplify. Analyze your scene.


seim-bridge-600x400
This award winning image has a lot going for it. Notice the balanced intersecting lines, bold colors, and simplicity of the scene. It leads the eyes and tells a story.
Focus Blurring was an effective tool here. The light at the ceremony was great but I wanted the focus on the couple. I used a Lensbaby to give me the soft edges and then some work in post production to make the viewers eye go right where I wanted. The blue could have also been done in post, but I enjoy the Lensbaby.
Silver Waves of Grain: Motion blur was used heavily in this 5 min+ exposure. This gave a ghostly feel to the fields and clouds, completely changing the feel of this scene. Then detailed tone work was done to add depth and dimension. You can click the image to read a detailed article on f164.com about how it was made.
Watch the details. Look To the Wind, is one of my early (and more recognized) HDR portraits. The space gives it a bold cinematic feel and the simplicity of the deserted beach adds strength to the scene. Looking back however I could have watched my lines more. The way the horizon cuts at the shoulder is not ideal. It's still a great image, but if I was doing it over I would try being higher with the camera for an even more powerful composition.

Over 5000 Facebook Fans say it best. Seim Effects Tools set the standard.

Use Promo Code PPS to save 15%

Read More

July 13, 2008

<<Click To Listen – Photography Roundtable #8 PPS#48

Subscribe in itunes
Like the show? Rate us in itunes, or Vote on Podcast Alley

Todays Panel…
Gavin Seim ~ Seim PhotographyEffects & Presets
Kerry Garrison ~ Camera DojoL7 Studios
Dennis Zerwas ~ DZ Photography

Show notes
Episode Forum Discussion

Nikon launches the D700, the Sb900 flash, and two new lenses.

A cool article about sharpening in Photoshop

What brides and clients think of photo websites.

Is NILMDTS (Now I Lay Me Down To Sleep) doing things right? (@27:10)

The Hassleblad H3d has 50mp. A nice camera.

Boda Bag. Looks interesting, but is it all that great?

Tamrac Modular Accessory Belt is what Gavin uses to carry gear during shoots. He just attaches MAS pouches to it.

Dynamic Photo HDR. A PC only HDR program that looks pretty cool.

Kerry has been reviewing out the Photo Basics Strobe Lights. from photobasics.net

Ken Rockwell has articles on setting up your camera.

Rocket Air for cleaning sensors.

Visable Dust is a popular cleaner for heavy duty cleaning.

Picks of the week.
Kerry Likes the Black Rapid R Strap.

Dennis says Phanfare is now his anti-pick because they have taken away features.
Smugmug is his new most favored one.

Gavin is excited about his MP3 Tape

Read More

June 18, 2008

Look To The Wind. HDR by Gavin Seim. Canon 30D

~ Check out Gavin’s HDR workshops. More details here.

Updated 07/2009: Revamped & improved article. Added a new segment dealing with movement and blur (towards bottom).

by Gavin Seim: In 2007 I wrote an article about using true HDR techniques with people. Yep, portraits, fashion and wedding images can be utterly amazing using High Dynamic Range. HDR is not just reserved for nature and still life. We’ve been using it at Seim Studios for some time now and it blows clients away. Heres some of my secret sauce to get you started with HDR portraits and a few of my own images.

Link Resources>>

What’s HDR All About?
First lets cover basics. If you’re already an HDR master you can skip this part. HDR stands for High Dynamic Range. It’s better seen than described, so other than the images I’ve included in this article, you can see more on my website.

HDR is the combining of light and dark tones of multiple images taken at varied exposure levels and then blended using software like Photomatix, Photoshop, or another HDR program. Photomatix is the most popular among HDR fans and we have a deal worked out with them. You can save 15% with promo code PPS15. Basically this software blending allows the photographer to selectively choose how much light he wants in various parts of the image. You’ll have a light to dark range that’s much higher than that of a normal exposure, thus giving you much more control over the final image.

You can also check my two PPS episodes from 2007, talking about HDR and HDR portraits. HDR Podcast Part1 & HDR Podcast Part2. There’s also PPS #57, an HDR episode with Trey Ratcliff that’s full of insight.

Read More

November 15, 2007

~ Check out Gavin’s 3 day HDR workshop coming Fall 2009. More details here.

So you’ve probably heard about HDR photography, and you may be wondering what you can do with it and why it’s so cool.
By Gavin Seim
: This is not a short article but it will explain a lot about HDR photography and why its so amazing. Today we’re going to talk about the editing techniques I used to create “Look To The Wind” the bride on the beach image that you probably have heard mentioned on Pro Photo Show, and maybe seen on the net. Also below are some additional links for things relevant to HDR.

Link Resources>>

HDR is a method of taking multiple images and combining them in a high dynamic range file. Lets say you take three images of the exact same scene, at various exposure levels. Standard images are only around 8 bits each, basically meaning that their ability to correctly expose dark scenes while keeping bright scenes from getting overexposed is limited.

So to make an HDR you might take one image that’s underexposed, one image over, and one with correct exposure. Then using software you can combine the shadow and highlight details from all the images into a single image is called an HDR, It’s the combined bits of these images, and is usually a 32 bit image when converted. What does 32bit mean to you? It means it can contain far more light. Even though the actual resolution of the image is not increased the details inside it are much higher. The HDR Photography technique is most often done with nature or still life images, but I have been doing extensive experimenting with this technique in portraits as well with good results, as we’ll see today.

hdr example

So lets look at an example. In this image I took three shots of the bride on the beach using continuous shooting mode with auto exposure bracketing. This along with a model holding as still as possible, and a fairly wide angle scene made “Look To The Wind” Possible possible (click for a larger version) You can read more about HDR portrait techniques in my HDR portrait article.

There a a few ways to take the three images and make an HDR from them. First take your images in unedited raw form. You could do it with jpegs, but raw will give you the best results. Don’t correct the raw files before converting to HDR. There is a very basic tool in Photoshop for converting the images called Merge To HDR (File/Automate/Merge To HDR) This allows you to select you images, and it will combine them into and 32 bit image. You then can use tools to adjust the levels, and curves of the image mix to try and get a good result.

Read More