February 25, 2011

by Gavin Seim: Updated 11/22/12. There’s a lot of confusion out there about resolution as it relates to making prints, so I want to help clear it up. I make mostly large prints and spend quite a bit of time studying factors that effect my image quality. Often I use a 5D MK II, which is 21MP. I also use 4×5 film because of it’;s vastly higher resolution. It scans in at closer to 200MP. But to start with lets use an average 18MP file as our example.

First let me say that digital has a long way to go in terms of resolution. Today’s camera’s are amazing, but lets get a perspective. Ansel Adams did much of his work on 8×10 sheet film. It’s hard to compare film to digital exactly, but using a good film he probably would have had a rough equivalent of around 400 million (mega) pixels. This makes our digital cameras look pretty paltry at times and it’s one of the reasons I’ve started working with 4×5 film for some of my projects, as it can give me  200+ effective megapixels when scanned (more of that on my pictorials website).

Say we have a full size file from a Canon 7D. The resolution of that file would be 5184×3456 pixels. About 18 mega pixels (roughly 22x less than that 8×10 film). Our file comes in at just over 11 x 17 at 300 PPI. Note that PPI and DPI refers to Pixels Per Inch or Dots Per Inch (a printing term). For today’s purpose I’ll refer to it as PPI as it’s becoming the more common term.

First and foremost, PPI and actual file resolution (or pixels) are not always the same. For example I could take our file in Photoshop and set the size to 30×20. Unless I told PS to Resample (or increase the resolution) of the file, the computer would now see this file as a 20×30. Only now it would show as being just over 172 PPI instead of 300 because the pixels have not changed or increased, which means there must be less pixel per inch when printed at that size – It’s still an 18MP file. I’ve just told the computer it’s larger in physical print size. What really matter however is if you have enough overall resolution. Here a screen capture to show how I was changing PPI. The PPI on each is different, but the pixel quantity is the same.

So what if I printed this file as a 4×6. I’m not sure why I would want a print that small (see the wall portrait article), but bear with me. At 4×6 our 18MP file would print out at just over 860PPI if we left it at full resolution. That’s a lot since most human eyes can’t see any difference above 300PPI. Bottom line, my file has more than enough pixels. Printing with that extra PPI won’t hurt anything. Though depending on the printer, all that information may not be used.

Why does all this matter. Well mainly so you don’t get confused. PPI has relevance in sizing and printing because it can quickly tell us something about how good our print will be. That brings us to larger prints and how this all relates.

Click for larger view – Gavin’s 30 inch canvas, Bull of the Mist. This a medium sized print. Taken in early morning at ISO 3200 made the detail on this slightly less, but it was needed for shutter speed. As you can see, the detail is good, but not flawless. The canvas helps give it an organic art feel. This was made from a file that was 5464 x 2732 pixels. It was up converted to 9000px wide before print. More about this image here.

Resolution VS Large prints.
This is where things get subjective. I’ll speak from my own experience as I regularly produce prints 40 inches and beyond. With our 18MP file we know we have plenty of information for a baby print. What about a serious print meant for the wall. Lets look at that 20×30 again. Lets go into the “Image Size” box of Photoshop and changing the file dimensions to 20×30, without altering the resolution as I did above. I left Resample un-checked which means I changed the print size but not the amount of pixels in the file. We’ll now have 172PPI at a print size of 30×20. Are you getting it? This is telling us how much information we have to lay on paper in terms of real life printed pixels – 172PPI is not bad. Most peoples eyes can probably see a bit more detail than that, but the print should still be good.

Read More

January 22, 2011

Click To Listen>> Photography Podcast. PPS #74
Review in iTunesVote on Podcast AlleyDirect Podcast Feed

Today’s Host... Gavin Seim.

Today we’re going in depth on digital quality and the Six Keys to Image Quality. Gavin discusses what he’s learned about getting down and getting the best image quality possible from digital files.

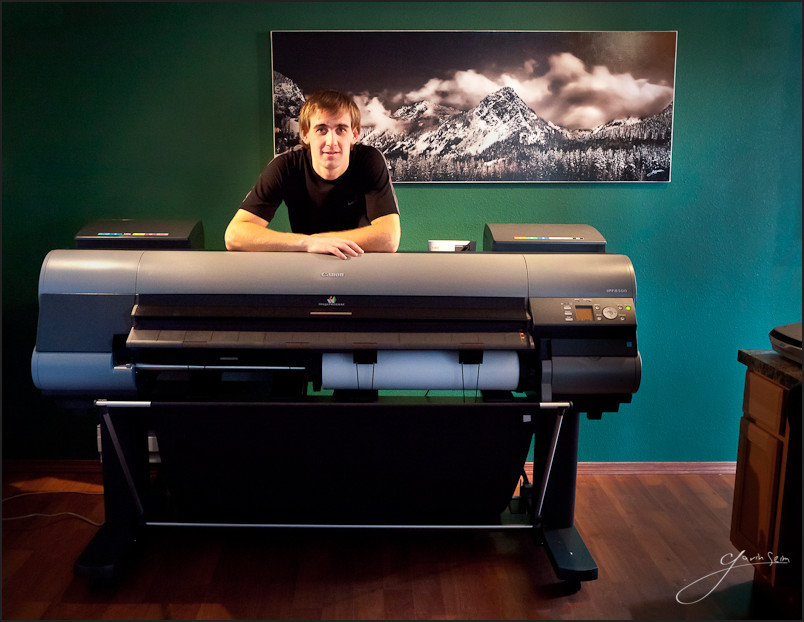
Gav with the new printer. The image links to the post about it.

Podcast #74 forum discussion:

Notable Time Indexes:

  • 00:00 Introduction. The Challenge
  • 07:05 The Six Keys to Quality.
  • 26:07 Editing Process in depth.
  • 29:18 Film resolution thoughts. More process.
  • 49:05 Thoughts on cameras, sensors & lenses.
  • 51:23 The new printer. Canon IPF8300.
  • 56:52 Picks of the week (links below)
  • 59:20 Coming workshops and closing thoughts.
  • 1:04:32 The after show.

NOTE: The Pro Photo Show Christmas contest winners will be announced soon. Stay tuned.

The Six Keys to Getting Great Image Quality.

The Fuji X100 looks really good.

A look at RAW vs JPEG.

File degradation article.

Read More

October 30, 2010

Bright lights of Monte Carlo. ISO 400, 2.5 sec. @ f4

by Lawrence Sawyer. First, let me thank Gavin Seim for the invitation to write a piece on my recent experience shooting stock photography in the Mediterranean. This was a dual-purpose trip: anniversary cruise, and a test of my theory that with the right choice, one could actually shoot salable stock with a point-and-shoot pocket camera. Now, a little background…

I’ve been shooting stock photography since my college days in the early 1980’s, and make a living doing it. I have several thousand images on file at four U.S. agencies and dozens of sub-agents worldwide. I have a new book out, entitled  See It, Shoot It, Sell It! -How to Earn a Great Second Income Taking and Shooting Photographs of Virtually Anything. That title embodies the way I work: I shoot “found images” more than anything else. I have learned over the years that there are countless opportunities to shoot highly marketable images all around us, every day… if we just learn to see them.

So when I’m shooting stock, here are the five main criteria I use in evaluating a scene:

1. Is there a message here? There needs to be either a solid piece of information in this shot, or a pure-magic artistic element to something mundane, like beautiful light on a cityscape.

2. Can I pull it off technically? An elk in a shaft of sunlight is killer if it’s 50 yards away and I have 300 f2.8 with me, but pointless if it’s 500 yards out.

3. Does it have enough appeal that it will sell to a broad audience? I worry about this one less and less, because all images are available now to the whole internet-connected world, and somewhere, there is a buyer for darn near anything.

4. Can I shoot it better than it’s likely already been done? If it’s a scenic shot, I’m careful not to be enamored by the place just because it’s my first visit. But if the light is phenomenal, I’ll roll the dice and shoot first, then ask questions later. The more famous the place, the more skeptical I am of my ability to make great stock on my first visit. I try to research how much a place has been shot before I go in with guns a-blazing.

Read More

October 23, 2010

Click To Listen>> Photography Podcast. PPS #72
Review in iTunesVote on Podcast AlleyDirect Podcast Feed

Today’s Host... Gavin Seim. This week Gavin gets in depth about his month and a half photo trip spanning various areas of the USA. He looks at things he saw and learned and ways to improve it all going forward.

Sunsets hidden falls. Gavin's favorite from an evening Yosemite. Did some experimenting with blacks on this. Image links to f164 post. More info in that post soon.

Podcast #72 forum discussion:

Notable Time Indexes:

  • 00:00 Introductions trip info.
  • 07:27 Verizon MiFi Pick
  • 12:03 Yellowstone
  • 17:34 Moving on and seeing things
  • 24:57 Zion area
  • 34:29 More resolution
  • 38:00 Details artifacts and light
  • 56:53 Mediums
  • 59:38 Closing

Read More

July 16, 2010

by Gavin Seim: Attempting to setup light outside with an with an umbrella, softbox, or even a lone strobe can quickly turn into a fiasco of tipping. I have a family session with over forty people this weekend, and the last thing I want to worry about was whether my lights are secure. One common method is to use sandbags, but I wanted something small, light and adaptable to keep stands from falling over. Behold the DIY quick release cords for.

Direct YouTube link.

PS. The wind was not intense on the day I made this, but I left them up all afternoon without reservation. These make a VERY stable light and they should handle heavy winds if needed. Do some tests of your own and if in doubt just add a few extra tether cords to make it as sturdy as you need. Also here is a good video on how to tie the Tautline Hitch.

Naked Elements Textures
Sponsor:

Read More