August 12, 2022

Should you use Capture One or Lightroom for your black and white edits? PLUS where does Photoshop for black and white fit in?

We’re going to test that in today’s video with direct comparisons. Taking the sale filed and editing them in each to see what gives us the best black and white in the least time. I’ll give you tips for all of them along the way.

Also, see my Lightroom vs Capture on 2022 video here for a general overview of these two great apps. For now, let’s watch today’s video and do some black and white tests.

Since I started digital photography 20 years I’ve seen just about every technique for Black and White in digital Some needless complex. some are just ugly. Simplifying that process led me to bypass plugins and create tools Like Silver 4 presets and Blackroom BW Actions.
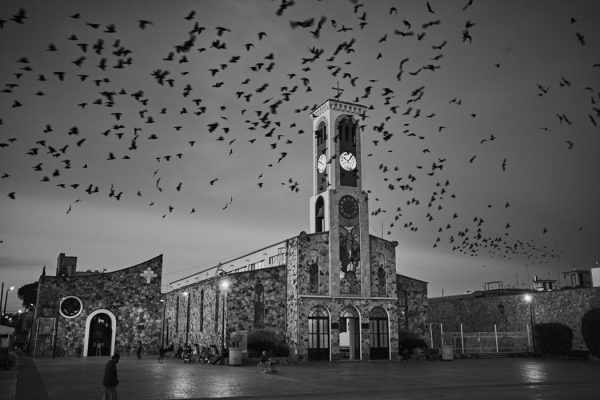
Pure Capture One. While there are fewer BW sliders, you can make up for it with the more advanced color tools and get a stunning result.

Honestly we B&W lovers occasionally get a little snobby, so this question can be complex. But since we no longer have the chemicals we used to use in the darkroom the traditional color filters do not have the same effect. Today to take the same principle and make it work digital.

The best black and white conversions usually start for a color photo because with those color channels we can convert and extract the colors, much like we did with filters in the film days but with more detail. Darkroom like green filter, lighter reds, etc. If you bake black and white in camera, you lose all that power. That’s not to say your BW photos are wrong. Just that they are not as flexible.

So I usually convert on the raw file. In LR or C1. I use my SIlver 4 presets if Filmist. But whether you use creative presets to go further, or all manual. You don’t want to supply desaturate. Use those channels and the power of your RAW.

Watch today’s video above, because we’re looking at Lightroom VS Capture ON in a side-by-side level. Does one give you a better black and white conversion than the other and what are the advantages between Lightroom and C1.

After that, you can go deeper into your black and white edits..

If I’m going to edit my best work. I go beyond RAW. I’ll restore the color channels before going into Photoshop, leaving my other edits in place. Then I can go deeper with my black and white edits. But they are also more complex in Photoshop.

Sometimes it’s not even clear how you can make a better black and white in Photoshop. I use Blackroom to convert to a more complex BW because it always helps me find a way to improve the edit without stumbling around. That’s what it was built for.

More about how I do those more advanced edits in this video and on the Blackroom page.

Lightroom is a little more user-friendly compares to Capture One. But with Styles or presets, you can get your look fast in both.

In conclusion. Which is best? LR, C1 or PS

When it comes to Lightroom VS Capture One for black and white. I think Lightroom has the edge for ease of use and results that just work. Capture One with its other available tools can perhaps give you more options but with more work. Both are going to work great if you save presets or styles or Have a pack like Silver 4 or Filmsist on hand.

In the end, both are good and the results will be good.

But comparing both to Photoshop. Photoshop offers more options, but with a lot more time spent. Even if you use Photoshop actions to vastly speed up these more advanced edits, Photoshop should probably not be where you start.

Edit normally in Lightroom or in Capture one or another RAW-type editor. Then take the very best images you want to showcase to Photoshop to give them that edge that makes them win.

Lastly, plugins for black and white are heavily hyped. I used them when I all this starting out but native tools have improved a LOT since those days. As I mentioned in the video, a plugin adds another step and takes away control.

Yes, using presets and styles and actions help a lot because they make hard tasks fast. But they use the native app tools in Lightroom, Capture One, and Photoshop. So instead of a new file or a flat image. You just highly refined sliders, adjustable layers, and a totally transparent process. To be that’s a huger win.

Let me know if the comments what you think is the best black and white tool.

Gavin Seim

The detail in Photoshop is almost impossible to beat. Layers and details equal more refinement. So I still take by best photos here in the end after using a RAW style editor.
Don’t be afraid to edit your black and white a little more. Whatever app you use. In the end, it’s all about shadow and contrast.
Read More

December 3, 2012


Winter’s End – Taken a few minutes apart. The mobile image  lacks any fine detail up close and fine detail is totally lost in that pasty look that is common of low end cameras and lenses. The film scan however holds up well. See complete image details here on Gavin’s journal. More examples below.

by Gavin Seim: When I was starting out you we’re not even regarded as a respectable portrait photographer unless you used at least medium format. How things have changed. But this mobile photography for the sake of it is a passing fad.

The camera in your iPhone costs about ten dollars to make – Now I was browsing Facebook the other day I found the above reference photo I posted while on our Spring 2012 tour. I remembered that morning, the light on the trees and how my 4 year old son rode with me to greet the sunrise. It was a good memory. But next I compared it as a photographer to the final print version of Winter’s End. That promoted me to compare others, from both film and digital, comparing them to their mobile counterparts.

A great image is more than the sum of it’s tech specs – But when those details are far below the sum of it’s artistic merit, it brings down the entire work.

What was really illustrated was the vast difference between a point and shoot image and a quality photograph. Even I had not realized how poor the quality was. The phone photo is a good reference and helped me plan and log I wanted to produce. It was also fun travel memory and some might say it was “good enough”. But I’ve learned that “good enough” is not how we produce great images to stand out in today’s market.

I see more and more people acting as if phones are serious cameras. Sometimes even touting it as something special. This bothers me because a low grade camera is not a feature of your art (and make no mistake, your phone camera is low grade). It’s true that gear does not make a photographer. But low image quality can make even the most accomplished photographer look like an amateur. Comparing a phone snap to a professional level camera is a bit like comparing a Prius to a dragster.

Read More

February 26, 2009

NOTE: This article is a few years old. Most of the products mentioned here have newer refined versions. They arr all viable options. Look over our review. But also check out the latest offerings from each company and see what they offer.

by Gavin Seim. Updated 04/2010: Even with cameras getting amazing at high ISO, low noise images, there’s still room in our kits for good noise reduction software. It allows us to push the limits and keep our images clean and vivid. Nearly every serious photographer should have a good noise reduction tool in his arsenal. That said I don’t think we need to use NR all the time like we did in the past. A little noise is not always bad, especially the more appealing grain like noise coming from today’s cameras. I keep various NR tools on hand however so if I want to reduce, their ready to go.

Today the showdown has come. I see lots of talk about what’s the best noise reduction software, but mostly it’s all talk. Rather than just talk, I’ve made comparisons. Lots of comparisons. I’ll give you examples with various products, images, cameras and ISO settings, including some HDR. At the end I’ll give my final opinions of each product and let you decide for yourself. Let’s get started.

The Contenders:
Neat Image VS Noise Ninja VS Noiseware VS Dfine VS Lightroom VS Topaz Denoise VS Photoshop:

All tests were made using the Photoshop plugin versions of the products but some are available as standalone apps. Settings varied, but I used mostly default settings and automatic profiles, with occasional tweaks to get the results I felt looked best. This means these images represent the results you would get with a single pass and minimal hassle.

Often I found that one product maybe great on one image, while another product may work better on the next. Tweaking the settings would perhaps improve results a little depending on the image, however I wanted a real feel of the results we’ll get everyday. You can click any image for a large view, but some results are similar so you may want to download the large image bundle linked below.

Download all HR Images in bundle

1_4-5d2-3200-ninja

1_1-5d2-3200-none 1_2-5d2-3200-dfine 1_3-5d2-3200-neat 1_5-5d2-3200-topaz

1_6-5d2-3200-noiseware 1_7-5d2-3200-cs4 1_8-5d2-3200-lr

Read More