June 30, 2023

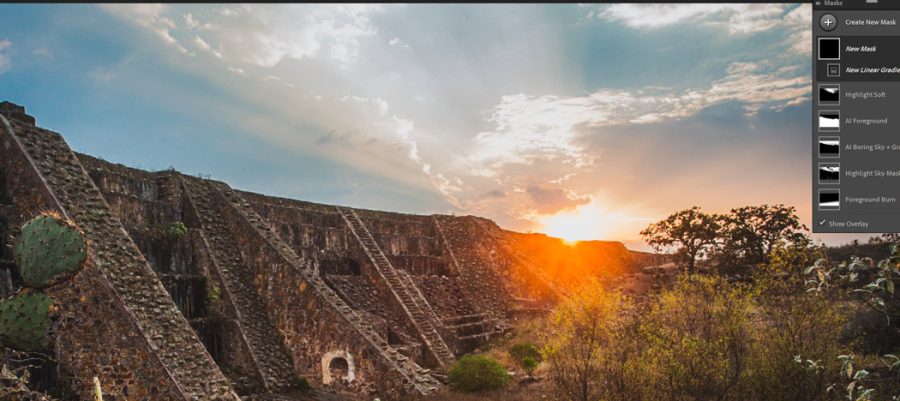
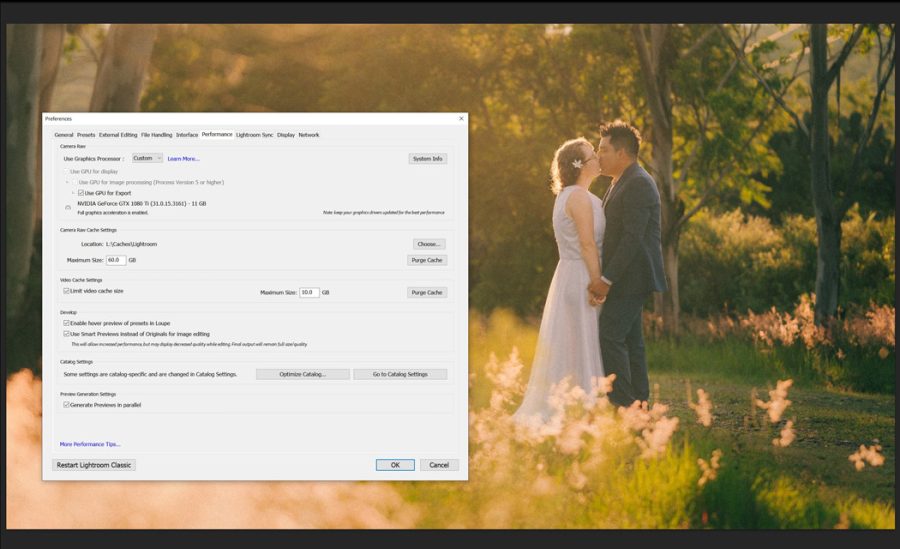
In last week’s video, I showcased the new curve features in Lightroom. You can watch that here. But this time we go a bit deeper te see how to make thsoe tools faster. I also show you the latest 4.6 update of Elegance Lightroom Masks.

I’ll show you how to use those curves in Lightroom Mask Presets

PS: You can get my Elegance presets here OR login here to download your free update.

You don’t edit better by doing everything manually.

That’s pure myth from people trying to sound important.

I’ll show you in today’s video how that works and what’s new in 4.6, Because in 2023 if you don’t use presets for this stuff Lightroom effectively punishes you with fewer features. You ge more and faster by making presets or using advanced presets like Elegance..

Ektar 100-like from Filmist and just did the background mask using the update 1.6 preste from elegance.

So Don’t start from zero. It’s pointless!

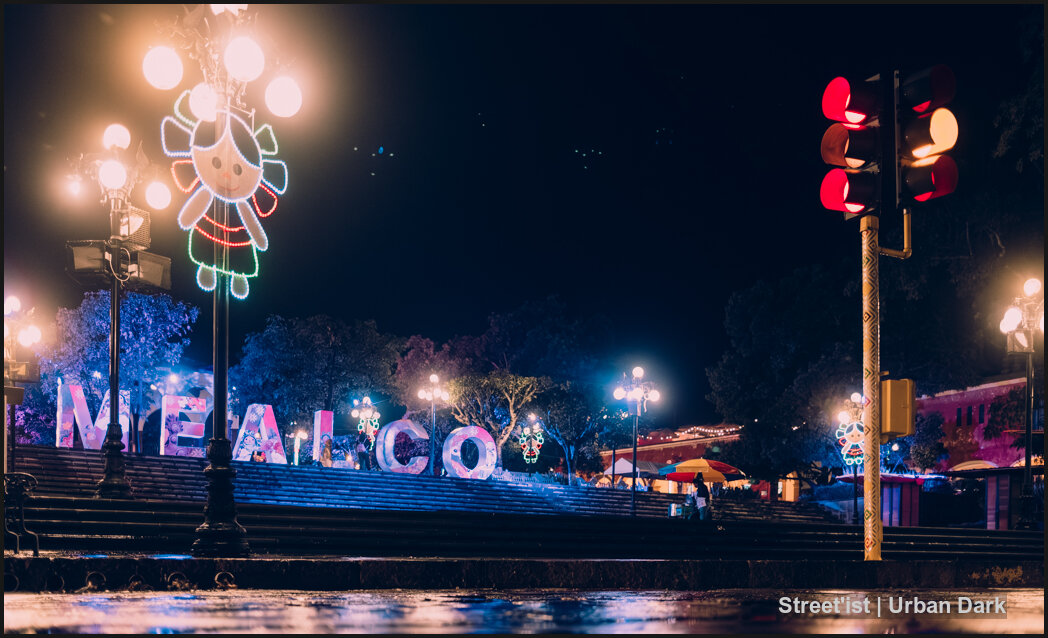
The reason for that is that whether we’re talking about advanced development presets like Silver or Street’ist, or masking of skin and details, Lightroom like Photoshop before it is built is fast.

So Adobe is creating features as I show you with the preset adjustment sliders that let you work much faster and get an exact result if you DO NOT manually start from zero with the sliders.

The right process in Lightroom

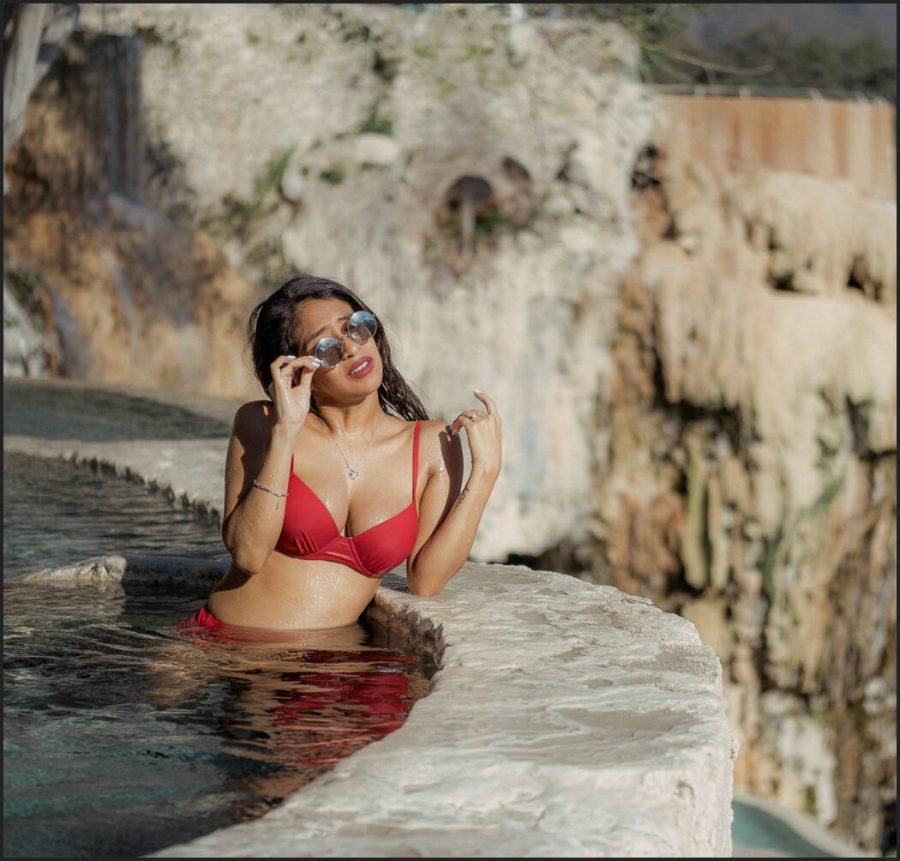
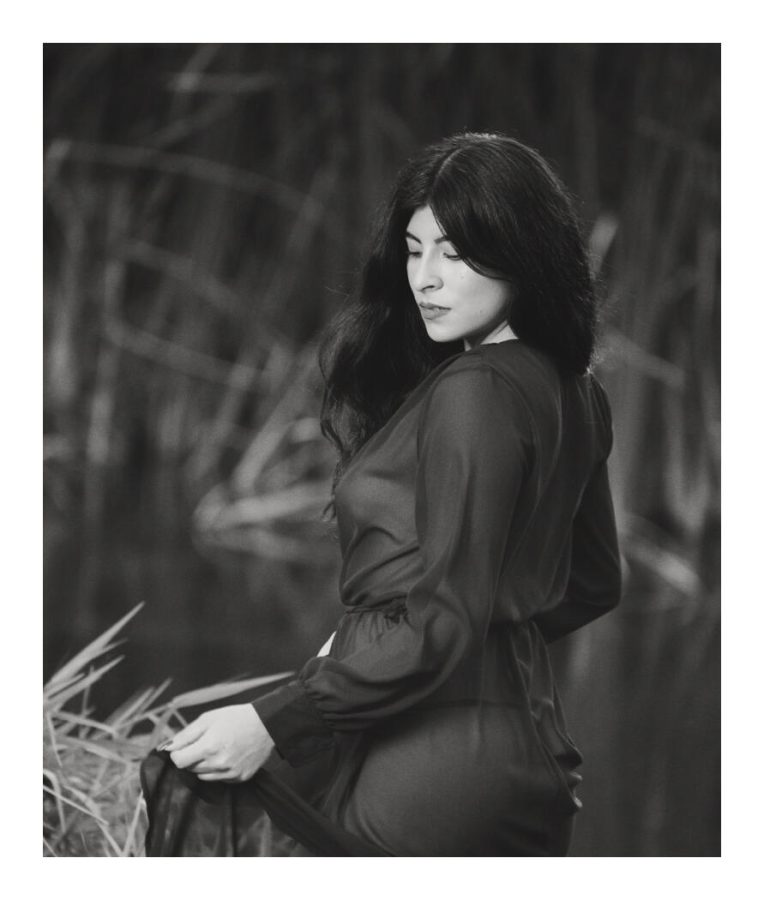
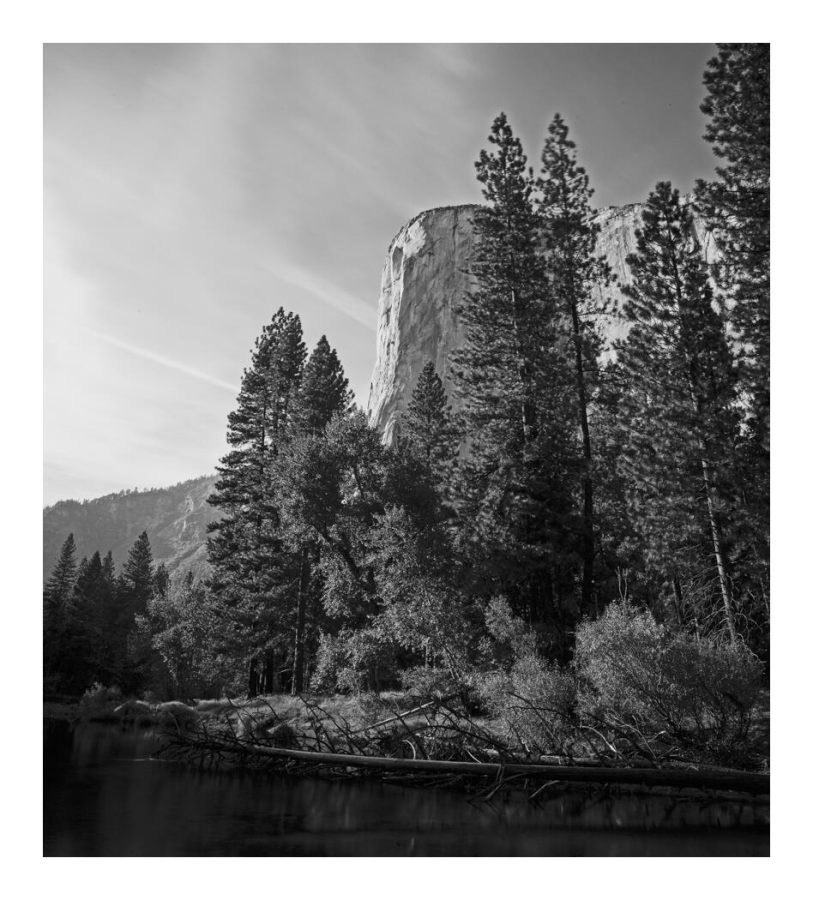
Sort your best images so you are not distracted by the duds. Start with your base photo. Edit it with your presets for your look be it film or black and white etc. Use ethe amount slide to dial it in. Copy as needed to another photo.

Take your best work that you want to mask and use the same procvess using Speed Lightroom Masks and the amount sliders. Then copy that to other photos as needed.

CineMist mask preset is a new one mask softening for when you don’t want a lot. Portra 400 from Filmist.

Results speak louder than words.

Put this to work and watch tegh qaulity of your edits, the time you save and the constsiantly of each body of work improve overnight. I’ve been teachiong Lightroom since V1 and these features from the past 2 years are really taking it to another level.

Let me know your thoughts in the comments.

Gavin Seim

Easy Sunlight is a simpler version of the Harch Sun tool in elegance, but the amount sliders lets you quickly control how far it shoudl go. I used Portra 160 for the main process.
Read More

June 16, 2023

As of 2023, this is the absolute best way to get dramatic black and white I have discovered. Plus I just did a big update to my Blackroom actions (login here if you own Blackroom)

But today’s video will fill you with black and white-ness, even if you don’t use my actions.

I’ll show you the best way to create black and white in Photoshop and why it;’s better than doing it only in Lightroom as we edit a landscape and a portrait. Go fullscreen and watch this one in 4k.

You can get BlackRoom here and if you’ve bought it, login and download your update.

Improving your Dramatic black and white is about nuance.

New photographers often make the mistake of thinking that dramatic black and white is more about adding contrast. Something the opposite is true. It’s actually about using shadow correctly.

That’s why you see me in the video referencing to the Zones and thinking about where I want the tone to be placed. You control all of that.

Speaking on shadow, If you’ve never been to one of my free Shadow Hackers LIVE workshops don’t miss the next one.

This lovely portrait edited fine in Lightroom. But in Blackroom it refined much more.

Lightroom, C1, or Photoshop for Dramatic black and white?

Both work great as you’ll see in today’s hands-on video. If you have a good editing plan they bother convert beautifully. But I’ll show you in today’s video why you will always get a bit more if you finish in Photoshop, even if you started out in Lightroom or Capture One (which is what I do).

In the end, you can do all of this manually, create your own tools, presets, actions etc if you are really experienced, or use tools like my Silver presets and Blackroom actions.

The main thing is to try the methods I showed you today and your dramatic black and white photos will touch the sky sell more and win competitions. Really.

That is the power of the dramatic black and white. Let me know what you think.

Gavin Seim

Using a gradient map and layers in PS I had more control in this photo from Yosemite National Park
Read More

May 26, 2023

Yes Lightroom needs every ounce of power. But when you have Lightroom running slow, your work slows down and drives you crazy.

In todays video we STOP letting lightroom RUN slow and make it FAST

I actually got fed up after last weeks video about Speed-Masks. I love Ai masking in LR but it was bringing my good system to a crawl. I decided it was time to review everything and make a video.

Check out Filmist and Elegance 4.5 Speed-Mask update that was mentioned briefly in the video.

Making Lightroom fast in 3 steps.

This 2023 video is everything relevant I could find to make Lightroom fast and it goes well beyond the basic Lightroom preference panel settings that you tweak when Lightroom is Slow.

This video has 3 segments. The first is the basics inside LR, then the factors outside of Lightroom and finally Advanced tips for your system to make it speedy.

Lightroom running slow? Make lightroom run faster

Lightroom is a log, accept that and make it fast!

Lightroom has always been a big of a hog. Lt likes lots of Ram, disk speed and now graphics. The Masking is epically heavy on graphics use so make sure you watch the external lightroom speed tips in the video because they really help.

Many if these will improve speed on other apps as well. So if you find Capture One is slow or you video editing app, many of the things I’ll share with you today still apply.

Check in with preferences first and often if you feel things are slowing down. We’ll cover those tips in the video. But don’t stop there, do the more advanced things to really make your Lightroom run faster.

I hope this helped you speed up Lightroom as much as it did for me. – Gavin Seim

Lightroom slow? Make lightroom faster
Read More

May 19, 2023

If you’re not using my Elegance Speed-Masks and don’t want to, then you need to make your own. So I’ll show you. This is the only way you should be masking in Lightroom. You get better masks about 10x faster. I mean that 100%!

In today video I’ll show you how to make your own Speed Mask presets and the latest update to my own local adjustments preset pack, Elegance 4.

Lightroom’s powerful masking tools can be slow and cumbersome. But now with Speed Masks

You can get the Elegance 4.5 presets here. And if you already have Elegance 4, this is a free update so login and grab it.

Control what you want.

Masking in Lightroom takes a lot of forms and sometimes it transforms everything while others it’s as simple as controlling tone in a sky.

IN this case I use Street’ist presets for the main look and just dialed back the sky using an Ai speed preset. INtersecting grads into you Ai sky selections like I do in Elegance 4.5 makes thenm more natural.

Control 10 layers at a time.

As I showed in the video with this we had all these layers and by using them as a Speed-Mask develop preset you’ll be able top adjust them as one turning the effect intensity up or down. This is a huge control boost for masks in general that most people don’t even know they are missing if they don’t use the Speed Mask presets.

Don’t go too far with masks.

No matter what app you edit with, going too far on a masked edit is the sure fire way to make a photo look fake. In in a time when Ai is creating fakes of everything, I think natural is a good thing.

You should isolate your background but that doe snot mean darken it two stop. Remember Masking is to digital what burning and dodging was in the darkroom. use it wisely.

You can see in this wedding photo how we used the Ai masks but more for atmosphere than to isolate one thing. The mix allows us to us the master slide to decide how far we wanted that to go.

Have fun with these and let me know what you think – Gav

Read More

May 12, 2023

So today’s vlog is for you even if you use either editing tools. Because today I want to share my ESS theory. What I’ve learned in the process has changed how I create photos in a fake Ai world.

No matter how you edit, your street process matters a lot.

So today after over 3 years of pushing hard on my street photography here in Mexico, I want to share how that’s changed the theories of a guy who’s been a pro photographer for over 20 years. I’ll show you how to use my new Street’ist street photography presets. But I’ll also show you ESS.

Get my Street’ist presets here. Or get a free pack of my film presets here.

Thinking from start to finish.

The key is to know have a simple plan like ESS. Only you know what you are feeling and how you want to share that in a street photo. But with this simple process you start to focus on what really matters in a street photo.

Sure editing tools and tone and using lightroom presets or capture one styles to make you more creative and make you try more ideas are important.

But YOUR process is the most important. Just make sure you’re always asking yourself how you can improve your process and how you cam make it more ESS.

What makes your street photography have style?

Should you shoot black and white or color. Should you use the blue and orange tones or go natural. And and no, Tik Tockers didn’t invent that look.

The truth is that is you focus on ESS and how it can make your process better you will find your editing style. As a long time purist myself however I would encourage you to not get too focused on perfection. On only natural tones or colors.

Great street photographer have always pushed the edge of edits and presentation and shadow. That’s because a great street photographer knows that he’s not just taking a photo. Though we are journalists in a way, the purity of a scene is sometimes less critical than telling your story about what you feel with light, color, shadow and motion.

Read More