June 16, 2023

As of 2023, this is the absolute best way to get dramatic black and white I have discovered. Plus I just did a big update to my Blackroom actions (login here if you own Blackroom)

But today’s video will fill you with black and white-ness, even if you don’t use my actions.

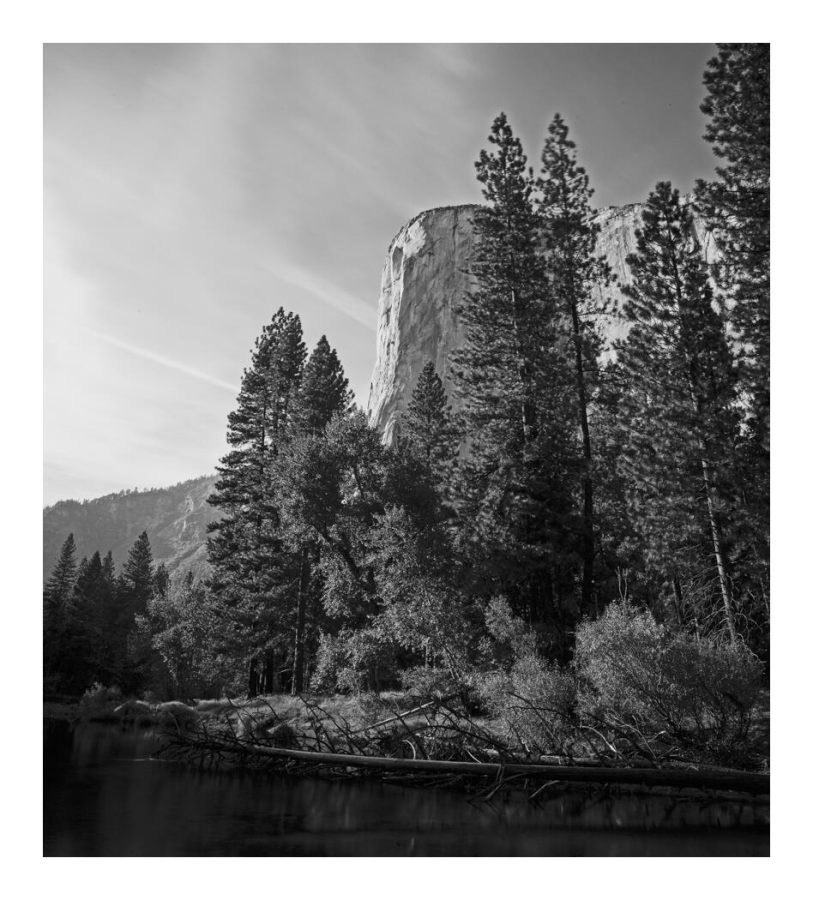
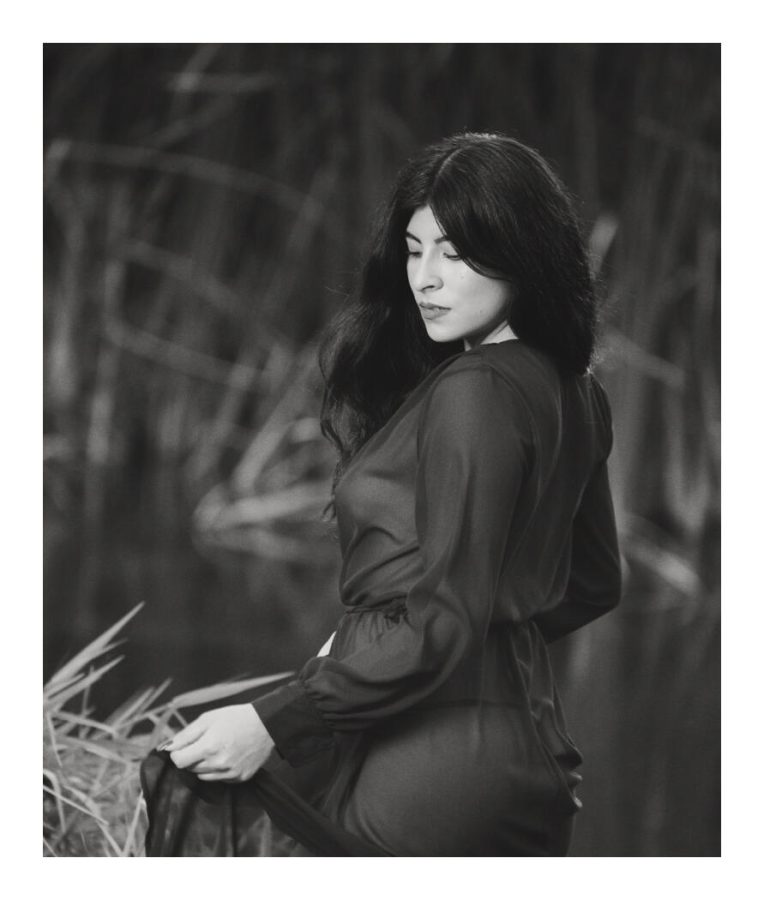
I’ll show you the best way to create black and white in Photoshop and why it;’s better than doing it only in Lightroom as we edit a landscape and a portrait. Go fullscreen and watch this one in 4k.

You can get BlackRoom here and if you’ve bought it, login and download your update.

Improving your Dramatic black and white is about nuance.

New photographers often make the mistake of thinking that dramatic black and white is more about adding contrast. Something the opposite is true. It’s actually about using shadow correctly.

That’s why you see me in the video referencing to the Zones and thinking about where I want the tone to be placed. You control all of that.

Speaking on shadow, If you’ve never been to one of my free Shadow Hackers LIVE workshops don’t miss the next one.

This lovely portrait edited fine in Lightroom. But in Blackroom it refined much more.

Lightroom, C1, or Photoshop for Dramatic black and white?

Both work great as you’ll see in today’s hands-on video. If you have a good editing plan they bother convert beautifully. But I’ll show you in today’s video why you will always get a bit more if you finish in Photoshop, even if you started out in Lightroom or Capture One (which is what I do).

In the end, you can do all of this manually, create your own tools, presets, actions etc if you are really experienced, or use tools like my Silver presets and Blackroom actions.

The main thing is to try the methods I showed you today and your dramatic black and white photos will touch the sky sell more and win competitions. Really.

That is the power of the dramatic black and white. Let me know what you think.

Gavin Seim

Using a gradient map and layers in PS I had more control in this photo from Yosemite National Park
Read More

September 16, 2022

I’ve been thinking for a while about how to make today’s video. People keep asking me for an overview of my tools but I’ve wanted a way to make that video useful, even for those who don’t have any of my tools or who just use my free tools.

What is Native editing?

This is when you use the tools already in your app like Lightroom instead of plugins. It can mean presets, actions, or all manual. And usually, it’s better because it uses all the engineering built into your favorite app.

Today I’ll show you why native editing in Lightroom, Capture One, Photoshop, and the rest is usually better than a plug-in and how to decide what kind of edit to do.

But I’m also going to show when you need to go beyond LIghtroom and a RAW edit and go to Photoshop.

There’s a lot of confusion on this and I get questions all the time about what native tool to use, why Silver 4 presets or when to Use Blackroom, Filmist, Lumist etc.

So Why do you need Photoshop?

I’m covering this more in the video. But where LIghtroom and apps like it are RAW converters. They are fast, you can copy and paste settings. You can batch edit. That’s great

You really can’t do that in Photoshop. Actions speed things up rapidly, but you can’t just apply settings from one photo to another or import a batch and edit on import. The difference is that in Photoshop you can do high-level refinement on your best photos. The keep is knowing how to use your RAW converter and your pixel level; editor like I show in the video.

There are a lot of ways to achieve your goal in photography.

I think the best way to get there is to know your options and most importantly to start making your editing plan. You need a system in place that guides you thru your own process each time.

I hope you found today’s video useful because I want this editing approach to make sense. If you have feedback just leave me a comment and I’ll see you next time.

Gavin Seim

Read More

April 13, 2018

People have asked me about being able to do this for a long time. Now with Lightroom 7.3 and the latest version of Camera Raw the, updated presets format allows you to use your Lightroom presets in Photoshop and Camera Raw and you can start now. In today’s video, I’ll show you how.

All of our current preset collections have been updated so if you’re ready to use the likes of Natural HDR, Belladonna, Silver or our other presets in Photoshop and Camera Raw, now you can. If you like this video subscribe to my YouTube channel. Also if you installed the presets in LR 7.3 or above they should automatically appear in PS/Camera Raw. But if you don’t use Lightroom you’ll need to install the presets first into Camera Raw. Here’s a video about that.

Also if you order 2 collections you can save 15% with code: BUNDLE. Or you can go here for more bundle deals.

Read More

July 12, 2017

This is a big update for Lumist that not only deal with some of the quirks but makes it 50-80% faster run time. Building the tonal map is blazing fast and once that done the magic really happens. Here’s a quick video looking at what’s new.

This is a free update for existing users and you should have en email. If you don’t have Lumist you can get it here.

Read More

June 16, 2017

 A lot of you asked for more videos that show all the crazy stuff you can do with Lumist. This is the first of that video and there’s a couple more to come.

In this video we take a deep look at the Basics of Lumist that are easy but go way beyond basics. This is tone control technique here that people spend a lifetime learning as we dig into the Simple Toolbox module in Lumist and learn how much it can actually do. It the next video we’ll dig deeper into the effects modules of Lumist. If you don’t have Lumist yet you can download it HERE.

Enjoy — Gav

Read More