This week I finally finished a big updater for my FIlmist presets and Capture One style.
Filmist 1.9 just got a bit update with big improvements to Portra 160 Push, Pro 400H, Velvia, darkroom-inspired mod presets, and more. I’ll show you everything in the video. If you already own Filmist, login here for the free update of Filmist Complete.
Intense edits that are clearly digital in nature can be amazing. But what I have learned over the years is that most of us over-edit, A LOT! Understanding the balance that film brings makes you edit everything better.
Even my more digital-focused editing kits like Natural HDR are shaped by the idea of being Natural. That’s because I was there when HDR arrived in the world, I saw digital become the dominant force, and I watched the transition happen. This is something we talked about on the recent Pro Photography Podcast.
Big Velvia 50 refinements bring out that classic red hue in a beautiful way.Portra 160 Push gives that snap and a true-to-life red shift that actually makes Portra 160 feel perfect,.
What if I don’t like Film?
Making film presets that work is very time confusing and detailed. Most people think they don’t like film looks because they have never really used them. Once you see that film was actually the well round bade baseline of everything we do in digital. It gives you perspective.
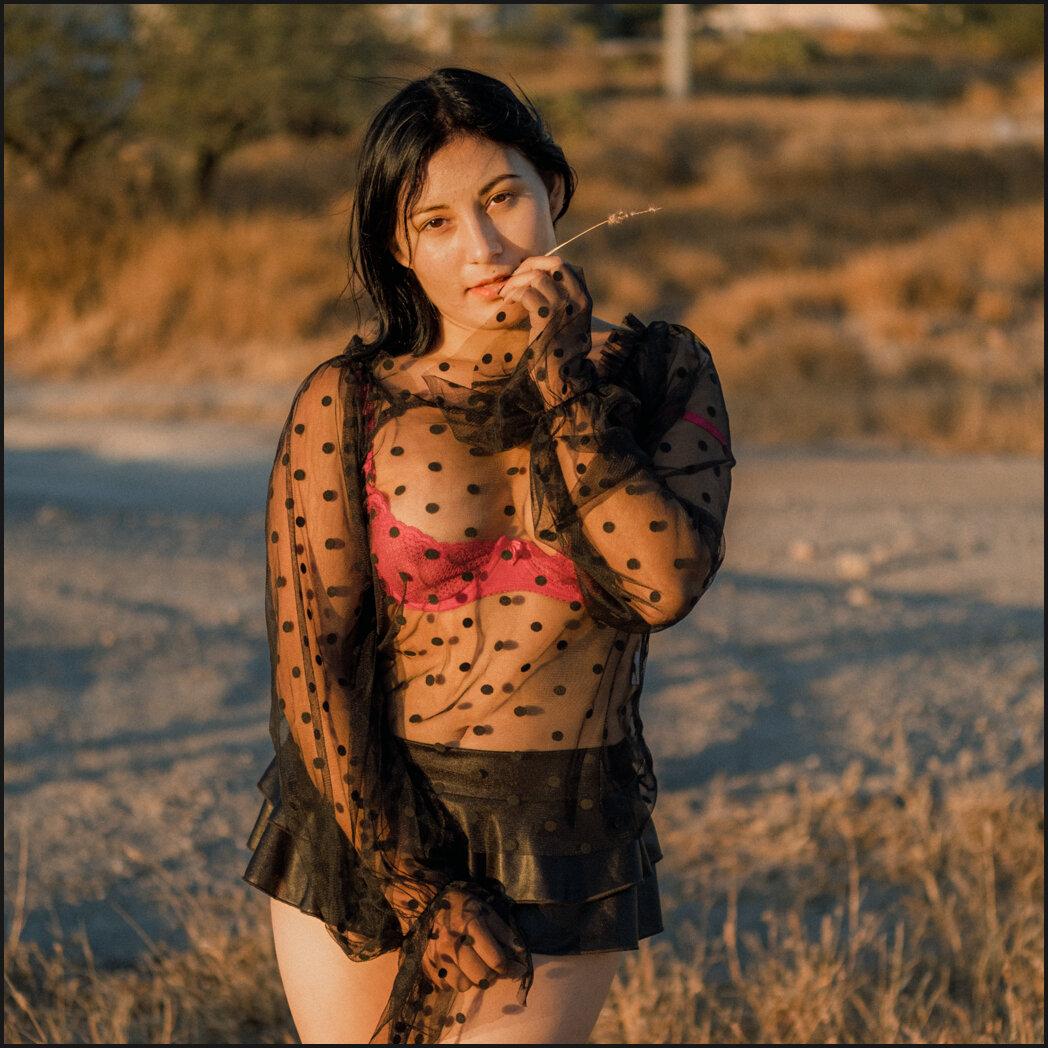
Even if I’m editing with Street’ist or something bold like Gold-Chrome, the film looks to create a trustworthy reference point. I think it really helps people have confidence in Lightroom and Capture One editing and make their work more emotionally focused instead id… Look how much I edited this.
Let me know what you think in the comments and enjoy Filmist 1,9.
Gavin Seim
Nuances improved in the LUTS Lightroom Presets and Capture One style. Even in Portraits Velvia 50 retains a more natural balance just like in the darkroom if exposed well.Classics like the AgfaFled RSX preset gives you more versatility. I use this look a lot in video edits also.
Do my photos make people feel anything? I’m Gavin and this is my street photography guide. Filled with photos, videos, useful links, and street photography tips. Also, it’s a story about being a street photographer, and even writing this post showed me how much I’ve changed.
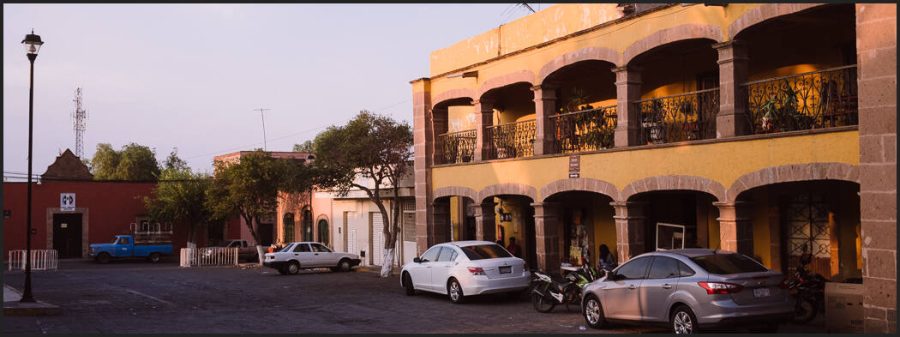
I’ve been a photographer for 20 years. I also have a Masters’s from PPA and a solid confidence level. Despite that, shooting streets intimidated me. Capturing life from the dramatic to the mundane. But roaming the highways and alleys of Mexico taught me a lot.
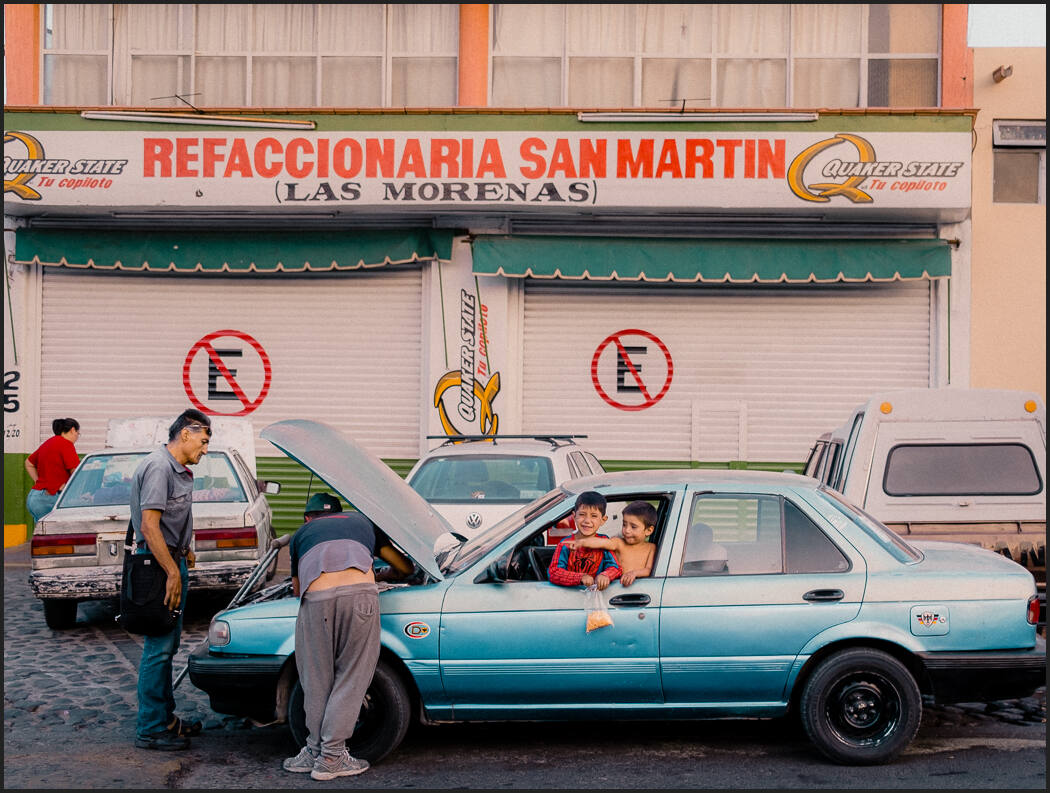
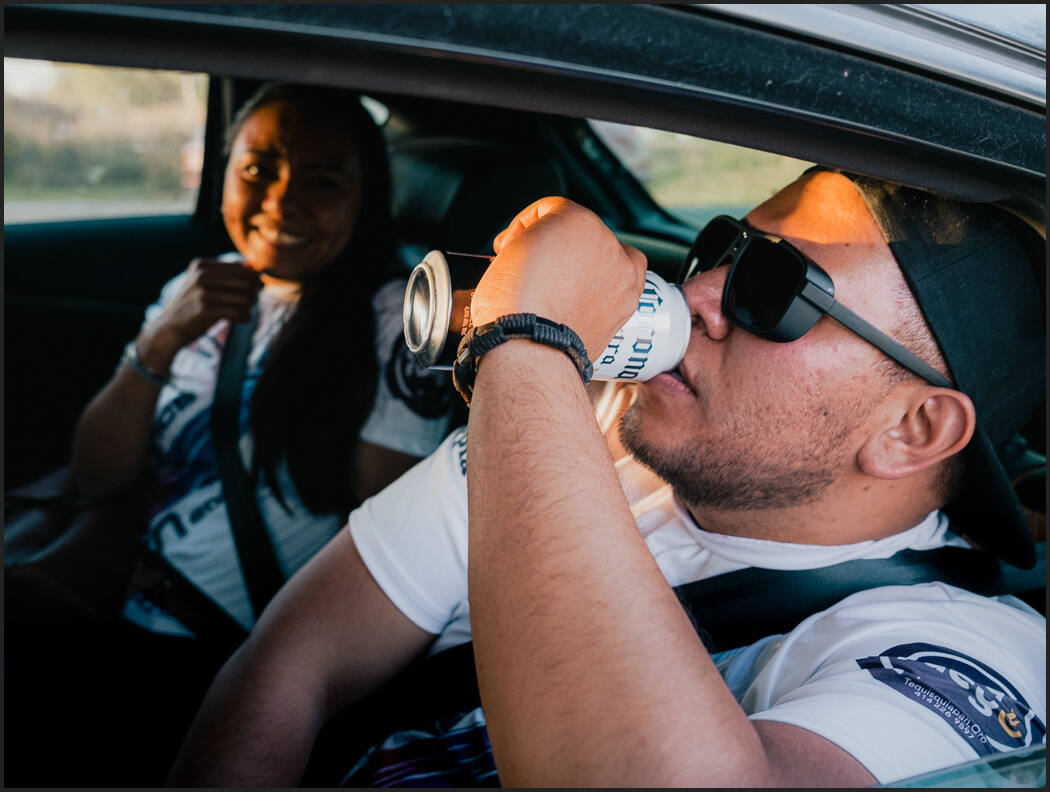
Kids waiting in the car while at the Mechanic. Mexico
Photo walks are not the same as street photography.
When I started thinking of street documentaries I saw more than a photo walk. over 3 years later I’m working on a book about Mexico, but it may take me years to finish.
Now we all know photo clubs go on photo walks. It’s a social event that is good in its own right. But for years I combined the two. You go take photos of things and people, mostly the things because pointing the camera at strangers makes you afraid. Despite being a confident person, that was me.
When I came to Mexico I saw a culture different from the USA. So much life and color and sometimes broken things and streets. Every time I did not take photos or videos, I felt I was losing something.
So I started pushing myself to take street photos. I looked for street photography tips and inspiration. My big landscape cameras felt clumsy on the streets and the first thing I learned is the right camera matters. You need to feel at ease and creative. Inspired.
I could not afford a Leica nor did I want to stalk dark streets with 15k of camera gear. My phone was not really enough. I wanted to be a documentary photographer. A Street photographer. A journalist of human expression. Where normal rules of photography exist, but step back to give room for the soul in those moments.
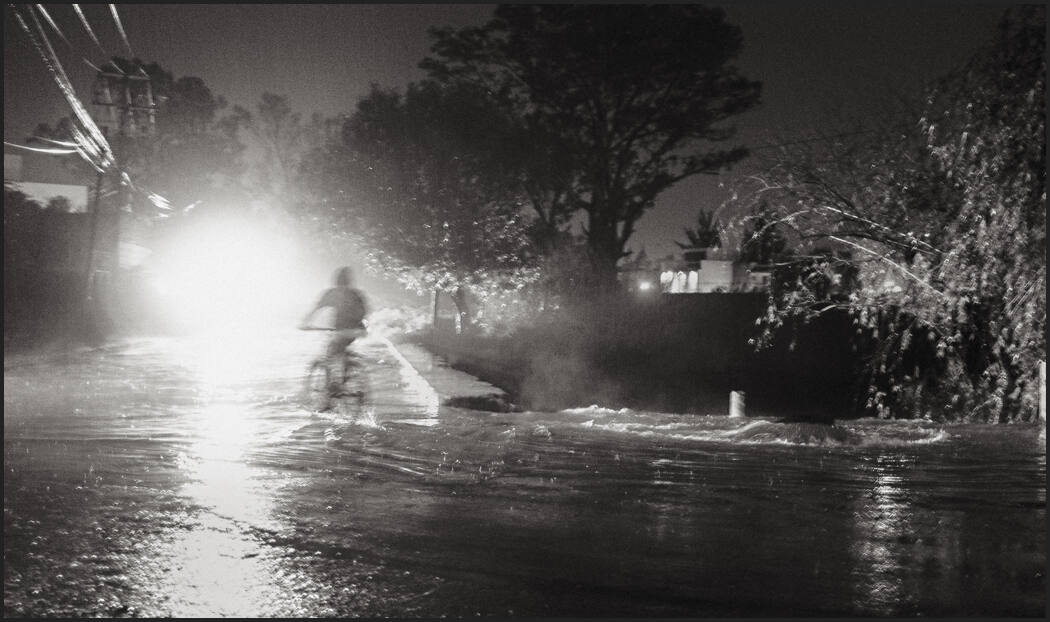
The streets flooded in San Juan During an intense 2021 rainy season.
I felt like the worst street photographer in Mexico!
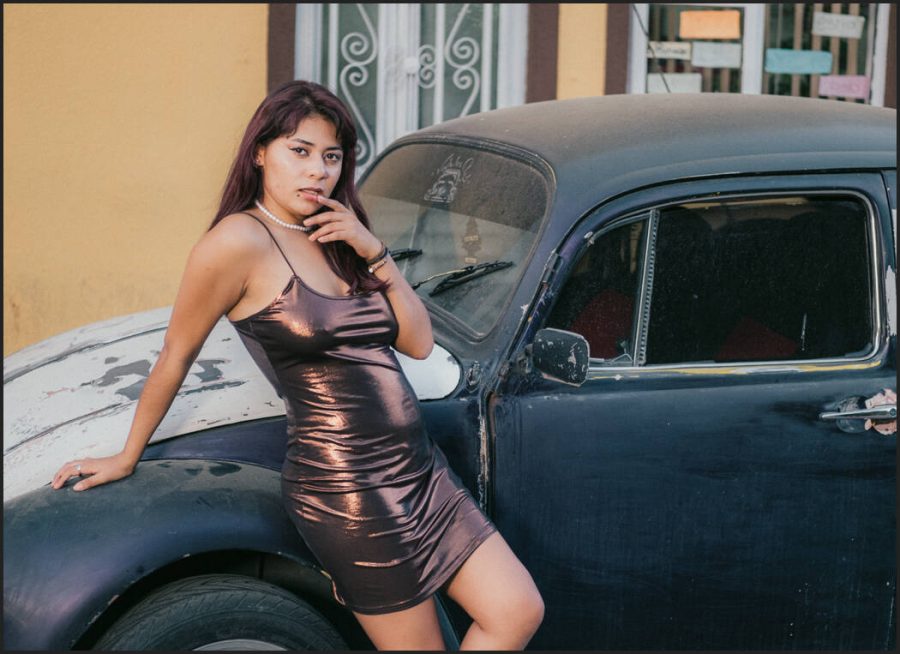
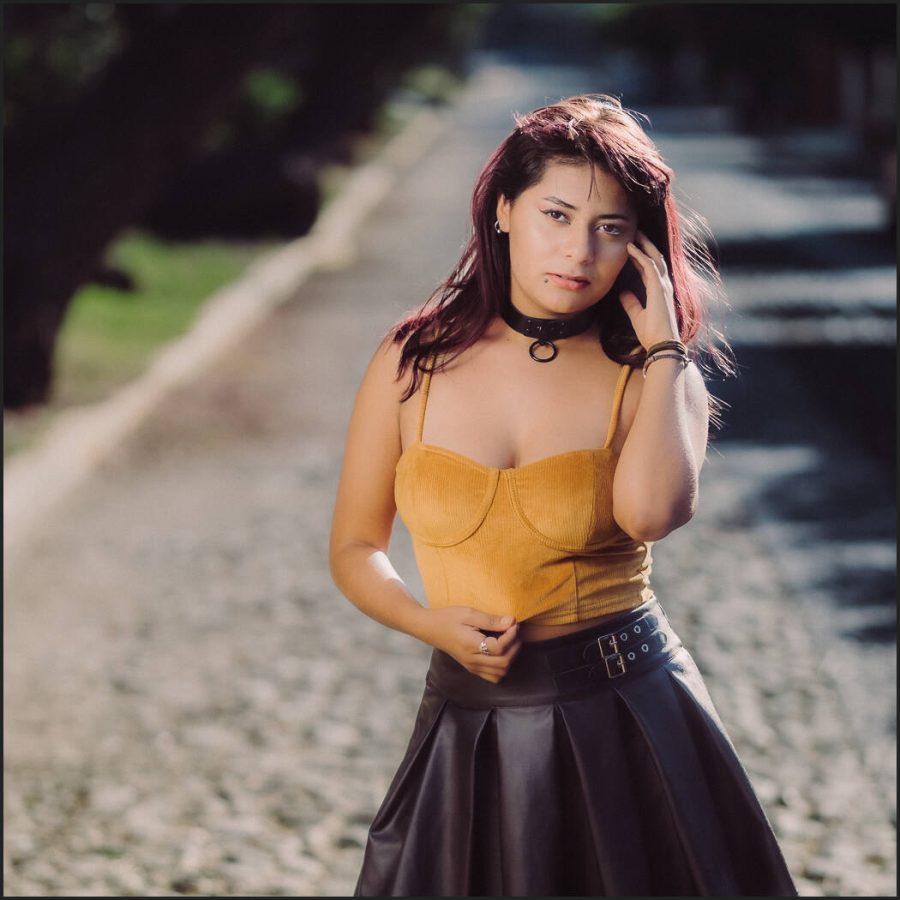
And so I created this street photography guide because I know that feeling. My photos lacked life. They were boring photo walks. That drove me. Just like my fashion portrait projects in recent years were a demand on me to be better at making portraits and moving outside my box. Streets were from the North Pole to the South Pole. I needed to conquer both.
I picked up a Fuji camera because it had that rangefinder street photographer feel and made me feel inspired. Your camera of choice may differ. The key is you feel inspired. I would put on vintage manual focus lenses to engage myself in the process. I would try normal lenses, wider and longer, and lock myself to that lens on a given afternoon of shooting.
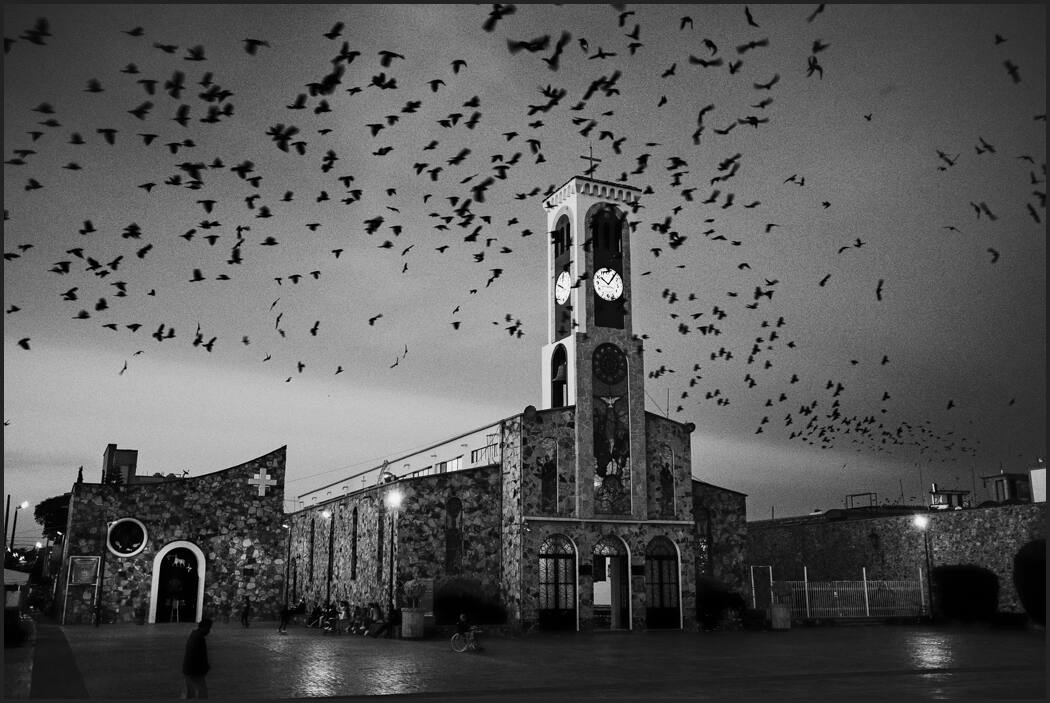
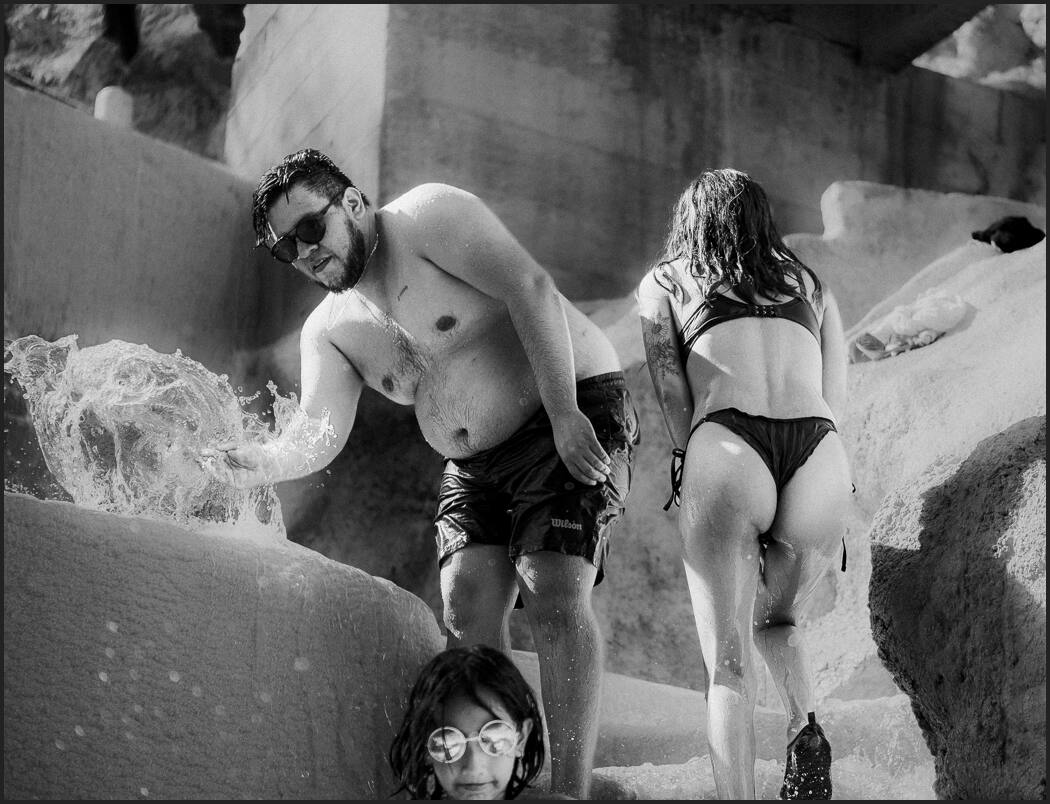
The birds of Ezekiel Montes Center on a Saturday The Grutas natural water park in Hidalgo Mexico
Here’s a video I made about a year ago. A Mexico street photography guide that applies everywhere.
Wherever you are. Street photography is important.
Emotions drive great photos. The most important photos in history are street photos. Sometimes they are pure journalism like the photo of Napalm Girl and when you read the story, you cry.
Sometimes a street photo makes you happy or maybe it’s organic moments like Henry Cartier-Bresson. Or the grippy close-ups of Vivian Maier. You can do that.
Maybe you take artistic license in ordinary things like Preet Uday. Or Raw controversial street portraits like those of Bruce Gilden. We are journalists of the human condition and the place it exists.
I shot from the hip to capture people’s more raw behavior. This is an important technique, but it does fail a lot. Then I simply pointed the camera. So many feel pressed and intimidated by this, but that’s ok. It also changes the photo because people often look at you.
Whether you’re in a new place or your own city. It’s the seeing of things that changes you. Look beyond the park bench and find the souls that sit on it.
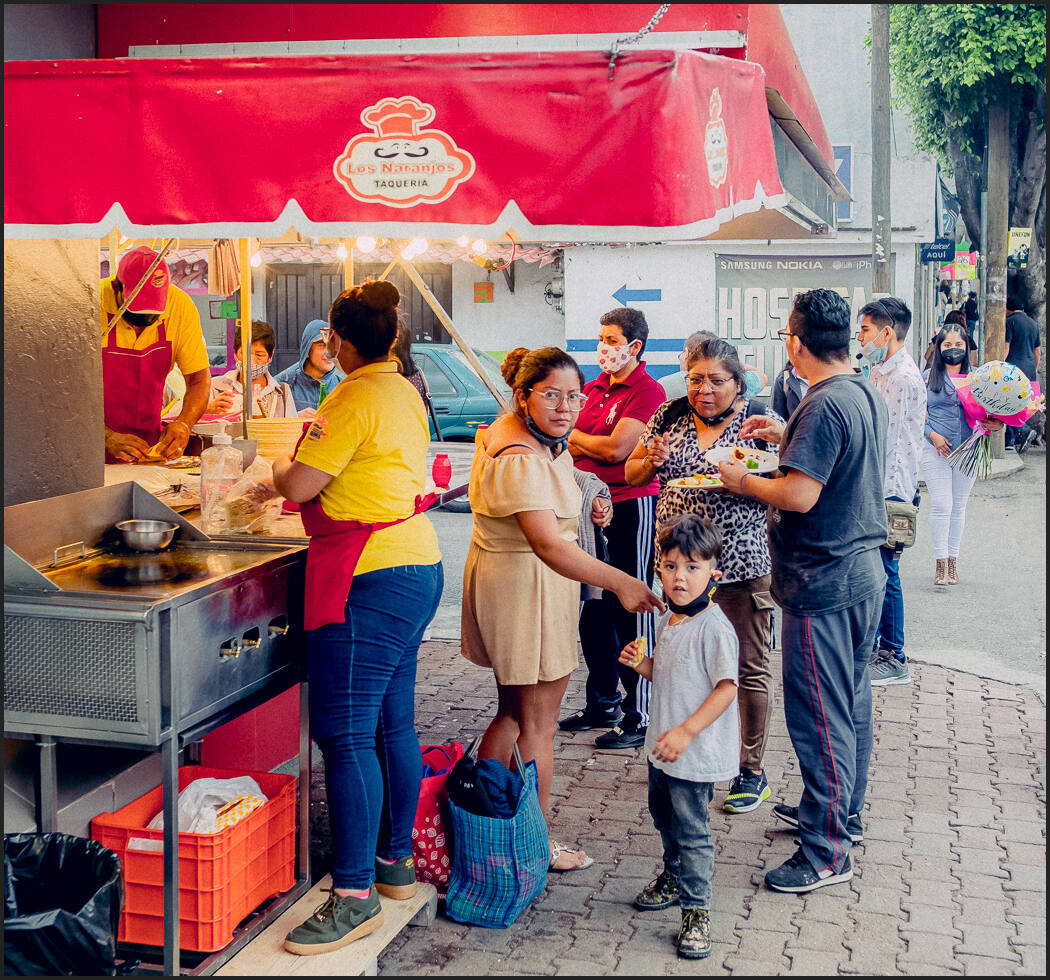
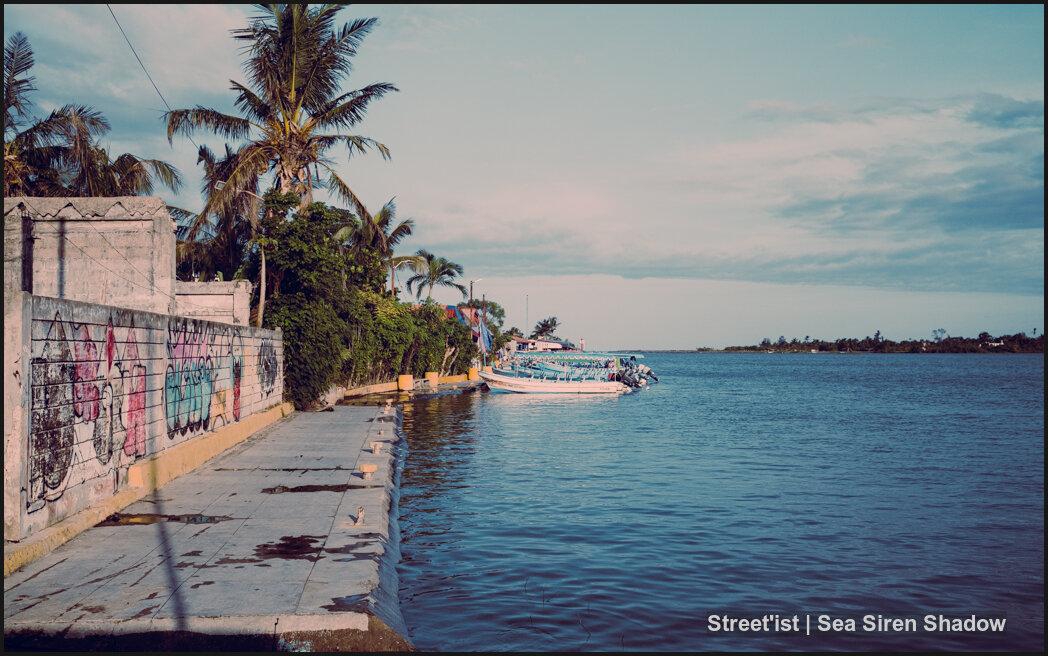
Street vendors at high noon. Editing with sunlight preset from Street’ist.Saturday beer drinking in the car.
Street photography tips show you it’s not just streets.
Everyone wants to make rules about what is a street photo. It’s people, it’s close, it’s far. The street photo groups drive me crazy because they have so many rules.
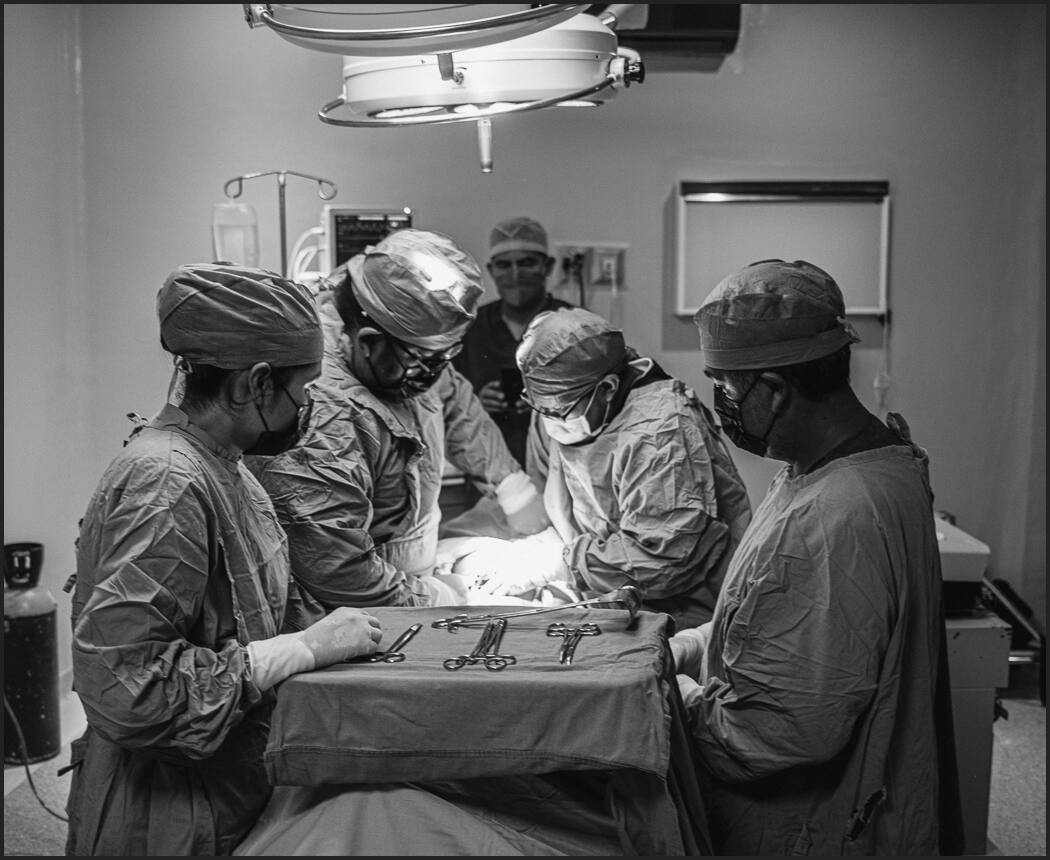
To me, this photo of a rare look inside a Mexico surgery or a group of kids smoking on a street corner, or a field with a farmer loading hay is all street photography. Because street photography is documentary photography about life.
A landscape is probably not a street photo because its focus is very different. But don’t let others define what your photos need to be. Only remember that the goal is to capture the human condition and how it makes you feel.
Surgery Room on an SJDR hospital.
Your street photos, the edit also really matters…
Color, black and white, grainy, gritty. None of them are wrong. You need a way to put viewers’ eyes where you need them.
I used Filmist for a natural color look but then took that further with my Street’ist presets pack. These recipes let me draw out whatever emotion inspired by film and color but make for things I encounter on the streets.
In the end, finding an editing style takes time. Don’t start by forcing yourself to do all black and white or all color. Feel your photos. And use tools like mine or that you create yourself that lets you try things that you otherwise might not.
I think some use black and white as a crutch to deal with bad exposure or make things feel artistic. Some think it’s more pure. I choose depending on what the photo is. I black and white to make the scene simple and tell a better I use it. If film like color or bolder contrast and tone tells that story, that’s what I use.
Street photos are a form of journalism. You can edit naturally or bold, light or dark. But there’s no such thing as not editing. Not even with film. Every photo is your interpretation of a moment.
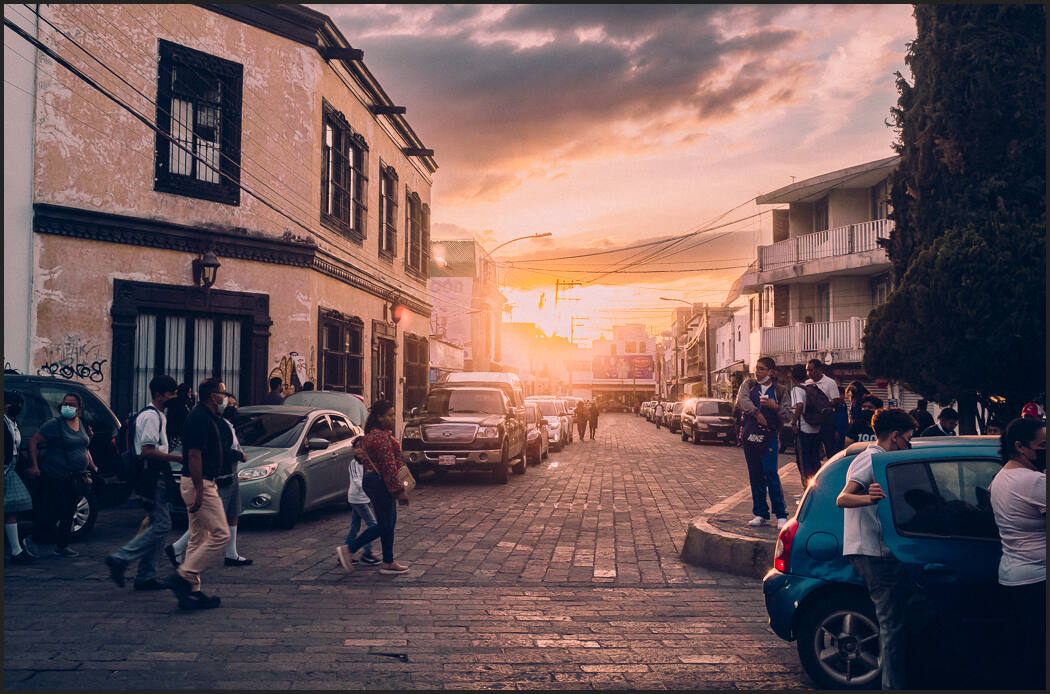
The second shift of getting out at sunset. Street’ist and Elegance Masks for a dark edit.
Street also improves your other photos.
I realized that just having people or things wasn’t enough. The great street photographers have drama. In expression, in shadow and light, in lines. It’s not a street walk to take 1000 photos of a city you’re visiting. So it doesn’t matter where you are. It’s about documenting life. When I slowed down and looked for settings and shadows my street photography improved.
Hence. You need few, not many. Shooting films can be inspiring on the streets is expensive. But manual lenses and slowing yourself down can give you a similar experience. I think this helps us see more details and emotions.
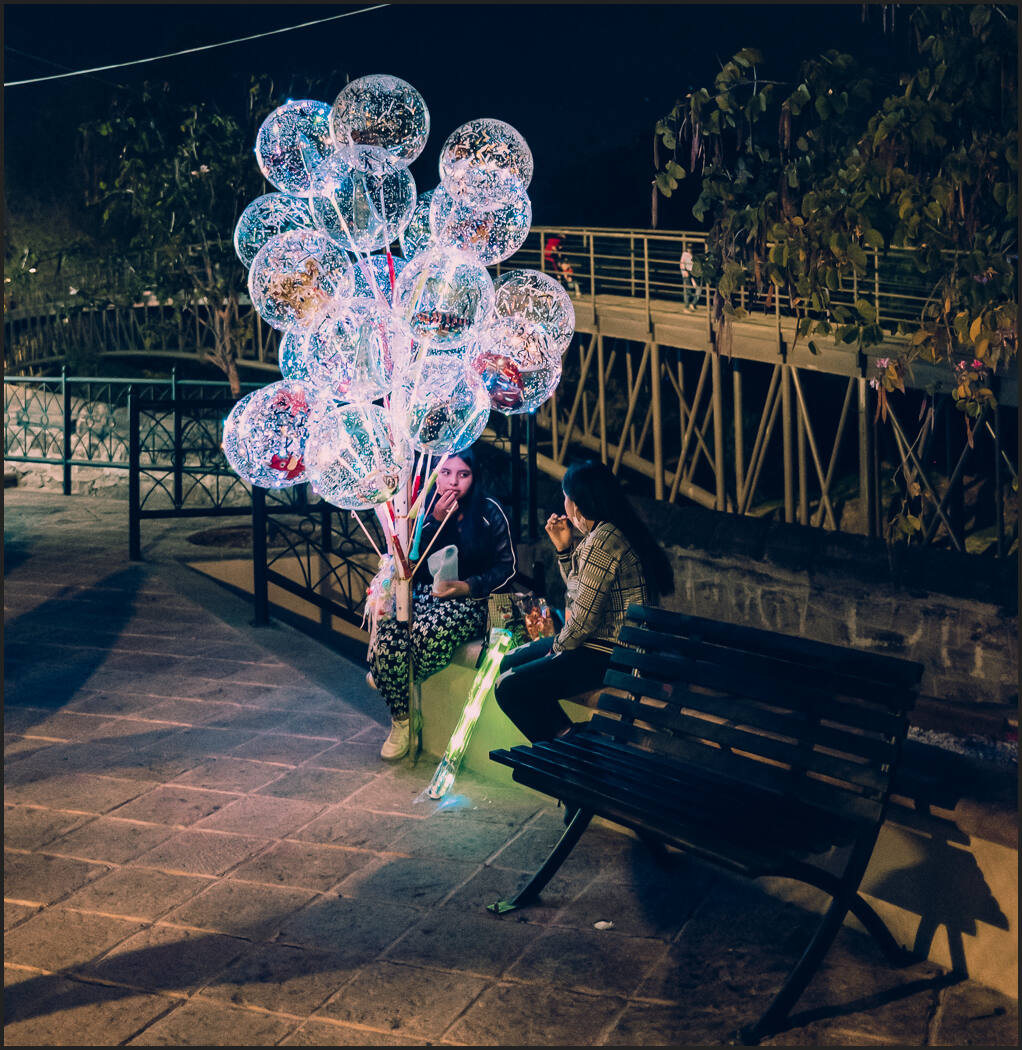
Kids in the Public Market of Huchipan HidalgoStreet vendors selling Christmas balloons.
Did YOU feel anything here? I often doubt my street photos.
Because in a landscape I can see the technique and know if it;’s good. A street photo has technique, but it needs more. You need to get excited, sad, inspired, even angry. You need to feel the importance of what’s in front of you. Then the light shadow and the edit to convey that feeling to your viewers.
Street photography can be hyperreal, low-fidelity, or all shadows. But it’s a series of creative choices not driven by making a photo perfect and beautiful like in a landscape. Or soft and rounded like in a portrait. Street Photography is about showing the world and how it makes YOU feel.
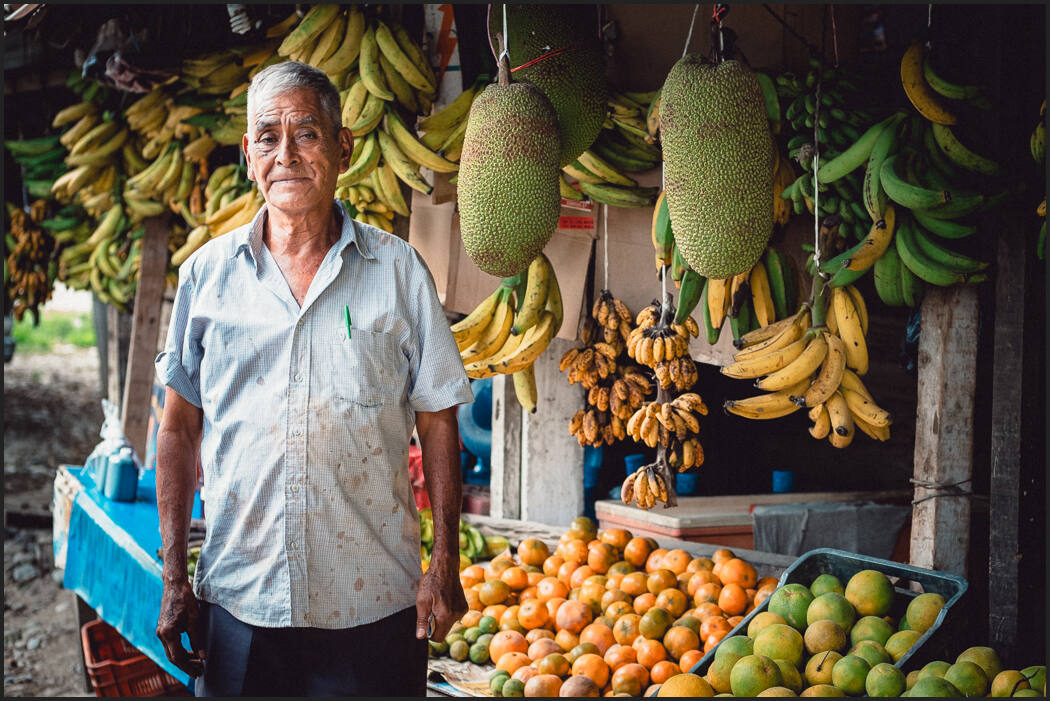
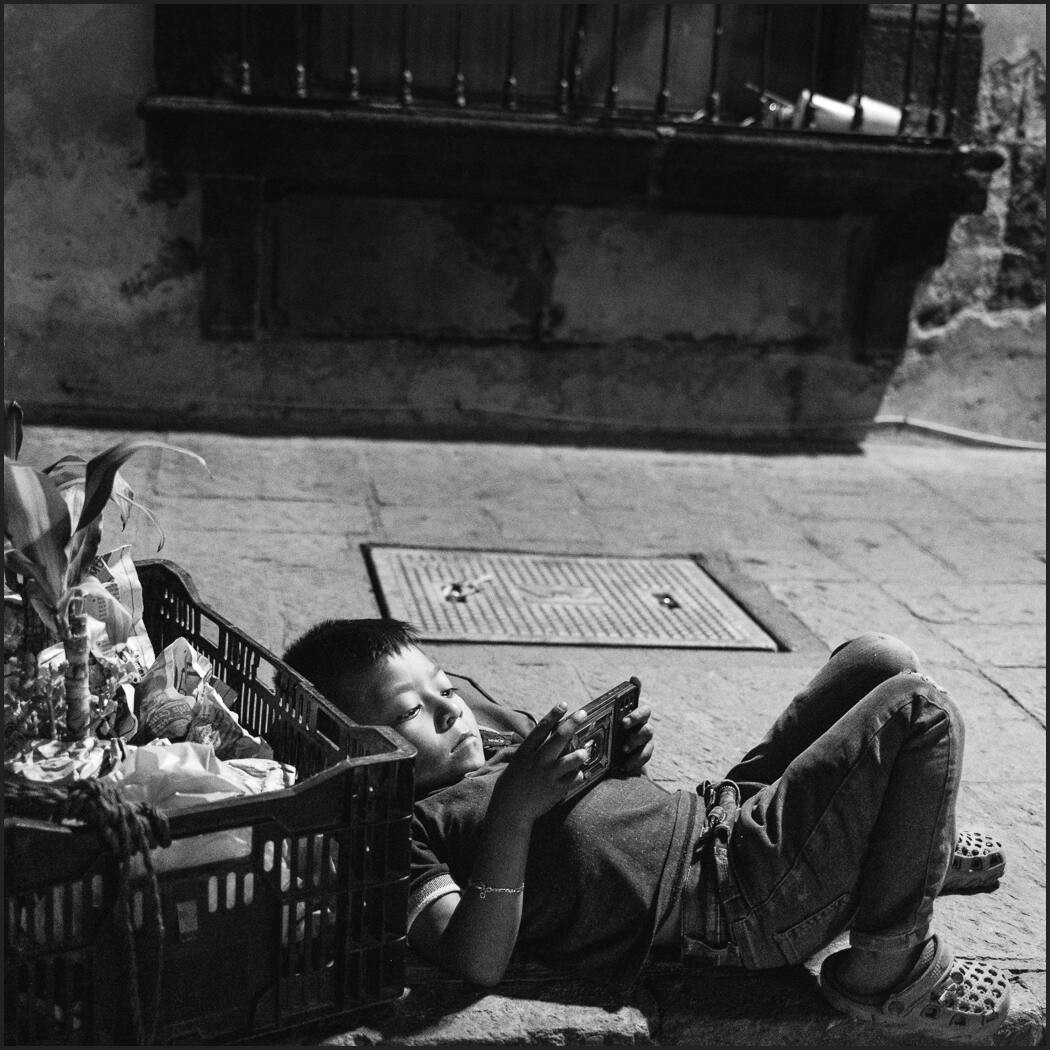
Old Fruit monger in Puebla State MexicoA young boy, relaxing on the street with a phone his parents sell plants. San Juan Del Rio.
Ethics of the street. Stop photographing LIGHT!
Photograph people, cultures, and history.
Sometimes this will offend. But we are journalists as well as artists. You have to examine your ethics and ensure you are showing respect for people. But asking permission will rarely work. I think it’s important that street photographers think like journalists at least to some degree.
You also have to unlearn some things. You have to accept that street photos are less technically perfect, but also know that if you don’t shoot and edit them right the viewers will just see a snapshot, not the emotion.
Great street photos tend to reduce, they use shadow and mood they make you look deeper. Watch my video about this and I’ll show you what it means to photograph shadow instead of light
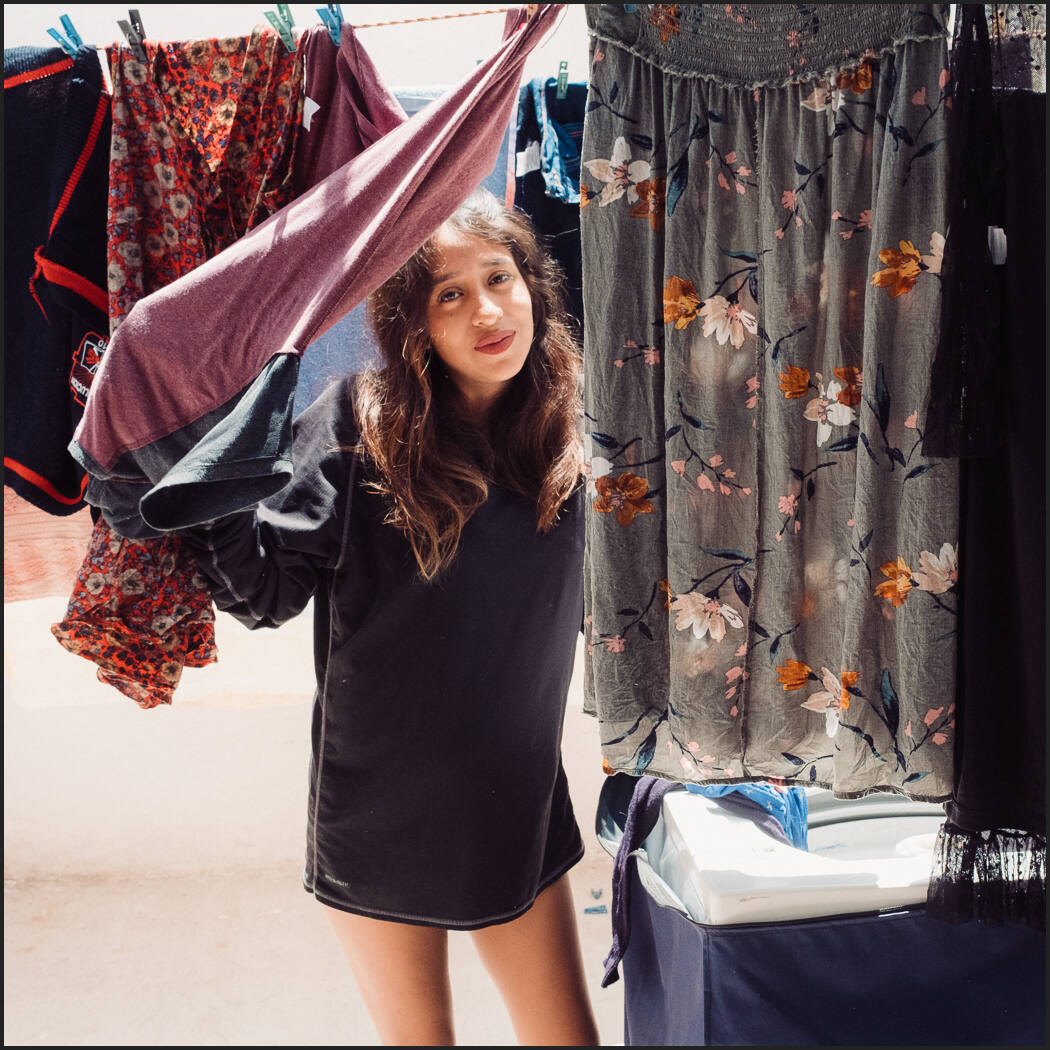
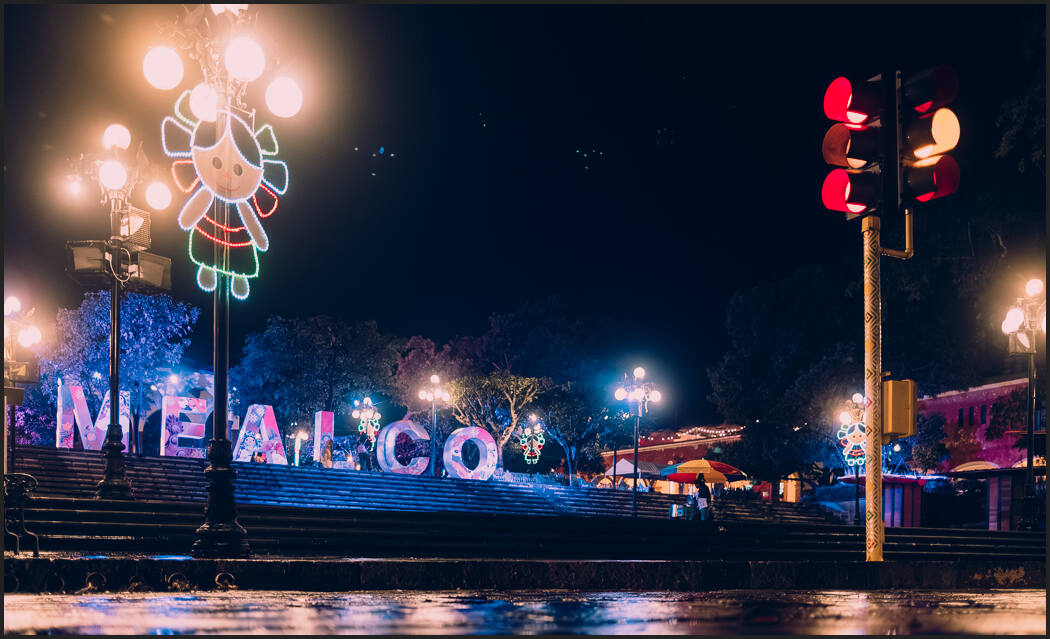
Woman drying her clothes.Rainy night in Amealco town center
This is not just for streets, but staying great street photos helped me discover it.
My 3 most important Street Photography Tips…
I finally feel honest calling myself a street photographer. Not that there’s a rule about this. But there are 3 key street photography tips I’ve discovered that helped me. That pushed me to the point where now I’m planning a book about Mexico.
1. Turn your discomfort into feelings and stories.
2. Shoot and edit for emotions and feelings.
3. Look for shadows not light in your photos.
This combo will transform your street photography. It’s taken me over 3 years to start understanding it. But doing so not only improved my streets, it is today improving every type of photography I do because it makes me see defiantly.
Photographers who ignore the streets lack important skills.
Because the streets teach you to see more. I hope you’ll go out and shoot streets this weekend. Then again and again. It’s ok to be uncertain. It’s OK to be uncomfortable. That’s what makes us real. Use that, respect others, and document cultures, histories, and moments.
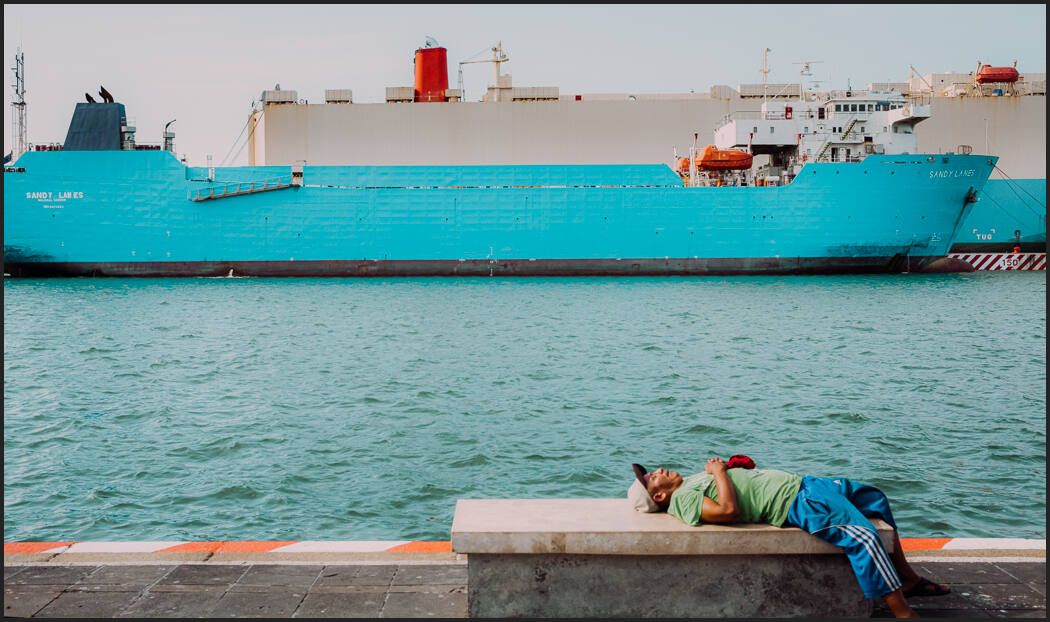
Taco stands in the afternoon.Man taking a nap in the port of VeracruzGoing home from the market
Street photography tips for editing and style.
Get seen. Share your results in my Facebook group and stray tuned to my podcast because we’ll talk about this more soon as we go deeper into these themes
Also, check out this video on my editing theory for Streets and why I made STreetist. It will give you some ideas on editing better and deciding how each street photo should look.
Let me know your thoughts in the comments – Gavin Seim
Here’s how I use the color presets I created to deal with any light or street situation.
Podcasts are perhaps the best way to catch up and tune in. A pure form where you listen on your terms to your favorite topics. After over 7 years of radio silence, Pro Photography Podcast is back.
The listing should be live in most podcast apps. But there’s direct links to subscribe and episode archives here on the podcast page
When I make a video on my YouTube channel the demands are high to cut tight and stand out. It’s hard to keep people watching and we always have to work for that goal to get views. In a podcast we can discover more about a topic.
A podcast is more like a talk show than a YouTube hit.
Almost everything for me started with the Pro Photo Podcast back in 2006. There were very few good photo podcasts then and my first episodes were not so good either. But they improved and my growing up and career was all in that podcast.
PPS had a good run and tons of great guests and co-hosts that I miss. It transformed changed my career and my understanding of photography at a time when everything was changing for all of us. I was told by many that it helped them become the photographers they wanted to be.
What happened to Pro Photo Show 1.0
Pro Photo Show started before Facebook was the thing. We had forums and contests and shows every week. It was a lot of work and very rewarding.
Then I started doing more YT videos and traveling. Life and even my human right activism absorbed my time and made wore me out. Then some of my regulars didn’t want to co-cost anymore and I was feeling beat down. At episode 100, PPS quietly faded into silence. I’ve missed it ever since and honestly felt a little sense of failure for not keeping it going.
In these past 7 years I earned my Master of Photography, I’ve improved in every way, worked tirelessly on growing my YouTube channel and even moved across the world. (Well the continent at least). And while life will always get in the way, my passion for photography has only grown and my abilities improved.
I’ve always been someone who was candid and spoke my mind even if I don’t fit in. Living in Mexico learning a new language, absorbing a new culture and world. It’s all taught me to never give up and that the beautiful light never stop.
The world of Photography has changed again.
Right now mobiles are at new levels. And Ai revolution is happening and standing out as a pro photographers is harder then ever. A good time to come back to a pure form of Photography d8icvssion with a photography podcast for profession and enthusiast photographers.
I’ve been busy and a bit intimated to make a Photography Podcast again because I know I have to make it good to keep up in these times. But after years of editing video, I found the process and simplicity of an audio podcast a pleasure. There’s something about just audio.
The new photography podcast plan.
I’ll have solo episode, panels, and guest. To start with a show every two weeks but maybe every week soon. I’m wanting your feedback on what kind of shows you want, but I have no many thinkings oppponing into my head and make more sense here than in a video. That said some shows will be recorded LIVE on my channel so make sure you subscribe.
Pro Photography Podcast will be our place for relaxed conversations about how to create better and sell more. And it will be backed my visual content that I create on my YouTube channel. Together we’re going to improve photography.
I’m Gavin Seim and I’m Glad you’re here for the Pro Photography Podcast.
Yes Lightroom needs every ounce of power. But when you have Lightroom running slow, your work slows down and drives you crazy.
In todays video we STOP letting lightroom RUN slow and make it FAST
I actually got fed up after last weeks video about Speed-Masks. I love Ai masking in LR but it was bringing my good system to a crawl. I decided it was time to review everything and make a video.
This 2023 video is everything relevant I could find to make Lightroom fast and it goes well beyond the basic Lightroom preference panel settings that you tweak when Lightroom is Slow.
This video has 3 segments. The first is the basics inside LR, then the factors outside of Lightroom and finally Advanced tips for your system to make it speedy.
Lightroom is a log, accept that and make it fast!
Lightroom has always been a big of a hog. Lt likes lots of Ram, disk speed and now graphics. The Masking is epically heavy on graphics use so make sure you watch the external lightroom speed tips in the video because they really help.
Many if these will improve speed on other apps as well. So if you find Capture One is slow or you video editing app, many of the things I’ll share with you today still apply.
Check in with preferences first and often if you feel things are slowing down. We’ll cover those tips in the video. But don’t stop there, do the more advanced things to really make your Lightroom run faster.
I hope this helped you speed up Lightroom as much as it did for me. – Gavin Seim
If you’re not using my Elegance Speed-Masks and don’t want to, then you need to make your own. So I’ll show you. This is the only way you should be masking in Lightroom. You get better masks about 10x faster. I mean that 100%!
In today video I’ll show you how to make your own Speed Mask presets and the latest update to my own local adjustments preset pack, Elegance 4.
Lightroom’s powerful masking tools can be slow and cumbersome. But now with Speed Masks
Masking in Lightroom takes a lot of forms and sometimes it transforms everything while others it’s as simple as controlling tone in a sky.
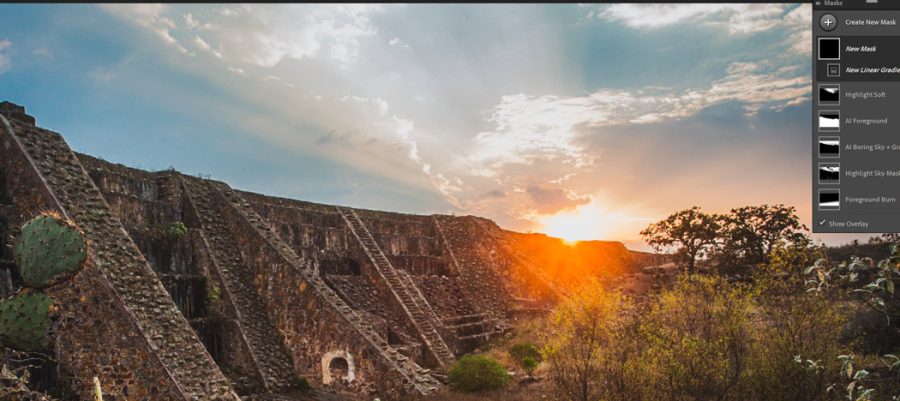
IN this case I use Street’ist presets for the main look and just dialed back the sky using an Ai speed preset. INtersecting grads into you Ai sky selections like I do in Elegance 4.5 makes thenm more natural.
Control 10 layers at a time.
As I showed in the video with this we had all these layers and by using them as a Speed-Mask develop preset you’ll be able top adjust them as one turning the effect intensity up or down. This is a huge control boost for masks in general that most people don’t even know they are missing if they don’t use the Speed Mask presets.
Don’t go too far with masks.
No matter what app you edit with, going too far on a masked edit is the sure fire way to make a photo look fake. In in a time when Ai is creating fakes of everything, I think natural is a good thing.
You should isolate your background but that doe snot mean darken it two stop. Remember Masking is to digital what burning and dodging was in the darkroom. use it wisely.
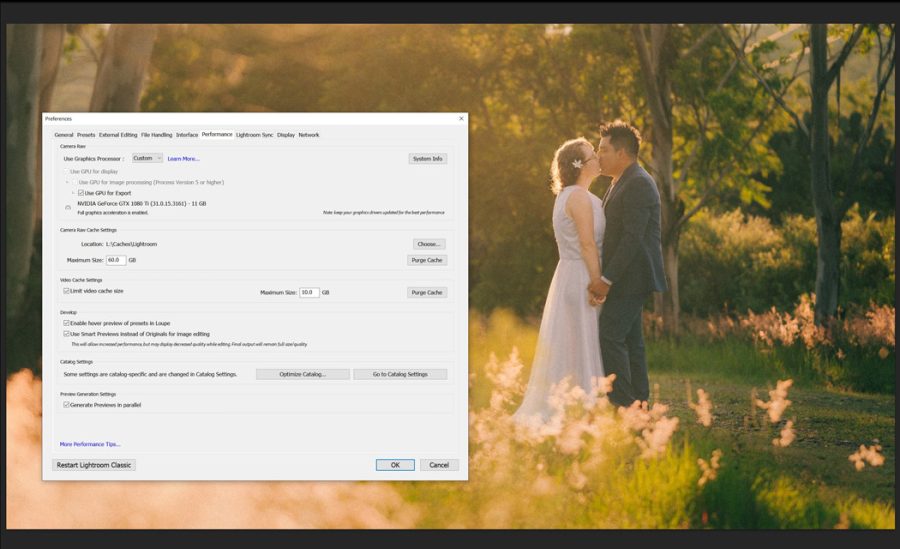
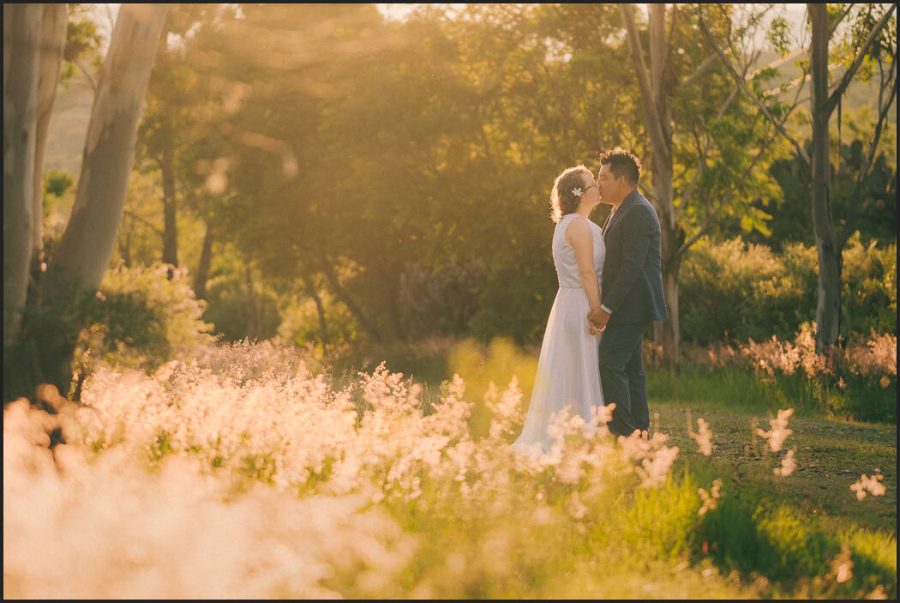
You can see in this wedding photo how we used the Ai masks but more for atmosphere than to isolate one thing. The mix allows us to us the master slide to decide how far we wanted that to go.
Have fun with these and let me know what you think – Gav