October 10, 2010

Sunset's Hidden Falls - Yosemite National Park, Fall 2010.

[like]

I’ve seen amazing things in my travels. So at first glance it just seemed like a beautiful landscape. But as I took what little time I had to really look at Yosemite through the eyes of an artist, I soon begin to realize why Ansel Adams loved it so much and to see that those giant slabs of rock towering above me were true wonders of natural beauty.

I had just one afternoon for this, as it was the tail end of our Fall 2010 tour and we needed to move towards home. I was hoping to take away at least one really good frame that afternoon. I think I did just that. I made various compositions throughout the day, and though we did not get to see a fraction of Yosemite’s beauty, we wound the narrow highways and hills, seeing what we could in the time we had. We ended up down in the village and roamed a bit, taking time to visit Ansel’s gallery and peek at some of his legendary images.

We were heading out of the village, working our way back to camp near Mono Lake. I was hoping to see some sort of sweeping sunset as the night drew in, but we barley got a mile before I rounded the bend and experienced this view for the first time. Gateway to Yosemite is a sight. With a view right cross the river and down the valley. Bridal Veil falls in the distance. Some others were in the pull off, snapping photos and enjoying the view as the low evening sun cast sprawling light on the crags of El Capitan and it’s surrounding landscape. I knew this was it and I was going to take my time.

Those of you who know me, know I’m a fan of  silver prints and of Ansel. I don’t want to copy what he did, but his and others work have allowed me to gain appreciation for quality silver images as I continue to refine my own approach. In the past few years I’ve started spending time in the study of monochrome. I love color, but sometimes I just want to take it away. Allowing me to explore the canvas that is tone, depth detail and density. This was one of those times.

This this was one of those places that get’s photographed often, but I wanted something above average and was willing to wait for it. I set up the tripod and gear, waiting for some people to move so I could get right where I wanted. I meticulously analyzed the composition and setup for the image. I think I spent a good twenty minutes planning it and running few test frames, refining the focus manually and just making sure I didn’t miss this.

Finally it all came together. The light, the plan and the moment. I made my final frames, then packed up. I don;t believe I took any more photos that night. This was what I had come for and I felt satisfied. After I was back in the trailer, final process proceeded. I could try it describe the scene, the flowing river, the driftwood, and the tiny distant waterfall. But I need not because I have the result of many hours of labor to show just how it felt to me on this evening in September 2010. I’m currently doing test prints on metal and this one should be officially released this year.

For Photographers. How it was made…

Read More

October 6, 2010

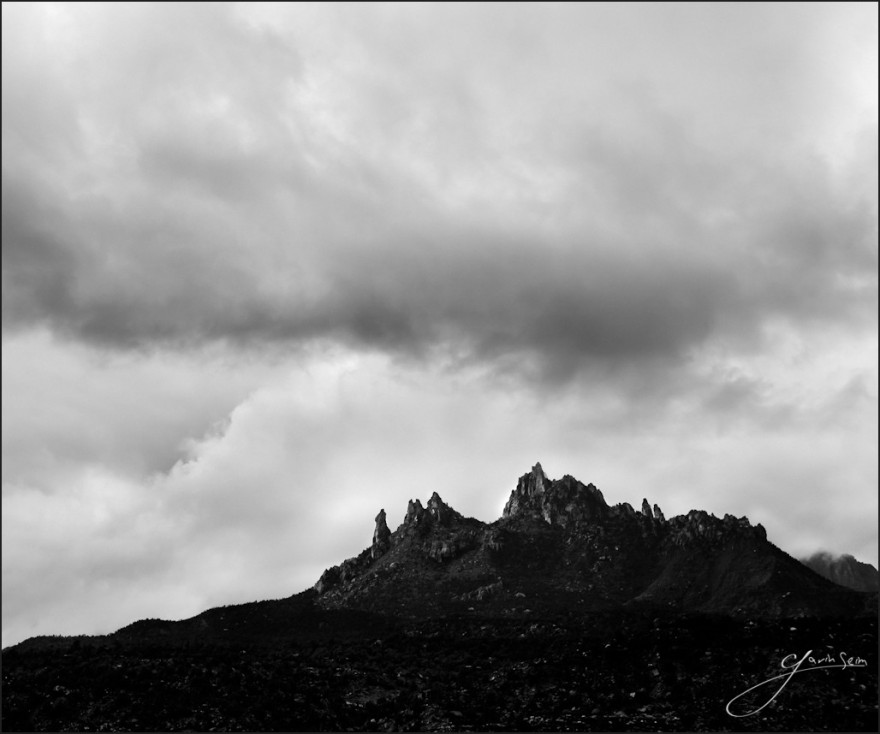
I’ve been in the area in the Zion National Park the past few days. It’s an amazing place, but the weather has been lousy. Clouds, rain and stormy winds reign. Not that one could never make good photos in those conditions, but the light overall has been less than magical.

We went for a drive this evening. For a a few brief moments near sunset, a subtle but beautiful light struck these peaks near the main park. I stopped and spent awhile atop the roof of the SUV with my tripod, taking compositions from a few different directions. The monotone of this scene shouted for a good silver process to really focus on the subtle but beautiful light of these peaks.

For Photographers. How it was made…

Read More

October 30, 2008

CPPOTW = The Digital Grey Kard

It seems someone is always selling a gadget to get your white balance right. It can indeed be useful to have a grey reading to get your white balance spot on out of the gate. This CPPOTW is the Digital Grey Card.

WB targets work quite simply. Their an 18% gray. You shoot a frame with the gray card in the scene, then later in post production you click it with the WB eye dropper using, Lightroom, Aperture, Camera Raw or whatever you use. The system reads, what you say is 18% gray and balances the rest of the scene accordingly.

I‘ve tried a few targets, and aside from being overpriced many of them are cumbersome, which means I tend not to use them. This set however is like having three business cards on a lanyard. Throw it in your bag, or better yet around your neck and wherever you are you can toss the card in for a WB target shot. It also includes white and black level target.

Nothing big, strange, or expensive. At around seventeen bucks, it may seem like a lot for three plastic cards, but these targets are cheaper than most and do just what they need to. Something every photographer should have in their kit. I’ve linked to Amazon. I’m sure you can find it all over, but the price is right.

Gavin Seim

Read More

September 8, 2008

Nik Siver Effects Pro = 4/5 stars

Silver Effects Pro

UPDATED: 04/10.

We’ve worked out a deal with Nik and you an save 15% on any of their products with promo code PPS.

I finally got a chance to play with Nik’s new Silver Efex Pro. It’s a Photoshop/Aperture plugin for making Black & White images from color one’s. Here’s the straight scoop! The interface follows Nik’s fairly clean and simple window style that graces the rest of their plugin’s. When it open’s you’ll be greeted by your image; a sidebar on the right that gives you control over the effects being added; a sidebar on the left with some easy preset effects,  and a few other tools around the screen that control the preview, etc.

Overall I liked the plugin. It suffers the the problem I find with most PS plugins, that causes me to stick with actions and presets for most images. When you open an image in the plugin you have to wait a few seconds and then use the tools in another window. Essentially PS goes away for that time, and when you commit those changes you are returned to your regular work environment. There’s nothing really wrong with this, it’s just not great for a workflow with large quantities of images, but more designed for those great images you want to spend extra time with.

I did find what’s inside to be simple and effective. There’s various preset options for making B&W images fast. You have color tones, film type, color filters etc to give you full control over making a nice piece of art. There’s also the ability to add some great looking grain effects is so desired, and the plugin; like many Nik products includes the U Point option that allows you to easily control effects on specific portions of the image (See Viveza)

BOTTOM LINE: I won’t be using Silver Effects for my everyday B&W images, because presets in Lightroom and actions in PS do most the the B&W effects I need, with more speed. I can also get most of the effects that the Silver provides by using the built in tools that PS provides (though with a bit more work)
All this said I think Silver is a good tool for getting great B&W effects on those images you want to spend some extra time with. It’s also great for trying out various effects with a lot of control and precision. I knocked off a half star because, Silver, at $199.00 costs twice what it probably should. Still if you have 199 to spare, and want a great tool for really fine tuning B&W images then pick it up (you can of course try Nik’s short 15 day demo).

Gavin Seim

Read More

November 9, 2007

Free Lightroom Presets and Capture 1 Styles list
Get my free Natural HDR mini pack here. Natural HDR Lightroom Presets.

The Free Lightroom Presets Directory.

Hey tribe it’s Gavin Seim and it’s 2022. This post was a pretty old list and most of the presets here are for older versions of Lightroom but if you install them they will update and work in the newer version. See my Lightroom presets install videos.

I’m going to start adding new free presets for Lightroom and Photoshop RAW, Free Styles for Capture One, and more to this list and get it up to speed again. I’ll need your help by adding your favorites in the comments so I can curate them.

I’m best known for my carefully formulated Lightroom presets. You’ll find a lot of these paid and fully supported packs here on this site. But many of my packs have free mini versions so you can get some of my best Lightroom presets free. I’ll start the list with those and keep adding more.

The new Free Lightroom Presets and Capture One Styles list…

Some of the most popular free presets made by me…

The old legacy Lightroom presets list…

You’ve just found the biggest, best-maintained list of free LR presets anywhere. I hunt the web for these, trying to add the best and filter out the dead ends. There’s plenty to browse. And feel free to share your favorites in the comments (freebies only).

LR4 and LR5 Presets: The develop module changed in LR4 and most LR3 presets will not fully function under the new process. As more LR4 presets are becoming available I’ll add to the list. I’ll also note listings that I’ve been able to verify are LR4 Compatible. Non-marked listing may be LR1,2 and 3 only.

There are also loads of freebies (linked below). I’m fanatical about quality and honored that they’ve become so well regarded my peers. OK, now on to the goodies. Oh and if you use Apple Aperture, here’s the free Aperture presets list.

My Free Legacy LR Preset picks


More Free Presets Worth Noting: These may not be large sets but they may have potential…

Other Random Presets: Some of these have obscure links, some with only 1 preset. But if you crave more…

Free Lightroom Brush PresetsHow To Install Brush Presets

LR4 Brushes…

LR2-3 Brushes

Free Lightroom Print Presets/Templates:


Read More