July 2, 2022

Why do camera-specific color profiles like Classic Chrome have to be camera-specific?

They don’t! In the end, it’s just a mix of colors and contrasts. A very detailed mix. And that’s what I’ll show you this week along with some samples of how these recipes look in real life.

The Filmist 1.7 update brings a lot of nuance, especially in the brand-new Classic Chrome recipe.

There’s a free sampler with 3 great film presets on the Filmist project page. It now includes the new Portra 160 1.7 update

First, I updated the Porta Gen.2 Presets.

Porta 160 for LIghtroom and Capture 1 Film presets - FIlmost free film preset
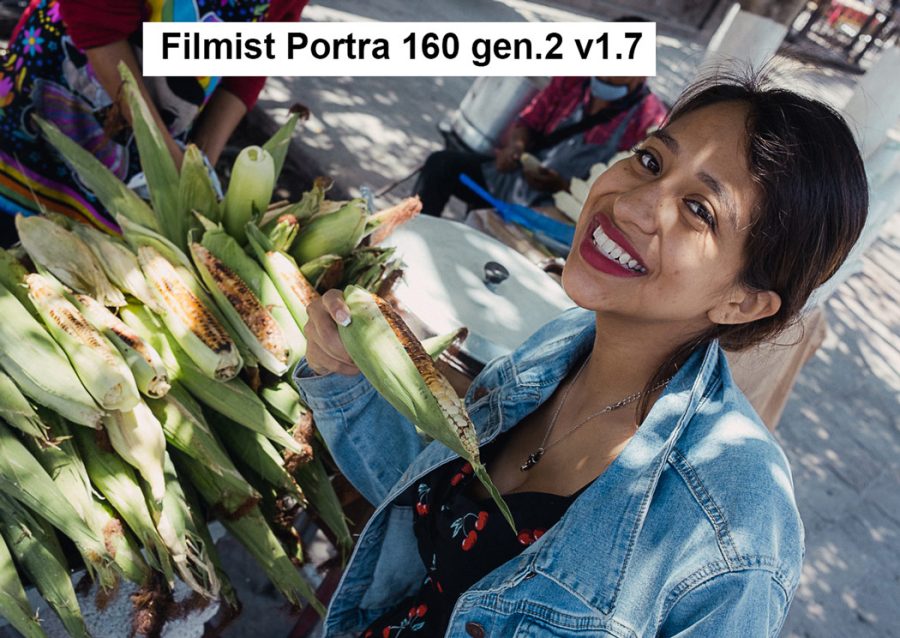
The latest version of Portra is more natural in both its LIghtroom Presets Variant and Capture One style. This is one of 3 Portra presets but this one can be found free in the FIlmist sampler pack.

I make Filmist 1.7 to have more refined Lightroom Presets, Capture One Styles, and video film LUTS that include a major refinement to the Gen.2 Portra presets, making them work more naturally like film.

Portra works on nearly anything and after years, the latest version of my gen,2 Portra presets much like the new Natura 1600 is just subline.

You can also watch my video on making the gen.2 Portra formulas.

The reason great recipes are better as presets is that they take a lot of dialing in. You will never do them manually every time. If you’ve seen things like my Sliders master workshop or the 3 Magic Sliders video on my channel, you have seen how these details matter.


Next, I finished the brand new Classic Chrome preset!

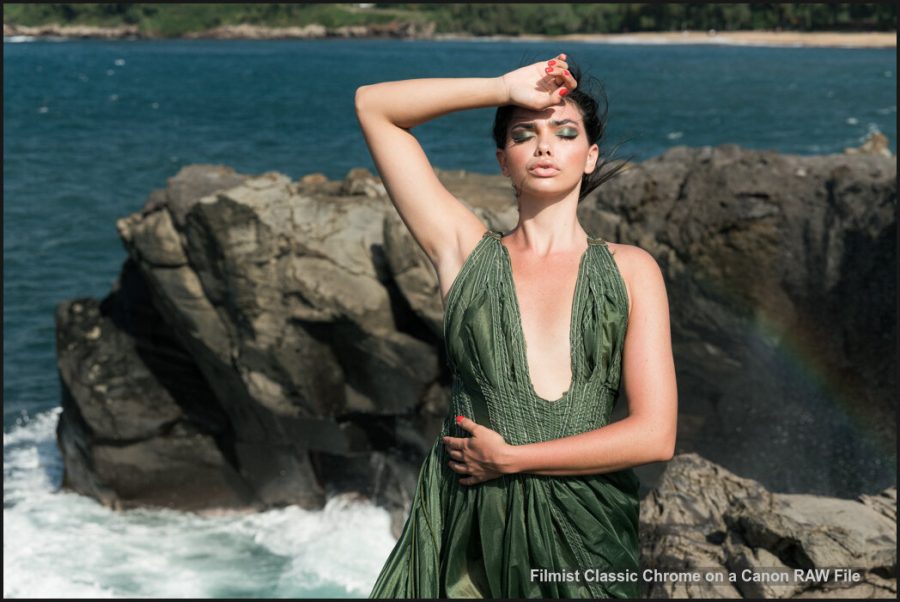
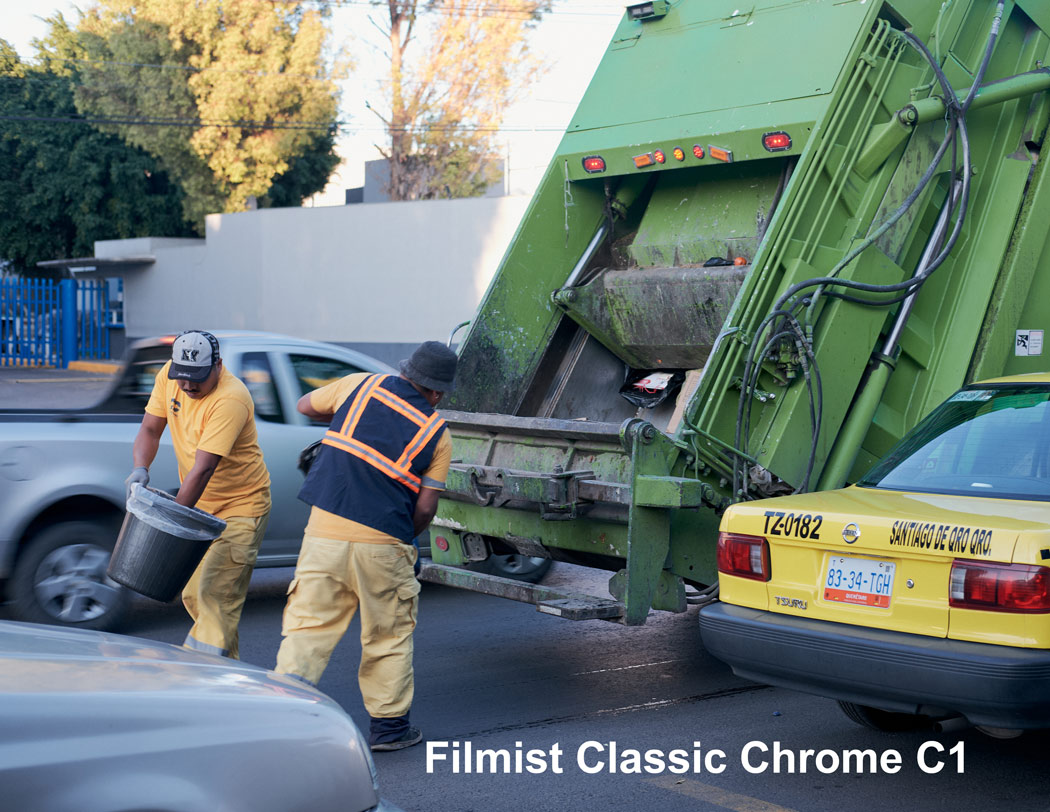
Canon RAW FILE, Classic Chrome Preset in Lightroom Classic.

Yes, I finally finished the much-requested Classic Chrome formula as a preset that can be used in any camera. It’s very clean and versatile. It’s actually a Fuji variant of Kodochrom, though since there were many Kopdachromes I can’t say which one specifically.

For those that don’t have my presets, I will be doing a video on how to create your own version of this recipe on my channel in the next week or so. So stay tuned.

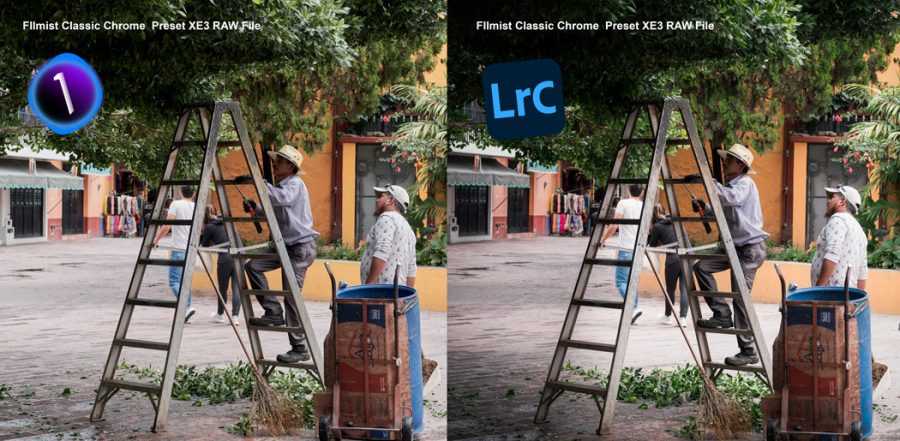
Side by side of classic chrome presets in Capture one and Lightroom
Same image in LR and C1 using the presets / style. Almost identical in LIghtroom and Capture One, I programmed the preset to give a very accurate rendition.

If you own a fuji Camera that supports the Camera specific RAW profiles in LR, or C1 you can shoot RAW and then apply the camera-specific color profiles. The problem is they don’t work on other files or even older models of your Fuji camera that did not include that Film profile.

So Like I did for the Classic Negative Lightroom Preset and Capture One Style. I’ve been working for weeks building and refining a recipe for based on Classic Chrome V2.


The win here is that you can use this on any file type!

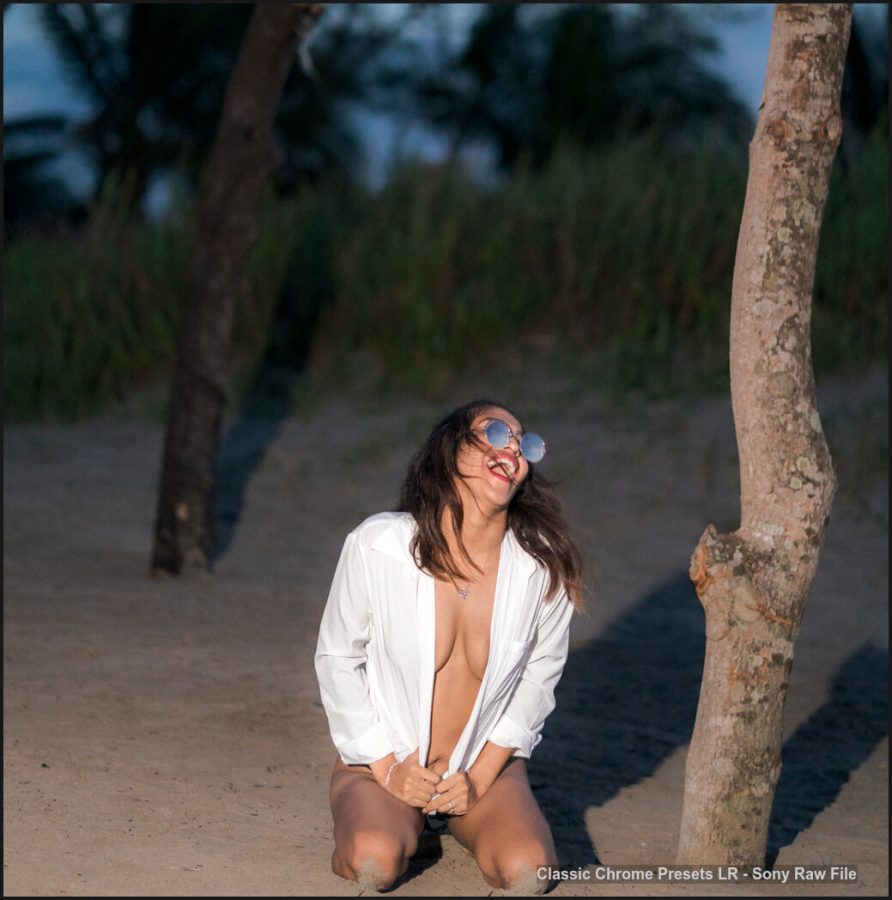
Here I used Classic Chrome on a Sony A73 file and result looked great.

Classic Chrome is a process that many photographers love because it’s very gentle and has that subtle feel.

This recipe is only included in the Complete version of my Filmist, since I already give away the Classic negative recipe for free in the Filmist sampler pack.

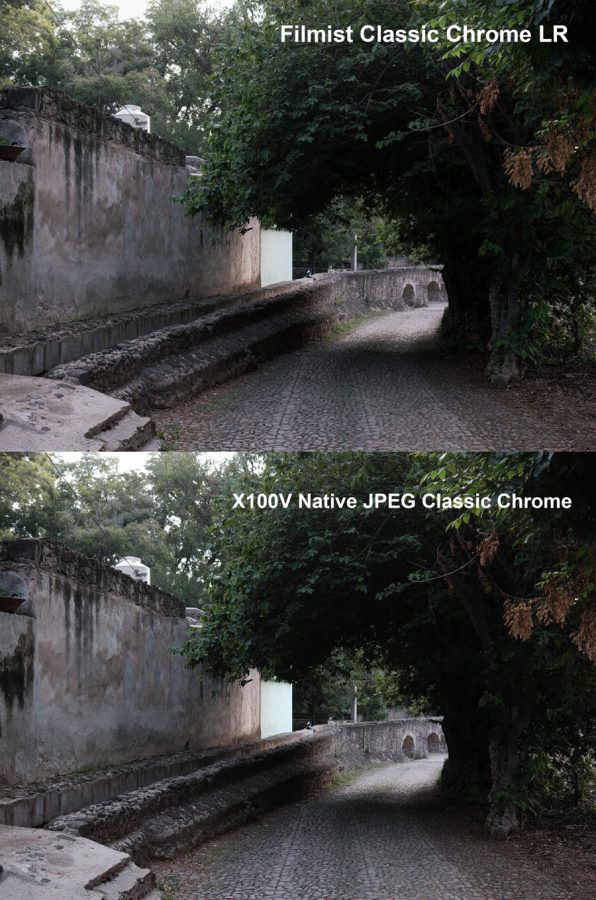
Side by side – The baked-in JPEG of the Classic Chrome look next to the preset process on the RAW file. Lightroom.

While in the Lightroom vs Capture One debate, I often favor the interface and speed of Lightroom. This was one of those times when the more advanced color controls in Capture One let me dial it in a little easier.

As you can see here however even in Lightroom, the baked-in JPEG from the Fuji camera next to the same photo from RAW file and NOT using any camera-specific profiles, just the preset. Well they are nearly identical which makes me happy.

A baked-in JPEG varies a lot from the settings and dynamic range you apply inside a Fuji camera. Here you just have the clean look and then can simply mod it with sliders of even the built-in Chemical tone mods that are in FIlmist. More control is the order of the day when you shoot RAW and then apply the color after.

Like I said next week I plan to make a video showing how to edit with Classic Chrome and where it works well. I’ll also give you an insider’s view of the formulas so you can play around and make your own variant even if you don’t use my presets or styles.

For Filmist users, make sure you update to V1.7 of the film pack in the portal. Then let me know in the comments how you like the results of these new updates 🙂

Enjoy – Gavin Seim

The Filmist Classic Chrome style used from Capture One
Read More

June 20, 2022

The topic of Lightroom VS Capture one comes up a lot.

I am a little bit of an expert since everyone one of my Lightroom Develop Presets Packs also comes, and a Styles Pack for Capture One Pro and I’ve been using both for many years.

I’ve compared various things about Lightroom and Capture One and I have the main video for 2022 that compares Lightroom VS Capture One in a wide sense so you can decide which one is best for you.

YOu can even try the edit yourself with the RAW file below and the free lightroom preset and free capture one style I’ll link below. You can also share your results on the Shadow Hunters group post for this.

Try it – Download the RAW file for today’s test here.

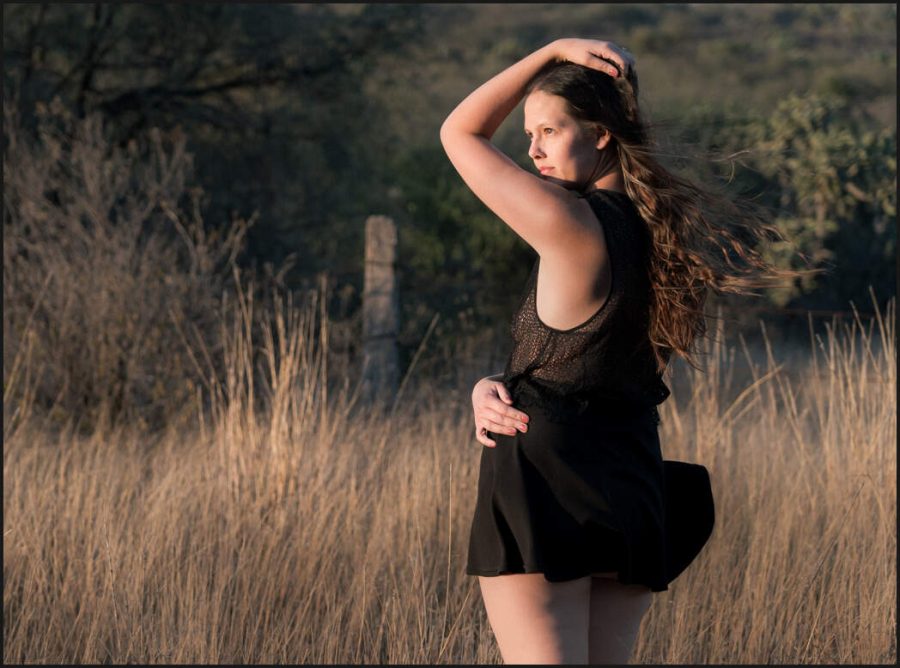
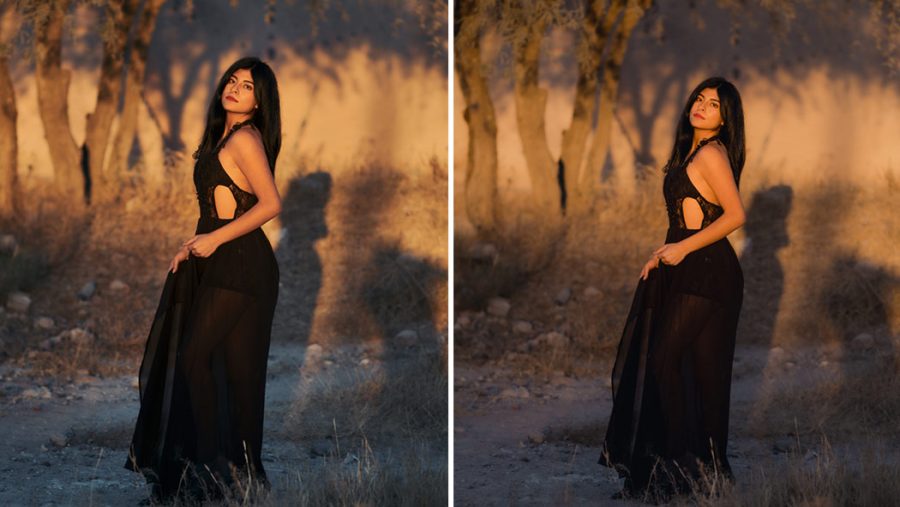
So today is about a simple portrait edit. BUt not really an easy one because of the tricky light. This is a perfect test to see how we use Lightroom and Capture One in the real world for a great portrait edit and which one offers the best features.

Both edits are clean and have gentle differences from Lightroom to Capture OnePro

Download the Portra 160 Preset/Style I use in the video for FREE in the FIlmist Mini Pack.

Watch the video and see side-by-side edits and some tips for editing great portraits in both.

Lightroom is a little more initiative and has better Ai tools. Capture One is more nuance and control. They are close!

In the end, both are good and both have their advantages. But watch the video and I’ll show you some ups and downs. Whether you use Lightroom Classic, CC, or Capture One Pro 22, you can get great results and we’ll see them in today’s video.

Let me know which one you like best and why, or if there’s another app you favor for your RAwe editing, I’d like to hear about it in the comments.

Read More

January 11, 2022


The Fuji worm invasion came after the film! In today’s video, I’ll show you how to fix it.

Fixing fuji worms LIghtroom vs Capture One

I want to tell you a story as we continue the LR vs C1 experiments because today I going to show more important ways to control details like the wormy artifacts sometimes caused by ISO noise.

I was starting photography in the late 90’s when I saved up for a Canon EOS 3. Oh I thought I was the coolest ever (hint, I was not)

I devoured the magazines. In those days we talked about fine-grain films like the new Portra 400, but words like worms and color noise were not topics. 1600 ISO was about the limit and it was noisy. Take it or leave it!

These days I’ll sit for hours and tinker with a formula for presets like Natural HDR 4 to get the best detail and tone from our files. Photographers that use presets actions and tools get better results. Because they see more without working harder.

35mm film was like having 10-20 megapixels.

This was me in the early 2000’s with my prized EOS 3.

Serious pros of the day said 35mm was not enough. Strangely they downgraded a few years later to the 6MP generation of digital SLR’s.

No matter. My EOS 3 cost $1000 without a lens and I used it for years, starting out my portrait and wedding work and being the official photographer at the local speedway. It had eye control focus, meaning it focused where you looked in the viewfinder. It did not detect the subject’s eyes like today’s cameras. It was just cool and it worked, some of the time.

Each Saturday I would go early to the speedway and pre-sell photos for 15 bucks. Then I would sit all night in the center field taking photos, playing with pans, and getting dusty. On Monday I developed 6-10 rolls of film, sort 4×6 prints, store the negatives and give the prints to my racers, hoping to profit about $200

That 35mm film with it’s noisy ISO 800 grain was what I had and I made it work and I learned a lot in that dusty center field.

But noisy was relative and more organic then. It was silver. These films were classic and looked beautiful. The formulas I’ve created in Filmist presets are more high-res than we had then, but they look great because they look like film.

PS: Download my FREE Filmist pack to get my noise presets and the film looks if you missed it. You’ll see what I mean about film color and detail.

Download Filmist mini here to get my free noise formula preset.

Today I think about the hurdles we had to get a good print and how many stages of noise and artifacts and dust and scratches could be introduced.

Today we pixel peep and panic over a little blip in a sensor or a little noise that as I showed in last weeks video is easy to clean up with good use of detail and grain tools

Watch my worms video and learn how to control detail.

I love doing testing. It’s experimenting like in this week’s video that help us understand more. It’s that hunt that results is tools like my presets and like Emulsion 3 and Lumist for Photoshop.

So this week I uploaded another video looking at more grain and noise. It’s a focus on Fuji files, but also another look at LR vs C1 and how it will handle noise regardless of what camera your worms and artifacts come from.


That’s all for this week. I’m hitting the streets looking for light like I found here and processed with Filmist. Come Monday I’ll be back to my experiments, working on formulas and ideas for next week’s email.

See you then, Gavin Seim

Fuji X100V ISO 800, Filmist process and Gavs detail preset

Read More

December 21, 2021

What Should you use Capture One or Lightroom

I promised I would make a video about Lightroom VS Capture One because it’s been a while. The Capture One vs Lightroom workflow is similar, but not the same, and there’s a lot of debate.

UPDATE: There’s a new 2023 version of my Lightroom vs Capture One Review. Watch it here.

In 2022 both editing apps have advantages. So in today’s video, I’m going to get hands-on and show you Lightroom and Capture One, and how to get the most out of both so you can decide which one is better. Should I use Lightroom or Capture One Pro? Let’s find out.

Watch my video: Lightroom vs Capture One 2022


Get my Free Lightroom presets and free Capture One Styles.

Try my Natural HDR , as well as packs like Silver and Filmist film presets. Presets/styles make a huge the diffence in both apps if you usequality recipes. All my develop preset packs have Lightroom Presets and Capture One Styles inluded. Even the free preset packs you’ll find around the site.

Is Capture One or Lightroom more feature rich in 2022?

In the past, Adobe also tended to move slowly, but in the past year, they have started innovating with Lightroom. Probably because of competition from apps like C1, One One RAW, and others. So we all win here.

Lightroom and Capture One are powerful tools, and I’ve been using both for a long time. I develop editing packs for LR and for C1 side by side. I see their ups and downs. You’re here to compare Lightroom vs Capture One. So I will in my conclusion and in the video above.

While they both have advanced, I feel that Lightroom is edging out Capture One and I think it’s mostly happening because Phase One does not listen to customers. There are things in C1 2022 that are just finally improving after many years of customer requests and frustration.

Lightroom AI and auto mask tools are far ahead of Capture One. Capture One in turn has more panels and adjustments than Lightroom. This can be good, but also confusing to new users.

Capture One can be purchased. Lightroom on the other hand is all subscription based. Unless you go with the old Lightroom 6 version bought used. It’s a good app but getting very dated.

But Gavin, Capture One is better for Fuji files and WORMS!

Fuji files in Capture One are always said to be better. Are they really? If you use Fuji you’re in the right place. We’ll look and see if C1 still handles details better in the video, so you can make the best choice for your Fuji workflow in 2022.

The short answer is no. For more in-depth analysis on this, watch my other video here on worms on Fuji files in LR vs C1.

The results of both Lightroom vs Capture One are good, but they have distinct differences that may sway you to one or the other. There’s nothing wrong with switching back and forth, but I like to choose a main primary editor each year, and that’s how I manage most of my work.

capture one vs lightroom fuji files
Lightroom handles Fuji and any other files perfectly in 2022 and so does Capture One.

What about older versions? Like Capture One vs Lightroom 6

I don’t dig into this in the video. But if you’re holding out because you hate the cloud model and won’t subscribe to Adobe. I get it. and for you, it’s time to switch. LR6 is very dated, and the processing tools you can get in Capture vs Lightroom 6 are better, hands down. Stop clinging on and get upgraded to something better like Capture One, One One, or another RAW editor that does not demand a subscription.

Conclusion – Lightroom vs Capture One?

I’m noticing more people starting to switch back to Lightroom as the price of Capture One rises. though available as a standalone, it actually costs more than Lightroom and Photoshop combined in 2022. But at least you own it.

Capture One Pro has some more advanced tools that some of you will like, and Lightroom os more essential. Capture one has a Levels tool and a Curves tool, for example, while LR only has curves. In the end, both these tools do more or less the same thing, but having both can be handy,

Lightroom is improving at a faster pace. For years Lightroom was pretty stagnant, but people moved away from forcing Adobe to up its game. As of 2022, mask tools, particularly AI tools, are more powerful in LR. The layers in C1 are nice, but the interface is dated, and they have not had substantial feature updates to layers in years.

Don’t think you can avoid a real layer-based editor like Photoshop or Affinity by going with Capture One or Lightroom. It’s not a replacement. C! and LR are still RAW editors and if you try to replace Photoshop with it alone, your finished images will suffer.

Since this video, there have been a few interface updates as C1 tries to get more modern. But Phase One is very slow to listen to customers and make changes. Though Adobe is also guilty of this, you would think Phase One would want to be on top of it to gain market share. Sadly, they don’t seem, to care about customer happiness any more than Adobe does.

If I was asked right now… Capture One vs Lightroom Gavin? It will have to be Lightroom. But it’s a personal choice and this could change with an update. They are close. Get a trial of both and see for yourself.

Final Capture One VS LIghtroom Thoughts.

When I first started testing Lightroom vs Capture One years ago, I was impressed, and it seemed like a viable way to escape Adobe. But as time goes on and prices go up, Phase One seems to be ahead of itself.

In the end, these are both very good editing apps. Lightroom is easier to use and has more features overall. Capture One has more nuanced color control, but there’s little I can do there that I can’t find a way to do in Lightroom.

If someone tells you that Capture One gives you better images. I have not found that to be the case in 2022. Lightroom produces equal results. So try them both and use the one that feels best to you. they are both good. In the end, these are simply tools, and if Capture One takes a big leap, I will be right back here talking about it and not afraid to switch.

Meanwhile, Lightroom wins the overall Capture One vs. Lightroom battle, but both apps are good and produce excellent photo edits.

Make sure you check out my presets and styles store for great tools for both.

Gavin Seim

Capture one interface. Is it better than Lightroom

Read More

August 21, 2020

Does C1 give better results on Fuji or other files? Today we look at some hard-to-process files from a Fuji XT-3 and see what the results say.

We’ll take a few FUJI RAW files and see what really hap[pens when we do the same process in LR and C1. To do that we’ll use the Classic Negative look from Filmist which will process the images almost identical in both.

Let me know if the comments what you think about the results and what you prefer.

Also for your own tests you can…


Read More