February 2, 2013

Gavin-Seim-Family-Portrait-2012-880x476Once upon a time there was a guy, his family, a bunch of cameras, a Super Camper and lots of passionate ideas. No sponsors. No backup team – Just the open road, a sense of adventure and three months to take full advantage of.

I’m Gavin Seim. We’re out to explore as we attempt to make images and film that do justice to the beauty America. There’s lots of projects on the menu so we can pay bills and keep gas in the tank. We live mostly by the seat of our pants and enjoy the ride.

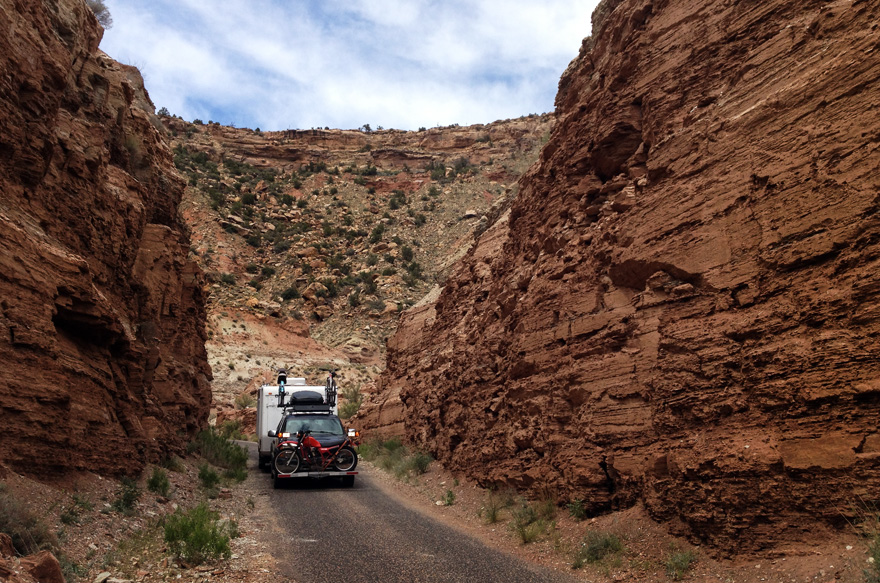
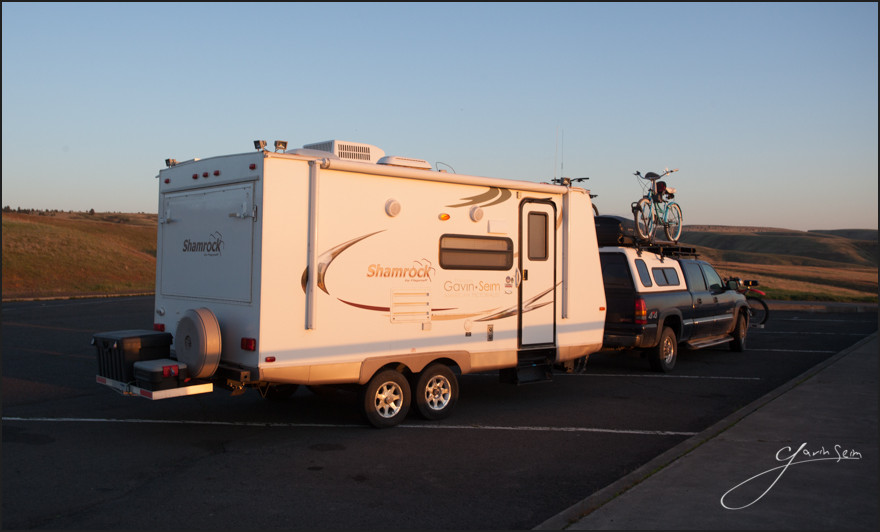
On Feb 2nd 2013 we set out for the road trip of 2013 – It’s a tad intimidating but quite amazing. We don’t hang out in RV parks or campgrounds. Months on the road in the Super Camper with my wife Sondra and our kids, Cyrus (5) Ariana (3) and Asher (1). There’s new products to test, new images to make, new stories to tell. Last year the big project was the EXposed Light Workshop. This year we’re working on a brand new film called Photographics. By the way,  you can learn more about our rig and tips on how we camp in this article.

With Facebook pages becoming less effective and the fact that I can’t send out the Light Letter every day, I wanted to share our journey with you in more detail than ever before. So rather than clutter up the journal with endless micro posts, I’ve decided to try something new – A Road Trip Journal.

This journal details our adventures by reverse date. The stuff you normally don’t see. The snapshots, clips, odd happenings and craziness. The things I’m sometimes reluctant to share, being such a perfectionist. That’s what you’ll find here. I hope you join in this adventure. Bookmark this page and come back because we’ll keep updating as long as we can still pound the keys. You can also join my Light Letter below for more updates and stories. Lets roll.

[xyz-ihs snippet=”newsletter”]

FINAL UPDATE: What it’s Like Coming Home Day 89-91 05/01/13 – 05/03/13

Cyrus at Cabelas
Cy likes the shooting gallery at Cabela’s. Teach them early.

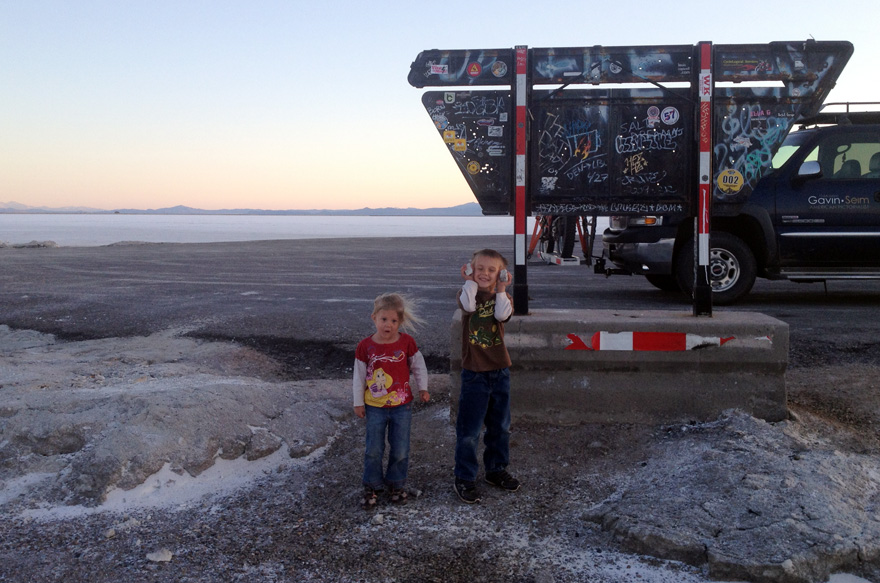
It’s bittersweet as I drive down the hill towards familiar grassy slopes and familiar cities on the map. We watch a Spring sunset and flowers spattering green hills. Three full months on the road we’ve been. An adventure of that won’t be forgotten. Yet a part of me feels somehow less for it coming to an end. Like my spirit of adventure is fading because I long for that slow hot shower, a bed where my toes do not hang over the edge and where my wonderful wife’s elbows do not hit me in the side every time she rolls over.

The last few days lacked the grand adventure you look for at the end of a long trip. The kids got a stomach bug and did what you do when you have that. Sometimes we had two going at once – The miles were long and we needed to get home soon for Wall Portrait Conference. We drove hard that final day. Perhaps longer than we’ve ever done. Over five hundred miles from Twin Idaho to Ephrata WA. It took us about twelve hours between breaks, gas and pauses to clean up the mess from sick kids in the back seat.

“What a lousy way to end such a grand adventure” I thought – But somewhere along the road I stepped into the sunlight and realized it was not. Sometimes we get sick, but it passes. Sometimes things go wrong, we have to make repairs, or we come in late. All of those things happened on this trip. More than once. But they’re part of the memories, part of the adventure. They’re surrounded by moments of laughs and wide eyes glistening at the wounder of creation.

The moment I pull in I’m starting a new vacation. We worked hard on this trip. We played hard. It was a gamble too, but our new film PHOTOGRAPHICS is already showing in the black and the trip is all but profitable both emotionally and fiscally. All that time on the road, but so happy to have a place to call home.

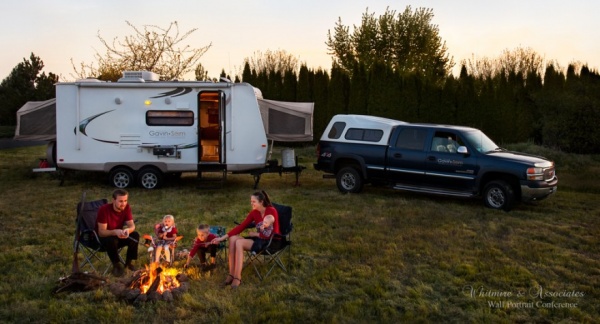
We walk in after 91 days on the road and switch on the lights. The house is still here, warm, waiting. Nearly as we left it but for a few extra cobwebs. A bed, a shower, a late night movie with my wife after the kids are finally asleep. We really are home. Next it’s time to process the film, repair the gear, make the prints and get organized.

On Sunday we’re off for a week again to learn and teach at Wall Portrait Conference. But really we’re home right now. It’s only a couple hours away and among people we know. That home feeling is back. It’s odd. Truly surreal to walk down the isle at the store and for once in so long see people you know. Get a hug from your mom when you walk thru a door, or see neighbors wave as you drive down the street. I honestly feel strange not being the stranger here. But that passes and fades into tales of the adventure and silent longing for more.

As the sun shines on our first day home, a breeze blowing, spring flowers popping out, I realize that the world is still alive and that both home and away are something grand. Appreciating your adventure is how you look at it. There’s nothing like a place to call home, but there’s also nothing like the open road, your wife riding shotgun and kids kicking the back of your seat as the road rolls by. This is living, all of it.

Until the next trip, Gavin Seim.

Coming down from the Death Road new Zion. Amazing views.
Picked up a hitchhiker from France named Tebu who's roaming America. He's headed for Moab. No room in the truck cab, but he fits in the back and his gear in the camper. This guy is hauling way too much weight.
Picked up a hitchhiker from France named Tebu who’s roaming America. He’s headed for Moab. No room in the truck cab, but he fits in the back and his gear in the camper. This guy is hauling way too much weight.


An evening at the Salt Flats. It's a stark place. but grand none the less.
An evening at the Salt Flats. It’s a stark place. but grand none the less.


The kids are hams. Just like dad.
The last sunset, overlooking the hills neat Pendleton Oregon.
Read More

June 29, 2012

The Giants Court – Carlsbad Caverns NP, New Mexico, 2012

I’ve spent three days at 750 feet below the surface, photographing in the dim light with digital and film. It’s truly awe inspiring and it was one of most challenging subjects I’ve worked with and not for lack of beauty or interest, but perhaps for to much of it.

A subterranean wonderland that’s a challenge to capture in a natural sense, since natural here is total darkness. The artificial lights here have been beautifully done and you rarely see a cord or a bulb, but they are low and were designed for seeing with the eyes more than seeing on film.

It was breathtaking. One day I hiked out the natural exit, packing all my gear all the way to the top rather than use then subterranean elevator. I’ll admit it was more than I bargained, but a stunning hike and a great exercise.

Behold! The Hall of Giants! Perhaps my favorite place in the caverns. It’s Stalagmite columns like towering kings watching over the royal court. It took some time and study to gain a grasp on how this beauty beneath should be best captured, but I feel I’ve in part conveyed that feeling I had as I stood, looking on in awe.


Release details: Prints Available.. Order Open Edition originals above.. Master prints and Signature Limited Editions are listed below and can be ordered by contacting gallery.. Learn about limited edition prices here.

Released prints….

For Photographers. How it was made…

Read More

February 17, 2012

by Gavin Seim:

Countdown To 60: After you choose that subject but before before you release the shutter, try taking a full minute to think about your scene and how you’re about to capture it. Really. Don’t just look at it. SEE IT. Sometimes we feel pressured to click. But even with a portrait, learn to take a little time and you’re images WILL improve. With some scenes you can even spend longer. Check out the 111 Project.

Sparks: I stood outside well before the exit. Experimenting, considering the scene, trying to predict the light. The effort paid off with a great candid from a challenging scene.

Cut The Trash: I know, you’ve already taken 60 seconds, you have a plan. But look again. Maybe even take a test frame. Controlling tone, removing clutter and distracting elements is one of the most neglected elements in art making. If something is not adding to the image, it should not be in the frame. Either you move, move it, or it will move the quality of your final image down to LOW.

Read More

October 29, 2011

And How it Can Change Your Life in 15 Minutes.

by Gavin Seim: Original article from Gavin’s f164 journal. (updated 11/15/11).

This may be the most valuable piece I’ve written on photography. In the last year, I’ve started working with 4×5 film and digital side by side. I’ve also explored extensive exercises in tonal control, truly learned to visualize, and implemented key parts of the Zone System that was developed by Ansel Adams and Fred Archer, both in my film and my digital work, in color and black and white.

The idea of visualizing and using Zones is not promoted heavily today. It seems much of the industry, including many of its educators, arrived at digital and decided that the past 150 years of photographic knowledge were somewhat irrelevant. What I’m about to show you is not taught much, but understanding it WILL change your photography forever. I’m not kidding; once you get this, you’ll never see light the same way again. And I hope you’ll share it with others.

Sunsets Hidden Falls. Yosemite, 2010 - A general look at where I placed the scene elements in relation to the Zones. Each arrow leads to what I see as the zone on the scale.

I’m going to stay simple because these concepts are essentially simple. I have not come up with a new digital based zone system, a stripped down version, or an article full of nerdy equations, white papers, or complex systems. This is not hard, and you can start putting it to use TODAY for film or digital. Since most of us are in the digital world, I’ll focus on that. I’m going to show you how to use the core of the Zone System to make you a vastly better photographer. I’ve also brought along some examples for analyzing the Zones.

To those of you who already know this, kudos. But I challenge you to review and analyze whether you’re really using it, or just buzzing along in digital bliss and fixing things later. Excuse my bluntness, but this is happening to the best of us. We need to get back to basics, visualize, control tone, dynamic range, and image quality.

Originally, the Zone System was a complete approach that included everything from the initial exposure to the final print. Now we don’t use darkrooms much these days, so I’ll focus on the pivot point of the Zone System: the Zones themselves. That said, I would encourage you to study the whole process even if you don’t use film. It will help you gain a better understanding of light and photography. Not only that, but old books like Fred Picker’s Zone VI workshop, deal with it quickly and effectively and can often be had for mere pennies.

1. The Zone Scale.

The Zone Scale lies at the core of the Zone System. It consists of eleven squares that span from clipped black (Zone 0) to clipped white (Zone X). Each square represents a change of one stop. The first part of using Zones starts before you release the shutter. Truly visualizing your image is like nothing else. Once you master it, you see the image you plan to make, including your edits and refinements, in your mind before you ever take the photo. It changes everything about how you photograph and how refined the resulting images become.

Brilliantly simple, the Zone scale allows us to visualize all our light from complete black to complete white in one stop increments.

To begin, look at your scene. What’s outside your window right now? Visualize what zones in which the things around you fall. Then imagine you’re taking a photo. Imagine where the zones would be if the image came out exactly as you wanted. It does not have to be what you “see” but what you “visualize” for the finished image. How do YOU want to make it?

Think about what Zone levels on various objects in this scene would most complement your main subject as well as your supporting cast of elements. Sometimes it helps to begin by trying to visualize a scene in black and white, even if your final image is going to be color. Thinking in terms of only tones can be helpful, especially early on in the process.

Read More

December 4, 2008

One of today’s big hurtles a good photographer must overcome is getting that amazing final edit. If you take your image straight out of the camera and leave it at that, you probably won’t get much notice. But if you over edit you may not either.

Standing out is about being excellent as well as being different. Being different however is more than it suggests. Just looking different isn’t good enough if it’s not attractive to your target audience. The post production details count and are a process of learning when and where to apply them. Today lets analyze a recent image and talk about it.

I call this shot The Gazebo. Though it’s a new favorite, it’s not an HDR or any other special acronym. It’s just a good foundation image, edited right. What I did to it was not so amazing, I just used the right effect at the right time.

The left side is straight out of camera. It’s good. I used my Canon 70-200 @ 150mm 1/125 at 2.8 ISO 320 with just a little fill flash. I  got nice compression and blur in the background. The evening light was coming from the right side and worked perfectly but was not really unusual.

I knew right away it had potential, so I started playing. Playing is the the keyword here. I use Lightroom presets and Photoshop actions not because it couldn’t be done manually, but because I want a great variety and I would not have that variety by doing it all manually every time. The effects I used were my own, that are sold here in Seim Effects, but this applies to whatever you happen to use. I started with a vintage preset from Power Workflow2. I tend to use the vintage looks sparingly, but it worked well with this simple scene.

Then it’s on to Photoshop. I used the Old Fashioned Love Song from Hollywood Effects. This helped me manipulate the light into something more interesting and glowing. Then thinking it needed a touch more I ran Simply Soft from Creative Essentials Actions. This is a skin softener. As I did this I used the masks to remove blur from areas of detail like the face.

Finally I finished up the way I normally do, by working with burn and dodge. This is a tool that most people overlook, and it’s one of those editing gems that’s right in front of us. I can draw the eye wherever I want it using burn and dodge. If you want to learn more about that see this post.

So there we have it. The finished product took only a few minutes and had that dreamy loving look to it. My point here is not that you need to use these specific effects to get your look. It’s that you need to do things other than just taking the picture if you want a portrait.

Set up your system so it’s easy to add effects, because otherwise you’ll avoid them. I have my favorite actions or Lightroom presets a click away, and when I’m working on a good shot I’m not afraid to try various looks because I can try ten different effects in the time I could do one of them manually. Also use direction. Just because you find an effect yon love don’t apply it to everything. balance is key and one of the most common mistake it to over do things. I often apply an effect and the fade it back so it’s very subtle, but makes my image more powerful.

What do you see in this image? How would you have done it differntly? Share your ideas in the comments… Gavin Seim

Read More