by Gavin Seim: I’m a Lightroom fanatic, but with my recent expansion into projecting proofs to sell larger prints and increase my sales, I started looking at software for projecting scaled images using my digital projector. The choices were limited. Whats being using now, is expensive software like Prism Projector, or Pro Select. These are good for some, but cost hundreds of dollars and have a bigger problem in that it throws a curve ball into a well planned workflow. They make us entirely leave Lightroom for the sales presentation. Not cool.
At first I couldn’t find a way, but I kept experimenting and finally I figured it out. I found I could make special print templates in Lightroom that could be scaled to the screen size and project images to size without ever leaving Lightroom. I call them Projectics.
I can’t tell you how excited I am about this. I’m now actively using Lightroom for my proof sessions with great results and no need for external software. No it does not have all the gimmicks and frills that some other sales apps do, but I for one don’t need those. I just need to project various images and sizes easily and effectively and that’s what LR can do. Using the scaled presets I can change sizes instantly. Then since I’m still in LR I can pick favorites, add things to collections, and even do edits without every leaving my workflow.
In the past I’ve written about using a separate Catalog for each job. There’s no rule you have to do things this way, but it makes more sense all the time. Since I’m sometimes in the studio and sometimes taking my Canon LV7370 on location, it keeps things really simple. I can simply copy the entire catalog for the session onto a portable drive and off I go.
Yes, I’ve made a collection of these presets to sell. Hey it’s what I do. You could make some yourself, but if that does not sound fun, I’ve done the math and tedious stuff and made a simple set that just works and will continue to be updated. Either way Lightroom is a powerful sales tool and I need no other sales software to proof, project and sell large prints. Oh and if you want to learn more about the sales concepts of all this, check out this article about selling large Wall Portraits.
Whether you get my presets or not I suggest you head over to the Projectics page and watch the video because it will show you how it all works and how I’ve integrated it into my workflow. The power of Lightroom keeps growing and I thrilled. Time is money, and projecting proofs is a key element in great prints sales and placing beautiful prints on your clients walls… Gav
by Gavin Seim: There’s plenty of info and a video on each product page of this site, but I wanted to make a post giving an overview of how I use Seim Effects in m fast photo workflow and what each collection is best for. I’ve found that having your workflow nailed down makes all the different in creative efficiency.
Power Workflow2: This is my starting editing tool, but certainly not the only one I use. Lightroom used with PW2 is the key to those fast 3hr wedding edit sessions I do. PW2 is a set of about 60 highly refined and organized presets that can be applied with a mousclick to one or thousands of images.
There’s categories, starting with the batch correction Super Series presets. I start my workflow by adding these to large batches of images from my session. This get’s me the basic but essential stuff like exposure, contrast and tone under control. There’s various Super Series presets depending on the shooting situation. Basically I pick the one that looks best for a batch of images and off I go. No rocket science yet. I may still have to do a few tweaks on a few images since no auto tool is perfect, but it get’s me close.
After the auto correction I sort down my images with a 3-5 star rating system. 5 being the best. I’ll then go over my favorite images and add other effects from the set. The Super Series is just the beginning. There’s lots of color and B&W effects to choose from and soon I have a nice variety.
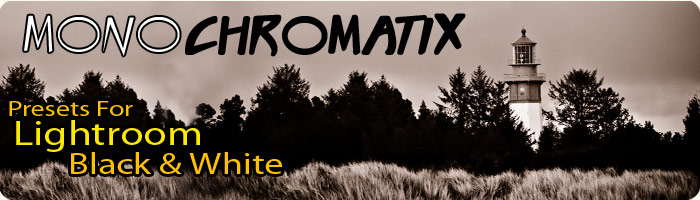
MonoChromatix: Black and white can be so powerful. PW2 takes has some great monotone effects, but MonoChromatix takes it to the next level with a complete set of all monochromtic effects that perfectly complements PW2. When I think an image just looks great in B&W and want to get something really remarkable I’ll try some effects from this set until I find one that’s perfect. There’s everything from classic black and white to sepia, to infrared. I use these to get some really cool B&W looks, and it saves me the time of having to use a plugin in Photoshop.
Creative Essentials: Essentials is a great tool for someone who does not use Lightroom, but also for someone use mainlines in Lightroom and then does those special tweaks in Photoshop like I do. It’s simple and straighforward with some poerful tools.
Once my primary edits are done in LR I head to PS with a few of my favorite photographs. There’s things I can do in PS that just can’t be done in LR. Essentials is a great starter set of actions that includes a nice range of effects from tonal changes to really nice color tones, shatpening and softening effects.
Hollywood Effects: The set that started it all. It’s been thru some tweaks, but the name still says it pretty well. Hollywood and Essentals complement each other really well and when I head into Photoshop I use them both.
In Hollywood you’ll find plenty of cinematic glows, color modifiers and mood setters. Some of them can be intense, but since with my actions I make standard practice of having layers, masks and details, you can easily adjust the way an effect changes your image to get a totally unique look.
I keep a main workflow action set where my actions (as well as favorites from others) are saved in one set. Easy to manage and easy to backup. Then I put the action pallete into button mode and it’s like a console of photo tools a mouse click away.
__
That about sums it up. As I work everything stays saved back into LR and when I’m done I just export the final results. Event those not using Lightroom can still move their workflow along much faster by having both action sets loaded and ready to fire.
It’s a complete workflow for Lightroom or PS users that does an important job. Giving us more creativity while making us faster. I’m always working to devise new workflow ideas and improve effects so stay tine. You’re also welcome to contact me with feeback or ideas… Gavin
One of today’s big hurtles a good photographer must overcome is getting that amazing final edit. If you take your image straight out of the camera and leave it at that, you probably won’t get much notice. But if you over edit you may not either.
Standing out is about being excellent as well as being different. Being different however is more than it suggests. Just looking different isn’t good enough if it’s not attractive to your target audience. The post production details count and are a process of learning when and where to apply them. Today lets analyze a recent image and talk about it.
I call this shot The Gazebo. Though it’s a new favorite, it’s not an HDR or any other special acronym. It’s just a good foundation image, edited right. What I did to it was not so amazing, I just used the right effect at the right time.
The left side is straight out of camera. It’s good. I used my Canon 70-200 @ 150mm 1/125 at 2.8 ISO 320 with just a little fill flash. I got nice compression and blur in the background. The evening light was coming from the right side and worked perfectly but was not really unusual.
I knew right away it had potential, so I started playing. Playing is the the keyword here. I use Lightroom presets and Photoshop actions not because it couldn’t be done manually, but because I want a great variety and I would not have that variety by doing it all manually every time. The effects I used were my own, that are sold here in Seim Effects, but this applies to whatever you happen to use. I started with a vintage preset from Power Workflow2. I tend to use the vintage looks sparingly, but it worked well with this simple scene.
Then it’s on to Photoshop. I used the Old Fashioned Love Song from Hollywood Effects. This helped me manipulate the light into something more interesting and glowing. Then thinking it needed a touch more I ran Simply Soft from Creative Essentials Actions. This is a skin softener. As I did this I used the masks to remove blur from areas of detail like the face.
Finally I finished up the way I normally do, by working with burn and dodge. This is a tool that most people overlook, and it’s one of those editing gems that’s right in front of us. I can draw the eye wherever I want it using burn and dodge. If you want to learn more about that see this post.
So there we have it. The finished product took only a few minutes and had that dreamy loving look to it. My point here is not that you need to use these specific effects to get your look. It’s that you need to do things other than just taking the picture if you want a portrait.
Set up your system so it’s easy to add effects, because otherwise you’ll avoid them. I have my favorite actions or Lightroom presets a click away, and when I’m working on a good shot I’m not afraid to try various looks because I can try ten different effects in the time I could do one of them manually. Also use direction. Just because you find an effect yon love don’t apply it to everything. balance is key and one of the most common mistake it to over do things. I often apply an effect and the fade it back so it’s very subtle, but makes my image more powerful.
What do you see in this image? How would you have done it differntly? Share your ideas in the comments… Gavin Seim
I‘ve mentioned this technique on the Pro Photo Show podcast, but I felt I should write it down in simple terms since I get questions about it. It’s how I use LR catalogs, and manage my jobs. Today I’m gonna share some power user tips that can really make your life, and image management easier.
I make a new Lightroom Catalog for each session. That’s right every senior, family, and couple get a catalog made in their honor. Sometimes people think it’s a bit crazy, but usually change their minds. It’s simple management mechanics and if you try it you might just love it. If not you can modify it to fit your needs. Though I use Lightroom, these techniques can also apply to other software.
Why?
Most photographers that use Lightroom have one huge catalog that all their images are stored in. They manage those shoots from within that catalog using collections, and the image files are referenced to various drives and directories all over the system. What happens when the disk gets full and images are archived, or when things get moved? The files are now separated from the main catalog. To use them again one has to bring back the files, and/or point LR to the right location.
There’s also the somewhat smaller issue of speed and reliability. Though the programs we have, deal with large amounts of images well, it’s basic math that tells us the bigger a database becomes, the more the system must process. I like portable streamlined catalogs and not having to worry about a huge master catalog getting corrupt. Here’s the two parts that make up my system.
The Portable Container Method:
The container method can apply whether you have one giant catalog, or a catalog for each session like I do. You simply make a folder that contains your catalog, as well as your images (usually in a sub folder). This way the entire unit is within one folder rather than scattered across various locations. It now becomes portable. You can even do this with existing catalogs by moving the images to the folder with the catalog. You’ll have to spend a few minutes showing Lightroom where you put everything, but then you’re set.
The Job Catalog Method:
It works great… Seriously though it does. It’s so seamless and easy to access a job from any date because each job has a customer folder which contains the catalog, as well as the folder with all the original images. It’s totally portable to any drive. If I want to archive or move, I can drop the entire folder anywhere and if I ever need it again I just open up the catalog and all my images, settings, ratings and info are right where I left them because their all within one folder along with the images.
When I finish editing a job I export final JPEG’s to a finals folder (separate from the catalog images) and I’m ready to put them online, send to the client, or wherever their going. I don’t ever have to worry about things getting lost or mixed up because every job is a own catalog, in it’s own folder, with it’s images inside. See the screenshot below for an example how I contain the entire job with it’s catalog in one folder for easy management. When I need to free up space I simple archive the entire folder on an archive disk catalog and all.
Going further:
Yep you can do more… I have a portfolio catalog that manages my sample images. Inside the images folder of that catalog are a few other folders, so I can keep weddings, portraits etc easily viewable, but also together in one catalog. This portfolio catalog fits in a few gigs, and I can copy the whole thing to any disk and take it with me. Then I can fire up LR and can be showing my portfolio in a LR slideshow within seconds. I can view the entire portfolio, or simply select on of the enclosed folders to narrow down to weddings, portraits etc.
Something else I often do, is make the customer catalog before a session. With weddings for example, I make the catalog on my laptop and dump images in it throughout the day. Not only do I have a backup, but now I can I easily edit a few and throw up a simple slideshow during the reception to WOW the guests (great advertising). Better yet, when I get home all (or most) of the the images are already in that catalog. I can apply one of my auto presets, and start 1:1 previews before bed, and in the morning I just copy the entire folder to my main machine, ready to sort, edit, and ship. Portability saves time again.
The Bottom line is that it’s really simple. Making a new catalog is barely more than creating a new folder for a job. You can manage things better, archive them easier, get work done quicker.
Exceptions:
In some situations a single large catalog might be needed. You can still the the container method, but If for example you are shoot stock, or nature and need a large tagged searchable database you may want a single catalog. If you’re shooting job based work, then most jobs can be better managed from their own catalogs. It’s a preference. Try it out and see what works for you
In my case I have personal images and large ongoing projects in master catalogs, since there’s far less of them and I work with them on a regular basis. Unlike client jobs that get filed away in the archives. I still use the portable container method of placing the images with the catalogs however.
UPDATE: These brushes no longer work properly in LR4. If you use LR2-3 download the brushes above. If you use LR4 get my new brushes.
Did you know that in Lightroom2 You can use a brush to make precise corrections, and even have brush presets ready to go to make those corrections easy.
Well I knew about LR brushes, but I had not given enough attention to them until Matt Kloskowski posted up some darken brushes, and got my mind churning on this great workflow asset.
Here’s a collection of brush presets I made for… Burn, Dodge, Color Boost, Color Drain, Skin Soft, and Detail Boost.
Remember that these don’t work the same as my Develop presets. These are for “Brush” settings. If you need to learn how to install them take a look at my Installing Lightroom Brush Presetsarticle.
Once you get them installed you can just select the brush effect that you want, from the drop-down. Brush size and intensity are still fully controllable with the sliders, but these preset will get you going fast.


